
How to Bead a Tire: Methods, Tips & Tools You’ll Need
To bead a tire safely, you need the right tools, controlled pressure, and a stable setup. You can break the bead with a bead breaker, tire levers, or a jack and wood block, then use a ratchet strap to help the sidewalls expand and catch the rim. Seat the bead with short bursts of air, check for leaks, and avoid flammable shortcuts. Keep hands clear and protect the rim; more methods and tips follow.
Key Takeaways
- Use the right tools: ratchet strap, bead breaker, tire levers, or a tire machine for safe tire beading.
- Seat the bead by tightening a strap evenly, then add air in short bursts until both beads pop into place.
- Keep the wheel stable and aligned to protect the rim and avoid slipping during inflation or bead breaking.
- Avoid dangerous shortcuts like flammable sprays or fire; use controlled, non-explosive methods instead.
- If the tire is large, stubborn, or you lack tools, have a tire shop bead it professionally.
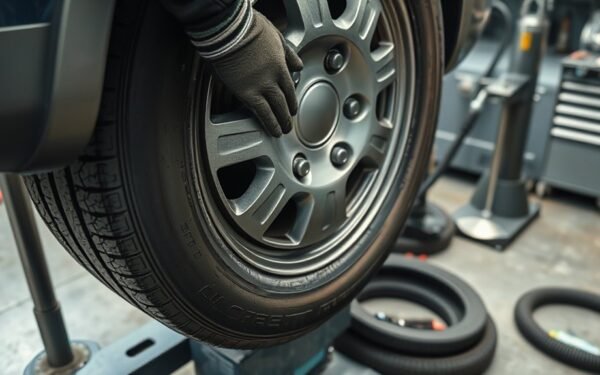
How to Seat a Tire Bead Safely
To seat a tire bead safely, start with the right tools and steady setup: use a ratchet strap or bead breaker to apply even pressure, and make sure the tire and rim are stabilized so nothing slips while you work. You can then position the ratchet strap around the tread and tighten it gradually until the tire bead contacts the rim uniformly. Keep your hands clear of pinch points and watch for movement as pressure builds. Use non-flammable methods first, because they give you control without adding unnecessary risk. Work on a level surface, check that the valve stem isn’t obstructed, and maintain a calm, measured pace. If the bead still won’t seat, stop and reassess instead of forcing it. When you’re unsure, choose professional help; tire shops have specialized equipment that seats beads faster and safer, letting you protect your freedom of movement without compromising your safety or the integrity of the wheel. Additionally, consider having a tubeless tire repair kit on hand for quick fixes in case of unexpected punctures.
Break the Tire Bead With Simple Tools
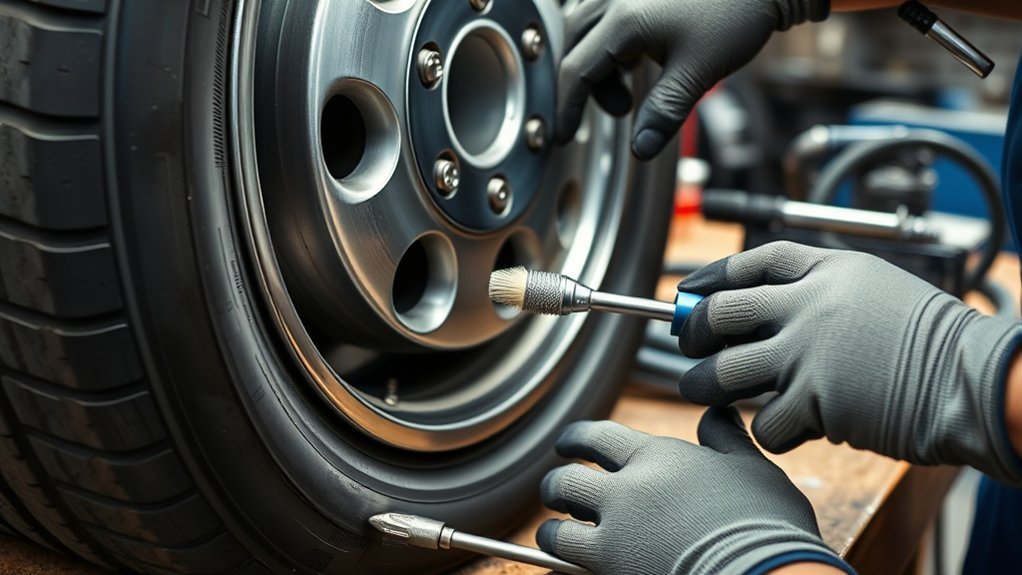
You can break the bead with tire levers or spoons by wedging them between the tire and rim and prying the bead down; tire pliers work the same way, though they may struggle on larger tires. If you don’t have a dedicated bead breaker, you can use a jack and a block of wood or another blunt tool to press the tire bead free while the wheel stays supported. Keep the setup stable and secure, because any slipping load can cause injury. Additionally, ensure you consider the tire’s UTQG rating to gauge its durability during the bead-breaking process.
Levers And Pliers
Tire levers, or spoons, can break the bead by wedging their tips between the tire and rim and prying the bead downward; work around the circumference with multiple levers or reposition the same tool several times until the bead releases fully. Keep the levers aligned so you’re pushing on the bead, not the sidewall, and protect the rim from gouging. Tire pliers work similarly: insert the jaws between tire and bead, then open them to split the grip. They’re fast for bead removal, though big tires may resist. Stabilize the wheel with your body if needed, and keep steady pressure instead of jerking. With practice, you’ll read the tire’s resistance, place each tool cleanly, and free the bead with control, confidence, and minimal damage.
Jack And Wood
A simple jack-and-wood setup can break a bead with controlled pressure. Position a sturdy jack on a stable surface, then place a solid wood block over the tire where the tire beads meet the rim. Lower the vehicle slowly so its weight presses the wood evenly into the bead.
- Align the wood squarely.
- Keep the jack secure.
- Apply pressure gradually.
- Watch for bead release.
This method uses common tools, so it’s a cost-effective way to free a stubborn tire. You control the force, avoid extra gear, and work with the vehicle’s own mass to do the hard part. Stay precise, keep your footing clear, and let the wood transfer pressure cleanly across the bead until it breaks free.
Bead Breaking Safety
When breaking a tire bead with simple tools, start with a stable surface and secure positioning so nothing can slip under load. For bead breaking safety, you need proper tools: tire levers, pliers, or a bead breaker that matches the wheel. Aim force at the bead, not the sidewall, so you don’t deform the tire or scar the rim. Keep your hands, face, and legs clear of the wheel path, especially when you use a jack or a heavy object. Work methodically, check each contact point, and stop if the setup shifts. If you don’t have the right equipment or you’re unsure, get professional help. Smart control gives you freedom without risking injury, wasted effort, or damaged gear.
Use a Ratchet Strap to Seat the Tire Bead
Slip a ratchet strap around the tire’s circumference, just below the bead, and tighten it gradually to force the sidewalls outward against the rim. This ratchet strap method helps you seat tire bead with controlled, even pressure, and it’s cost-effective—often for about $5. Keep the strap centered so it can’t slip, and watch the tire as you tighten. You’re aiming to move the bead outward, not crush the casing.
- Position the strap evenly around the tire.
- Tighten only until the sidewalls bulge slightly.
- Check that the bead stays aligned with the rim.
- Add air or sealant once the bead starts to catch.
This technique is ideal if you’re new to the job, because it lowers risk and gives you more control than aggressive force. Additionally, using a 3T Electric Car Jack can further streamline the process of changing tires. Stay alert, keep clear of the strap’s path, and let steady pressure do the work.
Try a Bead Breaker, Jack, or Tire Hammer
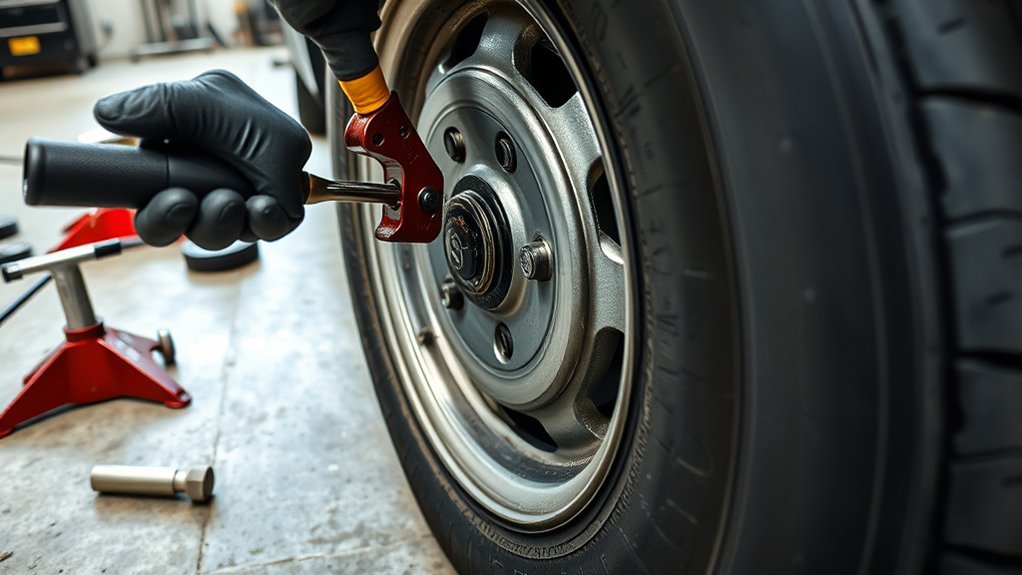
If the bead still won’t move, try a bead breaker, jack, or tire hammer to apply focused pressure and separate it from the rim. A bead breaker is the cleanest option: it’s portable, purpose-built, and usually costs about $60. You can use a jack, like a Hi-Lift, scissor, or bottle jack, to push the bead free, but you must position it carefully and stabilize the wheel. A tire hammer works well on larger tires, including tractor setups, yet it demands accuracy and control. Proper tire selection based on traction in wet and dry conditions is essential for effective tire maintenance.
| Tool | Best Use | Key Caution |
|---|---|---|
| Bead breaker | DIY bead release | Align it evenly |
| Jack | Targeted pressure | Watch weight shift |
| Tire hammer | Large tires | Strike with precision |
Keep your foot clear, support the rim, and avoid side-loading the wheel. When you apply force correctly, you free the bead without surrendering the rim or your safety.
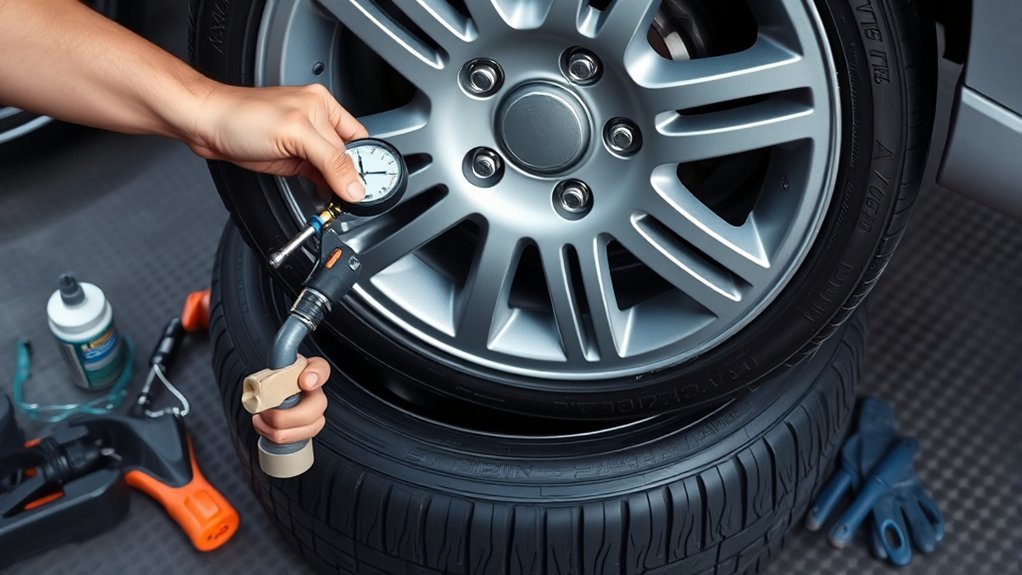
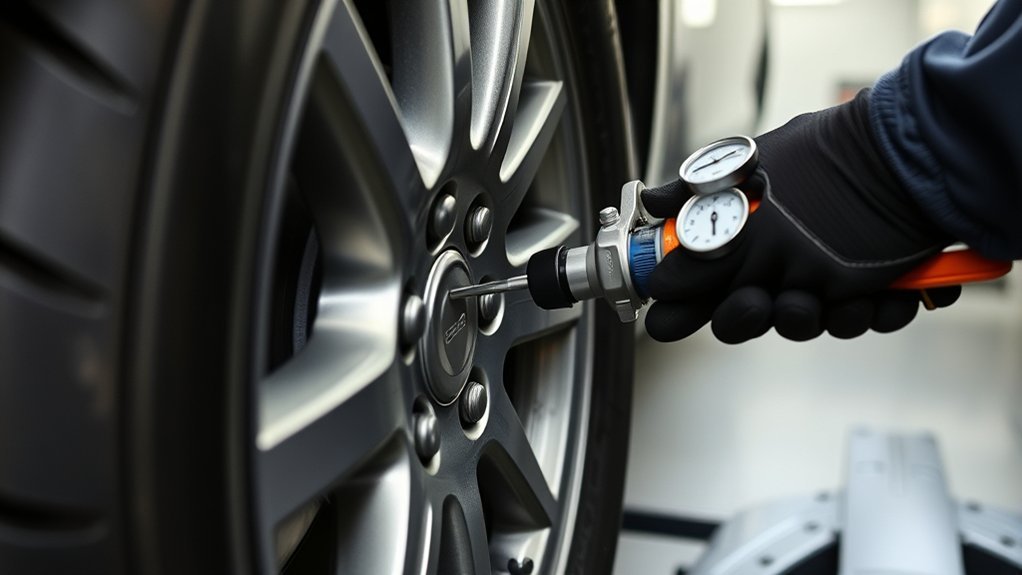
Seat the Tire Bead With Air
Once the bead is aligned evenly on the rim, begin inflating the tire with a quick burst of air from a compressor or pump to help it snap into place. Keep the tire bead centered so air pressure can build evenly and lock the rim without leaks. If the bead won’t climb, wrap a ratchet strap around the tread and tighten it slightly to compress the carcass. Then add air in short, controlled bursts, watching for the bead to pop against both rim edges.
- Check alignment before inflation.
- Use firm, even air pressure.
- Tighten a strap only enough to assist seating.
- Inspect for leaks after the bead sets.
When the bead seats, stop, release the strap, and verify the tire holds pressure. Run your hand around the sidewall and listen for escaping air. If you catch leaks, deflate, reset the tire bead, and try again. This method gives you clean, controlled seating and the freedom to finish the job confidently. Additionally, using tools like the ROTATION Tire Spoon Kit can provide essential leverage for tire changes, making the process smoother.
Avoid Flammable Bead-Seating Tricks
That controlled burst of air is the safe way to seat a bead; flammable tricks like carb cleaner and a lighter can create a fast seal, but they’re hazardous and shouldn’t be used, especially if you’re inexperienced. You don’t need flammable substances to get results; you need control, patience, and the right method. Fire-based shortcuts introduce serious safety risks, including sudden ignition and loss of control, so keep them out of your workflow. Choose non-explosive methods instead, such as a ratchet strap to help the bead move outward, or use a bead breaker or tire machine when available. These tools simplify the job and reduce guesswork. Before you start, learn each technique thoroughly so you can match the method to the tire and avoid mistakes. If you’re unsure, ask experienced people and trade safe practices. That shared knowledge helps you work with confidence, protect yourself, and stay free from dangerous shortcuts. Additionally, a tubeless tire repair kit can provide essential support for punctures, ensuring you’re prepared for unexpected issues.
Avoid Rim Damage and Slips
Secure the wheel on a stable surface so it can’t shift while you work. Align your tools and any pressure directly with the tire bead, not the sidewall, to avoid denting or cracking the rim. Before you apply force, check your footing and tool placement so nothing slips under load. Remember that a mismatched rim diameter can lead to dangerous mounting issues, so always verify compatibility before starting.
Secure the Wheel
Place the wheel on a stable, level surface before you begin beading the tire so it cannot slip or shift under force. To secure the wheel, lock it down before you work on tractor tires or any heavy assembly. Use solid chocks, blocks, or a jack to prevent slipping and keep the rim steady.
- Set chocks tight against the wheel.
- Brace the rim so it won’t tip.
- Check tool alignment before you push.
- Keep your body clear of the load.
Apply pressure only where the bead needs to move, and make sure your tools sit squarely on the tire. This keeps force controlled, protects the rim, and lets you work with confidence and control.
Align Pressure Carefully
With the wheel stabilized, position your beading tools so they sit squarely against the tire and not against the rim. You’ll protect the bead seat and avoid dents, cracks, or sidewall distortion. Make sure pressure lands on the bead, not the casing, and keep the load even so the tire doesn’t twist. A stable base matters: a slip can injure you and throw the setup off balance. Double-check alignment before each push, then recheck after movement. For quick reference:
| Check | Target | Risk |
|---|---|---|
| Tool angle | Bead | Rim damage |
| Force path | Even | Tire deformation |
| Surface | Stable | Slips |
If you’re using AI from the post to create a new account for notes, record settings precisely.
Common Tire Beading Mistakes
Common tire beading mistakes often come from using the wrong tools or applying force in the wrong place. You can avoid most failures by controlling setup, pressure, and leverage. Incorrect tool usage, improper securing methods, and excessive force application each create preventable damage and slow your work.
Wrong tools, poor securing, and excess force cause tire beading failures—control setup, pressure, and leverage instead.
- Use bead tools designed for tire work, not makeshift levers or pliers.
- Secure the tire firmly before you start, so it can’t slip or shift.
- Keep tool alignment true to the bead to protect the rim from dents or cracks.
- Apply steady pressure to the bead, not the sidewall, to preserve tire structure.
Additionally, having a tire repair kit on hand can provide peace of mind for unexpected punctures during the beading process. You also need a stable work area and basic protective gear. If you rush, you raise injury risk and reduce accuracy. Work methodically, check each contact point, and let the tire seat through controlled pressure instead of brute force. That approach keeps your wheel serviceable and your process efficient.
When to Let a Tire Shop Handle It
If you’re unsure about the beading process or don’t have the right tools, a tire shop is often the safer, faster choice. You get tire shop benefits that matter: trained technicians, controlled procedures, and reduced injury risk. When you need professional assistance, the shop can seat the bead with hydraulic tire machines that align the tire and rim correctly, minimizing damage and avoiding seal failures. That’s a major equipment advantage over improvised DIY setups.
You should also let a shop handle larger tires, like truck or tractor units, because their heavy-duty gear breaks stubborn beads efficiently. If you’re working without experience, mistakes can waste time and create hazards. A shop gives you peace of mind by checking the seal, preventing common errors, and returning a tire that’s ready for service. Choosing help isn’t surrender; it’s using the right system to protect your time, your body, and your freedom. Additionally, consider the durability of your tires, as certain models are designed to withstand more rigorous conditions, enhancing safety and performance.
Frequently Asked Questions
How to Get a Stubborn Tire to Bead?
You can get a stubborn tire to bead by applying lubricant application to the bead, then using a ratchet strap to compress the sidewalls and improve tire sealing techniques. Next, use air compressor usage with a quick, high-volume burst while keeping the valve core out. If the bead still won’t seat, tap the sidewall, reset the tire, and try again. When you’re stuck, use tire levers or call a shop.
What Is the 3 Tire Rule?
The 3 tire rule is a road map, a gauge, a quiet drumbeat: you may bead or mount three tires cleanly, then hit one tough one. You should expect that curve, use tire maintenance tips, apply bead sealing methods, and make tire pressure checks each time. It reminds you that technique grows through repetition, so you don’t fight the process—you master it, refine it, and move on with confidence.
What Is the Easiest Beading Technique?
The easiest beading technique is the ratchet strap method: you wrap the strap around the tire’s tread, tighten it to push the beads outward, then add air until the tire seats and seals. You’ll use simple beading tools, keep tire maintenance easy, and avoid more aggressive sealing methods. If you’re starting out, this practical approach gives you control, low cost, and freedom from unnecessary hassle.
What Are Common Beading Mistakes?
Like a puzzle piece forced into the wrong slot, common beading mistakes start with bead alignment issues. You’ll damage the rim if you use the wrong tool, skip stabilization, or misalign the bead during inflation. You can also cause improper seating by rushing the process or ignoring pressure checks. Don’t use unsafe flammables; choose controlled air leakage solutions instead. Stay precise, protect your hands, and let the tire seat cleanly.
Conclusion
When you bead a tire, you want clean tools, steady pressure, and a safe method that matches the job. You’ve seen how straps, breakers, and compressed air can help seat the bead, and why risky shortcuts can’t. If the bead still won’t lock, don’t force it. Check the rim, reset the tire, and try again. When damage, leaks, or stubborn fitment linger, let a tire shop finish the job.
Related Articles
How to Work a Tire Machine: Step-by-Step Guide & Safety Tips
Master tire machine basics with step-by-step safety tips, and discover the crucial final checks that can save you time and trouble.
Read More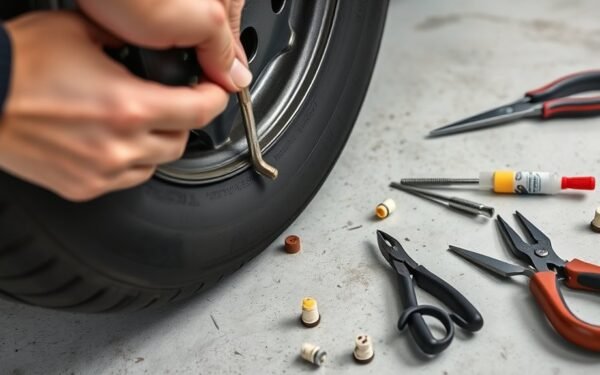
How to Use Tire Plugs: Step-by-Step Repair Guide in 10 Minutes
Tire punctures can be fixed fast, but only if you know the right steps—discover the 10-minute repair guide before you risk a bad plug.
Read More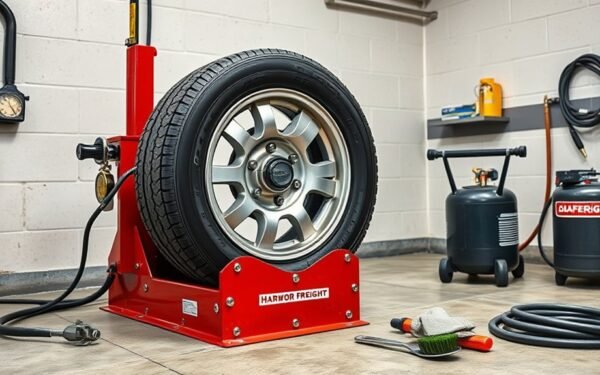
How to Use Harbor Freight Tire Changer: Full Operation Guide
Navigate Harbor Freight tire changer setup, bead breaking, mounting, and balancing with pro tips that reveal crucial fixes and finer points.
Read More