
What Is a Tire Bead? How It Seals to the Wheel and Common Bead Problems
A tire bead is the reinforced inner edge of a tire that sits against the wheel rim. On a tubeless tire, this bead-and-rim contact area helps hold air pressure, keep the tire seated, and transfer driving, braking, and cornering forces safely. When the bead seal is dirty, corroded, damaged, or poorly seated, the tire can lose air even when there is no nail or obvious puncture.
Quick Answer
A tire bead is the strong inner edge of the tire that clamps against the wheel rim. It helps create the airtight seal on tubeless tires. Bead leaks usually come from corrosion, dirt, old bead sealer, rim damage, or bead damage, and repeated air loss should be inspected before the tire is driven far.
Key Takeaways
- The tire bead is not just a rubber edge; it contains strong steel bead wire that helps the tire grip the wheel.
- A bead leak often causes slow pressure loss over days or weeks, especially around corroded or dirty rim edges.
- Soap-and-water bubbles around the rim edge can help confirm a bead leak, but the tire should also be checked for valve, tread, and sidewall leaks.
- Do not use flammable sprays, household sealants, grease, or improvised methods to seat a tire bead.
- A torn bead, cracked wheel, bent rim, or repeated air loss should be handled by a trained tire professional.
At a Glance
| Time Required | 10–15 minutes to check for bubbles; 30–60 minutes for a shop reseal, depending on corrosion and wheel condition. |
| Difficulty | Easy to diagnose; moderate to unsafe for repair without tire-mounting tools and training. |
| Tools Needed | Tire pressure gauge, spray bottle with soapy water, valve cap, tire inflator for pressure checks, and professional tire machine for reseating. |
| Cost | Often low for cleaning and resealing; higher if the wheel is bent, cracked, heavily corroded, or the tire bead is damaged. |
What Is a Tire Bead and Why Is It Important?
A tire bead is the reinforced inner edge of the tire that fits against the wheel’s bead seat. According to Michelin’s tire glossary, the bead is the tire section that sits on the wheel and contains steel wires that clamp the tire firmly against the rim. Bridgestone also describes the bead as the part designed to grip the tire to the wheel.
That tight fit matters because a tubeless tire relies on the tire bead, rim flange, valve stem, and wheel surface to hold air. If the bead area cannot seal cleanly, the tire may slowly lose pressure. Low tire pressure can increase heat, accelerate wear, reduce handling, and trigger a TPMS warning.
For everyday driving, the bead’s job is simple but critical: keep the tire seated on the wheel, help preserve air pressure, and support stable contact between the tire and road.
How to Tell a Bead Leak From Other Tire Leaks
A bead leak is only one possible reason a tire keeps losing air. Before assuming the bead is the problem, check the common leak points:
- Bead area: Bubbles appear where the tire edge meets the rim.
- Valve stem: Bubbles appear at the valve core or rubber valve base.
- Tread puncture: Bubbles appear around a nail, screw, or small hole in the tread.
- Wheel damage: Air leaks from a cracked, bent, or porous wheel.
- Temperature change: Pressure drops in cold weather, but it should not keep falling after correction.
Note: A tire pressure monitoring system is helpful, but it is not a replacement for manual pressure checks. NHTSA recommends using the vehicle manufacturer’s cold tire pressure from the door placard or owner’s manual, not the maximum pressure molded on the tire sidewall.
Common Causes of Tire Bead Leaks
Tire bead leaks usually happen when the bead cannot make smooth, even contact with the wheel. The cause may be minor dirt buildup, but it can also be corrosion, damaged rubber, or an unsafe tire-and-wheel mismatch.
Rust and Corrosion Issues
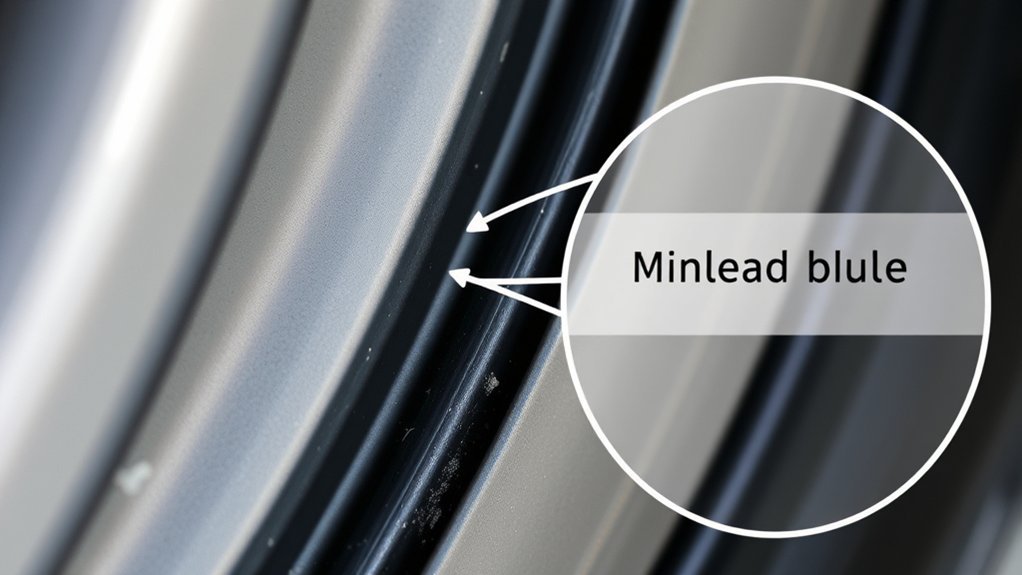
Rust on steel wheels or corrosion and oxidation on aluminum wheels can roughen the bead seat. That rough surface creates tiny air paths between the tire and rim. Road salt, moisture, age, and scratched wheel coatings can make this worse, especially in winter climates.
If corrosion is light, a tire shop may be able to demount the tire, clean the bead seat, apply an approved tire bead sealer if appropriate, and reseat the tire. If corrosion is deep or the wheel is cracked, replacement may be safer than resealing.
Dirt and Debris Accumulation
Dirt, dried mud, old bead sealer, rubber residue, and small debris can prevent the bead from sitting flat. Even a thin layer can create a slow leak. This is why the wheel surface should be cleaned when a tire is mounted or resealed.
- Clean contact surfaces: The bead seat and tire bead must be clean before reseating.
- Inspect both sides: A leak may appear on the inner bead where it is harder to see.
- Check after winter: Salt and grime can collect near the rim edge.
- Do not ignore repeat leaks: If the same tire keeps losing air, the cause needs to be found rather than topped off repeatedly.
Rim Damage or Poor Mounting
A bent rim, scratched bead seat, damaged tire bead, or incorrect mounting can also cause air loss. Be extra cautious after hitting a pothole, curb, trail obstacle, or road debris. Any tire that was mounted with the wrong lubricant, stretched over the wrong rim size, or forced on with damaged tools may also have bead damage.
Signs Your Tire Bead Needs Attention
A compromised tire bead can become a safety problem. Watch for these signs:
- Repeated air loss: You add air, but the tire drops again within days or weeks.
- Soap bubbles at the rim edge: Bubbles where the tire meets the wheel point to a bead-area leak.
- Visible gap or uneven seating: The tire does not look evenly seated around the rim.
- Vibration or wobble: New vibration after tire service can suggest improper seating, damage, imbalance, or another tire/wheel issue.
- Uneven shoulder wear: Long-term low pressure can wear tire shoulders faster.
- TPMS warning: A warning light that returns after inflation means the tire needs inspection.
The U.S. Tire Manufacturers Association recommends monthly tire inspections, including pressure, tread wear, and tire damage. It also advises drivers to consult a tire professional if they notice increased air loss, noise, or vibration.
[Products Worth Considering]

The 5 Gallon Air Tire Bead Seater quickly inflates tire sidewalls to seat the bead onto the rim, works for tires up to 24.5 inches on vehicles ranging from cars to ATVs. Its heavy‑duty all‑steel construction with powder coating ensures durability, while the easy‑to‑read gauge lets you monitor pressure accurately. The long‑reach metal barrel delivers a precise air blast at the perfect angle for efficient bead seating. Ideal for automotive shops and DIY enthusiasts needing reliable tire repair performance.
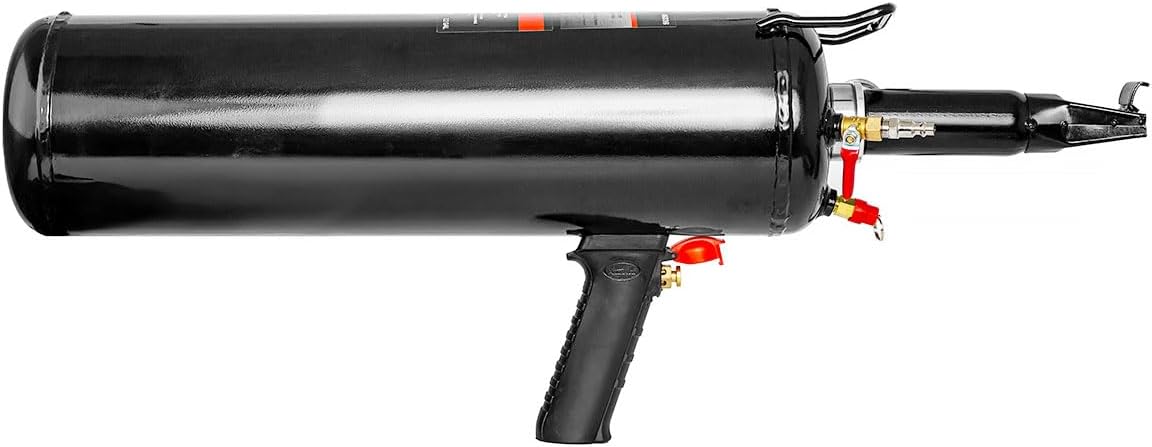
The XtremepowerUS Tire Bead Seater delivers rapid, high‑pressure inflation for a wide range of vehicles, from motorcycles to large tractors, with a 12‑liter capacity and 116 PSI maximum pressure. Its ergonomic, handheld design features a push‑button switch, non‑slip grip, and built‑in piston valve for precise control and easy operation. The durable steel construction and large‑diameter exhaust valve ensure reliable performance and efficient air release, making tire bead seating quick and hassle‑free.

The XtremepowerUS 5‑gallon bead seater delivers rapid, high‑pressure inflation for tires on cars, trucks, RVs, ATVs and more. Its durable 2.5 mm carbon steel construction with powder finish resists rust, while the specially designed lip and quick‑release valve ensure precise bead seating. An easy‑read gauge lets you monitor pressure up to 145 PSI, making tire inflation quick and safe.
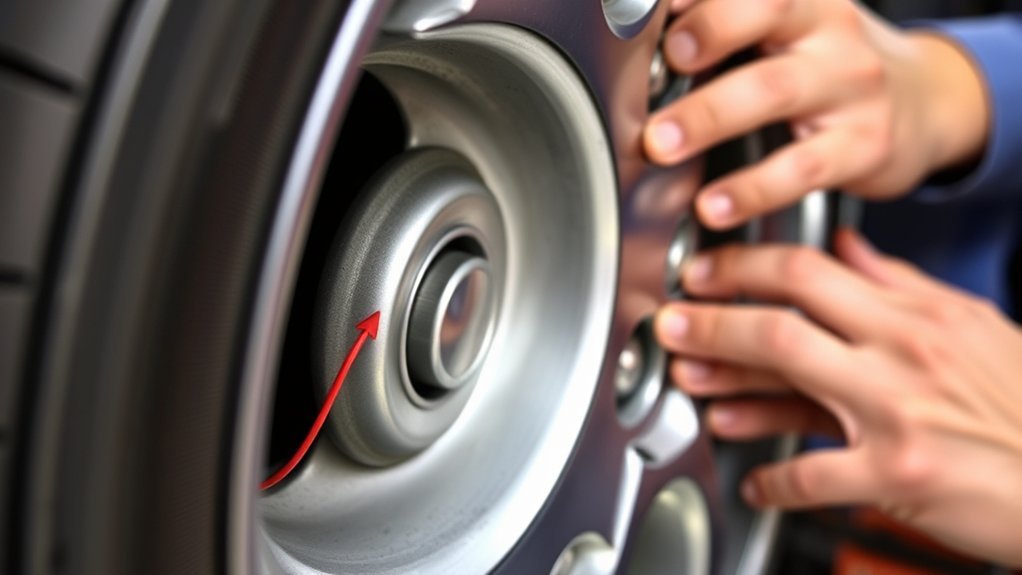
How to Check for a Tire Bead Leak Safely
You can safely check for the location of a slow leak without removing the tire from the wheel.
- Park safely: Put the vehicle on level ground, set the parking brake, and let the tires cool.
- Check cold pressure: Compare each tire to the pressure listed on the vehicle placard or owner’s manual.
- Mix soapy water: Add dish soap and water to a spray bottle.
- Spray the bead area: Wet the full circle where the tire meets the wheel on both sides if accessible.
- Watch for bubbles: Growing bubbles usually show escaping air.
- Check the valve and tread: Spray the valve stem, valve core, tread surface, and any visible puncture.
- Mark the leak: Use chalk or tape so a tire shop can find the exact area.
Warning: Do not try to break, reseat, or inflate a tire bead with improvised methods. Never use flammable sprays, starting fluid, straps, grease, household sealants, or excessive air pressure to seat a bead.
[Products Worth Considering]

The 2000A Jump Starter delivers a powerful 2000A peak current to start 12V vehicles up to 8.0L gasoline or 6.0L diesel, even in extreme temperatures. Its high-density lithium...
Effective Solutions for Tire Bead Leak Problems
The right fix depends on why the bead is leaking. A proper repair starts with inspection, not just adding sealant.
- Clean and reseat the tire: A shop can demount the tire, clean the rim bead seat, inspect the tire bead, apply approved tire lubricant, and reseat the tire.
- Use tire-approved bead sealer when appropriate: Bead sealer may help with minor surface imperfections, but it is not a cure for a cracked wheel, torn bead, or severe corrosion.
- Replace a damaged valve stem: A valve leak can look like a bead leak if the air runs along the rim.
- Repair or replace the wheel: Bent, cracked, or deeply corroded wheels may not seal reliably.
- Replace the tire if the bead is damaged: A torn, kinked, or exposed-cord bead is not a safe reseal candidate.
For safety, USTMA mounting guidance says tire and wheel components should be cleaned, approved tire lubricant should be used, the wheel/rim must be the correct size and type, and the assembly should be secured before inflation.
Proper Techniques for Installing and Seating Tire Beads
Installing and seating tire beads correctly requires the right equipment. The tire and rim must match in diameter and type, the bead must be lubricated with approved tire mounting lubricant, and the tire must be held securely on a tire-mounting machine or inside a suitable restraining device when required.
Do not exceed the tire or wheel manufacturer’s maximum bead-seating pressure. If the bead does not seat at the allowed pressure, the safe step is to deflate the assembly, reposition the tire, relubricate, and try again with proper equipment. Continuing to add pressure can damage the bead, wheel, or both.
A bead leak is usually a symptom, not the whole problem. The real fix is to correct the surface, seating, or damage that allowed air to escape in the first place.
OSHA warns that installing a tire on the wrong rim diameter can cause the bead to fail with explosive force during inflation. If you are not trained and equipped for tire mounting, leave bead seating to a tire professional.
Simple Tips to Make Your Tire Beads Last Longer
Good tire care helps the bead seal last longer and makes leaks easier to catch early.
- Check tire pressure monthly: Use a reliable gauge and check when tires are cold.
- Inspect after impacts: Look for rim bends, sidewall bulges, cuts, and new vibrations after potholes or curb hits.
- Keep valve caps installed: Caps help keep dirt and moisture away from the valve core.
- Clean wheels during tire service: Ask the shop to inspect and clean bead seats when tires are mounted or rotated.
- Do not drive on a very low tire: Low-pressure driving can damage the sidewall and bead area.
- Store off-season tire/wheel sets properly: Keep them clean, dry, and away from chemicals that can attack rubber or wheel finishes.
Pro Tip: If one wheel has repeated bead leaks, ask the shop to inspect the rim closely from the inside. Corrosion and small bends are often easier to see after the tire is demounted.
Custom Tire Bead Solutions for Off-Road and Performance Needs
Off-road and performance driving can put extra load on the bead area. Lower tire pressures, hard cornering, rocky terrain, and high heat can all increase the chance of bead movement, air loss, or bead damage.
Specialized Bead Designs
- Reinforced bead areas: Some performance and light-truck tires use stronger bead packages for demanding loads.
- Stiffer sidewalls: Performance tires may use construction that improves response but can make mounting more sensitive.
- Beadlock wheels: Off-road beadlocks clamp the tire bead to the wheel to help prevent unseating at low pressure.
- Corrosion-resistant wheel finishes: Good wheel coatings help protect the bead seat from oxidation and road salt damage.
Off-Road Sealing Techniques
For off-road vehicles, beadlocks can help keep the bead seated when tires are aired down for traction. However, beadlock wheels require correct hardware torque, periodic inspection, and compatibility checks. Some beadlocks may not be legal for every road-use application, so verify local rules and manufacturer instructions before using them on public roads.
After trail use, inspect the bead area for sand, mud, stones, or sidewall cuts. Debris trapped between the bead and rim can create a slow leak even if the tire looks fine from the outside.
Performance Tire Enhancements
Performance tires often have stiff sidewalls and bead areas designed for responsive handling. That stiffness can make correct mounting technique more important. A trained installer should use the correct tire machine settings, approved lubricant, and pressure limits so the bead is not stretched, kinked, or torn during installation.
When to Seek Professional Help for Tire Bead Issues

Get professional help if the tire loses air repeatedly, bubbles form around the bead, the wheel is visibly bent or corroded, the tire has a sidewall bulge, or the bead looks uneven on the rim. You should also stop driving and use a spare or roadside service if the tire is very low, the vehicle shakes, or the TPMS warning returns soon after inflation.
A tire shop can safely demount the tire and check the bead, wheel, valve stem, tread, sidewall, and inner liner. This matters because a tire that looks repairable from the outside may have internal damage from being driven underinflated.
DIY Sealant Solutions for Tire Bead Leaks
For a bead leak, the safest DIY work is diagnosis and temporary pressure management, not improvised sealing. You can check pressure, locate bubbles with soapy water, mark the leak, and drive carefully to a tire shop if the tire holds enough air for safe travel. If it does not hold air, use the spare or call roadside service.
Avoid these common mistakes:
- Do not use grease or petroleum products: They can affect rubber and are not approved tire mounting lubricants.
- Do not use silicone caulk or household sealants: They can make future tire service harder and may not bond safely under tire loads.
- Do not use starting fluid or flammable sprays: This is dangerous and can cause serious injury.
- Do not rely on liquid tire sealant for bead corrosion: Many emergency sealants are designed for tread punctures, not rim-bead sealing problems.
If a shop uses bead sealer, it should be a tire-specific product used after the tire is removed, the rim is cleaned, and the tire bead is inspected. Bead sealer should not be used to hide structural wheel or tire damage.
Frequently Asked Questions
How do tire beads differ between various tire types?
Tire beads differ in size, stiffness, construction, and intended wheel fitment. Passenger, light-truck, motorcycle, run-flat, racing, and off-road tires can use different bead designs. Always match the tire size and type to the correct wheel and vehicle recommendation.
Can tire bead issues affect vehicle handling?
Yes. A leaking or poorly seated bead can lower tire pressure, which can affect steering response, braking, cornering, tire temperature, and tread wear. Vibration, pulling, or repeated air loss should be inspected promptly.
What tools are necessary for tire bead maintenance?
For basic checks, you need a tire pressure gauge, spray bottle with soapy water, and an inflator. For actual bead repair or reseating, a tire machine, approved lubricant, safety equipment, and trained handling are needed.
How often should I inspect my tire beads?
Check tire pressure at least monthly and before long trips. During those checks, look for air loss, rim corrosion, uneven wear, vibration, or visible damage. A full bead-seat inspection usually requires demounting the tire, so it is best done during tire service.
Are there specific tire brands with better bead technology?
Major tire manufacturers design beads for each tire’s load, speed, and use case. Instead of buying by bead claims alone, choose a tire that matches your vehicle, wheel size, load rating, speed rating, and driving conditions.
Can I drive with a slow bead leak?
Only drive if the tire is inflated to the vehicle’s recommended pressure and holds pressure long enough for a safe short trip to a tire shop. Do not drive on a visibly low tire, because underinflation can damage the tire internally.
Does bead sealer permanently fix a tire bead leak?
Sometimes, but only when the tire and wheel are otherwise safe. Bead sealer can help with small surface imperfections after cleaning, but it will not fix a torn tire bead, cracked wheel, bent rim, or severe corrosion.
Conclusion
A tire bead is a small-looking part of the tire, but it plays a major role in holding air and keeping the tire seated on the wheel. If you notice repeated air loss, bubbles at the rim edge, vibration, or uneven seating, treat it as a safety issue rather than a nuisance. Check the leak location with soapy water, keep the tire at the correct cold pressure, and have a tire professional inspect any bead, rim, or corrosion problem that keeps coming back.
Sources
- NHTSA TireWise: Tire Safety Ratings and Awareness — supports cold tire pressure, TPMS, and tire safety guidance.
- U.S. Tire Manufacturers Association: Tire Care & Safety — supports monthly tire inspection and when to consult a tire professional.
- USTMA Tire Information Service Bulletin: Demounting and Mounting Procedures — supports bead seating, pressure, lubricant, and mounting safety guidance.
- OSHA Safety and Health Information Bulletin: Hazards While Servicing Small Tires — supports warnings about bead seating, mismatched rim/tire sizes, and explosive-force hazards.
- Michelin Tire Glossary — supports tire bead definition and bead construction details.
- Bridgestone: Basic Structure of Passenger Tires — supports tire bead structure and function.
Related Articles

How Often to Check Tire Pressure on a Tundra: A Simple Schedule
Discover the essential schedule for checking your Tundra's tire pressure to ensure safety and performance—don’t let improper inflation jeopardize your next adventure!
Read More
How to Prevent Dry Rot on Truck Tires: Storage, UV, and Dressing Tips
Avoid dry rot on truck tires with essential storage, UV protection, and dressing tips to prolong their life—discover the best strategies inside.
Read More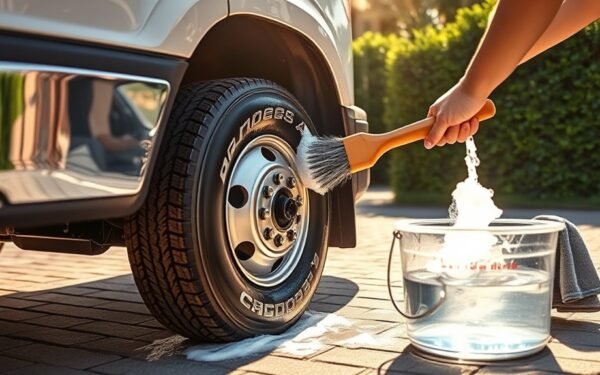
How to Clean White-Letter Tires on a Truck Without Damaging Them
Find out how to effectively clean your white-letter tires without damaging them, and uncover essential tips for maintaining their pristine appearance.
Read More