
How to Rotate Tires With One Jack: Safe Method
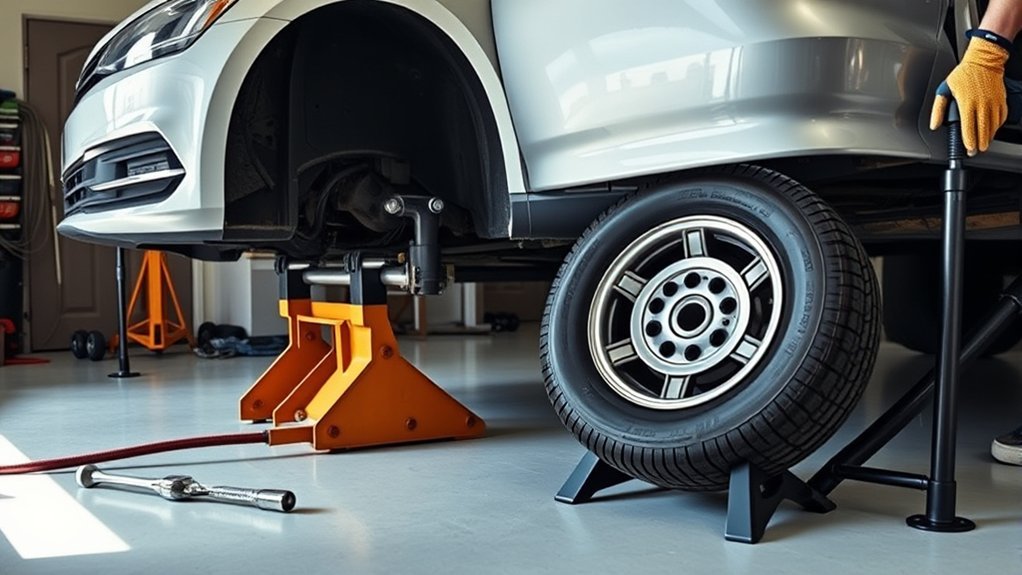
You can rotate tires with one jack by working one corner at a time and using jack stands plus wheel chocks for stability. Park on level ground, set the parking brake, and place the jack only at the manufacturer’s lift points. Remove the wheel, swap it according to your tire pattern, and tighten lug nuts in a crisscross pattern to spec. Check tire direction and pressure, and you’ll see how to make the process safer and more precise.
Key Takeaways
- Park on a flat surface, set the parking brake, and chock the wheels that stay on the ground.
- Use the owner’s manual to find the correct jack point and place the jack securely there.
- Lift only one side at a time, and always support the vehicle with jack stands before removing a tire.
- Follow the correct rotation pattern for your tires; avoid side-to-side swaps on staggered or directional setups.
- Hand-tighten lug nuts in a crisscross pattern, torque them to spec, and recheck torque after 50–100 miles.
[Products Worth Considering]

These oil-based permanent paint pens use quick-dry, waterproof ink for clean, lasting marks across many craft and DIY surfaces. The medium round nib delivers smooth, precise application for detailed writing, painting, and labeling. Each marker is individually packaged to help prevent leakage during shipping or storage.

The AstroAI L7 Mini tire inflator delivers fast, reliable inflation with a 5+4 smart inflation system, including preset modes for car, motorcycle, bicycle, ball, and custom pressure. A true gauge smart screen and advanced sensor provide accurate pressure readings to help prevent overinflation or low-pressure risk. Built-in 3-mode flashlight (flashlight, strobe, SOS) adds safety for roadside emergencies, while auto shut-off and long-lasting battery performance support repeated inflations.

The AstroAI 2 pack air chucks provide a heavy-duty, closed-flow locking design that helps keep air flowing during inflation while securely attaching to the valve stem. Built with 250 PSI rated brass components and compatible with Schrader valves, they feature 1/4" female NPT threads for a wide fit with common inflators. The straight tip and locking clip make filling tires and monitoring pressure more convenient.
What Do You Need to Rotate Tires With One Jack?
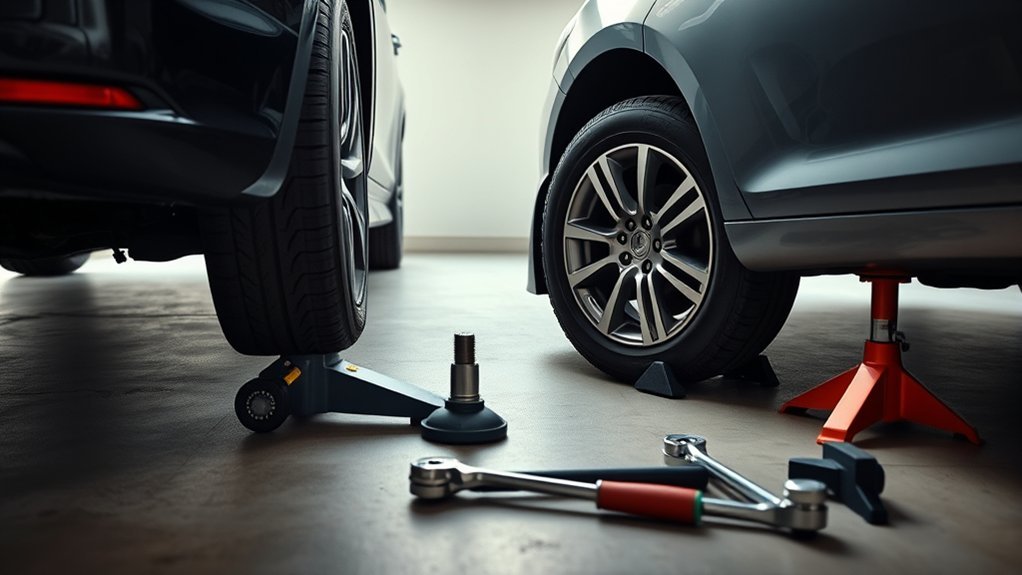
To rotate tires with one jack, you need a jack rated for your vehicle, jack stands, wheel chocks, and the owner’s manual to locate the correct jack points. You also need a torque wrench, a lug wrench, and gloves.
A jack rated for your vehicle, jack stands, wheel chocks, and your owner’s manual are essential.
For a non-staggered setup, one jack is a good solution because it can lift both wheels on one side for front-to-back rotation. Check your vehicle’s stiffness and structural integrity first, since weak points can make lifting unsafe. Use the manual to confirm jack points and avoid chassis damage.
You must log tire rotations every 10,000 miles so you don’t miss service intervals. Keep a spare tire nearby only if your vehicle carries one, but don’t use it for this job.
Inspect the jack and stands for wear before you begin, and verify that all tools match your wheel hardware.
How to Park and Chock the Vehicle
Before you lift the vehicle, park it on a flat, stable surface so it can’t roll or shift.
Set the parking brake firmly to lock the vehicle in place.
Then chock the wheels that’ll stay on the ground, placing the chocks snugly against the tires before you use the jack.
Parking Surface Check
Start by parking on a level, stable surface so the vehicle won’t shift during lifting. In the United States, tires are always safest to service when the ground is flat, firm, and free of loose gravel or soft asphalt.
Verify the area supports the jack without sinking or tilting, because an uneven surface can cause loss of stability. Park with enough clearance around the vehicle, then place wheel chocks on the opposite side of the tire you’ll raise.
Check the manufacturer’s jack points before positioning the jack, and confirm nothing blocks your path. Keep tools close at hand, and make sure the work zone stays clear.
This setup reduces movement, protects the undercarriage, and prepares you for a controlled lift.
Set Parking Brake
Set the parking brake firmly once the vehicle is parked on a flat, stable surface, then chock the wheels that will remain on the ground. This step underscores parking brake importance because it limits vehicle movement before you lift one side.
Use proper engaging techniques: apply the brake fully, confirm the pedal or lever reaches its stop, and verify the hold before positioning the jack.
Select wheel chocks sized and rated for your vehicle, then place them securely so they resist rolling.
Common mistakes include partial brake application, using undersized chocks, and skipping the final stability check.
Double-check that the brake is locked and the chocks are seated firmly before you proceed with any lifting or tire removal.
Chock Opposite Wheels
Place wheel chocks on the opposite side of the vehicle from the end you’re lifting, and do it on the wheels that’ll stay on the ground. Park on a flat, stable surface, then confirm the parking brake is fully engaged. Choose tire chock types that suit your setup and verify chock material options for grip and durability. Check chock size considerations so each chock fits tightly against the tire.
| Check | Requirement |
|---|---|
| Surface | Flat, stable |
| Placement | Opposite lifted end |
| Contact | Snug against tires |
| Inspection | Verify secure fit |
Recheck both chocks before you lift; a loose chock can let the vehicle roll or shift.
Where to Place the Jack Safely
You should place the jack only at the manufacturer’s designated jack points, which are reinforced to support the vehicle’s weight without damage.
Before lifting, position wheel chocks on the opposite side of the vehicle to block any movement.
Keep the jack on a flat, stable surface and verify it’s centered and secure under the jack point before raising the vehicle.
Jack Point Locations
Start by identifying your vehicle’s designated jack points in the owner’s manual, since these reinforced areas are built to carry the car’s weight safely during lifting.
Use jack point identification to confirm the front and rear locations, usually near each wheel and marked by notches or arrows.
Check how your vehicle’s weight distribution affects access, because some models have unique structural designs that change where the jack fits best.
Keep the car on a flat, stable surface before you lift it, and follow lifting safety measures at every step.
- Inspect the manual.
- Find the marked front point.
- Find the marked rear point.
- Verify solid, reinforced contact before raising the vehicle.
Wheel Chock Placement
Before you raise the vehicle, set wheel chocks behind the wheels that’ll stay on the ground to keep it from rolling. On inclines, chock both sides of the wheels opposite the lifted side for extra security.
Choose chock materials that resist compression and slip, and match chock sizes to the tire diameter so they contact firmly. Place the jack only on the designated jack points in your owner’s manual, then confirm the ground is level and stable before you lift.
After the vehicle rises, verify it’s steady before you begin tire rotation. Inspect chock maintenance regularly: replace cracked, worn, or oil-soaked chocks immediately.
Never rely on the jack alone for support. If the vehicle shifts, lower it, reset the chocks, and reassess the setup.
Can You Rotate These Tire Patterns?
Can these tire patterns be rotated safely? You can rotate many setups, but you must match the pattern to the tire design and axle layout. For non-staggered vehicles, same-side rotation usually controls tire wear and preserves predictable handling.
Keep your rotation intervals near 10,000 miles to limit uneven wear and reduce side effects from missed maintenance.
- Non-staggered: same-side rotation is the safest default.
- Staggered: avoid side-to-side moves; they can create irregular wear and handling issues.
- Cross-rotation: use it only when the tire size and spec permit it.
- Radial tires: follow the manufacturer’s pattern exactly to protect traction and hydroplaning resistance.
If you ignore the approved pattern, you can shorten tread life and change wet-road behavior.
Always confirm the tire sidewall markings, load rating, and rotation direction before you lift a wheel.
How to Swap Front and Rear Tires
To swap front and rear tires with one jack, you’ll lift one side at the designated jack point while keeping the opposite side on the ground for stability.
Move the front tires to the rear and the rear tires to the front in the same orientation, and confirm the tires match in size and type before you start.
Use the correct rotation pattern for your setup, then lower the vehicle carefully and recheck pressure before driving.
Front-Rear Swap Basics
When you’re doing a front-to-rear tire swap with one jack, lift one side of the vehicle at a time and keep the jack on the manufacturer’s designated jack points for safety.
Chock the opposite wheels before you raise either end, so the vehicle can’t roll.
Use these steps to control tire wear and keep your maintenance tips efficient:
- Loosen lug nuts before lifting.
- Raise one side, remove the front tires, and move the rear tires forward.
- Match each tire’s rotation direction to its design.
- Lower the vehicle, repeat on the other side, and torque all lug nuts to spec.
Finish with safety checks on every wheel.
Rotate every 5,000 to 10,000 miles to promote even tire wear and extend tire life.
Safe Jack Placement
Start by locating your vehicle’s designated jack points near the front and rear wheels; using those reinforced spots helps you lift safely without damaging the frame or body.
Choose jack types and lifting techniques that match your vehicle’s weight and ground clearance. Place chocks at the opposite wheels before you raise one side, and keep the surface level.
Use safety equipment, including gloves and a wheel stand if available, to control risk. Lift only one side at a time, remove the tires, and set the vehicle back down completely before moving to the other side.
Recheck that each wheel is seated and that the lug nuts are torqued to spec after rotation. This sequence keeps the vehicle stable and minimizes movement during the swap.
Tire Rotation Pattern
For a front-to-back tire rotation with one jack, you’ll lift one side of the vehicle and swap the front and rear tires on that same side, then repeat on the opposite side.
Keep the vehicle on a flat surface and chock the opposite wheels before lifting. This same-side pattern suits non-staggered setups and helps preserve handling balance.
- Rotate front and rear tires on the lifted side.
- Reinstall tires in the same side positions only.
- Repeat after lowering and relocating the jack.
- Verify torque after each wheel is mounted.
Following this pattern supports tire rotation benefits by promoting even wear and extending service life.
Avoid common mistakes like crossing tires side to side or ignoring your maintenance schedule. Check your owner’s manual for the correct interval; rotating every 10,000 miles is a reliable baseline.
How to Lift the Other Side
With the first side securely lifted on jack stands, chock the wheels on the opposite side before you move the jack. Recheck that the stands bear the load, then locate the manufacturer-approved jack points on the remaining side.
Position the jack squarely under the correct point so the saddle seats flat and the vehicle lifts straight. Use steady pressure and raise the vehicle in small increments, watching for tilt, roll, or suspension shift. These jack stability techniques support safe jack handling and reduce risk during vehicle lifting methods.
When the tire clears the ground, stop immediately and set jack stands under the frame or pinch weld at the specified support points. Lower the jack slightly so the stands take the weight, then confirm both supports are locked.
Before you rotate any tire, double-check that the vehicle is stable, level enough, and fully secured.
[Products Worth Considering]

AstroAI AIRUN H is a compact 12V tire inflator designed for fast, convenient inflation with an easy-to-read digital pressure gauge. Set your target pressure with programmable controls and let the auto shut-off turn off the pump when the preset is reached. It also includes a backlit screen and LED flashlight for nighttime use, with a ToughUltra durability design for longer service life.

Get quick, reliable tire readings with a backlit digital gauge that seals easily to valve stems for accurate 0.1 increments. Switch units on demand and check pressure on cars, trucks, motorcycles, and bicycles using the included Presta-to-Schrader adapter. The gauge powers with AAA batteries and automatically shuts off to help save battery life.

This calibrated digital tire pressure gauge delivers accurate readings within plus-minus 1 PSI for reliable tire maintenance. It features an illuminated nozzle and backlit LCD display to measure easily in dim areas, and offers four selectable units for versatile use. Automatic shutdown after 30 seconds helps conserve battery life for everyday convenience.
Single-Jack Safety Tips for Stable Lifting
Because a single jack leaves little margin for error, you should chock the wheels on the opposite side before you lift and confirm the jack is rated for your vehicle and in good working order.
Review the lift points in your owner’s manual, then place the jack only on approved pads to avoid slip or body damage. Raise the vehicle slowly, pausing to check for tilt, movement, or jack drift. These vehicle stability techniques reduce sudden load shifts.
- Inspect the jack for leaks, bent parts, and smooth operation; follow jack maintenance tips.
- Set wheel chocks tightly against the tires that stay on the ground.
- Lift evenly and stop immediately if the vehicle rocks or settles.
- Install jack stands before you remove any wheel.
Keep the work area flat and clear, and never crawl under a vehicle supported only by a jack.
After rotation, confirm tread direction and compare tire wear indicators so you can spot abnormal wear early.
Why Rotation Won’t Fix Alignment Wear
If your tires show uneven edge wear or a feathered pattern, rotation alone won’t solve the problem, since it only redistributes wear instead of correcting the alignment error causing it.
Rotation won’t fix uneven edge wear or feathering; it only moves the problem, not the alignment cause.
You can still rotate every 5,000 to 10,000 miles as preventive care, but you shouldn’t expect it to erase alignment signs.
When one shoulder wears faster than the other, the problem usually points to toe, camber, or caster faults, not tire position.
These uneven wear patterns often come from suspension issues, so you need a proper inspection and repair before you see lasting improvement.
If you keep rotating without fixing the cause, the same tire will continue degrading in a new position, and you’ll shorten tread life while risking reduced grip and stability.
Treat rotation as maintenance, not a cure, and verify alignment whenever wear patterns suggest a mechanical problem.
How to Tighten Lug Nuts Properly
Tighten the lug nuts in a crisscross pattern so you apply pressure evenly and avoid warping the wheel. Before you start, chock the opposite wheels so the vehicle can’t roll while you work.
Check that the lug nut types match the wheel studs, and clean each fastener so rust or debris won’t affect seating. Use a torque wrench, not an impact gun, to reach the manufacturer’s torque settings, usually 80 to 100 ft-lbs on most vehicles.
- Snug all lug nuts by hand first.
- Tighten them in a star pattern.
- Set the torque wrench to spec.
- Recheck after 50 to 100 miles.
Common mistakes include over-tightening, skipping the pattern, and ignoring corrosion. If a nut feels gritty or cross-threaded, stop and correct it before continuing.
Proper tightening keeps the wheel secure, reduces vibration, and helps the joint maintain clamping force after installation.
When to Rotate Tires for Best Wear
To keep tread wear even and extend tire life, rotate your tires every 5,000 to 10,000 miles, or sooner if your driving conditions demand it. You should check tire wear indicators and perform tread depth measurement at each service interval. Front tires usually wear faster because they handle steering and more load, so inspect them closely for uneven wear signs. If tread depth differs by more than 2/32 inch, rotate immediately. Use the correct pattern for your setup: same-side rotation on non-staggered tires, and a different sequence for staggered fitments. Seasonal shifts, stop-and-go traffic, and off-road use can shorten intervals.
| Condition | Action |
|---|---|
| 5,000 miles | Inspect and rotate |
| 10,000 miles | Rotate by default |
| >2/32 inch difference | Rotate now |
| Stop-and-go use | Shorten interval |
| Off-road or seasonal change | Recheck sooner |
Frequently Asked Questions
Can I Do a Tire Rotation With Just One Jack?
Yes, you can, if you lift one side at a time and follow tire maintenance tips, jack safety precautions, and rotating techniques explained; you’ll need secure chocks, correct jack points, and stable support.
Is It Okay to Use Only One Jack Stand?
No, you shouldn’t use only one jack stand; it’s risky. Follow tire maintenance tips, safety precautions, and jack usage guidelines, keep the car on level ground, chock wheels, and add another stand for stability.
How to Rotate Tires With No Jack Stand?
Don’t rotate tires with no jack stand; you risk vehicle stability. Use proper jack types, chock wheels, and lift one corner at a time. For tire rotation safety, support the car securely before you work.
What Is the Easiest Way to Rotate Tires at Home?
The easiest way is to use one jack, lift one side, and swap the front and rear tires there. You’ll need essential tools, follow safety precautions, and gain tire rotation benefits from even wear.
Conclusion
You’ve guided your car like a careful chessboard move: one jack becomes a steady hand, not a shortcut. You can rotate tires safely if you park level, chock firmly, lift at the correct jacking point, and swap each wheel only when the vehicle is stable. Tighten lug nuts to spec in a star pattern, then recheck after driving. If wear looks uneven, don’t blame rotation alone—inspect alignment, because even good armor can’t correct a bent road.
[Products Worth Considering]

AstroAI’s calibrated digital tire pressure gauge delivers precise readings across a 0–150 PSI range, with high clarity from a backlit LCD. Built for everyday road use, it features one-button operation, an anti-slip ergonomic grip, and support for multiple pressure units plus auto shutoff. Powered by AAA batteries, it’s an all-weather essential for checking tire health and TPMS warnings.

Stay on top of tire pressure with a factory-calibrated digital gauge accurate to ±1 PSI and readable in 0.1 increments. It features a bright backlit LCD plus a illuminated nozzle for easy readings in low light, with auto-off power saving for longer battery life. Switch quickly between PSI, Bar, Kgf/cm², and KPA using a single button, and cover most everyday vehicles with a 0–150 PSI range.

AstroAI’s digital tire pressure gauge inflates and measures with high accuracy, reading within 1% and supporting four pressure units from 3 to 250 PSI. The heavy-duty brass air chuck locks securely on valve stems, while the 19.7-inch stainless braided hose and 360° rotatable dial improve comfort and control for faster single-hand operation. Battery-saver behavior and an integrated flashlight add convenience and safety for everyday roadside and garage use.

Related Articles

What Is a Wheel Bolt Pattern? Can You Change It?
How does a wheel bolt pattern work, and can you really change it without trouble? Keep reading to find out.
Read More
Can You Replace Just One Tire? When It’s Safe
Can you replace just one tire safely? Discover the key match-up rules that could save your car’s handling and drivetrain.
Read More
How to Cut a Tire in Half: Tools, Steps, and Safety
Tough tires need the right tools and safety steps to split cleanly—discover the easiest method, crucial warnings, and what happens next.
Read More