
How to Change a Flat Tire on a Hyundai Sonata: Step-by-Step

You can change a flat tire on a Hyundai Sonata safely if the car is completely off the road, parked on firm level ground, and equipped with a usable spare, jack, and lug wrench. Work slowly, keep everyone out of the vehicle, use the designated notched jack point closest to the flat tire, and confirm your exact model-year torque specification in the owner’s manual.
Quick Answer
To change a Hyundai Sonata flat, park on firm level ground, set the parking brake, turn on hazards, block the opposite wheel, loosen the lug nuts one turn, jack at the notched side-frame point, install the spare, hand-start the nuts, lower the car, and tighten in a star pattern. Hyundai guidance checked lists 79–94 lbf.ft for wheel nuts and 60 psi for the compact spare.
Key Takeaways
- Do not change a tire in traffic, on soft ground, on a slope, or with passengers sitting in the vehicle.
- Use only the designated notched jack point closest to the flat tire, not the bumper, trim, suspension, or body panel.
- Loosen lug nuts before lifting, then tighten them by hand first and finish in a star pattern after lowering.
- For the Hyundai Sonata guidance checked, the wheel-nut torque is 79–94 lbf.ft and the compact spare pressure is 60 psi; always confirm your model year.
- A compact spare is temporary. Stay under the spare’s speed limit, avoid hard maneuvers, and repair or replace the original tire as soon as possible.
At a Glance
| Time Required | 15–30 minutes if the spare, jack, and lug nuts are usable |
| Difficulty | Moderate DIY task; call roadside assistance if conditions, tools, or physical ability are not safe |
| Tools Needed | Sonata jack, jack handle, lug wrench, inflated spare, wheel chock or solid block, tire-pressure gauge, gloves, flashlight, and torque wrench if available |
| Cost | Usually $0 if your Sonata has the spare and tools; tire repair, replacement, towing, or missing tools cost extra |
Warning: Never change a tire in a traffic lane, on a slope, or on soft ground. Never put any part of your body under a vehicle supported only by a jack. If you cannot get completely off the road onto firm, level ground, or if the jack, wheel nuts, studs, or spare are damaged, call roadside assistance or a towing service.
Quick Checklist: Change a Flat on a Hyundai Sonata

Start by moving the Sonata as far from traffic as possible. Choose firm, level ground, shift to Park, apply the parking brake, turn the engine off, and switch on the hazard lights. Ask passengers to get out and stand well away from traffic. If the location is not safe, stop here and call for help.
- Open the trunk and remove the floor cover to access the spare tire and tool tray.
- Check that the compact spare is inflated to 60 psi, unless your spare sidewall or owner’s manual states otherwise.
- Gather the jack, jack handle, lug wrench, wheel chock or solid block, and tire-pressure gauge.
- Block both the front and rear of the tire diagonally opposite the flat tire.
- Loosen each lug nut about one turn while the flat tire is still on the ground.
- Place the jack at the designated notched jack point closest to the flat tire.
- Raise the vehicle only until the tire clears the ground.
- Remove the lug nuts and flat tire, then mount the spare.
- Hand-start the lug nuts with the tapered end facing the wheel, then snug them in a star pattern.
- Lower the vehicle fully and tighten the lug nuts in a star pattern. For the Hyundai Sonata guidance checked, the correct range is 79–94 lbf.ft, but confirm your exact model year in the owner’s manual.
Hyundai’s official tire-changing guidance says the compact spare should be inflated to 60 psi and the wheel nuts tightened to 79–94 lbf.ft. Because specifications can vary by model year, market, and wheel setup, verify your Sonata’s owner’s manual, tire placard, and spare sidewall before relying on any number.
Locate the Sonata Jack and Spare
In most Hyundai Sonata models equipped with a spare, the spare tire and tools are stored under the trunk floor. Lift the trunk carpet or cargo floor panel, then remove the cover or foam tray to reach the compact spare, jack, jack handle, and lug wrench.
[Products Worth Considering]

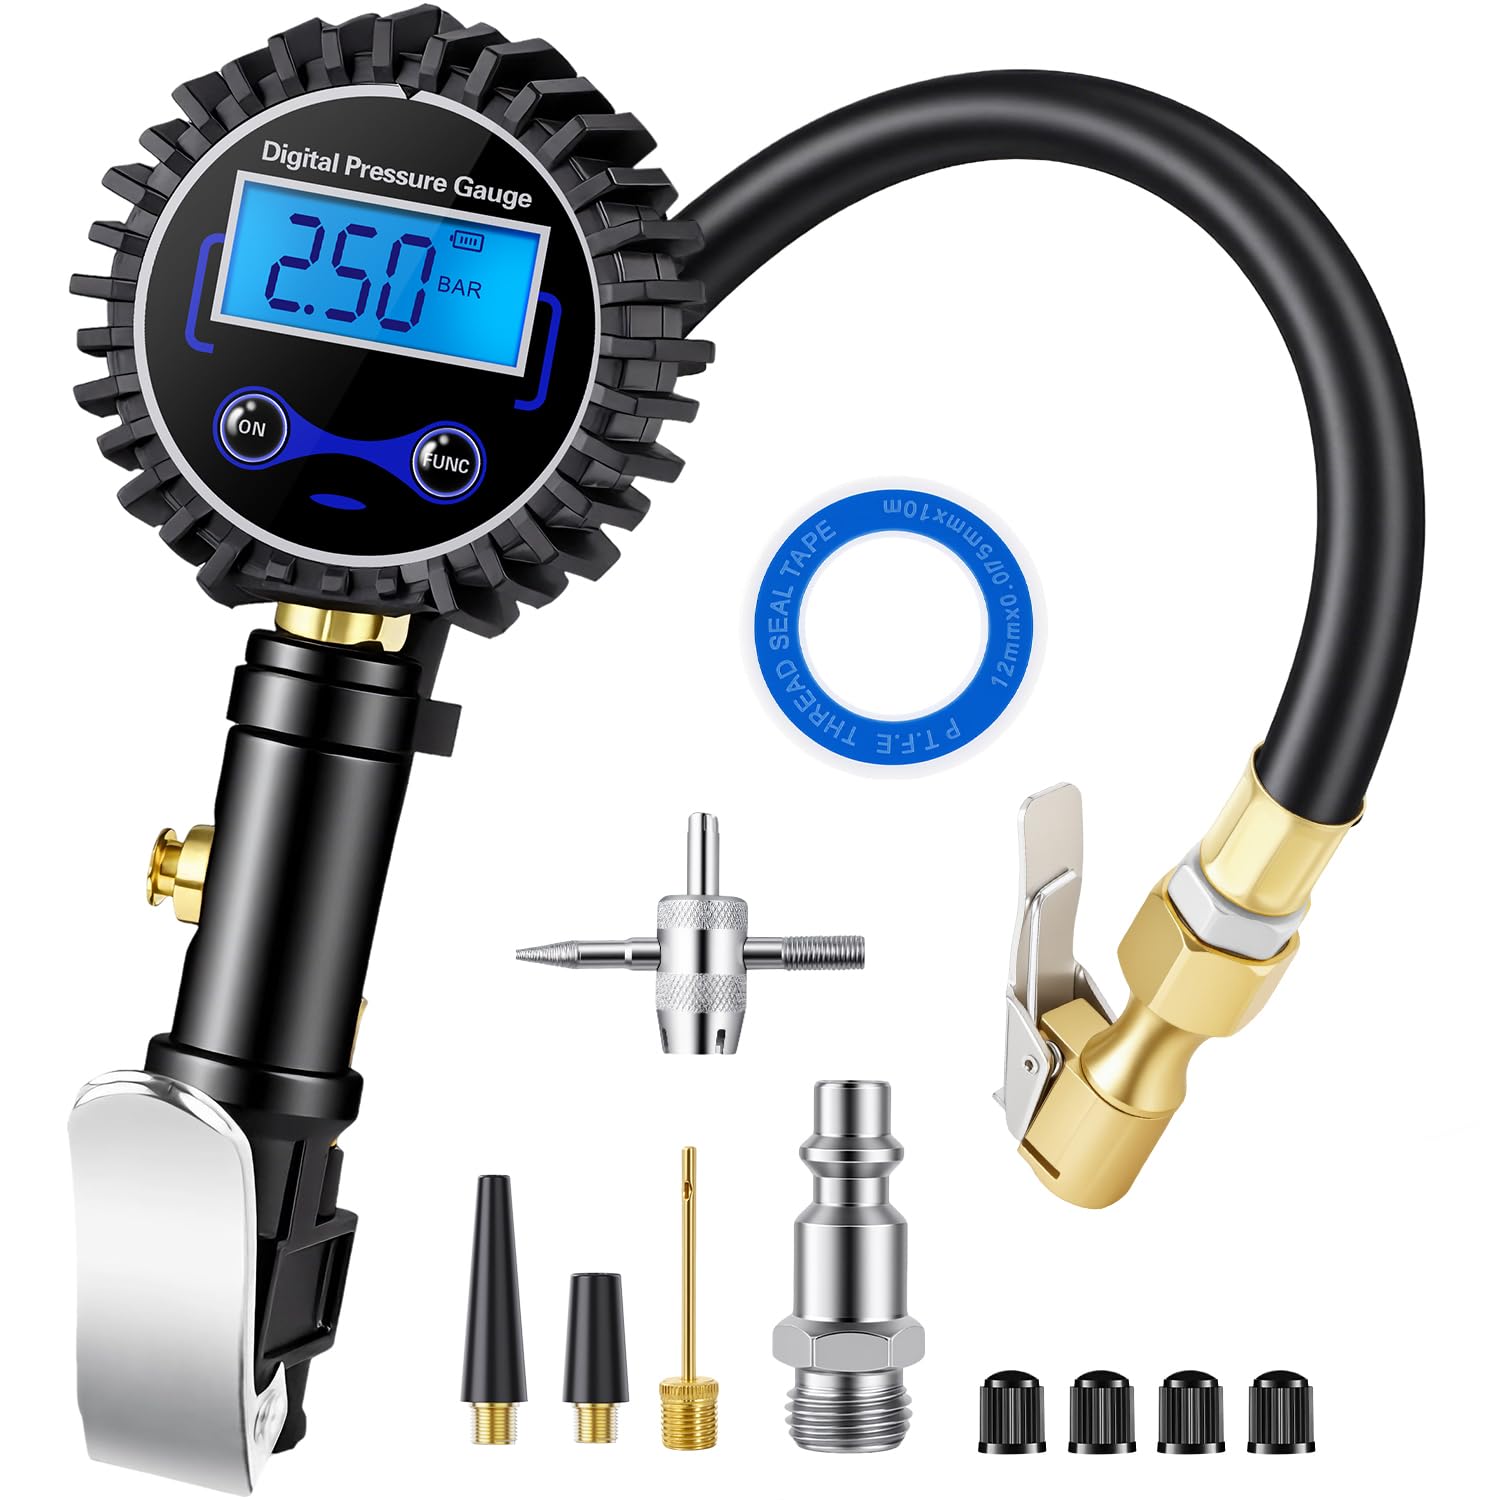
The Milton 555e digital tire inflator delivers fast, accurate pressure readings with a backlit display and multiple unit options, making tire inflation quick and easy. Its durable 20" EPDM rubber hose and grip‑head chuck provide reliable connection, while the ±1 PSI accuracy ensures precise inflation for cars, bikes, and trucks.

This digital tire pressure gauge combines a sturdy pistol grip inflator with a backlit 0.1 PSI display for quick, accurate readings in any lighting condition. Its 360° swivel gauge and 20" rubber hose make it easy to use and store, while the integrated inflate/deflate trigger and ¼" NPT air inlet provide fast, reliable tire maintenance.

The Milton 507KIT delivers fast, accurate tire inflation, deflation and pressure measurement with a backlit LCD gauge and 14" rubber hose. Its 3‑in‑1 design meets ANSI/ASME standards and provides readings from 0‑250 PSI with 0.1 PSI resolution. The ergonomic pistol‑grip body and brass lock‑on chuck make one‑handed operation effortless, while the auto‑off feature conserves battery life.
Trunk Carpet Removal
Open the trunk and lift the rear edge of the carpeted floor panel. Some Sonata trims use pull tabs or square access holes; others use a molded cargo-floor handle. Set the carpet or panel aside so it does not slide under your feet while you work.
| Area | What to Check | Why It Matters |
|---|---|---|
| Trunk floor | Panel lifts fully and stays clear | Prevents lost tools and rushed movements |
| Tool tray | Jack, handle, lug wrench, and hook are present | A missing tool can stop the repair |
| Spare well | Spare is secure, inflated, and not cracked | An old or flat spare is not safe to use |
Spare Tire Location
With the carpet folded back and the plastic or foam cover lifted, the spare tire sits in the recessed well under the trunk base. Remove the foam insert if it covers the tire. Before installing the spare, inspect the sidewall for cracks, bulges, exposed cord, or visible damage. If the compact spare is damaged, badly worn, or cannot hold air, do not use it.
Note: Many compact spares are labeled for 60 psi cold inflation, but you should still check the spare tire sidewall and the Tire and Loading Information label on the driver’s doorjamb. Measure pressure when the tire is cold whenever possible.
Jack and Tool Storage
The Sonata jack assembly, lug wrench, and handle are usually clipped or nested in the foam tool tray above or near the spare. Confirm the jack screw turns smoothly, the base is not bent, the saddle is not damaged, and the lug wrench fits the wheel nuts. If your Sonata has locking wheel nuts, make sure the wheel-lock key is in the vehicle before you begin.
Pre-Start Safety Checks: Parking, Brake, Surface, and Tools
Safety matters more than speed. A tire change is only a good DIY job when the car is stable, visible, and away from moving traffic. If any safety check fails, use roadside assistance instead.
[Products Worth Considering]

This compact 12V DC tire inflator quickly inflates car, truck, SUV, motorcycle, and bicycle tires up to 150 PSI, featuring a backlit LCD display with multiple pressure units and an auto‑shutoff function. It includes a 9.84‑ft power cord, emergency LED light, and a durable design tested for 20,000 hours, offering a lifetime warranty for peace of mind.
The Digital Tire Pressure Gauge with Inflator offers precise pressure readings with a high‑resolution LED display and four unit options, making tire maintenance quick and accurate. Built from stainless steel and brass, it includes a durable rubber hose, quick‑connect coupler, and a 3‑year warranty for reliable, everyday use across cars, RVs, bikes, and inflatables.

Crafted with heat-treated, drop-forged steel for added strength; Designed to perform better than plastic or resin-made wheel chocks
Park on Level Ground
Park on a firm, flat surface away from traffic. Avoid soft shoulders, sand, mud, steep driveways, gravel slopes, and uneven pavement. Turn on hazard lights, set the parking brake, shift to Park, and turn the vehicle off. Keep children and passengers away from the road and out of the vehicle while it is raised.
| Task | Checkpoint | Action |
|---|---|---|
| Surface | Firm and level | Move to a safer spot or call towing |
| Traffic | Completely out of the lane | Use hazards and stay visible |
| Vehicle | Parking brake on, engine off | Keep passengers out |
| Spare | Inflated and undamaged | Do not use a damaged spare |
Engage the Parking Brake and Block the Opposite Wheel
Apply the parking brake fully. Then block the tire diagonally opposite the flat tire. For example, if the right-front tire is flat, block the left-rear tire at both the front and rear if possible. A wheel chock is best, but a solid block of wood or stone can help in an emergency if it is stable and large enough not to slip.
Pro Tip: Keep a small tire-pressure gauge, a pair of work gloves, a flashlight, and a folding wheel chock in the trunk. These inexpensive items make the factory spare kit much easier and safer to use at night or in bad weather.
Tools to Carry and How to Inspect Them: Jack, Wrench, and Spare
The factory tools are designed for emergency tire changes, not routine repair work. Inspect them before long trips so you are not discovering a missing handle or flat spare on the shoulder of the road.
| Item | Check | Action |
|---|---|---|
| Jack | Turns smoothly, no bent base, no heavy corrosion | Replace or service before relying on it |
| Lug wrench | Fits the wheel nuts securely | Add the correct wrench or wheel-lock key if missing |
| Compact spare | 60 psi cold pressure if specified, no cracks or bulges | Inflate, repair, or replace before travel |
| Torque wrench | Can cover the Sonata’s wheel-nut range | Use for final torque when available |
NHTSA recommends checking tire pressure, including the spare, at least once a month when tires are cold. The DOT Tire Identification Number on the sidewall shows the tire’s manufacture week and year, which helps you follow the vehicle and tire maker’s replacement guidance.
[Products Worth Considering]

Sturdy: Made of 45# high carbon steel, galvanized surface treatment, wear-resistant, rust-proof, strong, high hardness, anti-oxidation, so it has a long service life.

Material: Heavy Duty Powder Coated Steel with Convenient Carrying Case

Durable construction - made of tough, durable materials and coated with corrosion-resistant finish,and material testing to ensure a quality fit and long service life
Loosen Lug Nuts Safely Before Lifting
Loosen the lug nuts while the flat tire is still on the ground. This keeps the wheel from spinning and lets you apply controlled force without rocking the vehicle on the jack.
- Fit the lug wrench fully onto the first wheel nut.
- Turn counterclockwise to loosen it about one turn.
- Move to the opposite nut and repeat in a star or cross pattern.
- Loosen every nut, but do not remove any of them yet.
If a lug nut will not move, make sure the wrench is fully seated and the wheel-lock key is installed if needed. Use steady pressure rather than jumping on the wrench. If a nut is rounded, seized, or feels like it may snap the stud, call for assistance.
Sonata Jack Placement: Pinch Welds and Notched Rails
Place the jack only at the designated jacking position closest to the flat tire. Hyundai describes these points as plates welded to the frame with two notches. On the side of the car, the front jack point is generally behind the front wheel, and the rear jack point is generally in front of the rear wheel. Look for the notches and align the jack saddle with that reinforced point.
Do not place the jack under the bumper, rocker-panel trim, suspension arms, oil pan, or any unmarked body panel. Press the jack base flat against the ground, confirm the saddle is centered on the notch, and raise slowly. If the jack tilts or shifts, lower it and reset before continuing.
Warning: A factory jack is for lifting the vehicle high enough to change one tire. It is not a work stand. Never crawl under the Sonata while it is supported by the jack.
Raise the Car, Swap Tires, Then Seat and Lower
Insert the jack handle and turn it clockwise until the flat tire clears the ground. Keep the lift as low as practical; raising the car higher than needed makes it less stable.
- Remove the loosened lug nuts with your fingers and place them in a pocket, cup, or tray so they do not roll away.
- Pull the flat tire straight off the studs and lay it flat on the ground away from your feet.
- Wipe visible dirt, gravel, or corrosion from the hub face, studs, and spare mounting surface.
- Lift the spare onto the studs and push it fully against the hub.
- Install the lug nuts by hand with the smaller tapered end facing the wheel.
- Snug the nuts in a star pattern until the spare sits evenly against the hub.
- Lower the vehicle by turning the jack handle counterclockwise until the tire touches the ground, then lower it fully before final tightening.
Starting the lug nuts by hand helps prevent cross-threading. If a lug nut will not turn smoothly by hand, remove it and try again. Do not force it with the wrench.
Seat, Lower, and Torque Lug Nuts + Troubleshooting
With the Sonata fully lowered and the jack removed, tighten the lug nuts in a star pattern. Tighten each nut in stages instead of fully tightening one nut at a time. This helps the spare seat evenly on the hub.
For the Hyundai Sonata guidance checked, the correct wheel-nut tightening range is 79–94 lbf.ft. If you have a torque wrench, set it within your owner’s manual specification and torque each nut in the star pattern. If you only have the factory lug wrench, tighten the nuts firmly and drive slowly to a tire shop or Hyundai dealer as soon as practical so the torque can be checked.
Note: The flat tire should be repaired or replaced as soon as possible. When the original tire and wheel are reinstalled, the wheel nuts must be tightened to the proper specification again.
Common Problems While Changing the Tire
| Problem | Likely Cause | Safe Fix |
|---|---|---|
| Lug nut will not loosen | Overtightened, corroded, or wrong wrench angle | Seat the wrench fully and apply steady pressure; call help if it may strip or break |
| Jack leans or shifts | Soft ground, wrong jack point, or uneven base | Lower immediately, reset on firm level ground, or call towing |
| Spare will not fit | Wrong spare, debris on hub, or misalignment | Clean the hub and realign; do not force an incorrect spare |
| TPMS warning stays on | Compact spare usually has no TPMS sensor | Repair and reinstall the original TPMS-equipped wheel as soon as possible |
After Installing the Compact Spare
Check the spare tire pressure as soon as possible. If it is below or above the pressure listed on the spare sidewall or doorjamb label, drive slowly to the nearest service station and adjust it. Reinstall the valve cap after checking pressure.
When driving on a compact spare, keep speed under the limit printed on the spare and in the owner’s manual. Hyundai guidance for compact spares says not to drive over 50 mph, not to use the compact spare continuously, not to use more than one compact spare at a time, and not to tow a trailer with the compact spare installed. Avoid potholes, hard braking, sudden acceleration, fast cornering, automatic car washes, and tire chains.
A compact spare is an emergency bridge to a repair shop, not a replacement for a full-size tire.
Frequently Asked Questions
Can I use the Sonata’s tire pressure monitoring sensor with a temporary spare?
Usually no. Hyundai says the spare tire, if equipped, does not come with a tire pressure monitoring sensor. After you install the spare, the low-pressure warning may remain on, and the TPMS malfunction indicator may blink and then stay on after driving. Once the original TPMS-equipped wheel is repaired, inflated correctly, and reinstalled, the lights should go off after a few minutes of driving. If they do not, have the vehicle inspected.
What speed limit applies when driving on a Sonata compact spare?
Follow the speed printed on the spare tire and in your owner’s manual. Hyundai guidance for compact spares says never operate the vehicle over 50 mph. Drive more slowly when road, traffic, or weather conditions are poor.
How far can I drive on a Hyundai Sonata donut spare?
Drive only far enough to get the original tire repaired or replaced. Hyundai says the compact spare is for emergency use only and should not be used continuously. Some general tire guides mention short-distance limits for temporary spares, but your spare sidewall and owner’s manual come first.
How long can I store the compact spare without replacing it?
There is no single age limit that fits every tire and climate. Check the DOT Tire Identification Number on the spare to find its manufacture week and year, inspect it regularly for cracks, bulges, tread separation, or pressure loss, and follow the tire maker’s and Hyundai’s replacement guidance. Replace the spare sooner if it is damaged or cannot hold the specified pressure.
Can I change a tire solo if I’m physically limited or injured?
Do not risk making an injury worse. A tire change requires lifting the spare, loosening tight lug nuts, kneeling or bending near traffic, and operating a jack. If any of that causes pain, dizziness, weakness, or unsafe movement, stay away from traffic and call roadside assistance.
Will roadside assistance cover tire changes for non-Hyundai spares?
It depends on your roadside-assistance provider, plan, and whether the spare is safe and compatible. Many providers can install an inflated usable spare or tow the vehicle if no usable spare is available. They may refuse to install a spare that is damaged, flat, incorrect for the vehicle, or missing required hardware.
What if my Sonata does not have a spare tire?
Some vehicles use a tire mobility kit, sealant kit, or roadside-assistance plan instead of a spare. Check the trunk storage area and your owner’s manual. If there is no spare or the tire damage is too severe for the supplied kit, call roadside assistance or a towing service.
Conclusion
Changing a Hyundai Sonata flat tire is a step-by-step safety task: get off the road, secure the vehicle, block the opposite wheel, loosen the nuts before lifting, jack only at the notched factory point, install the spare carefully, and tighten the lug nuts in a star pattern. Confirm your model-year torque specification, keep the compact spare at its listed pressure, and treat the spare as temporary until the original tire is repaired or replaced.
Sources
- Hyundai Owner’s Manual: Changing tires — jacking safety, wheel blocking, compact spare pressure, wheel-nut torque, and compact spare restrictions.
- Hyundai Owner’s Manual: Changing a tire with TPMS — TPMS behavior when the spare tire is installed.
- NHTSA TireWise — tire pressure, tire maintenance, spare tire pressure checks, and tire safety background.
- NHTSA Tire Buyers’ FAQ — DOT tire identification number and tire age/date-code guidance.
- AAA Club Alliance: How to Change a Tire — general flat-tire procedure, star-pattern tightening, and roadside-assistance guidance.
- Tire Rack: Temporary/Compact Spare Tire Use — general compact spare pressure, speed limits, and temporary-use cautions.
Related Articles

Danger of Using Summer Tires in Winter on a Hyundai Sonata
Potentially perilous, using summer tires in winter on your Hyundai Sonata can compromise safety—discover the hidden dangers that await you on icy roads.
Read More
Can You Mix Nitrogen and Air in Hyundai Sonata Tires? Answered
Discover the implications of mixing nitrogen and air in your Hyundai Sonata tires—are the benefits worth the risks? Explore the answer inside!
Read More
How to Tell If Hyundai Sonata Tires Are Too Old to Use Safely
Understand how to assess the age of your Hyundai Sonata tires and discover crucial signs of deterioration that could compromise your safety on the road.
Read More