
How to Take Off a Motorcycle Tire: Full Step-by-Step Guide
To take off a motorcycle tire, you first stabilize the bike on a flat surface with a stand or lift, then remove the wheel. Deflate the tire completely by removing the valve core, and break both beads with a bead breaker, C-clamp, or tire spoons and lubricant. Work one bead over the rim with two levers, then remove the tube and rim strip if fitted. Inspect the new tire for size, direction, and damage, and the next steps get easier.
Key Takeaways
- Gather tire levers, bead breaker, valve core tool, lubricant, and rim protectors before starting.
- Secure the motorcycle on a stand or lift, then remove the wheel safely.
- Deflate the tire completely and break both beads away from the rim.
- Pry one bead over the rim with tire spoons, then remove the tube if present.
- Inspect the rim and new tire for damage, direction arrows, and proper fit before reassembly.
What Tools Do You Need for Motorcycle Tire Removal

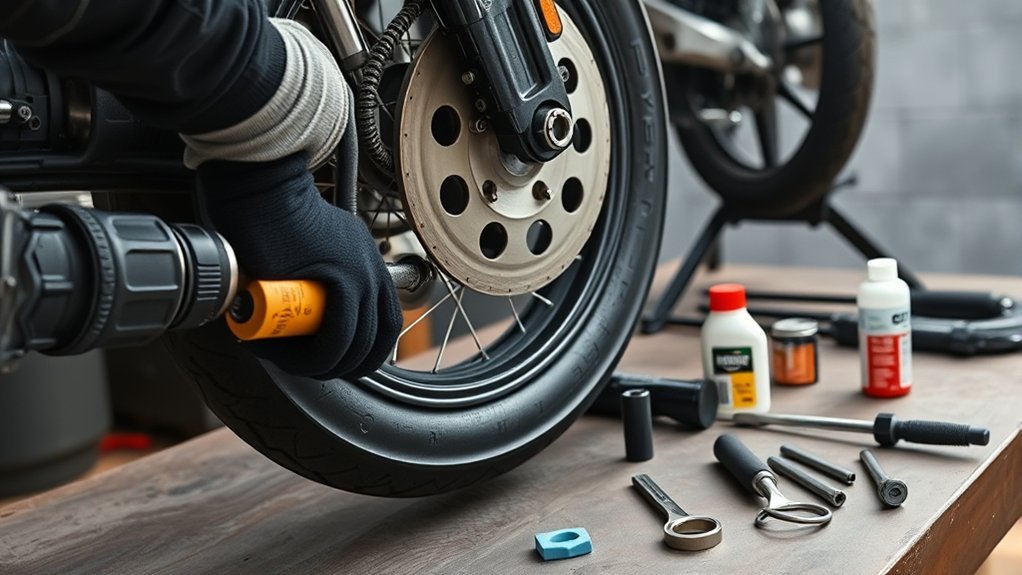
Before you begin, gather the right tools for the job: tire levers or spoons to pry the tire off the rim, a valve stem removal tool to fully vent the tire, and the correct wrenches or ratchet sockets to remove the axle nut. You’ll also want a bead breaker tool to separate the bead from the motorcycle wheel, since that cuts effort and helps you work with control. Fit rim protectors before you use tire levers, because they shield the wheel’s finish from gouges and scratches. Keep tire lubricant on hand; it lets the bead slide instead of fight you, which makes removal cleaner and faster. Matching your sockets to your axle nut size is essential, as brands vary. Additionally, ensuring proper tire pressure readings can help maintain tire performance during operation. With these tools ready, you can strip the tire efficiently, preserve the wheel, and stay in command of the process.
How to Stabilize Your Motorcycle Safely
Sure! Here’s your revised subheading content:
—
Set the motorcycle on a flat, stable surface, then use a center stand or motorcycle lift to raise it so both wheels are off the ground and you’ve got safe, easy access. Make sure the kickstand’s fully deployed and locked before you begin, because it adds backup support while you stabilize the bike. A reliable method resembles the stable traction needed when choosing tires for varied conditions.
| Method | Use | Benefit |
|---|---|---|
| center stand | Routine maintenance | Solid, centered support |
| motorcycle lift | Full-height access | Better stability and clearance |
| chocks + straps | No stand available | Keeps the bike upright |
Support the frame securely; don’t rely only on the swingarm or forks. That keeps the motorcycle securely supported and reduces the risk of shifting while you work. If you’re using ratchet straps, tighten them evenly so the bike stays upright without binding suspension travel. Check that nothing rocks, leans, or rolls before you continue. Good stability gives you freedom to work with control, protects the machine, and keeps the task efficient.
—
Let me know if you need any further adjustments!
How to Remove the Motorcycle Wheel
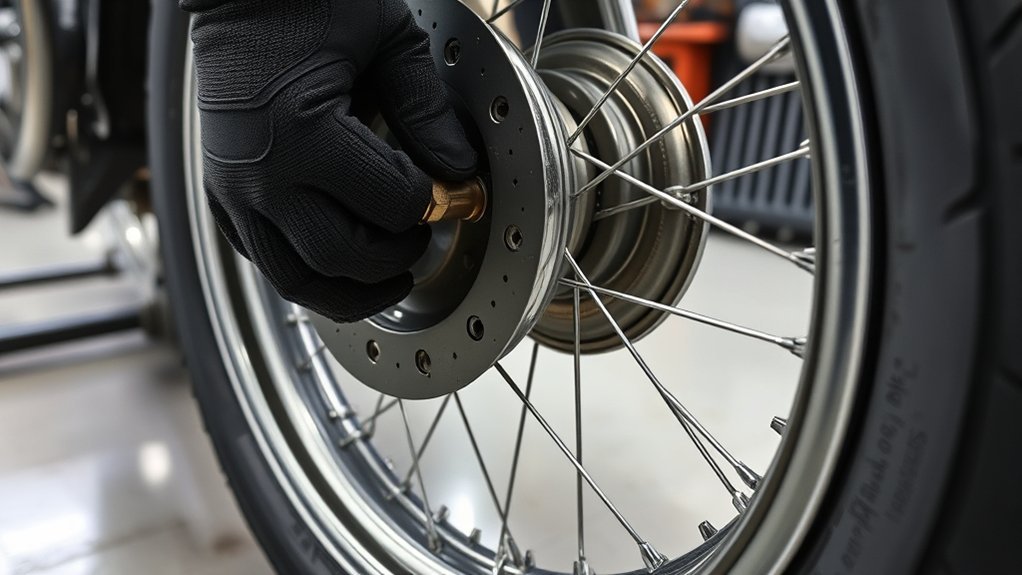
With the bike securely elevated, you can move on to removing the wheel. Use a center stand or motorcycle lift so the chassis stays steady while you work. Fit the correct wrench or socket on the axle nut and loosen it counterclockwise, but don’t pull it off yet. If your bike uses a chain, back off the chain adjusters and lift the chain clear of the rear sprocket. Next, remove the brake caliper, and disconnect any speed sensors if your model has them; set each part aside where it can’t get damaged. Once everything is free, withdraw the axle completely. Then carefully detach the wheel from the swingarm or forks, keeping the assembly aligned as you lower it. Inspect the axle, spacers, and mounting surfaces as you go. This controlled process lets you remove the wheel cleanly and keeps you in command of the machine. Additionally, ensure you consider the tire fitment and load rating for your motorcycle to maintain optimal performance.
How to Deflate the Motorcycle Tire
Remove the valve stem cap to expose the valve, then use a valve core removal tool to unscrew and take out the valve core so the air can escape quickly. Once you’ve opened the valve stem, press it down with a clean tool or your finger to release air faster. Keep pressure on it until the tire is completely flat. As you deflate, inspect the tread and sidewalls for punctures, cuts, bulges, or embedded debris; damage here can guide your repair or replacement decision. If the tire still holds pressure, check that the valve core is fully removed and that the valve isn’t blocked. Work methodically and keep your hands clear of pinch points for safe handling. A fully deflated tire gives you the freedom to remove it from the rim later without fighting trapped air. Confirm there’s no hiss or rebound before moving on, because a truly flat tire is easier and safer to handle. Additionally, be mindful of road noise that can indicate other issues with tire performance.
How to Break the Bead on Both Sides of the Rim
Use a bead breaker tool or a C-clamp to press the tire bead away from the rim, and apply tire lube or soapy water to reduce friction. Once one side releases, work the bead with tire spoons in small increments if needed, keeping steady pressure as you go. Then flip the wheel and repeat the process on the opposite side, making sure both beads are fully broken before you try to remove the tire. Using a reliable tire repair plug kit can be beneficial for fixing small punctures once the tire is off.
Bead Breaking Tools
A dedicated bead breaker or even a sturdy C-clamp can help separate the tire bead from the rim so you can remove the tire more easily. Use bead breaking tools to break the bead on your motorcycle tire by positioning the jaw at the edge and applying steady pressure. A little lubricant, like tire soap, lowers friction and helps free the tire from the rim with less strain. Use proper technique: keep the tool square, lean with controlled body weight, and avoid pinching the carcass. Repeat the process on the opposite side so both beads release cleanly. If the bead resists, increase leverage, not violence, and work methodically until it shifts.
- Align tool carefully
- Apply firm pressure
- Use lubricant generously
- Protect the rim
- Repeat on both sides
First-Side Bead Release
Start by breaking the bead on the first side of the rim with a bead breaker tool or C-clamp placed at several points around the tire, working gradually until the bead loosens and can move freely. Before you press, release the air completely from the motorcycle tire and apply lubricant or soapy water along the bead and rim edge to cut friction. If the bead resists, add steady body weight or tap the sidewall with a rubber mallet while maintaining pressure. Once the seal opens, use tire levers to lift a small section of bead over the rim, then advance in short, controlled steps. Keep your hands deliberate and your tools aligned. You’re not forcing the tire; you’re breaking the grip that holds it captive.
Flip And Repeat
Once you’ve freed the first bead, deflate the tire completely if you haven’t already, then rotate the wheel to expose the opposite side. Flip the tire and use your tools to break the bead on this side too. Apply body weight, a bead breaker, or a C-clamp until the bead over the rim releases. Lubricate the bead with soapy water so it slides cleanly and protects the rim.
- Check that pressure is fully gone
- Reposition the wheel for leverage
- Press steadily, not violently
- Remove the old tire debris
- Inspect for cuts or embedded grit
When both beads are free, you’re ready to remove the old tire without fighting the rim. Keep the wheel stable, work methodically, and use the correct torque when reassembling later.
How to Pry the Tire Off the Rim
With the bead already broken, fully deflate the tire and apply tire lubricant or soapy water along both beads to reduce friction. Insert a tire spoon near the valve stem, lever the bead over the rim’s edge, and lock the spoon in place. Use a second spoon to work around the tire in small steps, then flip the wheel and repeat for the other bead while avoiding pinching the inner tube or damaging the rim. Remember that using a tire plug kit can help you quickly address any punctures that may occur during your ride.
Breaking the Bead
To break the bead, press the tire sidewall inward with a bead breaker tool or a C-clamp until the bead separates cleanly from the rim. This breaking the bead step frees the tire and lets you work with control. Lubricate the bead with tire lubricant or soapy water, then use tire irons to start the detach process carefully.
- Apply steady pressure, not shock loads.
- Keep lubricant on the bead line.
- Work in small increments around the rim.
- Flip the wheel and repeat on the opposite side.
- Confirm both beads are fully broken before removal.
When you separate both sides, the tire moves freely and you protect the rim from gouging. This precise method gives you clean, controlled access and keeps you moving toward a full, independent repair.
Prying the Bead Over
Insert a tire spoon under the bead and push down to create leverage, then use a second spoon to pry the tire away from the rim. Keep the first tire spoon seated so it holds the bead down while you move the second removal tool a few inches at a time. Work in small increments around the rim; this controlled method helps you pry the tire off the rim without gouging metal or tearing rubber. Position each spoon at an angle that gives maximum leverage, and don’t force it. If the bead resists, apply lubricant, such as soapy water, so it slides more freely over the rim edge. Once one side loosens, flip the wheel and repeat the process to fully detach the tire and reclaim your independence.
How to Remove the Tube and Rim Strip
Start by fully deflating the tire, unscrewing the valve stem core and letting all air escape. Then use tire levers to ease the bead off the rim in small sections. This controlled approach helps you remove the valve stem area cleanly and keeps the rim from getting nicked. Once one side is free, pull the inner tube out carefully, keeping it clear of the bead and avoiding pinches against the rim. Lift the rim strip away by peeling it from the rim, then check it for wear. When installing a new tube later, that strip must be positioned correctly, with no sharp edges or debris left behind. All-terrain tires are designed to provide better traction in various conditions, making them a great choice for diverse riding experiences.
- Work slowly and keep leverage shallow
- Don’t twist the inner tube
- Protect the rim from tool slips
- Peel the rim strip straight off
- Clear any debris before reassembly
What to Inspect Before Installing the New Tire
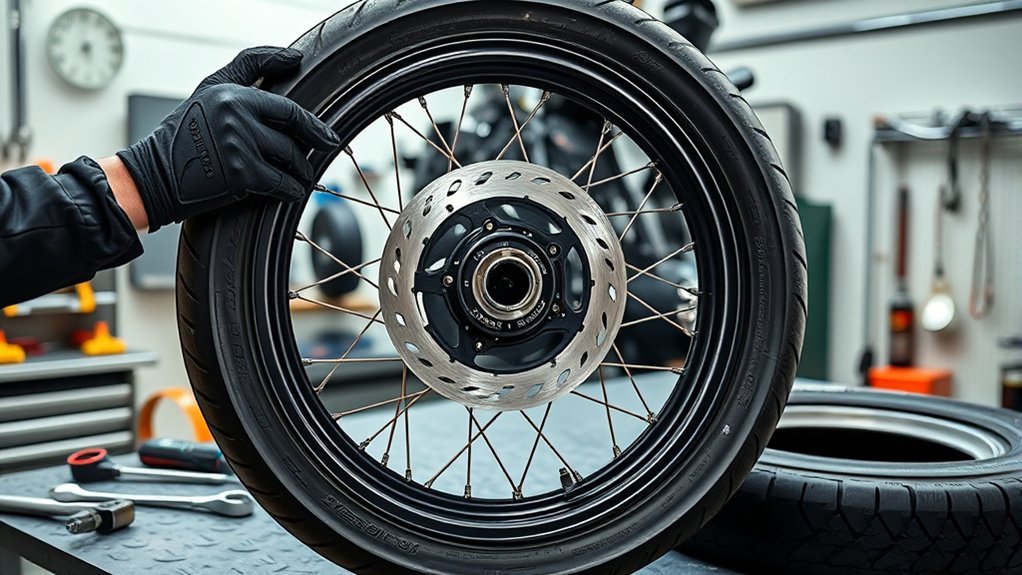
Before you mount the new tire, inspect it closely for cuts, bulges, uneven wear, or any other visible defects that could affect safety or performance. Check for defects across the sidewalls and tread, and don’t accept a tire with damage from shipping or storage. Verify directional arrows so the rotation matches your wheel’s travel direction; wrong orientation hurts handling and wear. Measure tread depth to confirm it meets legal minimums and suits the roads you ride, whether wet pavement or rough terrain. Confirm compatibility with your motorcycle’s size, load rating, and type, especially if you’re fitting a tubeless tire. Then inspect bead condition on both edges: they should be smooth, round, and free of debris, nicks, or molding flash. A clean bead seats properly, seals fast, and helps you ride with confidence. If anything looks off, stop and replace the new tire before installation. Also, consider the tire’s load capacity to ensure it meets your motorcycle’s requirements for safe operation.
Frequently Asked Questions
How to Remove a Tire off a Motorcycle?
You remove a motorcycle tire by lifting the bike securely, loosening the axle nut, and detaching the caliper or sensors. Then deflate the tire, break the bead, and use tire levers to pry it off the rim. For tire changing, use the right tools required and follow safety tips. Avoid common mistakes like forcing parts. Finish with tire inspection. If you’re unsure, get professional help during motorcycle maintenance.
How to Take off a Tire Step by Step?
About 80% of tire failures start with neglected tire pressure, so you’ll want to begin by checking it. You secure the bike, loosen the axle, remove calipers, then deflate the tire fully. With tool essentials ready, break the bead and pry the tire off. During tire changing, inspect wheel alignment, clean the rim, and fit replacement tires. Follow these motorcycle maintenance safety tips, and you’ll work faster, safer, and freer.
How to Easily Take a Bike Tire Off?
You can easily take a bike tire off by using tire removal tools, then loosening the axle, deflating it fully, and breaking the bead with lubricant. Follow motorcycle maintenance tips and tire changing techniques, use recommended equipment, and keep safety precautions first. Avoid common mistakes like forcing the bead or skipping valve-core removal. Finish with a tire inspection checklist, checking the rim and tire before reinstalling.
How to Pop a Motorcycle Tire off a Bead?
You’d think a tire stays loyal to its rim, but it doesn’t. First, remove all air pressure and the valve core. Use bead breaking with a bead breaker or C-clamp, then add lubrication techniques like soapy water. For rim protection, keep pry points padded. Use tire levers in small bites, not force. Follow safety precautions, and choose sturdy tool recommendations. Flip the tire and repeat until it’s free.
Conclusion
So, does a motorcycle tire really just “peel off” once you let out the air? Not quite. In practice, you need the right tools, a stable setup, and steady pressure to separate the bead without damaging the rim or tube. If you follow the steps carefully, you can remove the tire cleanly and inspect everything before reinstalling. That extra attention helps you avoid leaks, pinches, and costly mistakes on your next ride.
Related Articles
How to Remove Lug Nuts From a Tire: Tools, Torque & Tips
Need the right tools and torque to remove stubborn lug nuts safely, and learn the tricks that keep you moving.
Read More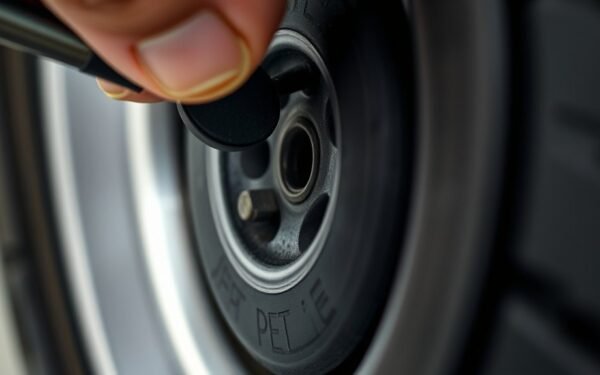
How to Release Air From a Car Tire: Fast & Easy Deflation
Fast, safe tire deflation methods help you control pressure precisely, but which tool works best depends on your exact situation.
Read More
How to Put Studs in a Tire: Step-by-Step Studding Guide
Tackle tire studding the right way with this step-by-step guide, and discover the crucial sizing and placement tips before you start.
Read More