
How to Stud a Tire: DIY Winter Tire Studding Guide
To stud a tire, choose a studdable winter tire with enough tread depth, then gather a stud gun, tread gauge, safety glasses, and gloves. Mark a staggered pattern so studs sit evenly, and install them with firm, steady pressure at the correct PSI and stud size. Check that each stud sits nearly flush, then break the tires in gently for 50 to 100 miles. With a few more details, you can do it cleanly and safely.
Key Takeaways
- Choose only studdable winter tires with adequate tread depth and the correct manufacturer-approved stud size.
- Gather safety glasses, gloves, a stud gun or installation tool, and a stable tire stand before starting.
- Mark stud locations in a staggered pattern, then install studs evenly with steady pressure and proper PSI settings.
- Seat studs so the tips sit nearly flush with the tread surface, and verify secure placement after installation.
- Break in new studs for 50–100 miles with gentle driving, then inspect regularly for loose or tilted studs.
Choose a Tire That Can Be Studded
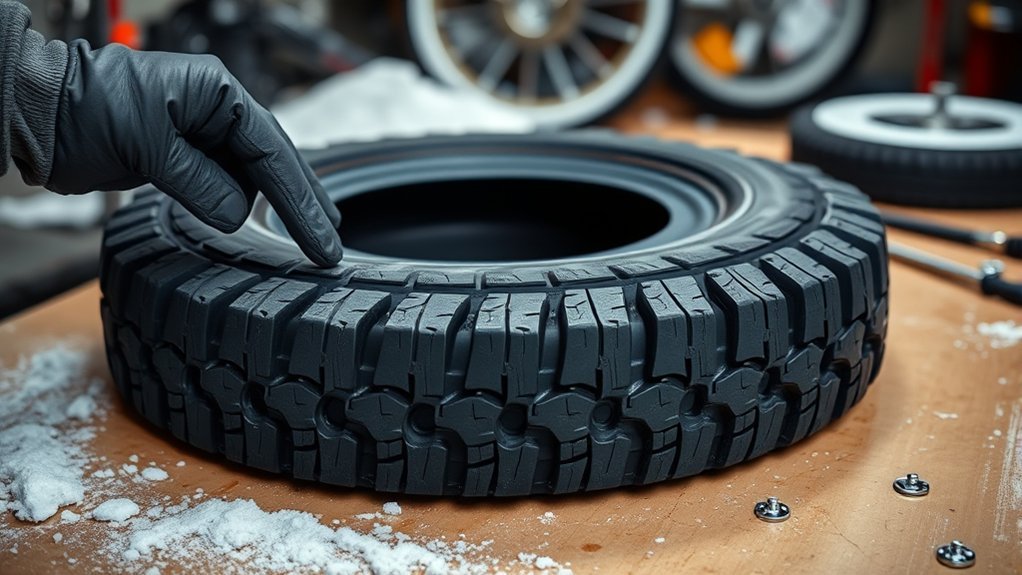
Before you drill for studs, make sure the tire is actually designed to accept them: look for a sidewall or product listing marked “studdable,” since many winter tires are not. You need studdable tires with enough carcass strength to hold studs without tearing. Check tire tread depth; aim for at least 12/32 inches so the cavity can accept the stud and still leave usable rubber around it. Inspect the tread pattern too: deeper grooves often let studs bite harder and improve winter control. Favor a tire with a tough rubber compound, because soft, weak rubber can deform under load and shed studs early. Then verify the manufacturer’s stud size specification and match it exactly; the wrong stud can sit loose or punch through the tread. When you choose correctly, you keep traction, reduce failure, and build a winter setup that answers to your road, not the other way around. Additionally, prioritize dedicated winter tires for optimal performance in severe conditions.
Gather Your Studding Tools and Safety Gear
Before you start, gather shop-approved safety glasses, work gloves, a stud installation tool, a stud gun, and a tire tread depth gauge. Set the tire on a stable K-5 stand, then check the tread depth so you can match the correct stud size and placement. Familiarize yourself with the stud gun, verify it’s set to the recommended PSI, and confirm that every tool operates correctly before you begin. Additionally, ensure that your winter tires meet the 3PMSF certification for effective winter performance.
Safety Gear Essentials
Start with the right protection and tools: wear shop-approved safety glasses and work gloves, clear the workspace of hazards, and familiarize yourself with the stud gun, power drill, and any air-powered equipment before you begin. You’re protecting each tire, each tire stud, and your hands from avoidable damage while you build studded tires with control. Inspect wear parts on the stud gun and drill for looseness, wear, or debris before every session. Keep air pressure within the tool maker’s range so the stud seats cleanly and the tire casing stays intact. Use the stud gun for placement and the power drill only where specified; skip impact drivers, since they can deform studs and tear rubber. Work methodically, keep your stance stable, and stay alert so you can finish safely and efficiently.
Studding Tool Setup
With your workspace cleared, gather shop-approved safety glasses, work gloves, a stud gun, a tire tread depth gauge, and a variable-speed power drill so you can set up for accurate stud installation. Secure the stud installation tool to the drill, then confirm it matches the grip studs you’ll use. Check compatibility before you fire the first stud; mismatched hardware wastes time and compromises control. Measure hole depth with the tread gauge so you can choose the correct stud size and get a tight, reliable fit. Set the tool pressure to 95-110 PSI for consistent operation and longer tool life. When you dial in the setup, you keep the process efficient, reduce error, and take control of winter traction on your terms.
Tire Prep Checklist
Now that your studding setup is dialed in, gather the rest of your prep gear: a stud gun, a variable-speed power drill, a tire tread depth gauge, shop-approved safety glasses, and work gloves. Use a K-5 stand to hold the tire steady so you can work with control and precision. Check tread depth, then match the correct stud size with the TSMI system; for example, TSMI #12 fits 12/32 depth. Wet each stud hole lightly with water to reduce friction and help the stud seat fully. Don’t use an impact driver; it can overdrive the fastener. These tire maintenance tips keep the install clean, and they support safer winter driving techniques while preserving studded tire benefits.
Check Tread Depth and Pick Stud Size
A tread-depth check sets the foundation for proper stud selection: use a tire tread depth gauge and confirm the tire has at least 12/32 inch of tread for TSMI #12 studs, or whatever minimum your stud system requires. You need enough tread depth to anchor each stud and protect the casing. Measure at several points, then choose stud sizing from the shallowest reading, not the best one. Deeper treads can accept larger studs and usually deliver stronger winter traction on packed snow and glare ice. For light to moderate conditions, shorter studs often give you enough grip with less wear. If you face mostly ice, longer studs can improve bite and control. Always match the studs to your tire model so they seat securely and stay put. Once you’ve confirmed compatibility, you’re ready to move forward with confidence and build winter traction on your own terms, without relying on shops, guesswork, or outside control. Consider using 3-Peak Mountain Snowflake certification tires for optimal winter performance.
Mark the Tread for Even Stud Placement
Measure the tread spacing first so you can set stud locations that match the block layout and the selected stud size. Mark each position with chalk or a marker in a staggered pattern, keeping about 2–3 inches between studs to preserve traction and tread strength. Use a template to keep the marks uniform across all tires, and check alignment before you drill or install. This ensures optimal performance in severe winter conditions, allowing your tires to provide the best traction and safety on icy roads.
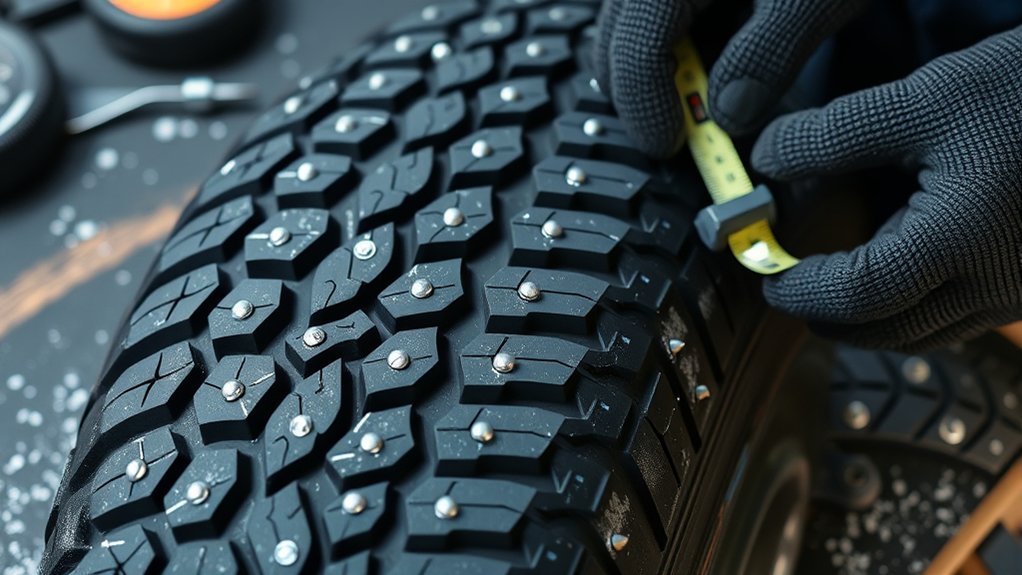
Measure Tread Spacing
Use a tire tread depth gauge first so you can match the stud size to the tread depth and avoid poor installation. Then use a measuring tape or ruler to mark the tread at consistent intervals, about 2-3 inches apart, so your layout supports even traction. Check tread wear before you commit: if the tire is greatly worn, adjust the marks to keep spacing balanced across the surface. Choose the stud types and installation techniques that fit your tire’s depth and rubber condition, then transfer those measurements carefully. You don’t need a straight line; a varied pattern can improve grip and stability on ice. Keep each mark clear and repeatable so you can install studs with precision and avoid weak spots that limit control.
Stagger Stud Layout
With your tread spacing mapped out, mark the tire’s pattern with chalk or a marker to plan a staggered stud layout that keeps spacing even across the contact patch. Use staggered patterns like a 3-2-3 sequence to distribute stud placement without crowding any row. Keep roughly 4–6 inches between studs in each line, and check tread depth with a gauge; around 12/32 gives you reliable bite. You can place fewer studs in the center and more on the outer edges to improve traction balance, cornering stability, and winter handling. Trace each position carefully before drilling so you don’t drift off pattern. This measured layout helps you build grip on your terms, with control that’s precise, durable, and ready for icy roads.
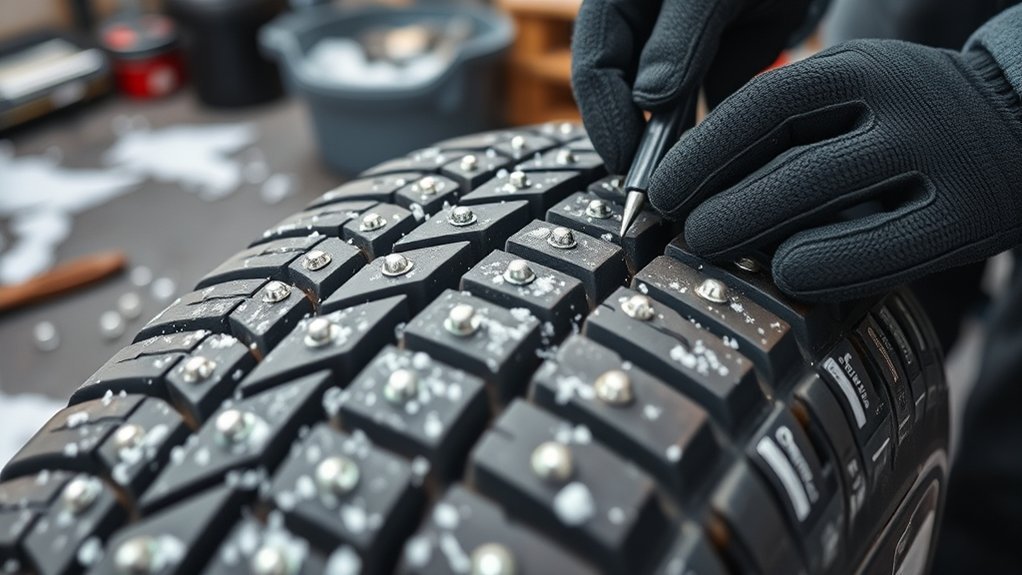
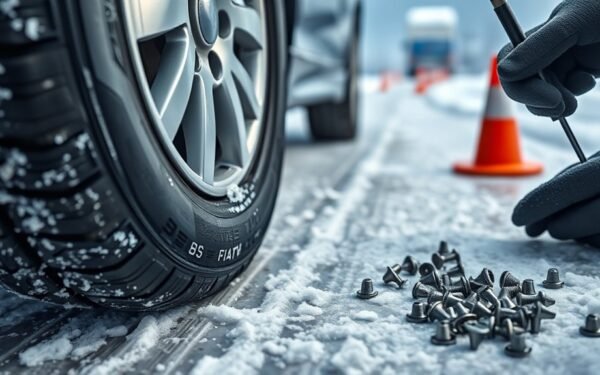
Install the Studs With Firm Pressure
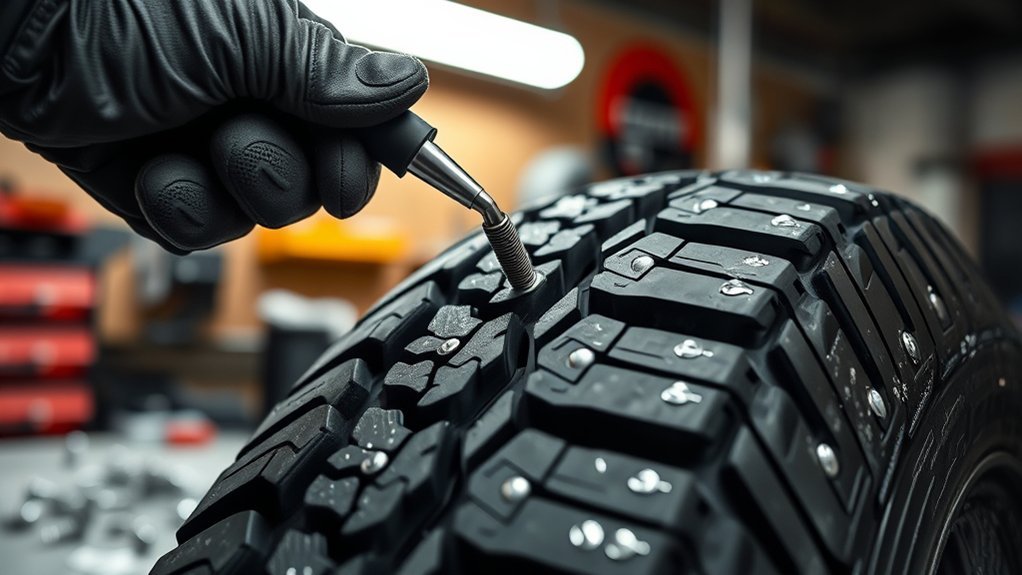
Set the stud gun tip squarely into each tire hole and press down firmly so the stud seats cleanly into the rubber. Use firm pressure techniques: keep the tool aligned, then depress the trigger while maintaining steady force until the stud installs. These stud installation tips help you control penetration without tearing the tread. Release the trigger first, then ease off pressure so you don’t stress the casing or bruise the surrounding rubber. Respect tire material considerations by avoiding jerky movement or overdriving; you’re aiming for secure placement, not deformation. Work around the tire in varied patterns instead of a straight line, so grip stays balanced across snow, ice, and mixed terrain. Repeat the same measured motion for every stud, letting consistency do the work. When you stay deliberate, you protect the tire, strengthen traction, and keep your winter setup ready for real-world use. Additionally, ensuring proper traction on ice is crucial for maximizing your safety during winter driving.
Check Stud Height and Seating Depth
Check each stud for height and seating depth so the tread stays effective and the hardware stays locked in place. You want the stud’s tip nearly flush with the tread surface, not buried too deep and not standing proud. That position supports tire traction on ice while reducing edge wear that can shorten stud longevity. Inspect the notched collar next; it should sit flush with the rubber around it. If the collar lifts, the stud can work loose under load and compromise winter performance. Use a tread-depth gauge before installation to confirm you matched the stud size to the tread, following TSMI guidance such as 12/32 for #12. Proper depth also means the prongs are embedded enough to grip the casing securely. Additionally, ensure that you are using a 3PMSF mark to indicate severe snow capability for optimal winter performance. Recheck every stud after mounting so you know the tire’s contact pattern is even and the studs are seated for reliable service.
Break In Your Studded Tires Safely
After installation, give your studded tires a 50- to 100-mile break-in period so the studs can seat properly in the rubber. Use calm break-in techniques: avoid aggressive cornering, rapid acceleration, and sudden braking. Build speed gradually, then let load and traction increase in measured steps. This protects stud retention and improves tire performance. Track tread wear and note any pull, vibration, or noise. It’s essential to remember that proper tire maintenance can significantly enhance winter driving safety.
| Check | Action |
|---|---|
| Miles | Drive 50–100 |
| Speed | Increase slowly |
| Steering | Keep inputs smooth |
| Braking | Brake gently |
| Inspection | Recheck stud seating |
After the initial miles, inspect each tire for alignment and loose studs. Good stud maintenance means you catch issues early and keep the tread working through winter. If you see missing or tilted studs, correct the problem before you push harder. You’re not just preserving hardware; you’re protecting your mobility, your control, and your freedom on winter roads.
Frequently Asked Questions
Can I Stud My Tires Myself?
Yes, you can stud your tires yourself if you’ve got the right kit, tools, and patience. You’ll need to check tread depth, choose the correct studs, and place them in a varied pattern for better winter traction. Follow tire safety steps, wear protection, and work on a stable surface. DIY studding can deliver real studding benefits, then let the tires break in for 50–100 miles.
How Do I Stud My Winter Tires?
You stud your winter tires by measuring tread depth, choosing the right stud size, then loading a studding tool with the stud’s auger facing out. You press straight into each thick tread knob until the collar sits flush. Think of it like planting steel seeds in rubber. Use proper tire studding techniques, and you’ll gain winter driving safety and performance benefits. Check every stud, then break them in gently for 50–100 miles.
What Is the 7 7 Rule for Snow Tires?
The 7-7 rule says you should keep your snow tires at least 7/32″ deep for solid snow tire performance. You’ll get better grip, shorter stops, and stronger control on slush and ice. Check tread often with a gauge, and replace tires once they drop below that mark. This also supports winter driving safety and helps you stay aware of studded tire legality where you drive.
Can You Use Screws as Tire Studs?
No, you shouldn’t use screws as tire studs. You’ll hurt tire performance, and different screw types won’t give you consistent grip on ice or snow. Purpose-made studs bite predictably; screws can loosen, damage the tread, and create safety concerns for you and others. If you need better winter traction, choose approved winter tires or manufacturer-rated studs instead. You’ll get safer control, better wear, and legal compliance.
Conclusion
Now that you know how to stud a tire, you can add winter traction with care and precision. Choose a compatible tire, match the stud size to the tread depth, and install each stud with steady pressure for consistent seating. Keep the pattern even, then verify height before you drive. During break-in, go easy, because fresh studs need time to settle in. Done right, your tires grip the road like claws on ice.
Related Articles
What Is Tire Studding? Benefits, Laws & Winter Traction Guide
Curious how tire studding boosts winter traction, when it’s legal, and whether it’s worth it?
Read More
What Is a Summer Tire? Complete Guide & Best Options
What is a summer tire and which options perform best? Discover the key differences, benefits, and top picks before you choose.
Read More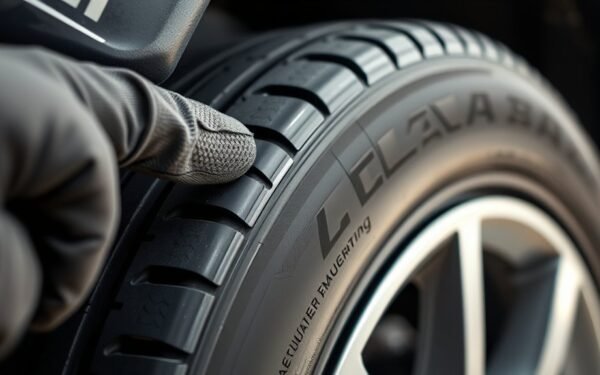
How to Tell If a Tire Is All-Season: What the Markings Mean
I’ll show you the key tire markings that reveal all-season performance and what they really mean, so you can spot the right tire fast.
Read More