
How to Remove a Motorcycle Tire: Complete Tutorial
To remove a motorcycle tire, you first gather tire irons, a valve stem remover, tire lube, and the correct wrench or socket set. Support the bike on a center stand or lift, then fully deflate the tire and loosen the axle fasteners. Break the bead on both sides, then pry the tire off the rim in small increments. If you keep going, you’ll also learn how to handle tubed and tubeless setups safely.
Key Takeaways
- Gather tire irons, a valve stem remover, tire lube, wrenches, gloves, and a clean cloth before starting.
- Support the motorcycle securely on a center stand or lift, then loosen the axle nut and wheel fasteners.
- Fully deflate the tire, break the bead on both sides, and pry the tire off the rim with tire levers.
- For tubed tires, remove the inner tube carefully after one bead is off to avoid pinching or puncturing it.
- Inspect and clean the rim for cracks, burrs, rust, or debris before installing the new tire.
Motorcycle Tire Removal Tools
Before you start, gather the right motorcycle tire removal tools so the job goes smoothly and safely. You’ll need tire irons to break the bead and pry the tire off the rim without forcing the carcass. Use a valve stem remover to pull the valve core and fully deflate the tube or tubeless tire before you apply leverage. Keep tire lube or a diluted soap solution ready; it reduces friction, helps the bead slide, and protects the rim from gouges. Match your wrenches or socket set to the motorcycle’s wheel nuts and axle bolts so you can loosen fasteners without rounding them. Check your service specs first, because sizes vary by model. After you mount the new tire, use an air pump or compressor to seat the bead and bring pressure back to spec. With the right tools, you control the task, cut wasted effort, and claim mechanical independence. Additionally, having a reliable spare tire kit can enhance your overall preparedness for roadside issues.
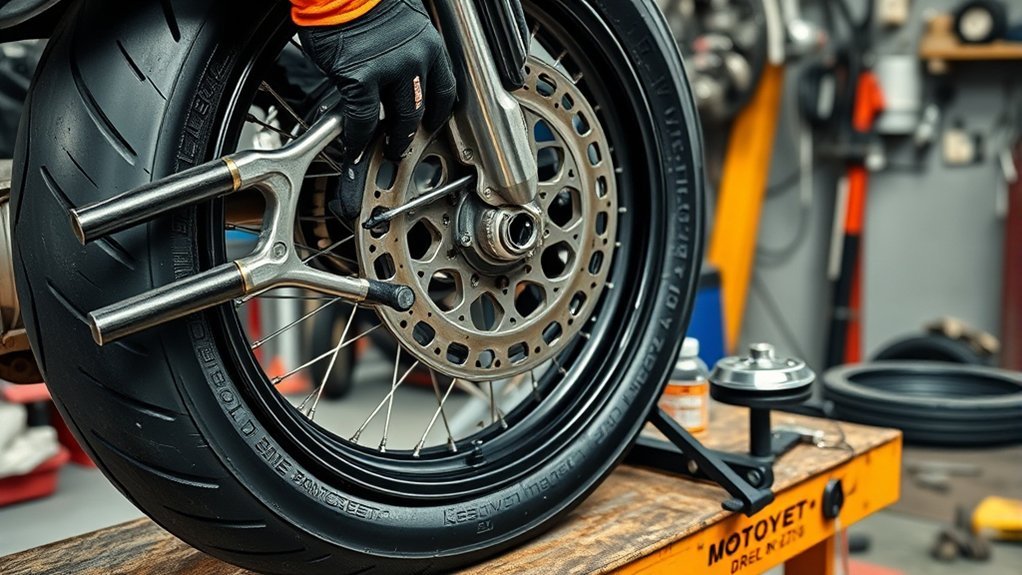
Remove the Motorcycle Wheel Safely
Set the motorcycle on a stable surface, then support it with a center stand, motorcycle lift, or paddock stand before you touch the wheel. Confirm the bike’s weight is fully supported, because safety comes first when you remove the wheel. Use a wrench or ratchet to loosen the axle nut and any wheel fasteners, turning the axle nut counterclockwise before you fully unscrew it. Raise the motorcycle enough to clear the tire from the ground. If your model uses them, unbolt the brake calipers and move them aside without stressing the lines; disconnect speed sensors only if needed. Slide the axle shaft out slowly, keeping track of spacers and washers. Rock the wheel back and forth as you pull it free, then guide it clear of the forks or swingarm. Inspect and clean the mounting area now so you can install the new tire with proper fitment and secure alignment. Additionally, consider using a repair kit to fix any small leaks before reinstallation.
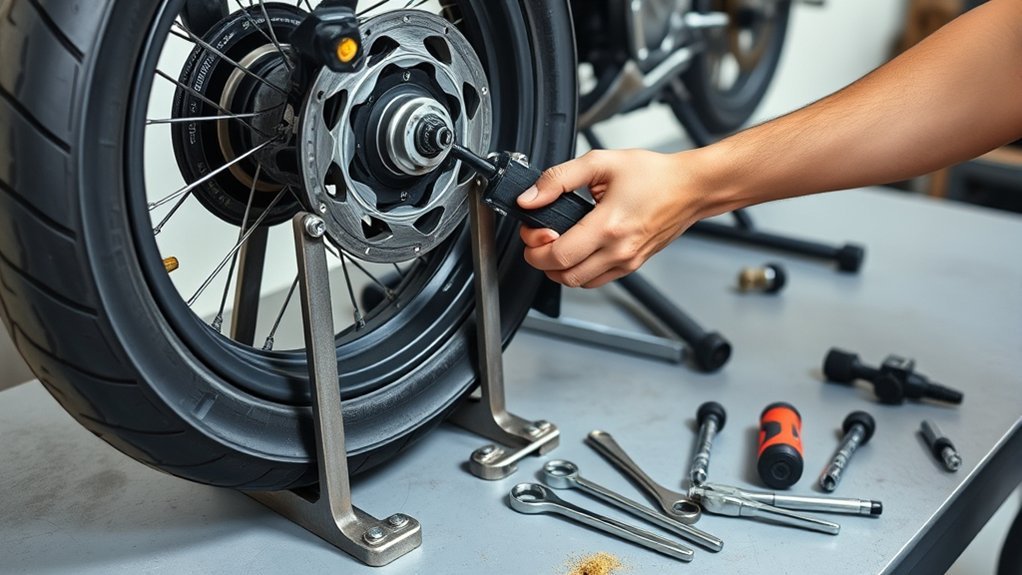
Break the Bead on a Motorcycle Tire
With the valve core removed and the tire fully deflated, you can break the bead using a bead breaker tool or a C-clamp to apply even pressure around the rim. Coat the bead with tire lube or a diluted soap solution to reduce friction and help the tire separate cleanly. If it stays stuck, use tire levers to work around the wheel and pry the bead free in small, controlled increments. Keep in mind that having a tubeless tire repair kit on hand can provide peace of mind for unexpected punctures during rides.
Bead Breaker Methods
A bead breaker separates the tire bead from the rim so you can remove and reinstall the tire safely and efficiently. Use a dedicated bead breaker for controlled tire removal, and keep the tire fully deflated first. Manual bead breakers are a practical choice for home mechanics; you step on the lever or pull the handle to force the bead free. Hydraulic bead breakers use pressure to multiply force, so they handle stubborn beads with less effort and better precision. If you’re stranded, you can improvise with a C-clamp or a block of wood paired with a tire lever, but treat that as an emergency-only method. Apply steady force until the bead releases, then repeat around the rim. Check both sides before moving on.
Lubricate and Pry
Once the bead is free, lubricate the tire bead and rim edge with tire lube or a diluted soap solution to reduce friction. Keep the tire fully deflated before you break the bead, because trapped air fights your leverage and slows removal. If needed, use a bead breaker or C-clamps to press the sidewall down and open the gap. Then insert tire levers between the tire and rim, starting at the valve stem, and pry the bead over the rim edge. Work in small steps around the wheel, using multiple tire levers to hold tension and spread force evenly. This controlled approach protects the rim, limits damage, and gives you the clean, practical freedom to remove the tire without struggle.
Remove a Tubed Motorcycle Tire
First, fully deflate the inner tube with a valve stem remover so no air remains and the tube won’t be damaged during removal. Next, break the bead with tire levers and a small amount of tire lube or diluted soap solution to reduce friction. Then pry one side of the tire off the rim, work around to the other side, and handle the tube carefully to avoid pinches or punctures. Additionally, ensure you check the UTQG rating of your new tire to gauge its performance and longevity.
Deflate the Tube
With the motorcycle securely stabilized and lifted, remove the valve core with a valve stem remover to let the tube deflate completely. Keep the motorcycle is stable so tire removal stays controlled and you stay free from preventable mishaps. As the inner tube empties, press the sidewalls to force out trapped air and finish the deflate process. Wear safety goggles throughout, because debris can still flick free while you work. Once the tube is flat, inspect it for punctures, cuts, or abrasions that could explain the failure. This quick check saves time later and helps you decide whether repair or replacement gives you the cleanest path forward. Don’t rush this step; full deflation makes the next stage easier and keeps the rim-to-tube interface calm, manageable, and under your command.
Break the Bead
Now break the bead so the tire can separate cleanly from the rim. With the tube fully deflated and the valve core removed, you reduce trapped pressure and resistance. Apply tire lubricant or a diluted soap solution around both bead areas to help the rubber release. Use a bead breaker or a C-clamp to press evenly on the tire, then move a few inches at a time around the rim. Keep the pressure consistent until the bead drops free on both sides. Work methodically; don’t force one spot. A clean break gives you control and protects the wheel from damage. Once the bead is loose, you’re ready to use tire levers in the next step and continue the tire removal process with precision and confidence.
Pry Off Tire
Slip a tire lever under the bead and pry the tire edge up and over the rim, working only after the inner tube is fully deflated and the valve core is removed. If the bead still grips, reset your tire levers and apply tire lube or a diluted soap solution to free it. Keep steady pressure and move in small increments around the Motorcycle tire, lifting one section at a time without pinching the tube. Once one side clears the rim, repeat the process on the opposite side, maintaining control so you don’t scar the rim or cut the tube. After the tire is off, inspect the rim, bead seat, and tire interior for damage, corrosion, or debris. Clean everything now, and you’ll reclaim a safer, easier path forward.
Remove a Tubeless Motorcycle Tire
Start by fully deflating the tubeless tire with a valve stem remover so you can break the bead safely. To remove a tubeless motorcycle tire, position a bead breaker tool or C-clamp against the sidewall and push the bead off the rim evenly. Once the bead releases, use tire levers to lift one side over the rim edge, then work around the wheel in short, controlled increments. Repeat the same process on the opposite side until the tire clears the rim. Remember to consider tire sealants for potential repairs before installation of a new tire.
| Tool | Purpose | Tip |
|---|---|---|
| Valve stem remover | Deflate fully | Keep pressure at zero |
| Bead breaker tool | Break bead | Work evenly around wheel |
| Tire levers | Pry tire off | Protect the rim edge |
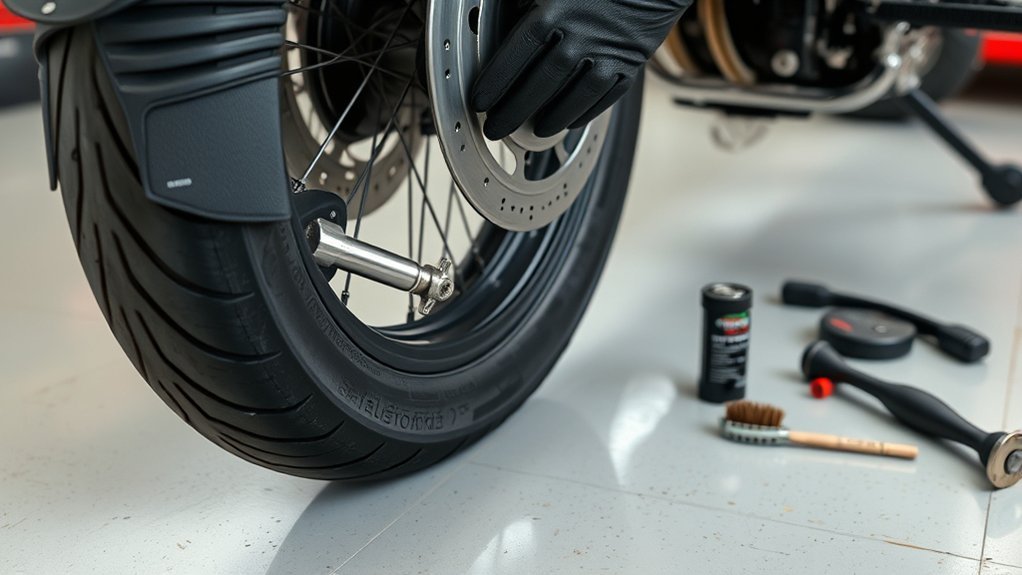
After removal, inspect the rim for damage or wear, and clear any debris before you fit a new tire. This keeps your wheel ready for the next step and helps you stay in command of the machine.
Inspect the Rim Before Installing a New Tire
With the tire off, you should inspect the rim for cracks, dents, corrosion, or sharp burrs that could weaken the wheel or damage the new tire. Clean the bead seat completely, because debris, rust, and old sealant can block a tight seal and cause leaks after installation. Run your fingers carefully along the rim’s edge to find burrs or sharp spots, then smooth them if needed so you don’t cut the tire during mounting. Verify the rim diameter against the new tire’s specification; exact compatibility matters for fit, pressure retention, and safe performance. Also check for uneven wear marks or scuffing on one side of the rim, since those patterns can reveal alignment problems that should be corrected before you mount the new tire. When you inspect the rim thoroughly now, you protect your work, preserve control on the road, and install with confidence instead of risk. Additionally, looking for uneven wear marks can help identify potential issues that may affect tire longevity.
Frequently Asked Questions
How Do I Dispose of the Old Motorcycle Tire Properly?
Take your old motorcycle tire to a licensed recycler or a community tire collection event, and check local disposal regulations first. You’ll reduce environmental impact by choosing tire recycling methods or tire retreading options when the casing’s still sound. If the tire’s contaminated with oil or debris, follow hazardous waste guidelines. Don’t dump it illegally; you can keep your ride—and your neighborhood—clean, lawful, and free.
Can I Remove a Tire Without Damaging the Valve Stem?
Yes, you can, if you use careful tire removal techniques and support the wheel properly. During tire changing, protect the valve stem by deflating fully, removing the core if needed, and keeping irons away from the stem area. Good valve stem care, the right tools needed, and steady pressure help with damage prevention. For motorcycle maintenance, work deliberately, and you’ll keep control without surrendering the wheel or the tire.
What’s the Best Way to Store a Motorcycle Wheel Overnight?
Store the wheel upright on a clean, dry surface and keep it off concrete with wood or rubber pads. You should protect the rotor, axle, and valve stem, then cover it loosely for wheel protection. For wheel storage, avoid moisture and direct sun, and check tire maintenance pressure if the tire stays mounted. These storage tips support motorcycle safety during seasonal changes and help you keep control over your machine.
How Often Should Motorcycle Tire Pressures Be Checked?
You should check motorcycle tire pressure before every ride, and at least weekly if you ride often. The theory that tires “hold air well enough” is false; small leaks and temperature swings can change tire pressure fast. Use reliable pressure gauges, follow inflation guidelines, and add seasonal checks to your maintenance schedule. These safety tips keep handling precise, protect your freedom on the road, and reduce wear.
When Should a Motorcycle Tire Be Professionally Replaced?
You should replace a motorcycle tire professionally when you spot replacement signs like tire wear, low tread depth, sidewall damage, or a failed puncture repair. Don’t wait if the tire age is over five years, even with decent tread. You’ll protect your machine and your freedom by having a technician inspect any cracks, bulges, uneven wear, or casing damage. When in doubt, trust a pro and ride with confidence.
Conclusion
By the end of this job, you’ve guided your wheel like a traveler through a narrow gate: careful hands, steady pressure, no sudden moves. You’ve broken the bead, lifted the tire, and cleared the rim without damaging the path ahead. Now check the rim as if it were the road itself—clean, smooth, and ready for the next journey. If you stay precise here, you’ll make the next installation safer, faster, and far less troublesome.
Related Articles
How to Remove a Stripped Lug Nut From a Tire: Expert Methods
Discover expert methods to remove a stripped lug nut from a tire before damage worsens, and see which fix works best.
Read More
How to Read a Tire Gauge at a Gas Station: Quick Guide
Pump your tire gauge correctly at the gas station, and discover the PSI secrets that keep your car safe, smooth, and ready.
Read More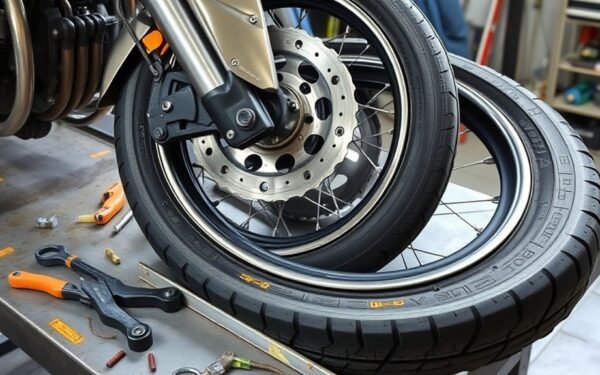
How to Dismount a Motorcycle Tire: Easy Step-by-Step Guide
Pry off a motorcycle tire with confidence using this step-by-step guide, and discover the critical tricks that keep your rim safe.
Read More