
4Runner Vibration After New Tires: Troubleshooting Steps
Start by verifying your tire pressure at 35 psi cold and torque lug nuts to 95 ft-lbs in a star pattern. Swap front and rear tires to isolate whether vibration follows a specific wheel, then inspect rims for bends exceeding 2-3mm. Confirm hub-centric fit with proper centering rings, and if vibration persists, demand road force balancing rather than standard spin balancing. Document all measurements and service records meticulously. Your persistence here reveals deeper diagnostic strategies below.
Check Tire Pressure and Lug Nut Torque First
Before you suspect a more complex issue with your 4Runner’s new tires, you’ll want to verify two fundamental installation parameters: tire pressure and lug nut torque. This tire maintenance step eliminates common vibration sources quickly.
Grab your pressure gauge and check each tire cold. You’ll typically target around 35 psi for proper contact patch and load distribution. Don’t eyeball it—precision pressure monitoring prevents uneven wear and resonance at speed.
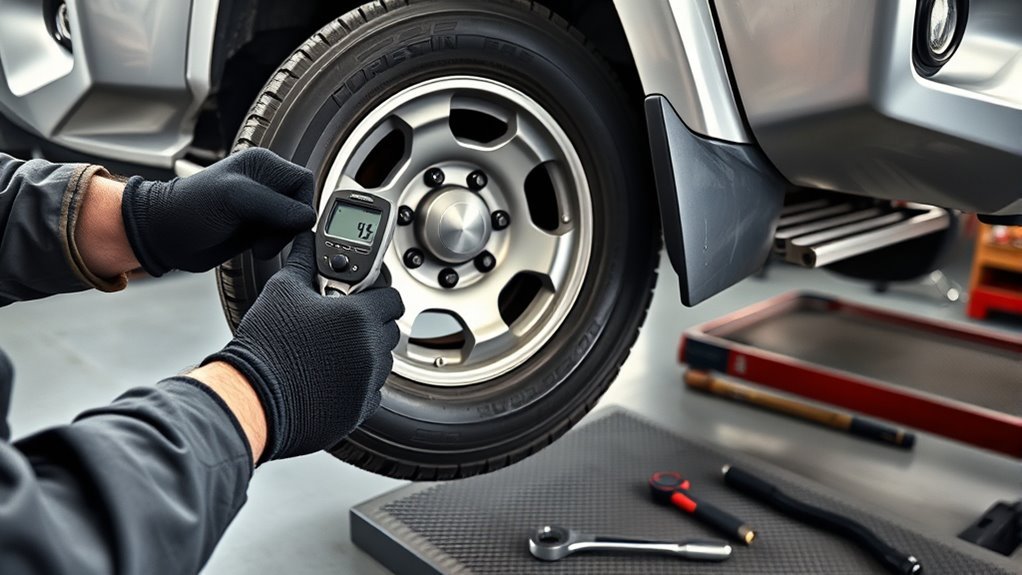
Next, verify lug nut torque with a calibrated wrench. Your 4Runner’s wheels demand approximately 95 ft-lbs. Under-torqued nuts loosen; over-torqued ones distort wheels and compromise balance. You’ll torque in a star pattern, rechecking after fifty miles.
Recheck both metrics weekly, especially post-service. Small deviations amplify through your suspension at highway speeds. Master these basics first. You’re not chasing ghosts—you’re ruling out the obvious with disciplined procedure before escalating diagnostics.
Isolate the Problem: The 5-Minute Tire Swap Test
Swap your front and rear tires, then take the vehicle above 55 mph to determine if the vibration relocates or changes intensity. Document tire pressures before and after the swap to maintain consistent test conditions. If the vibration persists in the same location, inspect the rims for damage or runout, as this indicates a component issue rather than a positional one.
Swap Front to Rear
Pinpoint the vibration’s origin by performing a front-to-rear tire swap—a diagnostic technique that separates tire-related defects from chassis issues in minutes. You’ll isolate vibration sources efficiently without specialized equipment.
Execute this procedure methodically:
- Lift vehicle safely using jack stands, never rely on a jack alone
- Remove front wheels completely, marking original positions for reference
- Install front tires on rear axle, rear tires on front axle
- Torque all lug nuts to factory specification using a calibrated torque wrench
- Test drive immediately, noting vibration location and intensity changes
If vibration migrates rearward, you’ve confirmed defective tires—inspect for irregular tire wear patterns. Persistent front vibration indicates suspension or alignment faults requiring professional evaluation. Document your findings precisely; this data streamlines subsequent diagnostics and empowers informed discussions with service providers.
Check for Bent Rim
One visual inspection during your tire swap reveals what balance machines miss: a bent rim distorting the tire’s contact patch. Position yourself at wheel level and rotate each tire slowly, tracking the rim edge against a fixed reference point. Look for wobbles, flat spots, or deviations exceeding 2-3 millimeters—clear indicators of structural compromise.
Document your findings. A damaged rim creates harmonic vibration that intensifies with speed, often mimicking balance issues. Mark suspect wheels with chalk before remounting.
Your rim inspection eliminates guesswork from vibration causes. If you spot deformation, you’ve isolated your culprit—no further swapping required. Straightening services cost less than replacement, but severe damage demands new wheels.
Proceed only with verified-true rims. Reinstall with proper torque sequence: 95 ft-lbs in star pattern prevents distortion-induced vibration from compounding your problem.
Inspect Hub-Centric Fit and Check for Rim Damage
Since you’ve already confirmed the tires are balanced and properly mounted, you’ll want to shift your attention to how the wheels interface with the vehicle’s hubs. A proper hub centric fit eliminates vibration by centering the wheel precisely on the hub bore rather than relying solely on lug nuts.
Once tires are balanced, focus shifts to the critical wheel-to-hub interface for vibration-free performance.
Begin your rim inspection by examining each wheel for visible damage—bends, dents, or cracks that compromise structural integrity. Run your hand along the inner and outer lip to detect irregularities your eyes might miss.
Critical verification points include:
- Confirming wheels are hub-centric to the 4Runner’s 106.1mm hub bore
- Installing centering rings for any aftermarket wheels with larger bore diameters
- Checking for missing, damaged, or improperly seated centering rings
- Torquing lug nuts to 83 ft-lbs per Toyota specifications
- Re-torquing after 50 miles to prevent distortion
Over-torquing warps rims and induces vibration. Precision at every step liberates your 4Runner from highway instability.
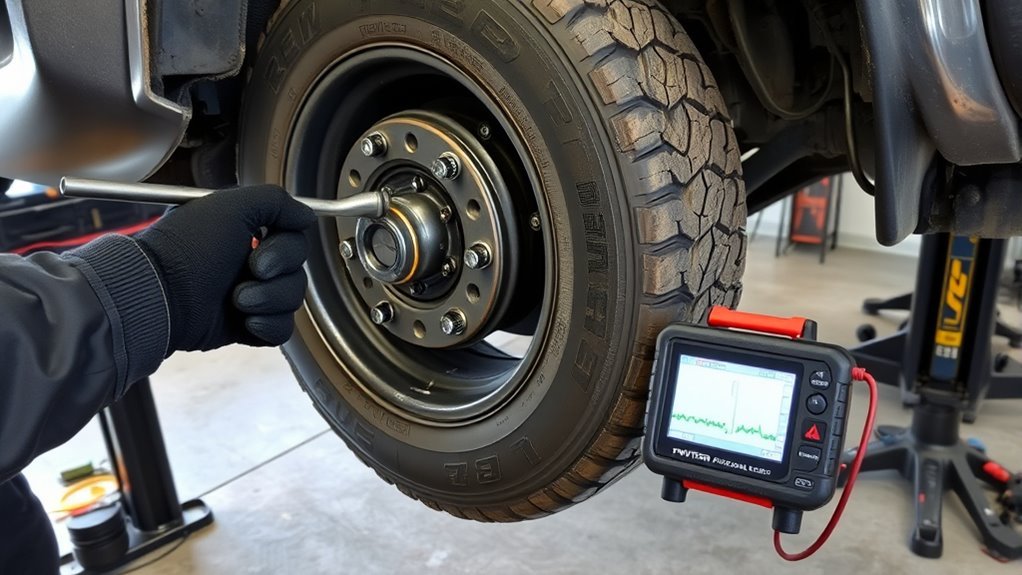
If Regular Balancing Failed, Get Road Force Balanced
If standard balancing hasn’t eliminated your 4Runner’s vibration, you’ll need to locate a shop equipped with a Hunter road force balancing machine. This equipment applies simulated road pressure to the tire during rotation, pinpointing force variations that conventional balancers miss. Verify the technician’s certification with this specific machinery before scheduling your appointment.
Hunter Machine Precision
When standard balancing doesn’t eliminate the vibration you’re experiencing, a Hunter road force balancer becomes your next diagnostic step. This machine delivers superior vibration diagnostics through precise force measurement.
Road force advantages include:
- Detecting tire roundness variations invisible to standard balancers
- Identifying hard spots causing persistent highway-speed vibrations
- Measuring actual force applied to the road surface
- Pinpointing defective tires requiring replacement
- Optimizing tire-wheel matching for minimal runout
You’ll gain liberation from persistent vibration by seeking a reputable shop with Hunter equipment. Many shops lack this capability, so verify their expertise before scheduling. The machine’s precision eliminates guesswork, directly addressing root causes rather than masking symptoms. This procedural approach restores your 4Runner’s stability and ride quality efficiently.
Reputable Shop Selection
Because standard balancing has failed to resolve your 4Runner’s vibration, you’ll need to locate a shop equipped with Hunter road force technology—equipment that measures actual radial force variation rather than simply counteracting weight imbalances.
Prioritize shop reputation when selecting your service provider. Verify they maintain current Hunter equipment and employ technicians with documented technician experience in road force procedures. Request references from 4Runner owners who’ve resolved similar vibration issues.
Document all services, technician names, and measurements obtained. This creates accountability and protects your warranty rights if problems persist.
| Criteria | Questions to Ask |
|---|---|
| Equipment | Is your Hunter machine calibrated annually? |
| Experience | How many road force balances performed monthly? |
| Documentation | Will you provide before/after force variation readings? |
| Warranty | Do you guarantee vibration resolution? |
Hold Your Tire Shop Accountable: What to Document
The tire shop’s accountability rests squarely on your documentation practices from the moment you arrive for service. You must actively document interactions, recording dates, services performed, and any verbal agreements about repairs or balancing. Track specifications meticulously—brand, model, size, torque values, and warranty terms—to guarantee compliance with manufacturer standards.
Retain every receipt and invoice. These records transform your position from vulnerable consumer to empowered advocate when vibrations persist.
Your documentation arsenal should include:
- Dated service records with technician names and specific work performed
- Tire specifications and torque settings used during installation
- Warranty documentation for potential defect claims
- All receipts for balancing, alignment, and related repairs
- Symptom logs noting vibration frequency, intensity, and post-service changes
This systematic approach eliminates ambiguity, establishes clear service history, and positions you to demand corrective action without dispute. Precise records shift power dynamics—they cannot dismiss what you’ve meticulously preserved.
When to Demand Free Tire Replacement Under Warranty

Once you’ve exhausted proper balancing and alignment procedures without resolving the vibration, you’re positioned to escalate toward warranty replacement—provided you’ve built the documentation foundation outlined previously.
Request road force balancing to isolate tire defects. This diagnostic measures radial force variation; readings exceeding manufacturer thresholds confirm defective construction. Document these findings—they constitute objective evidence for your claim.
Road force balancing reveals hidden tire defects through radial force measurement—objective proof that strengthens your warranty claim when readings exceed manufacturer thresholds.
Examine each tire for physical anomalies: bulges, sidewall irregularities, or abnormal wear patterns accompanying persistent vibration. These observable tire defects strengthen your demand for no-cost replacement.
Review your warranty coverage terms immediately. Most manufacturers cover defects in materials and workmanship, excluding damage from road hazards or improper maintenance. Know these boundaries before engaging the supplier.
Present your compiled records—service dates, road force measurements, and photographic documentation—assertively. You’ve fulfilled your obligations through proper diagnostics; now the manufacturer must honor their warranty coverage commitment. Insist on replacement tires that meet specification.
Skip the Alignment: It Won’t Fix Your Vibration
You’ve built your warranty case through proper documentation and road force diagnostics, but before you schedule another shop visit, reconsider your priorities. Don’t waste time and money on alignment adjustments when your vibration stems from tire-related issues. Alignment corrections address geometry, not rotational imbalances.
Many drivers chase alignment fixes for steering wheel shake, but this approach misses the mark. You need targeted tire maintenance strategies that address actual vibration causes.
Key diagnostic priorities:
- Verify road force balance results exceed factory tolerances
- Inspect for defective tire construction or irregular wear patterns
- Check wheel mounting surface cleanliness and hub centricity
- Measure lateral and radial runout on each assembly
- Document persistent vibration frequencies for warranty claims
Skip the alignment bay. Demand precise tire diagnostics instead. Your liberation from persistent shake requires rejecting ineffective procedures and insisting on evidence-based solutions. Control your repair narrative—don’t let shops upsell irrelevant services when defective tires or imbalance remain unaddressed.
Frequently Asked Questions
Is There a Break-In Period for New Tires?
Yes, you’ll experience a 500-1,000 mile tire break-in period. During this time, expect minor vibration causes as tread conforms to road surfaces. You’ll achieve maximal grip by avoiding aggressive driving and maintaining proper tire pressure throughout this critical settling phase.
How to Get Rid of Tire Vibration?
Ironically, your smooth ride demands mechanical intervention. You’ll perform precise wheel balancing using road force equipment, then execute a thorough alignment check. Liberate yourself from vibration through these technical procedures—freedom arrives via calibrated precision, not passive acceptance.
Conclusion
You’ve now got a bulletproof diagnostic arsenal that’ll hunt down vibration causes like a bloodhound with a grudge. Follow these steps methodically, document everything, and don’t let shops brush you off with lazy excuses. Your 4Runner deserves glass-smooth highway cruising—not a teeth-rattling massage. Stay precise, stay persistent, and reclaim that factory ride quality you paid for.
Related Articles
Biggest Tire That Fits a Stock 4Runner Without a Lift
Curious about the largest tire you can fit on a stock 4Runner without a lift? Discover essential tips for the perfect fit!
Read More
3rd Gen 4Runner Tire Size and Wheel Specifications
How to choose the perfect tire size and wheel specifications for your 3rd Gen 4Runner? Discover essential tips for an upgraded ride!
Read More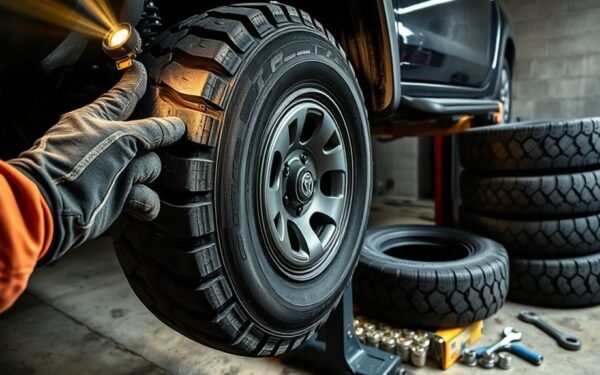
4Runner Tire Noise After Rotation: Is It Normal
Brief tire noise after rotation is usually harmless, but when should you worry?
Read More