
How to Patch a Toyota Hilux Tire at Home
A small nail or screw in your Toyota Hilux tire can look like an easy home fix, but tire repair is safety-critical. At home, you can usually install a temporary plug only if the puncture is small and in the tread area. A true permanent repair requires the tire to be removed from the wheel, inspected inside, and repaired with a combined plug-and-patch by a trained tire technician.
Quick Answer
To patch a Toyota Hilux tire at home, first confirm the puncture is a small tread-area injury, then use a plug kit only as a temporary repair. A permanent safe repair requires the tire to be removed, inspected inside, and sealed with a combined plug-and-patch by a trained technician.
Key Takeaways
- Only attempt a temporary home plug on a small puncture in the main tread area.
- Do not repair sidewall, shoulder, bulge, cracked, exposed-cord, or driven-flat tire damage.
- Industry guidance limits proper puncture repairs to tread-area injuries no larger than 1/4 inch or 6 mm.
- A plug by itself is not a permanent repair; a proper repair uses a plug/stem plus an inside patch.
- After a temporary plug, check for leaks, inflate to the Hilux placard pressure, and have the tire inspected professionally.
At a Glance
| Time Required | 20–45 minutes for a temporary home plug, plus professional inspection afterward |
| Difficulty | Moderate; only suitable if you can lift the vehicle safely and identify repairable tread damage |
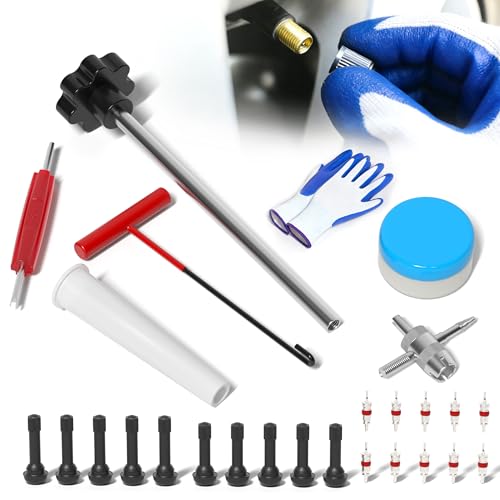
| Tools Needed | Tire plug kit, tire inflator or air compressor, pressure gauge, soapy water, spray bottle, pliers, marker, side cutters or knife, wheel chocks, Hilux jack and lug wrench, jack stand, and torque wrench |
| Cost | Low if you already own the tools; higher if you need an inflator, torque wrench, or professional tire repair |
Before You Start: Is the Hilux Tire Repairable?
Before you reach for a plug kit, decide whether the tire should be repaired at all. The U.S. Tire Manufacturers Association says puncture repair should be limited to the tread area, no larger than 1/4 inch or 6 mm, and completed with a plug/stem plus an inside patch after removing the tire from the wheel. The Tire Industry Association also treats on-wheel string plugs as temporary rather than a complete repair.
Warning: Do not plug, patch, or keep driving on a tire with sidewall damage, shoulder damage, a bulge, exposed cords, cracks, a puncture larger than 1/4 inch or 6 mm, overlapping punctures, or damage from being driven flat. Fit the spare tire or call a tire professional instead.
A plug by itself may get you out of trouble, but it is not the same as a permanent tire repair. Treat it as a temporary seal until the tire can be inspected from the inside.
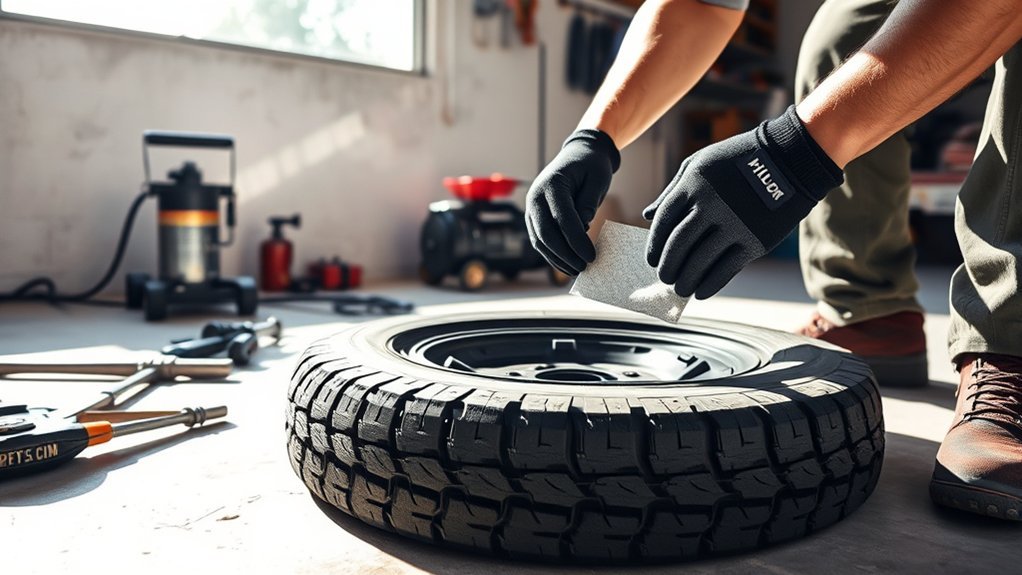
Essential Tools for Tire Repair
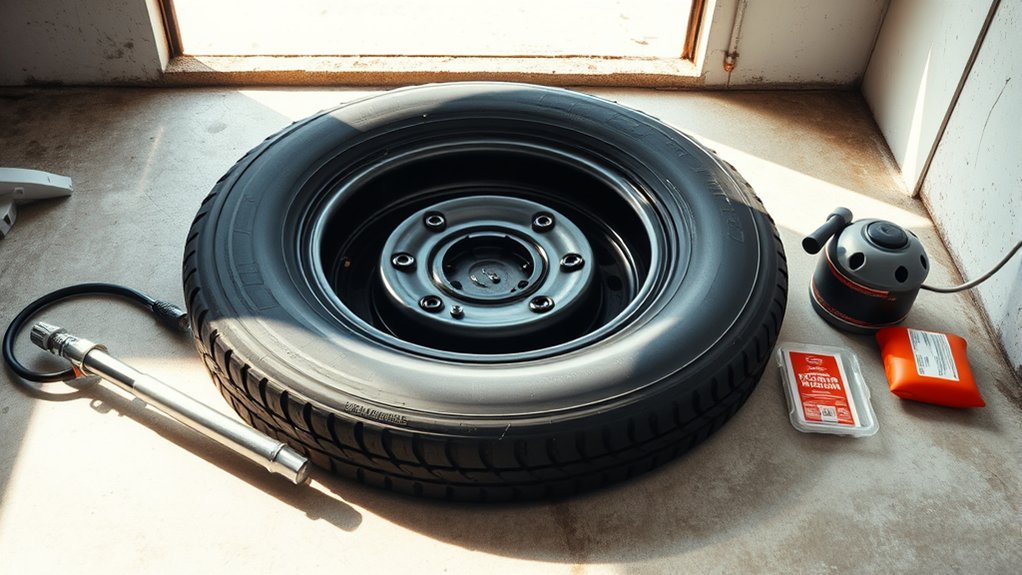
When tackling a tire repair at home, having the right tools is essential for both safety and efficiency. Start with a tire plug kit for a temporary tread puncture seal. You will also need an air compressor or tire inflator, a reliable tire pressure gauge, needle-nose pliers, a spray bottle with soapy water, a marker, gloves, eye protection, and side cutters or a sharp utility knife for trimming the plug.
If you need to remove the wheel, use the jack and lug wrench supplied with your Hilux, plus wheel chocks and a jack stand. Check the correct jacking point and wheel-changing instructions in the Toyota owner’s manual for your exact model year. Toyota’s official owner manual lookup is available through Toyota UK owner manuals.
A torque wrench is strongly recommended when refitting the wheel. Tightening by feel alone can leave the lug nuts under-tightened or over-tightened, both of which can cause problems later.
Note: The pressure molded into the tire sidewall is not the recommended driving pressure. Use the Hilux tire placard or owner’s manual, and check pressure when the tire is cold whenever possible. NHTSA recommends checking tire pressure cold and using the vehicle’s Tire and Loading Information label or owner’s manual.
[Products Worth Considering]

The Milton 555e digital tire inflator delivers fast, accurate pressure readings with a backlit display and multiple unit options, making tire inflation quick and easy. Its durable 20" EPDM rubber hose and grip‑head chuck provide reliable connection, while the ±1 PSI accuracy ensures precise inflation for cars, bikes, and trucks.

This digital tire pressure gauge combines a sturdy pistol grip inflator with a backlit 0.1 PSI display for quick, accurate readings in any lighting condition. Its 360° swivel gauge and 20" rubber hose make it easy to use and store, while the integrated inflate/deflate trigger and ¼" NPT air inlet provide fast, reliable tire maintenance.

The WORKPRO digital tire pressure gauge with inflator offers precise 0.1 PSI resolution and ±1% accuracy for reliable tire inflation across vehicles and inflatables. Built with heavy‑duty aluminum alloy, brass, and rubber, it resists rust and drops while delivering deflation, inflation, and pressure checking functions. The kit includes valve caps, adapters, a twist‑on chuck, screwdriver, nozzles, needle, seal tape, and a storage bag with batteries, making it a versatile, portable solution for on‑the‑go tire maintenance.
Find the Tire Leak
Start by parking the Toyota Hilux on firm, level ground away from traffic. Turn on the hazard lights, set the parking brake, and chock the wheels that will stay on the ground. If the tire is still holding some air, inflate it enough to help reveal the leak, but do not overinflate it.
Inspect the tread for a nail, screw, thorn, metal shard, or other object. Do not pull the object out yet unless you are ready to plug the hole, because removing it can make the tire lose air faster. Mark the area with chalk or a marker.
Next, mix dish soap and water in a spray bottle. Spray the tread, valve stem, valve core, and bead area where the tire meets the rim. Watch for steady bubbles. Bubbles at the nail or screw usually mean a puncture. Bubbles at the valve may mean a leaking valve core or valve stem, which a plug kit will not fix.
Pro Tip: If the puncture object is angled, note the angle before pulling it out. The reaming tool and plug insertion tool need to follow the same path so the plug fills the injury instead of creating a second hole.
Get Your Tire Ready for Repair
Before you begin, confirm again that the puncture is in the main tread area and appears smaller than 1/4 inch or 6 mm. If you see sidewall damage, a shoulder puncture, a long cut, exposed cords, a bubble, or signs the tire was driven flat, stop and use the spare tire instead.
If the puncture is easy to reach while the wheel is still on the vehicle, you may be able to install a temporary plug without removing the wheel. If you need better access, loosen the lug nuts slightly while the tire is still on the ground, then lift the Hilux only at the correct jack point. Place a jack stand under a suitable support point before working around the wheel.
Once identified, follow these preparation steps:
| Step | Action |
|---|---|
| Inspect | Confirm the puncture is in the tread and the tire has no visible structural damage. |
| Mark | Circle the leak and note the angle of the nail, screw, or puncturing object. |
| Stabilize | Park level, apply the parking brake, chock wheels, and support the vehicle safely if lifted. |
| Prepare Plug | Thread the repair plug through the insertion tool before removing the object from the tire. |
Keep the plug tool, reaming tool, and pliers within reach. Speed matters once the object is removed, because the tire can lose pressure quickly.
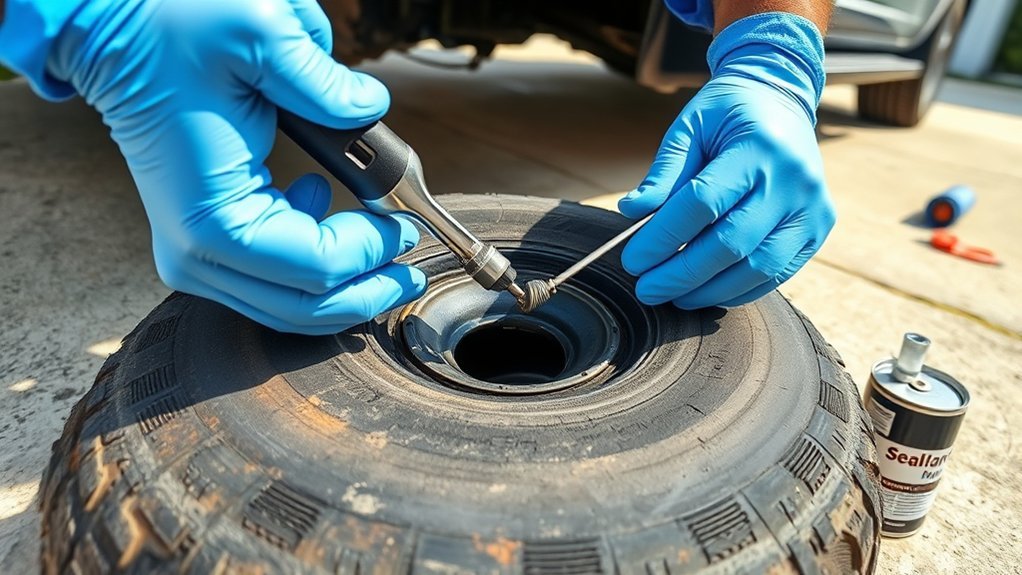
How to Properly Insert a Temporary Tire Plug
Properly inserting a tire plug requires firm pressure and careful alignment. This step is for a temporary tread repair only. For a permanent repair, Michelin and tire industry guidance call for removing the tire from the wheel, inspecting it inside, and using a combined plug-and-inside-patch repair.
- Remove the object: Pull the nail or screw out with pliers, following the same angle it entered the tread.
- Ream the puncture: Push the reaming tool into the hole and work it in and out several times, following the puncture path. This cleans and sizes the hole for the plug.
- Load the plug: Center the sticky plug strip in the insertion tool. Some kits include rubber cement; use it only if your kit instructions require it.
- Insert the plug: Push the plug into the puncture until roughly two-thirds of the plug is inside the tire, or until your plug kit’s instructions say to stop. Do not push the entire plug through.
- Pull the tool out: Pull the insertion tool straight back out, leaving the plug in place.
- Trim the excess: Cut the plug ends close to the tread surface, leaving a small amount above the tread so it can settle as the tire rolls.
If the plug tears, will not stay in place, or the hole is too large to seal, stop. Do not add multiple plugs to force the repair. Install the spare or call a tire professional.
[Products Worth Considering]

The Milton 507KIT delivers fast, accurate tire inflation, deflation and pressure measurement with a backlit LCD gauge and 14" rubber hose. Its 3‑in‑1 design meets ANSI/ASME standards and provides readings from 0‑250 PSI with 0.1 PSI resolution. The ergonomic pistol‑grip body and brass lock‑on chuck make one‑handed operation effortless, while the auto‑off feature conserves battery life.

The GERCHWAY tire inflator combines a durable rubber‑protected gauge with a 360° swivel air chuck for hands‑free operation and reliable sealing on any valve. Its 100 PSI range delivers ±2 PSI accuracy, making it ideal for most passenger and light‑truck tires. The battery‑free design ensures you can measure, inflate, or deflate without worrying about power loss, while the universal ¼ NPT connection fits any standard compressor.

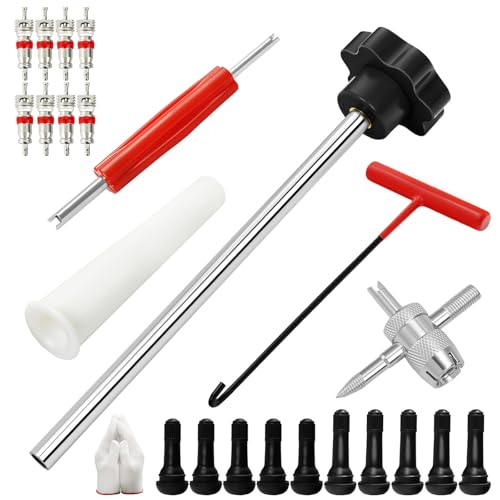
SIMPLE BUT COMPLETE--- Includes 1pc T-handle insert tool & 1pc T-handle spiral probe tool; 1pc 4-way valve stem tool; 2pcs Plastic Valve Caps; 15pcs self-vulcanization repair plugs; 1pc jar of lubricant; 1pc Instructions for use steps; 1pc “L” hex key; 1pc package bag.
Reattach the Tire and Check for Leaks
If you removed the wheel, reinstall it carefully. Align the wheel on the hub, hand-thread each lug nut first, and snug the nuts in a star pattern. Lower the Hilux until the tire just touches the ground, then tighten the lug nuts in a star pattern with a torque wrench according to the owner’s manual for your specific model.
Inflate the tire to the recommended cold pressure listed on the Hilux tire placard or owner’s manual. The National Highway Traffic Safety Administration recommends checking tire pressure when tires are cold and using the vehicle label or owner’s manual rather than the tire sidewall maximum.
Spray the plugged area with soapy water. Watch for bubbles for at least 30 seconds. No bubbles means the temporary plug is holding for now. Bubbles mean air is still escaping and the tire should not be driven except to move the vehicle to a safer location.
If your Hilux has a tire pressure monitoring system, do not rely on the warning light alone. Use a pressure gauge. A TPMS warning may remain on until the tire is correctly inflated and the system resets, and it may not warn until the tire is already significantly underinflated.
What To Do After the Temporary Repair
A successful home plug does not end the repair. Drive gently, avoid high speeds, and go to a tire shop as soon as practical. Ask the technician to remove the tire from the rim, inspect the inner liner, confirm the tire was not damaged by low-pressure driving, and perform a proper combination plug-and-patch repair if the tire qualifies.
Check the tire pressure again after the tire cools, then recheck it the next day. If the pressure drops, the repair is leaking or there is another issue such as valve-stem damage, bead leakage, or hidden internal damage.
Troubleshooting: What If It Still Leaks?
- Bubbles from the plug: The plug did not seal. Do not stack extra plugs; use the spare and get professional help.
- Bubbles from the valve: The valve core or valve stem may be leaking. A tire plug will not fix this.
- Bubbles from the rim edge: The bead area may be leaking because of corrosion, dirt, rim damage, or bead damage.
- Pressure drops overnight: The tire may have a second puncture, a poor temporary seal, or internal damage.
- Vibration after reinstalling the wheel: Stop driving and have the wheel, lug nuts, tire balance, and tire structure checked.
[Products Worth Considering]
【Valve Stem & Valve Core Repair Tool Kit】:By this tool kits,easy to chaging valve stem and core,in most cases, meet the valve stem removal without tire removal,inculding 5 TR413 and 5 TR414 valve stem
【Package Includes】This tire stem removal tool set comes with 1 valve core installation metal push rod tool, 1 plastic tapered positioning tube, 1 T-shaped hook tool, 5 TR413 valve cores, 5 TR414 valve cores, 1 four-way valve tool, 1 dual-head valve removal tool, 10 universal valve cores (compatible with all vehicle valves and air conditioning units), a box of lubricant, a pair of gloves, and a detailed instruction manual. Ideal for use on cars, light trucks, small trailers, lawn mowers, ATVs, and more.

🚗【Package Include】You will get 1 valve core installation push rod tool, 1 plastic tapered positioning tube,1 T-hook tool, 4PCS TR413, 4PCS TR414,2PCS TR418 valve cores, 1PC 4 way valve tool, 1 dual heads valve removal tool,10PCS valve cores,10 PCS valve stem caps, 1 gloves and 1 detailed instruction manual.Suitable for cars, light trucks, small trailers, unicycles, lawn mowers, ATVs and motorcycles, etc.
Know When to Call a Professional?
After confirming your tire is temporarily sealed and reattached, it is still important to know when to hand the job to a professional. Tire failure at road speed can be dangerous, especially on a loaded pickup like a Hilux. Call a professional or install the spare tire in these situations:
- Sidewall or shoulder damage: A puncture outside the main tread area is not a safe DIY repair.
- Large puncture: Damage larger than 1/4 inch or 6 mm should not be repaired with a plug.
- Driven-flat damage: If the tire was driven flat or severely underinflated, the inside may be damaged even if the outside looks fine.
- Bulges, cracks, exposed cords, or cuts: These are signs of structural damage and usually mean replacement.
- Multiple or close punctures: Repairs that overlap or sit too close together can make the tire unsafe.
- Uncertainty: If you are unsure about the location, size, angle, or condition of the damage, let a tire technician inspect it.
Trusting experts in these situations does more than protect the tire. It protects the vehicle, your passengers, and everyone around you on the road.
Frequently Asked Questions
How long will a patched Toyota Hilux tire last?
A properly inspected and professionally repaired tire can often last for the remaining usable life of the tire, as long as it was not damaged by being driven flat and it still has safe tread depth. A DIY string plug should be treated as temporary, not as a repair expected to last for years.
Is a patch safer than a plug?
A patch alone seals the inner liner but does not fill the puncture path. A plug alone fills the path but does not properly seal the inner liner. The safer permanent repair is a combined plug-and-inside-patch installed after the tire is removed from the wheel and inspected.
Can I plug a Toyota Hilux tire without removing the wheel?
You can sometimes install a temporary plug without removing the wheel if the puncture is easy to reach and is in the tread area. That is not a permanent repair because the inside of the tire has not been inspected. Have the tire checked by a technician afterward.
Can I repair a puncture near the sidewall?
No. Damage in the shoulder or sidewall area should not be repaired with a home plug or patch. That part of the tire flexes heavily and is outside the accepted repair zone. Use the spare tire and replace or professionally assess the damaged tire.
How soon should I check tire pressure after plugging it?
Check it immediately after inflation, again after a short low-speed drive, and again when the tire is cold. If pressure drops or the plugged area bubbles with soapy water, do not keep driving on it.
Conclusion
Patching a Toyota Hilux tire at home is really a temporary emergency repair, not a complete professional fix. If the puncture is small, straight, and in the main tread area, a plug kit can help you seal the leak long enough to get moving again. But if the damage is large, near the sidewall, caused by driving flat, or still leaking after the repair, stop and call a tire professional. Your Hilux can handle tough roads, but it still needs safe tires under it.
Sources
- U.S. Tire Manufacturers Association — Tire Repair Basics — repairable area, 1/4-inch limit, tire removal, and plug-plus-patch guidance
- Tire Industry Association — Tire Repair — consumer safety guidance on temporary plugs, tread limits, and non-repairable damage
- NHTSA TireWise — Tire Safety Ratings and Awareness — cold tire pressure, tire placard location, tread depth, and TPMS reminders
- Michelin USA — Can My Tire Be Repaired? — proper combined plug-and-inside-patch repair and tire removal for inspection
- Michelin — Tire Repair: Is My Tire Repairable? — professional inspection, low-pressure damage, and repair method considerations
- Toyota UK — Owner’s Manual Lookup — model-specific Hilux owner manual reference for jack points, wheel changing, and tire information
Related Articles

Toyota Hilux Run-Flat Tires: What You Need to Know
Take control of your safety with Toyota Hilux run-flat tires; discover their benefits and hidden costs that could change your driving experience forever.
Read More
Effects of Underinflated Tires on the Toyota Hilux
Inadequate tire pressure in your Toyota Hilux can lead to serious safety issues and costly repairs; discover how to avoid these pitfalls.
Read More
The Risks of Overinflating Toyota Hilux Tires
Overinflating your Toyota Hilux tires can lead to dangerous blowouts and uneven wear, but understanding the risks is crucial for your safety.
Read More