
How to Install TPMS Sensors on New Wheels: A Guide for Tundra Owners

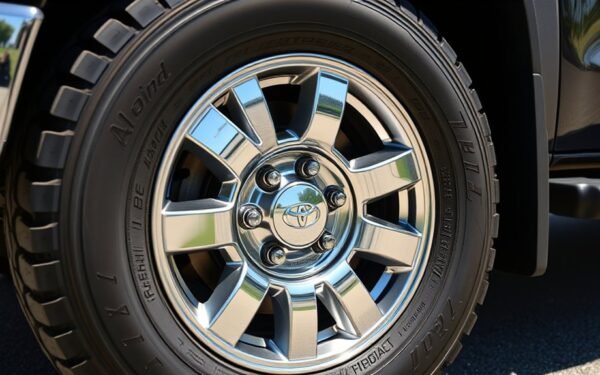
Installing TPMS sensors on new Toyota Tundra wheels is not just a bolt-on detail. The sensor must physically fit the wheel, match the truck’s TPMS system, seal correctly at the valve stem, and be registered or cloned so the truck can read it. Use this guide to plan the job, avoid a persistent TPMS warning light, and know when a tire shop or Toyota dealer is the safer choice.
Quick Answer
To install TPMS sensors on Tundra new wheels, confirm the correct sensor by VIN, wheel type, valve style, and frequency first. Then install the sensor with a new service seal, torque it correctly, mount the tire carefully, check for leaks, and either clone the old IDs or register the new IDs with the truck.
Key Takeaways
- Do not buy sensors by appearance alone. Match the sensor to your Tundra’s model year, VIN, wheel type, valve style, and TPMS frequency.
- New TPMS valve/transmitter IDs must be cloned from the old sensors or registered to the tire pressure warning computer before the system will work properly.
- Breaking the tire bead and installing a TPMS valve can damage the sensor if done carelessly, so use a tire machine or have a tire shop do the mounting.
- A solid TPMS light usually means low tire pressure; a flashing light that stays on usually points to a TPMS system fault or unregistered sensor.
- A temporary spare may not have a TPMS transmitter, so do not assume every spare can be part of a five-tire TPMS rotation.
At a Glance
| Time Required | About 45–90 minutes for a set of wheels after the tires are unmounted or during tire mounting |
| Difficulty | Moderate if you have tire equipment; best handled by a tire shop if the tire bead must be broken |
| Tools Needed | TPMS-compatible sensors, service kits, tire machine or bead breaker, torque wrench, tire pressure gauge, valve core tool, soapy water, TPMS scan/programming tool, and safe lifting equipment |
| Cost | Varies by OEM vs. programmable sensor, service kit, tire mounting labor, and whether dealer-level ID registration is needed |
Why TPMS Sensors Matter for Your Tundra
Your Tundra’s tire pressure monitoring system helps warn you when one or more tires are significantly underinflated. That warning matters because low pressure can increase tire heat, hurt handling, reduce fuel economy, and shorten tire life.
TPMS is still a backup system, not a replacement for checking tire pressure. The federal TPMS owner-manual language says each tire should be checked monthly when cold and inflated to the vehicle manufacturer’s recommended pressure on the placard or tire label. Your Tundra’s Toyota Owners manual also notes that the TPMS does not replace routine tire inflation pressure checks.
TPMS helps catch significant underinflation, but the correct pressure target is still the cold PSI listed on the driver-door placard, not the maximum PSI molded into the tire sidewall.
If you are installing new wheels, the sensors matter even more. Wheels without registered tire pressure warning valves and transmitters can trigger a TPMS malfunction warning, and the truck may not display accurate tire pressures.
Note: A matching full-size spare with a compatible TPMS sensor may support a five-tire rotation only if that sensor is installed and registered. A temporary spare may not have a tire pressure warning valve/transmitter, so always check your specific Tundra setup before planning a five-wheel rotation.
Check Compatibility Before Buying TPMS Sensors
Before you remove a tire or order sensors, confirm the exact sensor your Tundra needs. Toyota TPMS systems use unique transmitter IDs, and the sensor must physically and electronically match the truck.
Compatibility Checklist
| Model year and VIN | Use your VIN or Toyota parts lookup to confirm the correct tire pressure warning valve/transmitter. |
| Sensor frequency | Confirm whether your sensor application requires 315 MHz, 433 MHz, or a programmable dual-frequency sensor set up for your truck. |
| Wheel material and valve style | Match clamp-in or snap-in valve style to the wheel and sensor design. Some aftermarket wheels need different valve hardware. |
| ID strategy | Decide whether you will clone the old sensor IDs into programmable sensors or register new IDs to the truck. |
| Second wheel set support | Some newer Tundras support registering a second wheel set. Check the TPWS menu and the Toyota Owners manual for your exact model year. |
For factory repair information and exact service procedures, Toyota’s Technical Information System is the official Toyota service-support source for North American Toyota vehicles. For owner-level TPWS operation and second wheel set guidance, use the Toyota Owners manual for your model year.
Preparing for TPMS Sensor Installation: Tools and Materials
Gather everything before the tire comes off the wheel. The right tools help protect the sensor, prevent leaks, and avoid a repeat trip to the tire shop.
- Correct TPMS sensors: OEM Toyota sensors or programmable sensors that match your Tundra application.
- TPMS service kits: New grommets/seals, valve cores, caps, and nuts where applicable.
- Tire machine or bead breaker: Needed to access the valve-mounted sensor inside the wheel.
- Torque wrench: Used for sensor valve hardware and wheel lug nuts. Use the spec for your exact sensor kit and truck.
- Valve core tool: For fully deflating the tire before bead work.
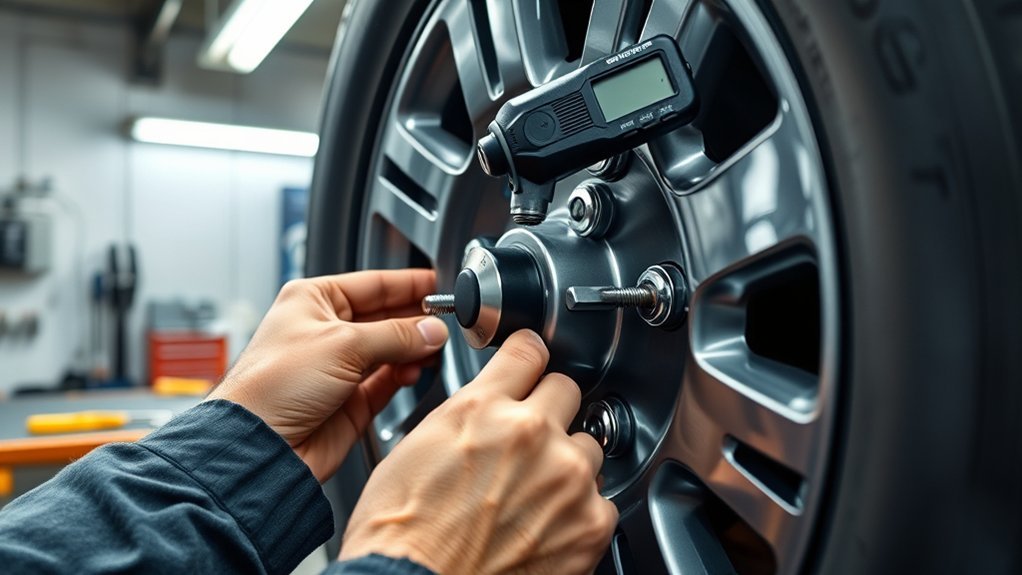
- TPMS scan/programming tool: Needed to read sensor IDs, clone programmable sensors, wake sensors, or confirm signal output.
- Tire pressure gauge: Use a reliable gauge to set cold tire pressure to the door-placard value.
- Soapy water: Used to check for leaks at the valve stem after installation.
- Safe lifting equipment: Floor jack, jack stands, wheel chocks, and lug wrench if the wheels are still on the truck.
Warning: Do not break a tire bead while the tire is pressurized. Fully remove the valve core and release air first. If you do not have tire mounting equipment, have a tire shop install the sensors while the tires are being mounted and balanced.
OEM vs. Aftermarket Sensors: Which Should You Choose?
Both OEM and aftermarket TPMS sensors can work well when they are correctly matched and programmed. The best choice depends on how you use your Tundra and how often you swap wheels.
| Sensor Type | Best For | Watch For |
|---|---|---|
| OEM Toyota sensor | Owners who want factory-style fitment and VIN-based parts matching. | New IDs still need to be registered unless the truck already knows that sensor set. |
| Programmable aftermarket sensor | Owners with seasonal wheels or multiple wheel sets who want cloning or broad coverage. | Requires the correct programming tool and application setup. Dual-frequency sensors must still be programmed correctly. |
Universal programmable options, such as the Autel MX-Sensor 1-Sensor, can support both 315 MHz and 433 MHz, but that does not remove the need to choose the correct Tundra application and program or clone the sensor correctly.
Pro Tip: If you are building a second wheel set for winter tires or off-road tires, ask the tire shop whether they can clone your original sensor IDs. Cloned IDs can make wheel swaps easier because the truck sees the new wheels as the same registered sensor set.
How to Remove Old TPMS Sensors: A Step-by-Step Process

Removing old TPMS sensors is straightforward when the tire is already off the bead, but it is easy to crack a sensor, tear a seal, or damage the valve stem if you rush.
- Record the current sensor IDs if needed. Use a TPMS scan tool to read each old sensor before removal. Label the readings by wheel position if you plan to clone the IDs.
- Remove the wheel safely. Park on level ground, chock the opposite wheels, loosen lug nuts before lifting, support the truck with jack stands, and remove the wheel.
- Deflate the tire completely. Remove the valve cap and valve core. Wait until all air is released before bead work.
- Break the bead away from the sensor area. Position the bead breaker so it does not hit the sensor body inside the wheel.
- Remove the retaining hardware. For clamp-in sensors, remove the retaining nut and washer from the outside of the rim. For snap-in styles, follow the sensor manufacturer’s removal procedure.
- Pull the sensor out carefully. Remove the sensor and old grommet or seal. Do not reuse crushed, corroded, or hardened sealing parts.
- Inspect the rim hole. Clean corrosion, old rubber, dirt, and lubricant from the valve hole without scratching the sealing surface.
Warning: Tire repair sealant can interfere with TPMS operation and may require sensor inspection or replacement. If a tire has had liquid sealant inside it, tell the tire shop before the tire is dismounted.
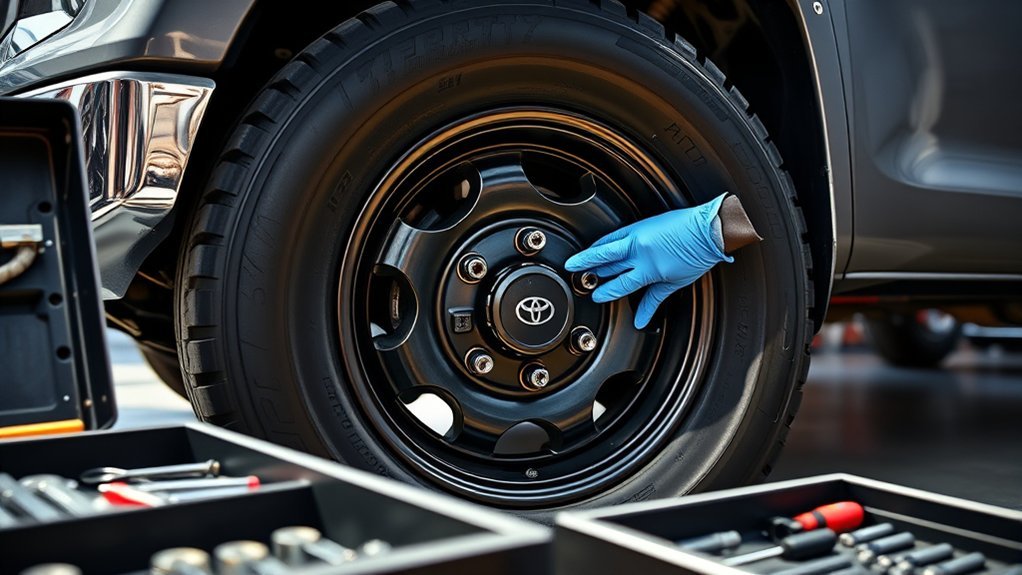
How to Install New TPMS Sensors: Best Practices
Install the new TPMS sensor before the tire is fully mounted. The goal is a clean seal, correct sensor angle, no bead interference, and a transmitter ID that the truck can recognize.
Step-by-Step TPMS Sensor Installation
- Write down the new sensor ID. If the ID is printed on the sensor, record it before the tire is mounted. Once the tire is on the wheel, the printed ID may be hard or impossible to read.
- Install a new service seal. Use a fresh grommet/seal, valve core, cap, and nut as required by the sensor style. Do not reuse flattened seals.
- Insert the sensor from inside the wheel. Make sure the sensor sits in the correct orientation and clears the tire bead path.
- Tighten the valve hardware to spec. Use the torque value from the sensor maker or Toyota service information for your exact sensor. Over-tightening can crush the seal or damage the sensor.
- Mount the tire carefully. Keep the mounting head and tire bead away from the sensor body. Rotate the wheel as needed so the bead does not strike the sensor.
- Inflate to seat the bead. Follow tire-shop safety practices and never exceed the tire or equipment limits.
- Install the valve cap. Use the specified cap to protect the valve core from dirt and corrosion.
- Check for air leaks. Spray soapy water around the valve stem, valve core, and bead area. Bubbles mean the leak must be fixed before driving.
- Set cold tire pressure. Use the driver-door placard pressure, not the sidewall maximum pressure.
| Step | Action | Why It Matters |
|---|---|---|
| 1 | Record or scan sensor IDs | You may need the IDs for registration or troubleshooting. |
| 2 | Install new seals and valve hardware | Old seals can leak after being compressed once. |
| 3 | Torque hardware correctly | Too loose can leak; too tight can damage the sensor or seal. |
| 4 | Leak-check with soapy water | A small valve leak can trigger a TPMS light later. |
Sensor Activation Procedures
“Activation” can mean several different things, so use the right process for your setup:
- Wake or trigger the sensor: A TPMS scan tool can wake the sensor and confirm it transmits.
- Clone the old ID: A programmable sensor can be written with the same ID as the original sensor. This is useful for duplicate wheel sets.
- Register a new ID: If the sensor has a new ID, the Tundra’s tire pressure warning computer must learn it.
- Initialize the system: After ID registration or pressure changes, the TPWS may need initialization so the truck stores the correct pressure baseline.
Newer Tundra owner manuals explain that new tire pressure warning valve/transmitter ID codes must be registered and the tire pressure warning system initialized. Some newer models also support registering a second wheel set so either set can be selected for TPMS use.
How to Activate or Register TPMS Sensors on a Tundra
After the wheels are mounted, inflated, and balanced, confirm the truck can read the sensors. The exact process depends on model year, sensor type, and whether the IDs were cloned or are new.
- Inflate all tires to the correct cold pressure. Use the driver-door placard PSI.
- Scan each sensor. Confirm all sensors respond and record each ID.
- Use the correct registration method. Depending on your Tundra, this may be done through the TPWS menu, a TPMS tool, Toyota Techstream, or a Toyota dealer.
- Select the right wheel set if equipped. If your Tundra supports two registered wheel sets, make sure the active set matches the wheels on the truck.
- Initialize TPWS if required. Follow the Toyota Owners manual for your year.
- Drive to confirm readings. It can take a few minutes of driving for pressures to appear or update on the multi-information display.
Note: If new sensor IDs are not registered, Toyota owner guidance says the tire pressure warning system may not work properly and the warning light may blink for 1 minute and then stay on after driving.
How to Troubleshoot Common TPMS Issues
Start with tire pressure, then move to sensor and registration checks. Do not assume every TPMS light means a bad sensor.
| Symptom | Likely Cause | What to Do |
|---|---|---|
| Solid tire pressure light | One or more tires may be low. | Check all tires cold with a gauge and inflate to the door-placard PSI. |
| Light flashes, then stays on | TPMS malfunction, unregistered ID, dead sensor battery, or signal issue. | Scan each sensor, verify IDs are registered, and check for fault codes with a capable tool. |
| One tire shows “–” or no reading | Sensor not transmitting, wrong ID, or signal blocked. | Trigger the sensor with a TPMS tool and confirm ID, frequency, and battery status. |
| Light returns after pressure correction | Slow leak, bad valve seal, puncture, or incorrect initialization. | Leak-check the valve stem and tire, then initialize TPWS only after pressure is correct. |
| Works with one wheel set but not another | Second set not registered or wrong set selected. | Register the second set or select the correct set in the TPWS menu if equipped. |
If the TPMS light persists after pressures, IDs, and sensors check out, use dealer-level diagnostics. Toyota Techstream or an equivalent capable scan tool can read TPMS data and trouble codes that a basic code reader may miss.
TPMS Maintenance: Tips for Longevity and Accuracy
Once the sensors are installed and registered, maintenance is simple but important.
- Check tire pressure monthly when cold. TPMS warnings are not a substitute for routine pressure checks.
- Keep valve caps installed. Caps help keep dirt and moisture out of the valve core.
- Replace service parts when tires are dismounted. New seals and valve cores help prevent slow leaks.
- Avoid harsh valve-stem handling. Do not bend clamp-in stems or use metal tools carelessly around rubber snap-in stems.
- Watch sensor age. TPMS batteries are sealed inside the sensor. DENSO notes battery life is commonly estimated around 5–10 years or about 100,000 miles, so older sensors may need replacement even if the tire is still good.
- Clean around the valve area during tire service. Dirt and corrosion can cause leaks and make future removal harder.
Pro Tip: If one sensor battery fails on an older Tundra, ask the shop to test all sensors before replacing only one. Sensors from the same set often age together.
Frequently Asked Questions
How do I switch TPMS sensors to new Tundra wheels?
Scan or record the old sensor IDs, fully deflate the tire, break the bead, remove the old sensor, install the sensor in the new wheel with fresh service hardware, mount and balance the tire, then clone the old IDs or register the new IDs to the truck.
Do new TPMS sensors need to be programmed on a Toyota Tundra?
Yes, if the sensors have new IDs. The IDs must be registered to the tire pressure warning computer and the system may need initialization. If programmable sensors are cloned to the old IDs, the truck may recognize them as the existing sensor set.
Can I install TPMS sensors without a tire machine?
Not safely in most cases. The sensor mounts inside the wheel at the valve stem, so the tire bead must be broken and the tire must be handled without striking the sensor. If you do not have tire equipment, have a tire shop install the sensors during mounting and balancing.
Why is my TPMS light flashing after installing new wheels?
A flashing TPMS light that later stays on usually means a system fault, not just low tire pressure. Common causes include unregistered sensor IDs, the wrong sensor frequency, a dead sensor battery, damaged sensor hardware, or the wrong wheel set selected in the TPWS menu.
Can I reuse my old TPMS sensors on new wheels?
Yes, if the sensors are compatible with the new wheels, still transmit correctly, and the seals or service kits are replaced as needed. Reusing the same sensors can avoid ID registration because the truck already knows those IDs.
Does the Tundra spare tire have a TPMS sensor?
It depends on the spare setup. A temporary spare may not have a tire pressure warning valve/transmitter, while a matching full-size spare can only participate in TPMS monitoring or five-tire rotation if it has a compatible registered sensor.
Conclusion
Installing TPMS sensors on your Tundra’s new wheels is a small job with big consequences if it is done wrong. Match the sensors before buying, use new service hardware, protect the sensor during tire mounting, check for leaks, and make sure the sensor IDs are cloned or registered before you drive away. Once the TPMS readings display correctly and the warning light stays off, your new wheels are ready for regular use with proper pressure monitoring.
Sources
- Toyota Owners: 2025 Tundra Tires — TPWS operation, routine pressure checks, second wheel set registration, ID registration, and TPMS malfunction behavior.
- Toyota Owners: 2025 Tundra If You Have a Flat Tire — temporary spare TPMS note, tire sealant warning, and flat-tire safety information.
- eCFR: 49 CFR § 571.138 Tire Pressure Monitoring Systems — federal TPMS warning and monthly cold tire pressure check language.
- Toyota Technical Information System — official Toyota service-support source for Toyota vehicles marketed in North America.
- Autel MX-Sensor 1-Sensor — example of a programmable dual-frequency 315 MHz / 433 MHz universal TPMS sensor.
- DENSO: When Should TPMS Sensors Be Replaced? — TPMS battery life, damage, and corrosion replacement guidance.
Related Articles
Toyota Tundra Tire and Wheel Package: What to Consider Before Buying
Unlock the secrets to choosing the perfect tire and wheel package for your Toyota Tundra—essential tips await to enhance your ride.
Read More
Do Bigger Tires Void a Toyota Tundra Warranty? Magnuson-Moss Act Explained
Bigger tires might not void your Toyota Tundra warranty, but understanding the Magnuson-Moss Act is crucial—discover how to protect your investment effectively.
Read More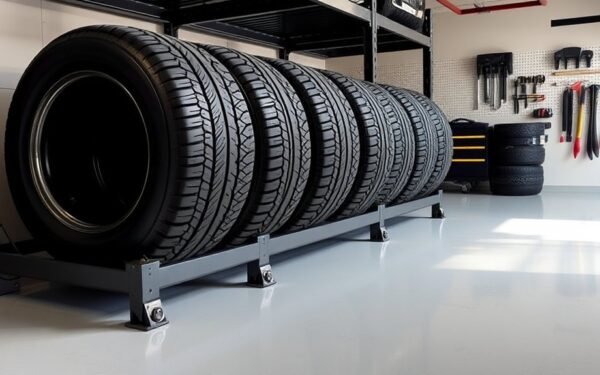
Toyota Tundra Tire Rack Setup: Garage Storage Ideas for Seasonal Sets
Better tire storage for your Toyota Tundra awaits—discover essential tips to maximize space and protect your seasonal sets in the garage!
Read More