
How to Install a Spare Tire on a Honda Accord Correctly

A Honda Accord compact spare tire is meant to get you safely to a repair shop, not to replace a regular tire for normal driving. The safest process is to park on firm, level ground, loosen the wheel nuts before lifting the car, use the correct jacking point, install the compact spare, and tighten the wheel nuts in stages. For current U.S. Accord models, Honda lists the compact spare pressure as 60 psi and the wheel nut torque as 80 lbf·ft, but always follow the owner’s manual for your exact model year.
Quick Answer
To install a spare tire on a Honda Accord, stop on firm level ground, set the parking brake, turn on the hazard lights, chock the opposite wheel, loosen the lug nuts one turn, jack the car at the marked jacking point, swap the tire, hand-tighten the nuts, lower the car, then tighten them in a star pattern.
Key Takeaways
- Never change a tire where traffic, soft ground, or poor visibility makes the job unsafe; call roadside assistance instead.
- Loosen each wheel nut about one turn before raising the Accord with the jack.
- Use only the designated jacking point, and never put any part of your body under a vehicle supported only by a jack.
- For current Accord models, Honda specifies 80 lbf·ft wheel nut torque and 60 psi compact spare pressure; check your owner’s manual if your model year differs.
- Keep speed under 50 mph on the compact spare and replace it with a repaired or regular tire as soon as possible.
At a Glance
| Time Required | About 20–30 minutes if the ground is safe, the tools are present, and the lug nuts are not seized |
| Difficulty | Beginner, but only when the vehicle is parked safely on firm, level ground |
| Tools Needed | Compact spare tire, jack, wheel nut wrench, jack handle bar, wheel block or rock, clean cloth, tire pressure gauge, and a torque wrench if available |
| Cost | Usually $0 for installation if your Accord has the spare and tools; tire repair or replacement costs vary |
Safety First: Essential Precautions Before You Start

Before you touch the jack, make sure the location is safe. If you have a flat while driving, hold the steering wheel firmly, slow down gradually, and pull over as far from traffic as you safely can. Choose a firm, level, non-slippery surface. Avoid soft dirt, steep shoulders, grass, gravel slopes, and narrow highway shoulders where passing traffic is close.
Warning: Never place any part of your body under a Honda Accord that is supported only by the factory jack. The jack is for changing a tire, not for working underneath the vehicle.
Set the parking brake, shift the transmission into Park (P), turn on the hazard warning lights, and set the power mode to Vehicle Off. Have passengers wait away from traffic if it is safe to do so. If the jack is damaged, the ground is unstable, a wheel nut will not loosen, or the vehicle is too close to traffic, stop and call a professional towing or roadside service.
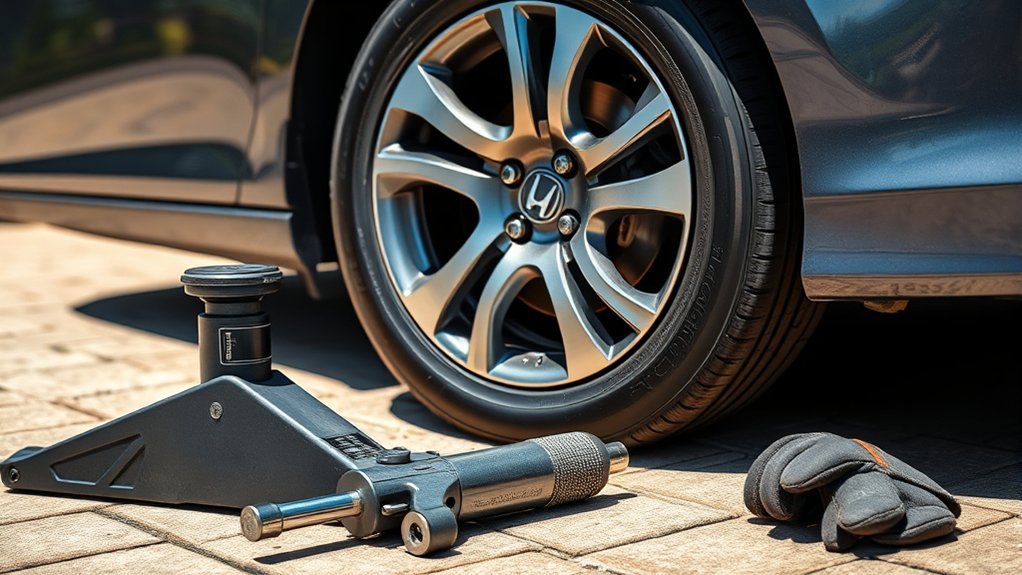
Gather Your Tools
Most Honda Accord models with a compact spare store the spare tire and tool kit under the trunk floor. Open the trunk floor lid and take out the tool case. You should have the jack, wheel nut wrench, jack handle bar, and compact spare tire. A flashlight, gloves, tire pressure gauge, and torque wrench are also helpful.
[Products Worth Considering]

This digital tire pressure gauge combines a sturdy pistol grip inflator with a backlit 0.1 PSI display for quick, accurate readings in any lighting condition. Its 360° swivel gauge and 20" rubber hose make it easy to use and store, while the integrated inflate/deflate trigger and ¼" NPT air inlet provide fast, reliable tire maintenance.

The Tire Inflator Portable Air Compressor delivers fast, reliable inflation with a high‑performance motor and digital gauge, reaching up to 150 PSI in minutes. Its rechargeable battery powers multiple car, bike, and ball inflations on a single charge, while smart modes and auto‑off prevent over‑inflation. Built‑in LED light and USB output add emergency convenience, making it a versatile tool for road trips and daily maintenance.

The Aneson portable air compressor delivers rapid 34 L/min airflow and up to 150 PSI, inflating car tires in just one minute and supporting up to 18 inflations on a single charge. Its dual LCD display with auto shutoff prevents over‑inflation, while preset modes and memory function simplify inflation for cars, bikes, motorcycles, and sports balls. A built‑in LED light and emergency flashing mode add safety for nighttime or roadside use, and the lightweight 1‑pound design makes it easy to store in any vehicle or backpack.
Essential Tools Checklist
- Compact spare tire: Make sure it is inflated before driving. Current Accord compact spares are specified at 60 psi.
- Jack: Use the jack supplied with the vehicle unless your manual specifies otherwise.
- Wheel nut wrench: This loosens and tightens the lug nuts.
- Jack handle bar: This operates the jack.
- Wheel block or rock: Use it to block the wheel diagonal from the flat tire.
- Clean cloth: Use it to wipe dirt or corrosion from the wheel mounting surface.
- Torque wrench: Best for final tightening. Current Accord wheel nut torque is 80 lbf·ft, but check your model-year manual.
Note: Some Accord trims or model years may use a tire repair kit instead of a compact spare. If your vehicle does not have a spare tire, follow the tire repair kit instructions or call roadside assistance.
Set Up the Accord Before Lifting It
Place a wheel block or large rock in front of and behind the wheel diagonal to the flat tire. For example, if the front-left tire is flat, block the rear-right wheel. This helps reduce the chance of the car rolling while you work.
Next, place the compact spare tire under the vehicle body near the tire you are changing, with the wheel side facing up. This does not replace safe jack use, but it adds a small margin of protection while the flat tire is off the vehicle.
Before raising the car, use the wheel nut wrench to loosen each lug nut about one turn counterclockwise. Do not remove the nuts yet. Loosening them while the tire is still on the ground keeps the wheel from spinning and keeps the vehicle more stable.
[Products Worth Considering]

This compact 12V DC tire inflator quickly inflates car, truck, SUV, motorcycle, and bicycle tires up to 150 PSI, featuring a backlit LCD display with multiple pressure units and an auto‑shutoff function. It includes a 9.84‑ft power cord, emergency LED light, and a durable design tested for 20,000 hours, offering a lifetime warranty for peace of mind.

The AIRSURE portable tire inflator delivers up to 150 PSI, inflating car tires, bikes, motorcycles, and sports inflatables up to five times faster than standard pumps. Its 6000mAh rechargeable battery provides up to 20 car tire top‑ups, while a 12V DC backup ensures continuous power. Smart preset pressure, auto shut‑off, and multiple modes guarantee precise inflation, and the built‑in LED flashlight and USB output add convenience for emergencies.
Set Up the Jack Safely
| Step | Action |
|---|---|
| 1. Position the jack | Place it under the designated jacking point closest to the flat tire. |
| 2. Seat the jack | Turn the end bracket clockwise until the jack contacts the jacking point. |
| 3. Check alignment | Make sure the jacking point tab rests in the jack notch. |
| 4. Raise the vehicle | Lift only until the flat tire is off the ground. |
| 5. Stay clear | Do not get in the vehicle, place items on the jack, or put anything under the jack. |
Use the jack only on firm, level ground and only at the correct jacking points. Other jacks may not fit the jacking point or support the load properly. Do not run the engine while the car is on the jack.
Remove the Flat Tire
Once the flat tire is raised off the ground, remove the loosened wheel nuts completely. Keep them together where they will not roll away. Pull the flat tire straight toward you and set it flat on the ground.
Before mounting the spare, wipe the wheel mounting surface with a clean cloth. Dirt, rust flakes, or debris between the wheel and hub can prevent the spare from sitting flush.
Mount the Spare Tire Securely
Lift the compact spare onto the hub and align the bolt holes with the wheel studs. The valve stem should face outward so you can check and adjust pressure. Install the wheel nuts by hand first, turning them clockwise until they touch the lips around the mounting holes. Stop when they are seated; do not fully tighten while the tire is still in the air.
Lower the Accord until the spare tire contacts the ground enough that it will not spin, then begin tightening the wheel nuts in a star pattern. Tighten a little at a time and go around the pattern two or three times so the wheel seats evenly.
Pro Tip: If you have a torque wrench, tighten the wheel nuts to the Honda-specified torque for your model year. For current Accord models, Honda lists 80 lbf·ft (108 N·m). If you do not have a torque wrench, tighten the nuts firmly with the vehicle’s wrench and have them checked by a repair shop as soon as possible.
After the wheel nuts are tightened, lower the vehicle fully and remove the jack. Do one final pass in the same star pattern. Never add extra force by standing on the wrench or using a pipe as a cheater bar, because over-tightening can damage wheel studs or make the nuts difficult to remove later.
Post-Tire Change Checklist
Before driving away, check that the compact spare is mounted flat against the hub, all wheel nuts are tight, and the jack and tools are back in the tool case. Store the flat tire face down in the compact spare tire well if your Accord is designed that way, then secure it with the wing bolt so it cannot move during a sudden stop.
Loose items can become dangerous in a crash, so do not leave the jack, wrench, handle bar, or flat tire unsecured in the cabin or trunk. Check the compact spare tire pressure with a gauge. For current Accord compact spares, the specified pressure is 60 psi (420 kPa).
TPMS and the Compact Spare Tire
Do not panic if the low tire pressure/TPMS indicator comes on after the compact spare is installed. Honda notes that this is normal with the compact spare on current Accord models. After the regular tire is repaired or replaced and reinstalled, calibrate the TPMS according to your owner’s manual.
TPMS calibration is not meant to be completed while the compact spare is installed. Set the cold tire pressure in all four regular tires before calibrating the system. If the warning light remains on after the regular tire is reinstalled and calibrated, have the vehicle checked by a Honda dealer or qualified tire professional.
Driving Safely on the Spare Tire
A compact spare tire changes how your Accord handles, brakes, and rides. Drive cautiously, avoid sudden steering or hard braking, and keep your speed under 50 mph. Replace the compact spare with a repaired or regular tire as soon as possible.
- Check pressure: The compact spare should be properly inflated before use.
- Limit speed: Keep speed under 50 mph unless your owner’s manual gives a lower limit.
- Avoid long trips: The compact spare is for temporary use only.
- Do not use tire chains: Honda warns not to mount tire chains on a compact spare.
- Use the correct spare: Do not use another vehicle’s compact spare on your Accord.
Note: Do not automatically turn off traction control or VSA just because a compact spare is installed. Current Accord guidance says Honda does not recommend driving with VSA switched off except in specific stuck-vehicle situations. Some older Honda manuals give different compact-spare VSA instructions, so follow the manual for your exact model year.
A compact spare is a short-term emergency tire. The goal is to reach a safe repair location, not to continue normal driving.
When to Call Roadside Assistance Instead
Changing a tire is not worth the risk if the conditions are unsafe. Call roadside assistance or a towing service if you are on a busy highway shoulder, the ground is soft or sloped, the jack will not sit securely, a lug nut is stuck, the spare is flat or damaged, you do not have the correct tools, or you are unsure where the jacking point is.
Roadside help is also the better choice if the tire damage is severe, the wheel is bent, more than one tire is flat, or the vehicle behaves strangely after the spare is installed.
Frequently Asked Questions
How do you put a spare tire on a Honda Accord?
Park on firm, level ground, set the parking brake, shift into Park, turn on the hazard lights, chock the diagonal wheel, loosen the lug nuts one turn, raise the car at the designated jacking point, remove the flat tire, mount the compact spare, hand-tighten the nuts, lower the car, then tighten the nuts in a star pattern.
Which way does a Honda Accord spare tire go on?
The spare should sit flat against the wheel hub, with the valve stem facing outward so you can reach it for pressure checks. Align the bolt holes with the wheel studs, then install the lug nuts by hand before tightening them with the wrench.
What is the lug nut torque for a Honda Accord spare tire?
For current U.S. Accord models, Honda lists wheel nut torque as 80 lbf·ft (108 N·m). Because torque specs can vary by model year or wheel setup, confirm the exact value in your owner’s manual.
How fast can you drive on a Honda Accord compact spare?
Keep speed under 50 mph on the compact spare. Drive gently, avoid hard turns and sudden braking, and have the regular tire repaired or replaced as soon as possible.
What pressure should the Honda Accord compact spare tire be?
Current Accord compact spares are specified at 60 psi (420 kPa). Check the pressure with an accurate gauge before driving, and check your owner’s manual or tire placard for your exact model year.
Why is the TPMS light on after installing the spare tire?
The TPMS light can come on when a compact spare is installed, and that can be normal. Reinstall a repaired or regular tire first, set the cold tire pressures, then calibrate TPMS according to the owner’s manual.
Should you turn off traction control or VSA with a Honda Accord spare tire?
Do not treat that as a universal step. Current Accord VSA guidance does not recommend driving with VSA switched off except in special stuck-vehicle situations, while some older Honda manuals differ. Follow the owner’s manual for your exact year and trim.
Conclusion
Installing a spare tire on a Honda Accord is straightforward when you follow the correct order: stop safely, secure the car, loosen the lug nuts before lifting, use the proper jacking point, mount the compact spare, tighten the nuts evenly, and drive slowly to a repair location. The compact spare is only temporary, so check its pressure, keep speed under 50 mph, and replace it with a repaired or regular tire as soon as you can.
Sources
- Honda 2025 Accord Owner’s Manual: Changing a Flat Tire — Honda Accord flat-tire procedure, compact spare pressure, speed limit, jacking safety, wheel nut torque, storage, and TPMS spare-tire behavior.
- Honda 2025 Accord Owner’s Manual: Tire Pressure Monitoring System — TPMS calibration rules and compact-spare limitations.
- Honda 2025 Accord Owner’s Manual: Vehicle Stability Assist — VSA and traction-control cautions.
- NHTSA TireWise — Tire safety, inflation, and maintenance guidance.
- U.S. Tire Manufacturers Association Tire Care and Safety Guide — Spare tire inflation checks, T-type temporary spare pressure, and spare tire maintenance.
- AAA: How to Change a Tire — General roadside tire-changing safety and when to call roadside assistance.
Related Articles

Honda Accord Lug Nut Replacement: A Step-by-Step Guide
Find out how to safely replace lug nuts on your Honda Accord and discover essential tips for optimal performance. Don't miss these crucial steps!
Read More
When and How to Replace a Honda Accord TPMS Sensor
Find out when and how to replace your Honda Accord TPMS sensor to ensure safety and performance; discover essential steps you won't want to miss!
Read More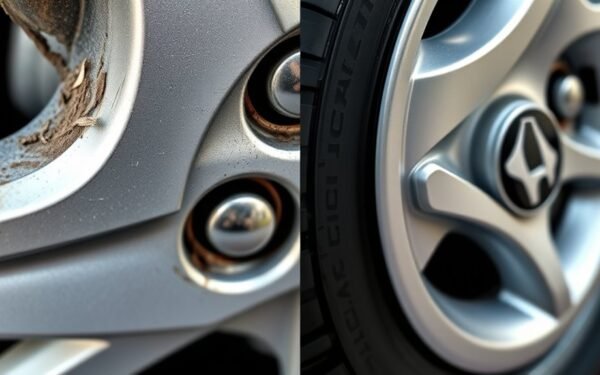
Honda Accord Wheel Rim Damage: Repair vs Replace Guide
In assessing Honda Accord wheel rim damage, understanding when to repair or replace can save you money and ensure safety—discover the key factors to consider.
Read More