
How to Change a Bike Tire: Quick Step-by-Step Flat Fix Guide

First, release the brakes, shift the chain to the smallest cog, and remove the wheel. Use tire levers to pry one bead off, then pull out the tube. Inspect the tire and tube for glass, thorns, or valve damage. Patch small punctures or replace the tube. Reinstall the tube, seat the tire evenly, and refit the wheel. Inflate to spec, then test the brakes. Keep going, and you’ll catch the finer details that make the job faster.
Key Takeaways
- Remove the wheel, release the brakes, and shift the rear derailleur to the smallest cog if needed.
- Pry one tire bead off the rim with levers, then pull out the tube carefully.
- Inspect the tire, tube, and rim for sharp objects, punctures, cracks, or damage.
- Patch the tube or replace it, then reinstall the tube and reseat the tire evenly.
- Reinstall the wheel, secure the axle or quick-release, inflate to the recommended pressure, and test the brakes.
Remove the Wheel From a Flat Bike Tire
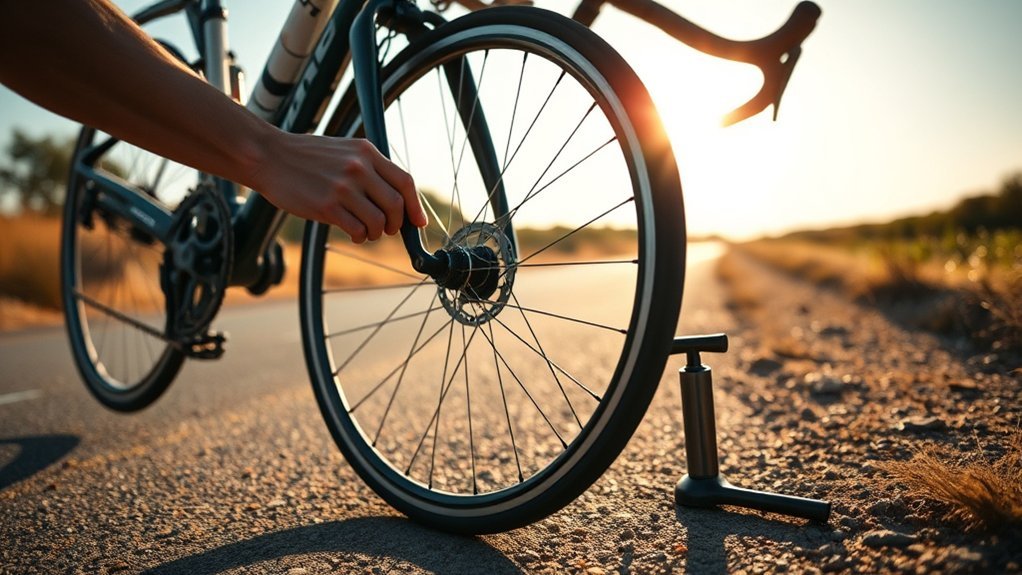
Start by releasing the brakes so the wheel can move freely; on v-brakes, squeeze the arms together, and on bikes with a quick-release brake, open the lever. Now you can remove the wheel from your flat bike with control. If you’re working on the rear wheel, shift the chain onto the smallest cog first; that reduces tension and keeps the chain from snagging. Next, loosen the quick-release axle by flipping the lever open, or use an adjustable wrench to back off a bolt-on axle completely. Hold the wheel steady and guide it straight out of the frame. On a rear setup, keep the derailleur clear as you pull the wheel away so nothing binds. Don’t force the parts; a smooth motion protects the bike and speeds the job. Practice this removal at home until you can do it confidently. When you know the mechanism, roadside repairs become simpler, faster, and more freeing. Remember, a 20×4.0-inch tire provides stability and load support, making it easier to handle during tire changes.
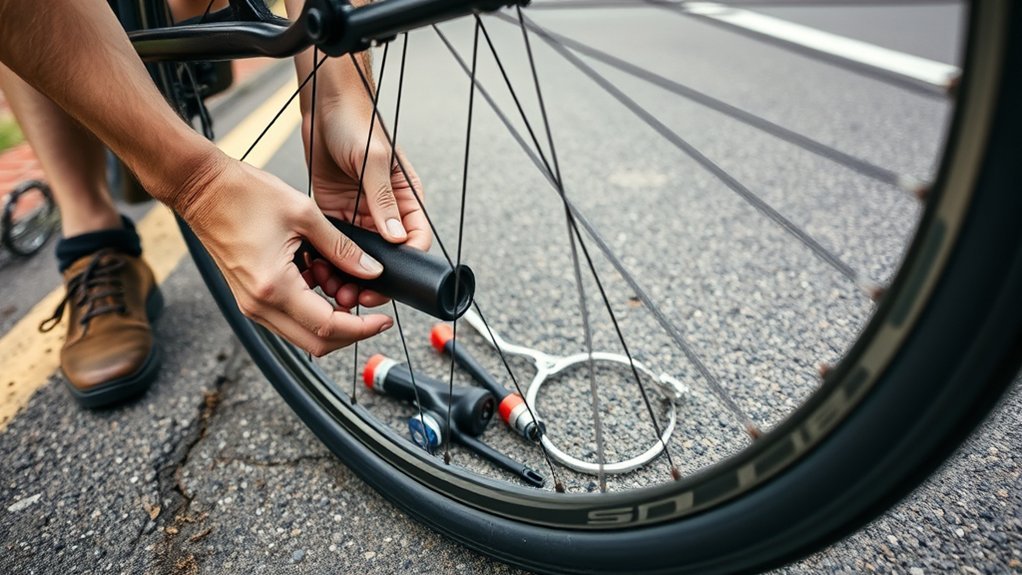
Pry Off the Tire and Pull Out the Tube
Slip a tire lever between the tire bead and the rim, then pry the bead up and slide the lever around the rim until one side of the tire pops free. Use tire levers to pry off the tire with control, not force. If the bead resists, place a second tire lever a few inches away and advance the first tire lever farther along the rim, repeating until you can remove the tire cleanly. Once one side is off, pull out the tube carefully, starting at the valve stem so you don’t tear it. After you pull out the tube, fully deflate it if any air remains; a soft tube handles easier during inspection and repair. Then inspect the inside of the tire for embedded objects, sharp wire, glass, or other debris that could have caused the flat bike tire. Keep the work deliberate and precise. Your hands should guide each step, because clean removal protects the tube, the rim, and your freedom to ride again. Having a compact repair kit on hand can make the process smoother and ensure you are prepared for any unexpected flats.
Find What Caused the Flat
With the tube out, inspect the tire’s exterior and inside surface for the cause of the flat. You’re looking to find the cause fast, then stop it from taking your freedom again.
- Inspect the tire’s exterior for visible punctures, nails, glass shards, thorns, or any embedded debris. Mark the spot if you find one.
- Inflate the tube just enough to listen for hissing sounds. If you hear air escaping, rotate the tube and narrow the leak area.
- Submerge the deflated tube in water and watch for bubbles. That shows hidden punctures or damage the eye can miss.
Also check the valve stem for cracks or cuts, since it can fail under pressure. Finally, check the rim for sharp edges or protruding spokes that can pinch or puncture the tube during inflation or riding. Remove any hazard before reassembly, and keep the wheel path smooth, clean, and ready to roll. Remember, using a tire sealant can help prevent future flats by sealing small punctures quickly.
Patch the Tube or Replace It
If the puncture is small, patch the tube only after cleaning and drying the damaged area thoroughly, then roughen the surface around the hole with sandpaper so the adhesive bonds properly. Apply the adhesive patch from your patch kit with firm pressure to achieve peak adhesion, then let it set before you proceed. If you can’t repair the tube cleanly, or if the tear is large, the valve is faulty, or the tube completely failed, replace it instead. Choose a replacement tube whose diameter and width match your tire specs exactly; that fit keeps the system efficient and safe. For quick field repairs, a patch kit can get you moving fast, but you should still carry a spare tube for emergencies. When the damage is extensive, replacement is the most reliable route, and it gives you a clean reset without wasting time. Either way, you’re making a practical choice that keeps you rolling independently. Additionally, having a tubeless tire repair kit on hand can provide an effective backup for unexpected situations.
Reinstall the Tube and Reseat the Tire
Insert the repaired or new tube into the tire and align the valve stem with the rim hole. Make sure the tube sits fully inside the tire without pinching it at any point, especially near the valve. Starting at the valve, push the tire bead back over the rim and work around until the tire seats evenly. Additionally, ensure that you have a reliable tool for everyday needs like auto shut-off tire inflators, which can help maintain optimal tire pressure.
Valve Stem Position
Position the valve stem at the top of the wheel as you reinstall the tube so you can access it easily for inflation and reduce the chance of pinching it during tire reseating. Keep the valve stem straight, then insert it through the rim hole without twisting.
- Position the tube so the valve stem stays centered.
- Begin reseating by pushing the tire bead over the rim at the valve stem first.
- Check for trapped tube by squeezing the tire; watch for bulging.
Once the tire bead sits in place, inflate slowly to the recommended pressure. Monitor both sides of the tire as you go, and stop if you see misalignment. This careful sequence gives you clean control and keeps the wheel ready to roll freely.
Seat Tire Bead
Slip the tube back into the tire with the valve stem aligned to the rim hole, then start reseating the bead at the valve area and work evenly around both sides to avoid pinching the tube. Use your hands to push the tire bead over the rim, keeping the tube centered and the valve straight. As you move around, align each section and check for bulges, twists, or trapped rubber. If the bead resists, massage it into place instead of forcing it. Once both sides seat cleanly, inflate the tire a little, then pause to inspect the rim line and confirm even seating. Finish by inflating to the recommended pressure, usually 30 to 65 PSI, and spin the wheel to check smooth rotation.
Put the Bike Wheel Back On
Align the axle with the dropouts and seat the wheel fully in the frame or fork. If you’re reinstalling the rear wheel, drape the chain over the smallest cog before you tighten the axle. Then secure the quick-release lever or axle nuts firmly, making sure the wheel sits centered and spins freely. Additionally, ensure that your tire is properly inflated using a reliable tire inflator to prevent future flats during rides.
Align Axle With Dropouts
Guide the axle into the dropouts on the frame, making sure it seats snugly without force; if you’re reinstalling the rear wheel, pull the derailleur back to open up the space the axle needs. Keep the quick-release or axle nut on the drive side, then confirm the wheel sits centered in the frame.
- Slide the axle fully into the dropouts.
- Check that the tire bead seats evenly against the rim.
- Tighten the quick-release lever or nut until secure, and keep it clear of the frame.
A clean fit gives you control and safety. If the wheel shifts, reset it before tightening again. You’re restoring motion with precision, not pressure, so let the parts align naturally and lock them down only after every contact point looks right.
Reconnect Chain And Gears
Pull the derailleur back gently and drape the chain over the smallest rear cog, then set the wheel axle into the dropouts so it seats evenly in the frame. To reconnect chain and gears, align the chain with the rear cogs, then position the derailleur so it clears the cassette and lets the wheel settle straight. Hold the wheel centered, secure the axle, and tighten the quick-release just enough to lock the hub without shifting it. Check alignment by spinning the wheel; it should spin freely and track true, with no rub on the brake pads or frame. If your bike uses them, reconnect brakes and test brake functionality before you ride. That final check keeps your setup precise, safe, and ready for clean, liberated motion on the road.
Secure Quick-Release Or Nuts
Set the wheel into the frame dropouts so it sits evenly and the axle is fully seated before you tighten anything. Pull the rear derailleur back gently if you’re reinstalling a rear wheel, then secure the wheel with a snug fit:
- Quick-release: close the lever firmly until it’s perpendicular to the frame.
- Nuts: hold the wheel steady and tighten the axle nuts with a wrench.
- Check: make sure the wheel sits centered, then spin freely and confirm the brakes engage correctly.
Don’t overdo the force; you want secure retention, not frame damage. If the wheel shifts, reopen, reseat, and tighten again. A properly mounted wheel restores safe, independent movement and keeps your ride ready for the open road.
Inflate the Tire and Test the Brakes
Inflate the tire to the pressure marked on the sidewall, using a hand pump or CO2 inflator that matches your valve type, whether Schrader or Presta. Bring the tire to the manufacturer’s recommended pressure so it runs safely and efficiently. Then visually inspect the tire bead around the rim; it should be evenly seated with no gaps or twists. Spin the wheel and watch for wobbling or misalignment, which can signal improper seating or damage. If you see a problem, deflate, reset the bead, and reinflate. Next, test the brakes by squeezing the levers firmly. Make sure the pads or rotor engage properly and stop the wheel without delay. Check that both brakes respond smoothly and that they’re functioning correctly before you ride. This final verification keeps your repair independent, your bike reliable, and your ride free. Additionally, ensure that the tire maintains consistent traction, similar to all-season tires for diverse conditions.
Frequently Asked Questions
How to Change a Flat Tire Step by Step?
First, remove the wheel, then use tire levers to unseat one bead and pull out the inner tube. Check the tire for debris and match valve types before any puncture repair. Insert a repaired or new tube, seat the bead, and inflate with an air pump to correct tire pressure. Reattach the wheel, test brakes, and use cycling tools plus maintenance tips for riding safety.
What Is the 105% Rule in Cycling?
The 105% rule says you should keep your average effort at or below 105% of your threshold power, but it isn’t a law—it’s a pacing theory you can test in cycling performance. You use it for riding tips, gear selection, and endurance training to avoid burnout. Good pressure management, tire maintenance, bike tools, flat prevention, speed techniques, and cycling safety help you stay efficient, free, and fast.
Can You Fix-A-Flat Bike Tire Yourself?
Yes, you can fix-a-flat bike tire yourself with DIY Repair. Use Tire Tools, Safety Gear, and Wheel Removal, then inspect the Rim Inspection and choose matching Tube Types. Patch or replace the tube, check Tire Brands fit, and follow Inflation Tips before reinstalling the wheel. Add Puncture Prevention to your Maintenance Checklist, test brakes, and verify pressure. You’ve got the skill, control, and freedom to keep rolling.
How to Change a Bike Tire Step?
Why wait? You change your bike tire by opening the brake, loosening the wheel, deflating it, prying one bead off, and pulling the tube out. Use bike repair tools, compare tube types, inspect for punctures, and choose tires carefully. Patch or replace the tube, then reseat the bead, inflate to proper pressure, and reinstall. These tire maintenance tips support puncture prevention methods, seasonal tire care, bike safety checks, and avoid tire changing mistakes.
Conclusion
By following these steps, you can fix a flat quickly and get back riding with confidence. For example, if you pull a thorn from the tire but skip checking the inside casing, the new tube may puncture again within minutes. Always inspect, patch or replace the tube, reseat the tire evenly, and inflate to the correct pressure. Then test the brakes before you ride. A careful repair saves time, money, and another roadside stop.
Related Articles

Sand Driving Tire Pressure: Best PSI Guide
Discover how to safely lower tire pressure for sand driving—12–18 PSI guidance, tools, and step-by-step tips await to keep you rolling.
Read More
Tire Rotation Patterns: Best Guide for Every Drivetrain
Gentlemen and drivers alike will discover which rotation pattern suits your vehicle—front-to-back, forward cross, rearward cross, or X—so keep reading to learn why.
Read More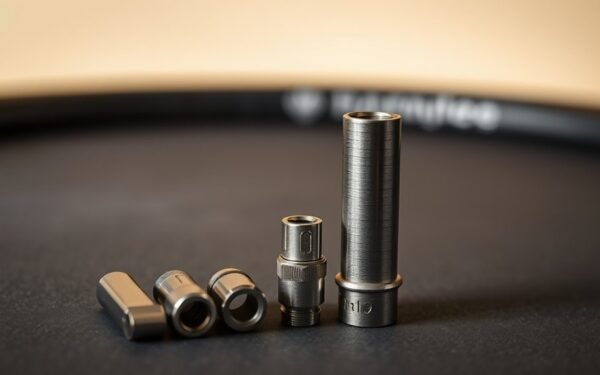
Valve Stem Length Guide: Choose the Right Size
I need to explain how to choose and extend valve stems for deep-section rims—discover which lengths, types, and tricks prevent leaks and broken cores.
Read More