
How To Do a Cab Mount Chop on a Toyota Tacoma
A cab mount chop, also called a body mount chop, is a tire-clearance modification for Toyota Tacoma builds that rub at the rear of the front wheel well. It is common on 2005–2023 Tacomas running larger tires, but it is not a casual trim job. You will be cutting near a cab/body mount, welding a reinforcement plate, sealing bare metal, and checking steering and suspension clearance afterward.
Quick Answer
A Toyota Tacoma cab mount chop removes part of the front cab/body mount and welds in a reinforcement plate to create more tire clearance. It can reduce rubbing with larger tires, but it requires careful measuring, safe lifting, grinder PPE, competent welding, rust protection, and a post-install alignment check.
Key Takeaways
- A cab mount chop helps with tire rubbing at the cab/body mount, but it will not fix every rubbing point by itself.
- Use a model-specific chop plate or template. Do not assume one measurement works for every Tacoma year or tire setup.
- Grinding and welding require eye, face, hearing, hand, fire, and ventilation protection.
- After welding, paint all bare metal, reinstall the fender liner cleanly, check alignment, and test for rubbing at full steering lock.
At a Glance
| Time Required | 3–6 hours for an experienced DIYer; longer if you are test-fitting, learning, or cleaning old coating from the mount. |
| Difficulty | Advanced DIY. Cutting is straightforward, but the weld must be strong, sealed, and clean. |
| Tools Needed | Floor jack, jack stands, wheel chocks, lug wrench, torque wrench, tape measure, paint pen, guarded angle grinder, cut-off wheels, flap disc, clamps, welder, welding helmet, PPE, primer, and rust-resistant paint. |
| Cost | Usually low if you already own tools; higher if buying a chop-plate kit, welding supplies, or paying a fabrication shop. |
Warning: This job involves lifting a vehicle, cutting steel, sparks, hot metal, and welding near a body mount. If you are not confident in vehicle support, grinder control, or weld quality, have a qualified off-road fabrication shop do the cab mount chop.
Before You Cut: Check Fitment, Year, and Rubbing Location
Do not start with the grinder. Start by confirming that the cab mount is the actual contact point. Larger tires can also rub the plastic inner fender, mud flap area, pinch seam, fender flare, bumper edge, sway bar, or upper control arm depending on tire size, wheel width, wheel offset, backspacing, caster, lift height, and suspension travel.
Many cab mount chop guides and aftermarket plates are aimed at 2005–2023 Tacoma models. If you have a 2024 or newer Tacoma, inspect the truck carefully and use parts or guidance made for that generation instead of copying older measurements. You can compare your stock tire information with the tire placard, tire sidewall, and Toyota owner resources at the Toyota Owners manuals and warranties page.
Cab mount relocation is a separate, more involved option. Some aftermarket manufacturers position relocation kits as a better choice for aggressive 35-inch tire setups where a basic chop may still leave rubbing. If your goal is maximum tire clearance, review a model-specific relocation option such as the DRT Fabrication Tacoma cab mount relocation kit before deciding.
Note: A cab mount chop does not increase suspension travel. It creates more clearance so the tire is less likely to hit the cab/body mount while steering or compressing the suspension.
Tools, Materials, and Safety Gear You Need
Gather everything before the truck is in the air. You will work faster and safer if you are not searching for clamps, discs, or paint while bare metal is exposed.
- Floor jack rated for the truck
- Two quality jack stands
- Wheel chocks
- Lug wrench and torque wrench
- Tape measure, straightedge, and paint pen
- Cab mount chop plates or a model-specific template
- Guarded 4-inch or 4.5-inch angle grinder
- Cut-off wheels and flap discs
- Clamps or locking pliers
- Welder with settings matched to the plate thickness
- Welding helmet, welding gloves, long sleeves, hearing protection, safety glasses, and face shield
- Fire extinguisher, welding blanket, primer, seam sealer if needed, and rust-resistant paint
Portable abrasive wheels should be used with proper guards, and the guard should be positioned to help deflect fragments away from the operator. Review OSHA’s portable powered tool guarding rules before using the grinder. Welding and cutting also require fire control, safe ventilation, and protection from fumes, as outlined in OSHA’s welding, cutting, and brazing requirements.
Step-By-Step Guide to Lifting and Securing Your Truck
Park on a flat, solid surface. Put the Tacoma in park or in gear, set the parking brake, and chock the rear wheels. Loosen the front lug nuts slightly before lifting the front of the truck.
- Lift the front of the truck from a strong, approved frame point.
- Set jack stands under solid frame locations on both sides.
- Lower the truck gently onto the stands and shake-test it before working near the wheel wells.
- Remove the front wheels for clear access to the cab mount area.
- Keep the floor jack lightly supporting the frame as a backup, but never rely on the jack alone.
Pro Tip: Before cutting, turn the steering from lock to lock and mark every place the tire has rubbed. The cab mount may not be the only contact point.
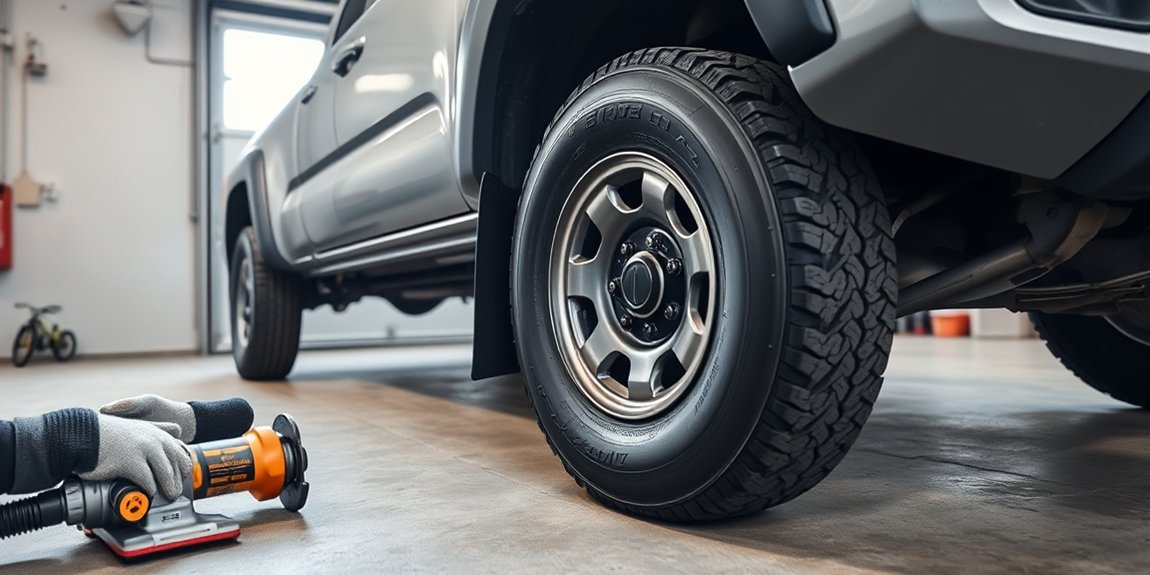
Why You Need a Cab Mount Chop for Your Tacoma
A cab mount chop is useful when larger tires contact the front cab/body mount at the rear of the front wheel well. This is common on off-road Tacoma builds with wider tires, taller tires, lower-offset wheels, or added caster after a lift.
The goal is simple: remove the interference point, close the cut area with a welded plate, then seal the metal so the mount area is protected from corrosion. Done well, the modification helps larger tires clear through steering and suspension movement. Done poorly, it can leave weak welds, sharp edges, exposed metal, alignment problems, or continued rubbing.
Vehicle modifications can also affect inspections, insurance, and warranty discussions. NHTSA administers Federal Motor Vehicle Safety Standards, and state rules can vary. Check your state requirements, your insurer, and your Toyota warranty documents before modifying a road-driven truck. A cab mount chop should not be treated as a reversible cosmetic change.
Measuring and Marking for Precision Cuts
Use a model-specific cab mount chop plate or template whenever possible. Many 2nd- and 3rd-gen Tacoma methods use a reference mark around 3.5 inches from where the frame meets the cab mount, but the template and the truck in front of you should control the final line.
- Clean dirt, undercoating, and loose paint from the cab mount area.
- Hold the chop plate or template against the mount.
- Align the lower edge so the finished plate can sit flush and fully cover the cut opening.
- Mark the cut line clearly with a paint pen.
- Leave enough material around the mount hole so the mounting area is not thinned or distorted.
- Repeat the same layout on the other side, then compare both sides before cutting.
Measure twice, mark once, and cut slowly. Removing too little material is easy to correct. Removing too much material can create a bigger welding and fitment problem.
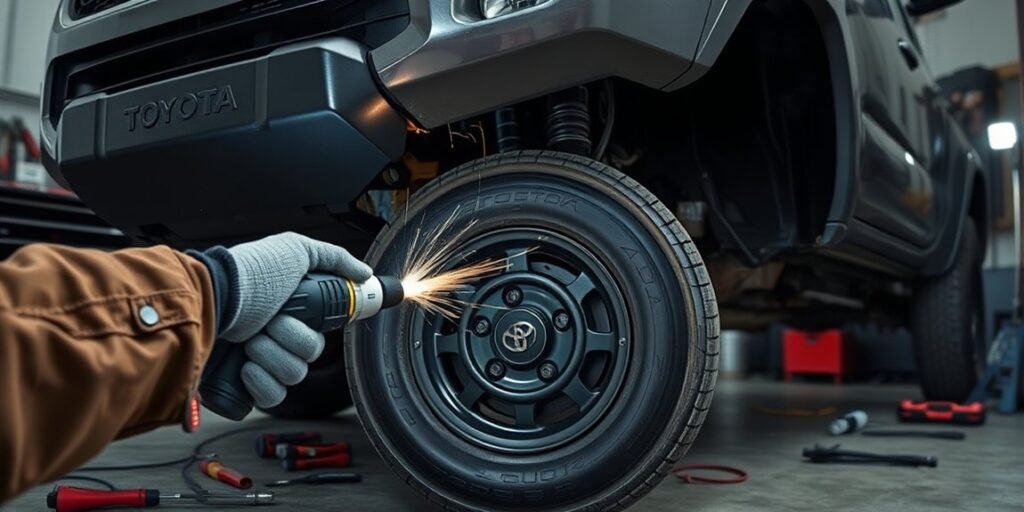
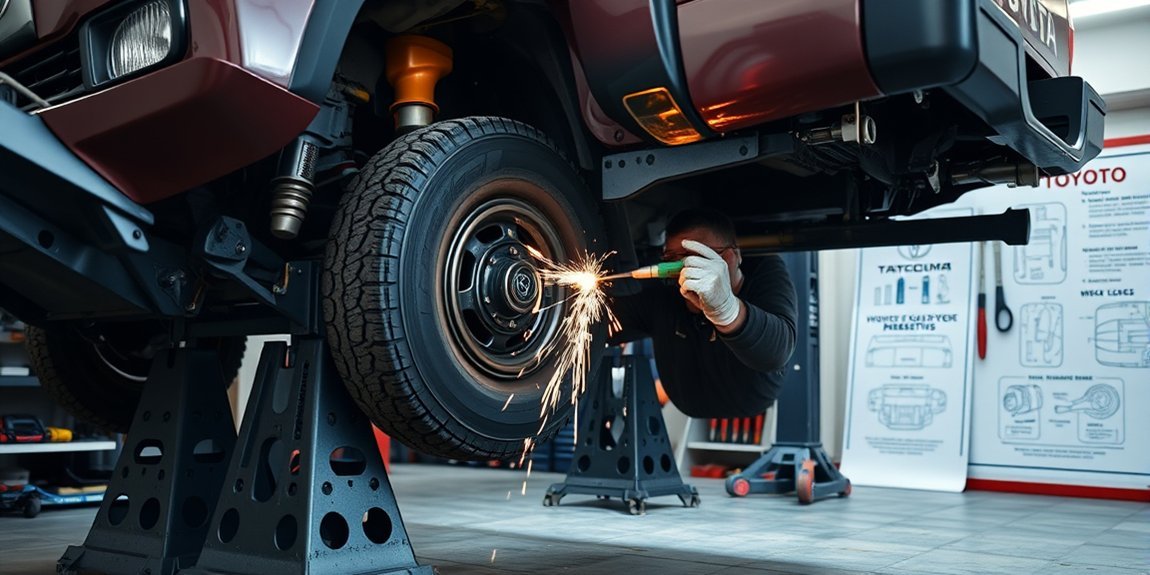
Cutting Your Cab Mount for Better Tire Clearance
Put on safety glasses, a face shield, hearing protection, gloves, and nonflammable clothing. Move plastic liners, wiring, hoses, and other flammable items away from sparks. Keep a fire extinguisher within reach.
- Use the angle grinder to score the marked line first instead of plunging through the mount immediately.
- Make shallow passes so the wheel does not bind and the metal does not overheat.
- Cut out the marked section carefully.
- Test-fit the chop plate before grinding more material away.
- Use a flap disc to smooth the cut edge and prepare clean bare metal for welding.
- Check tire clearance with the wheel temporarily fitted if needed, but do not drive the truck until the plate is welded and finished.
Warning: Do not grind without a guard, do not use cracked or damaged cut-off wheels, and do not position your face in the wheel plane. A broken abrasive wheel can cause serious injury.
Welding and Finishing Touches for Stability
The chop plate should close the opening cleanly and sit tight against the prepared mount. A 110-volt welder can be enough for some chop-plate jobs when the machine, wire, settings, and material thickness are matched correctly, but weld penetration and consistency matter more than the welder’s voltage rating.
Welding Techniques Overview
Disconnect the battery if recommended for your welding setup, remove nearby flammable materials, and protect painted surfaces from sparks. Tack weld the plate in several spots first. Check fitment, then weld in short sections to control heat. Avoid long, overheated passes that can warp the plate or burn away surrounding material.
If you cannot produce clean welds with good penetration on similar scrap steel, do not practice on the truck. Have a qualified welder finish the job.
Finishing Touches Importance
After welding, inspect the bead for gaps, pinholes, undercut, or missed edges. Grind only what is needed to remove sharp high spots. Do not grind the weld flat just for appearance if that removes too much strength.
Clean the area, then apply primer and rust-resistant paint over the weld, plate, and surrounding bare metal. If the truck sees winter roads, mud, or water crossings, take extra time sealing edges where moisture can sit.
The best cab mount chop is not the biggest cut. It is the smallest clean cut that gives the tire enough clearance and is closed with a strong, sealed plate.
Essential Adjustments After Cab Mount Chop
Once the welded area is painted and cool, reinstall the wheel and check the whole front wheel well. Larger tires often rub more than one area.
- Plastic inner fender: Trim only the sections that contact the tire, then secure the liner so it cannot flap into the tread.
- Pinch seam: Do not slice it open casually. Many off-road fabricators prefer folding the seam flat instead of cutting it because cutting can open the seam.
- Fender flare and mud flap area: Trim carefully if the tire touches at full steering lock.
- Alignment and caster: After a lift or tire-size change, get the truck aligned. Caster can move the tire closer to or farther from the rear of the wheel opening.
- Wheel offset and backspacing: Wider or lower-offset wheels can increase rubbing even if tire diameter stays the same.
Post-Installation Troubleshooting and Tips
Test the truck slowly before taking it on the road or trail. Turn the steering wheel from lock to lock on level ground. Then check clearance again with the suspension compressed, such as when pulling carefully into a driveway angle. Look for shiny rub marks, fresh cuts in the tire lugs, or liner movement.
| Problem | Likely Cause | Fix |
| Tire still rubs at the rear of the wheel well | Not enough clearance, liner movement, or caster/offset issue | Inspect rub marks, adjust liner, check alignment, and review wheel specs. |
| Rust appears around the chop plate | Bare metal, thin paint, or trapped moisture | Sand, clean, prime, repaint, and seal edges. |
| Truck pulls or steering feels off | Alignment changed after lift, tire, or suspension work | Get a professional alignment and inspect suspension components. |
| Weld has holes or gaps | Poor fit-up, contaminated metal, or incorrect welder settings | Stop driving hard use and have the weld repaired by a qualified welder. |
After the first drive, recheck the painted area, nearby wiring, fender liner fasteners, and lug nut torque using the specification in your owner’s manual. After the first trail ride, inspect again for fresh contact marks.
Frequently Asked Questions
What tools are essential for a cab mount chop?
The essentials are a floor jack, jack stands, wheel chocks, tape measure, paint pen, chop plate or template, guarded angle grinder, cut-off wheels, flap disc, clamps, welder, welding helmet, gloves, face shield, hearing protection, primer, and rust-resistant paint.
How long does a cab mount chop typically take?
Plan on about 3–6 hours if you already have the tools and welding experience. The job can take longer if the mount needs heavy cleaning, the plate needs extra fitting, or you are also trimming liners and checking alignment.
Can I perform this modification without prior experience?
You can learn what the job involves, but you should not make your first structural-area weld on your Tacoma. If you have never welded or safely used an angle grinder, have a qualified fabrication shop perform the chop.
What are the risks of not doing a cab mount chop?
If your larger tires already hit the cab mount, skipping the chop can damage tire lugs, bend or wear liners, limit steering at full lock, and create harsh rubbing during suspension compression. If the tires do not rub, a cab mount chop may not be needed.
Are there any legal considerations for vehicle modifications?
Yes. Rules vary by state and by how the truck is used. Tire size, ride height, structural modifications, inspection rules, insurance coverage, and warranty claims can all matter. Check local requirements, your insurer, and Toyota warranty documents before cutting.
Will a cab mount chop let my Tacoma run 35-inch tires?
Not by itself in every setup. Tire clearance depends on tire size, wheel width, wheel offset, lift height, caster, fender trimming, and suspension travel. Some 35-inch setups need more trimming or a cab mount relocation instead of a basic chop.
Conclusion
A Toyota Tacoma cab mount chop can be the right fix when larger tires rub the cab/body mount, especially on 2005–2023 off-road builds. The best results come from careful diagnosis, a model-specific plate or template, safe lifting, controlled cutting, strong welding, complete rust protection, and a proper post-install clearance check. If you are unsure about the welding or safety side of the job, paying a skilled fabricator is cheaper than repairing a bad cut.
Sources
- OSHA 1910.243 — Guarding of Portable Powered Tools — supports grinder guard and abrasive wheel safety guidance.
- OSHA 1910.252 — Welding, Cutting, and Brazing — supports fire prevention, ventilation, and welding/cutting safety guidance.
- Toyota Owners Manuals and Warranties — supports checking owner documentation, tire information, maintenance, and warranty resources.
- NHTSA Laws, Regulations, Authorities, and FMVSS — supports the note that vehicle modifications can involve safety-standard and regulatory considerations.
- Total Chaos — Toyota Cab Mount Chop Guide — supports cab mount chop use cases, rubbing causes, pinch seam caution, and common Toyota applications.
- DRT Fabrication — Tacoma Cab Mount Relocation — supports the distinction between a traditional cab mount chop and relocation for more aggressive tire-clearance goals.
Related Articles
Toyota Tacoma Tire Rubbing After Lift How To Fix
Unlock the secrets to solving tire rubbing issues on your lifted Toyota Tacoma, and discover essential tips for optimal performance and clearance.
Read More
Steering Wheel Shakes After New Tires on Toyota Tacoma
Uncover the common causes of steering wheel shakes after new tires on your Toyota Tacoma and learn essential tips to ensure a smoother ride.
Read More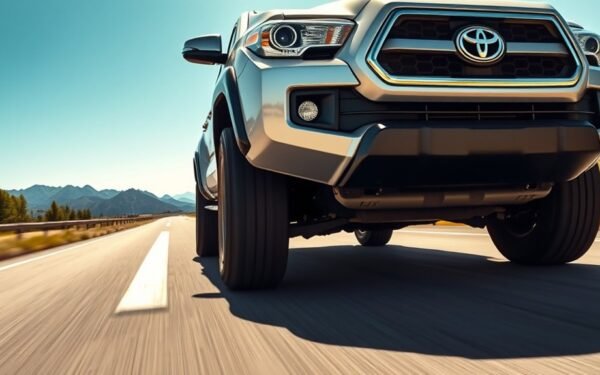
Toyota Tacoma Vibration at Highway Speed Tire Causes
Prolonged vibrations in your Toyota Tacoma at highway speeds may signal tire imbalances or suspension issues—don't ignore these signs; discover how to address them effectively.
Read More