
4Runner Hub Centric Ring Install: Tips to Avoid Problems

Hub-centric rings can help an aftermarket wheel sit precisely on your Toyota 4Runner’s hub, but only when the wheel’s center bore is larger than the vehicle’s hub pilot. The correct ring size, lug hardware, torque specification, and spacer design depend on your exact model year and wheel. Never assume that one 4Runner specification applies to every generation.
Quick Answer
You need hub-centric rings when an approved aftermarket wheel has a larger center bore than your 4Runner’s hub pilot and the wheel manufacturer specifies a ring. Match the ring’s outer diameter to the wheel bore and its inner diameter to the vehicle hub. Verify your model year, lug hardware, wheel load rating, and torque before installation.
Key Takeaways
- Do not assume every 4Runner uses a 106.1 mm hub. Toyota introduced an all-new sixth-generation 4Runner for model year 2025.
- A centering ring helps position a larger-bore wheel while the lug hardware is tightened. It cannot correct the wrong bolt pattern, offset, lug-seat design, load rating, or spacer.
- Polymer and aluminum rings can both work when they are accurately machined, undamaged, and approved for the wheel and driving conditions.
- Use the exact Toyota and wheel-manufacturer torque specification. Do not use a universal 80–100 ft-lb range.
- Persistent vibration after installation requires a complete wheel, tire, spacer, and mounting-surface inspection.
At a Glance
| Time Required | 20–45 minutes for measurement and a basic wheel installation; longer when spacers or damaged hardware require inspection |
| Difficulty | Moderate; safety-critical when lifting the vehicle or installing wheel spacers |
| Tools Needed | Digital caliper, correct socket, breaker bar, calibrated torque wrench, rated jack, jack stands, wire brush, and clean cloth |
| Cost | Centering rings are usually a low-cost fitment part; professional spacer installation, damaged studs, or wheel correction can cost considerably more |
Do You Need Hub Centric Rings on Your 4Runner?

You need a hub-centric ring only when all of the following are true:
- The aftermarket wheel is approved for your 4Runner’s bolt pattern, load, brakes, offset, and lug hardware.
- The wheel’s center bore is larger than the vehicle’s hub pilot.
- The wheel or fitment supplier specifies a centering ring.
- A correctly sized ring is available and allows the wheel to sit completely flush against the hub or spacer.
You do not need a separate ring when the wheel is already a direct hub-centric fit. Some wheels are also intentionally designed as lug-centric systems and use matched lug hardware to center the wheel. Follow the wheel manufacturer’s instructions rather than adding an unapproved ring.
Do not assume every Toyota 4Runner has the same hub specification. Toyota describes the 2025 model as an all-new sixth-generation 4Runner. An older Toyota TRD Pro replacement-wheel listing shows an approximately 106 mm hub diameter for that specific wheel, but that product specification should not be applied automatically to a 2025 or newer vehicle.
A matching six-lug pattern does not prove that a wheel fits. Center bore, lug thread, lug-seat shape, offset, brake clearance, load rating, and torque must also match.
[Products Worth Considering]

This 1/2-inch drive breaker bar delivers powerful leverage for loosening and tightening stubborn lug nuts and automotive fasteners. The 180-degree flex head helps you reach tight spaces at the angle you need, making tire and brake jobs easier. A spring-loaded ball detent design holds 1/2-inch sockets securely while the chrome-moly head provides durable strength for everyday use.

These M14x1.5 closed-end chrome lug nuts are a one-piece replacement designed for secure fitment on compatible GM, Ford, and select Chrysler/Dodge models. Featuring a 60-degree conical seat and anti-rust chrome plating, they help resist corrosion and maintain a bright look for everyday driving. Built for long-term durability, they include OEM-style part references and are backed by 12 months of support.

Upgrade your wheels with MIKKUPPA closed-end lug nuts designed for reliable fit and corrosion resistance. The one-piece, cold-forged and heat-treated steel construction helps resist rust and stripping, while the integrated finish delivers a durable black appearance. Built to OEM standards with a conical 60-degree seat, these nuts provide a secure solution for compatible Ford, Honda, Jeep, and Chevrolet models.
What Happens If You Skip Hub Centric Rings?
If a larger-bore wheel was designed to use a centering ring, leaving the ring out can make it harder to hold the wheel perfectly centered while tightening the lug nuts. The result may be highway-speed vibration, inconsistent wheel runout, or repeated balancing complaints.
Missing rings do not automatically mean that the wheel is about to detach. Wheel attachment depends on correct lug hardware, adequate thread engagement, clean and flush mating surfaces, proper torque, and compatible wheel construction. However, you should correct the fitment before normal driving if the wheel supplier requires rings.
Possible symptoms include:
- Steering-wheel or seat vibration that begins after an aftermarket wheel installation
- A wheel that can move slightly around the hub before the lug nuts are tightened
- A visible gap between the wheel center bore and the hub pilot
- Difficulty obtaining consistent wheel balance or runout readings
- A ring found cracked, distorted, loose, or missing during wheel removal
Warning: Do not drive if the wheel does not sit flat against the mounting surface, a lug nut will not thread by hand, a stud is damaged, the lug seat does not match the wheel, or the hardware will not hold the specified torque. Have the setup inspected before returning to the road.
How to Measure Hub Bore for Hub Centric Ring Fitment
A centering ring is normally described by two dimensions. The first is the wheel’s center-bore diameter, which matches the ring’s outer diameter. The second is the vehicle’s hub-pilot diameter, which matches the ring’s inner diameter. A ring may therefore be listed in a format such as “wheel bore × vehicle hub,” but you should confirm how the manufacturer writes its dimensions before ordering.
Measuring Hub Diameter
Park on firm, level ground. Loosen the wheel nuts only enough to break them free, raise the vehicle at an approved lifting point, and support it with rated jack stands. Never work under or around a vehicle supported only by a jack.
Remove the wheel and any old centering ring. Clean rust and dirt from the hub pilot without grinding away metal. Do not measure over corrosion, grease buildup, a chamfered edge, or a damaged surface.
Use this measurement process:
- Zero the digital caliper and confirm it closes correctly.
- Use the outside jaws to measure the hub pilot across clean, straight metal.
- Take readings at several positions to identify corrosion or damage.
- Use the inside jaws to measure the wheel’s center bore behind the chamfer.
- Compare your measurements with the wheel manufacturer’s published center-bore specification.
- Order a ring whose inner diameter matches the hub and whose outer diameter matches the wheel bore.
The ring should slide or press into place according to its design without forceful hammering. It must seat fully and must not prevent the wheel from contacting the hub face.
Pro Tip: Published wheel and vehicle specifications are more reliable than a single home measurement. Use the caliper to confirm the parts in front of you, then compare the result with Toyota and wheel-manufacturer documentation before ordering.
Ring Sizing Guide
| Ring Material | Practical Use | Important Limitations |
|---|---|---|
| Polymer or composite | Common street-wheel packages; corrosion-resistant and easy to remove | Replace if cracked, melted, distorted, or loose; use only within the supplier’s temperature and vehicle limits |
| Aluminum | Precise fitment and higher-heat applications when approved by the wheel supplier | Can corrode or seize to the hub; inspect during every wheel removal |
| Steel or specialty metal | Special applications supplied by a wheel, adapter, or spacer manufacturer | Do not choose it merely because the vehicle carries heavy loads; follow the component manufacturer’s design |
Material cannot correct inaccurate dimensions. A precisely sized polymer ring is preferable to a loose metal ring. The ring should not rock on the hub, fall through the wheel bore, or stand proud of the mounting surface.
Plastic or Aluminum Hub Rings: Which Works Better With Spacers?
Neither material is automatically correct for every spacer setup. A quality polymer ring can work well for normal street use when it remains within the brake and hub temperature limits specified by its manufacturer. Aluminum offers greater heat resistance but may corrode against a steel hub or aluminum wheel.
Evaluate these factors instead of choosing by material alone:
- Manufacturer approval: The wheel and spacer supplier should permit the ring design and material.
- Dimensional accuracy: The ring must fit both surfaces without looseness, binding, or deformation.
- Spacer construction: A thick spacer should provide its own correctly sized outer hub pilot rather than relying on a loose ring over a flat spacer.
- Heat exposure: Heavy braking, towing, and repeated mountain descents may justify a higher-temperature material if the supplier approves it.
- Corrosion environment: Road salt and moisture can make metal rings difficult to remove unless they are inspected regularly.
Do not stack several loose rings to bridge incompatible dimensions. Do not machine a ring by hand, glue it into place, or use a ring that prevents the wheel from seating flush.
How to Install Hub Centric Rings With Wheel Spacers
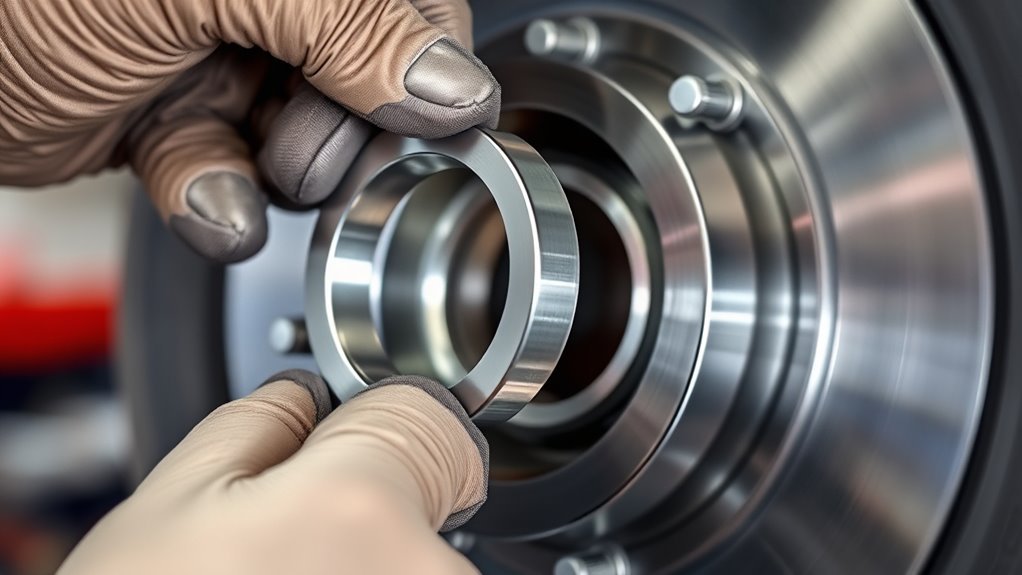
Wheel spacers add another mounting interface, another set of dimensions, and sometimes another set of fasteners. Confirm that the spacer is approved for your vehicle, wheel load, intended driving, and exact hub and stud dimensions before installation.
Spacer Compatibility Check
Complete these checks before lifting the vehicle:
- Confirm the wheel and spacer use the correct bolt pattern.
- Confirm the spacer’s inner bore fits the vehicle hub.
- Confirm the spacer has an appropriate outer pilot when its thickness covers the original hub pilot.
- Confirm the wheel center bore fits the spacer’s outer pilot directly or with an approved ring.
- Confirm the lug thread and lug-seat design match the wheel or spacer hardware.
- Confirm adequate thread engagement for slip-on spacers.
- Confirm bolt-on spacer nuts do not protrude beyond the spacer and contact the wheel.
- Confirm the wheel and spacer sit flush with no clips, rust, old rings, or debris trapped between surfaces.
- Confirm brake-caliper, suspension, fender, and tire clearance through the steering range.
A centering ring cannot compensate for the wrong spacer bore, insufficient stud engagement, an incorrect lug seat, or a spacer that lacks a required outer hub pilot.
Ring Placement Options
| Placement | When It Works | Check Before Driving |
|---|---|---|
| Ring retained in wheel bore | Common when the wheel uses a removable centering-ring system | Ring sits fully in the bore and does not protrude past the mounting pad |
| Ring fitted over hub pilot | Acceptable when the ring is designed to remain on the hub and the wheel slides over it correctly | No corrosion, binding, rocking, or gap behind the wheel |
| Hub-centric spacer with integrated outer pilot | Preferred when a spacer covers the vehicle’s original hub pilot | Spacer fits the hub, wheel fits the spacer, and both mounting faces remain flush |
| Loose stacked rings or flat spacer stack | Not recommended unless the complete system was specifically engineered and approved together | Have a qualified wheel specialist inspect the setup before use |
Proper Torque Sequence
Keep lug-nut threads, lug seats, studs, and wheel mounting faces clean and dry unless the vehicle or hardware manufacturer gives different written instructions. A thin coating of anti-seize may be used around the hub pilot when permitted, but it must not reach the studs, lug nuts, lug seats, or clamping surfaces.
Install the wheel as follows:
- Place the ring in its designed position and confirm it is fully seated.
- Fit the spacer, if used, according to its manufacturer’s procedure.
- Lift the wheel onto the hub or spacer without using the studs to drag it into alignment.
- Hand-thread every lug nut. Each nut should turn smoothly without a tool.
- Snug the nuts lightly in an opposite-side crisscross pattern while the wheel is off the ground.
- Lower the vehicle enough to prevent the wheel from turning without placing full vehicle weight on an unconfirmed installation.
- Torque the nuts in two or three stages using a calibrated torque wrench.
- Complete a final pass at the exact Toyota, wheel, or spacer specification.
- Recheck the installation after the initial driving interval specified by the wheel, spacer, or installer.
For example, the official 2023 Toyota 4Runner Owner’s Manual lists 76 ft-lb for aluminum wheels and 83 ft-lb for steel wheels. The 2025 4Runner Owner’s Manual uses different specifications for its newer wheel and hardware system. Confirm the exact value in the manual for your model year, powertrain, wheel type, and replacement hardware.
Note: An aftermarket wheel, lug nut, or bolt-on spacer may specify a procedure that differs from the original wheel procedure. When instructions conflict, stop and contact the component manufacturer or a qualified installer rather than averaging the torque values.
Hub-Mounted vs. Wheel-Mounted Rings: Which Placement Works?
Some centering rings remain in the wheel bore, while others tend to stay on the vehicle hub during wheel removal. Either arrangement can work when the ring is designed for it and all surfaces seat correctly.
A wheel-bore ring can be convenient because it stays with the wheel. Before installation, confirm that it has not fallen out, cracked, or moved beyond the wheel’s mounting pad.
A hub-mounted ring can make it easier to guide a heavy wheel into position. However, aluminum rings may seize to a rusty steel hub, and an old ring can remain unnoticed when a different wheel is installed. Remove and inspect any ring whenever changing wheel designs.
The correct placement is the one specified by the ring or wheel manufacturer. The final installation must meet four conditions:
- The ring sits fully against its locating shoulder.
- The wheel contacts the entire mounting surface.
- The ring does not carry the wheel away from the hub face.
- The lug nuts thread and seat normally.
The Star Pattern Torque Sequence for Hub Centric Wheels
A crisscross sequence pulls the wheel evenly toward the hub and reduces the chance that one side becomes clamped before the opposite side is seated. The sequence does not replace the need for clean surfaces, correct lug seats, accurate torque, and a flush wheel.
[Products Worth Considering]

Upgrade your wheels with MIKKUPPA M12x1.5 mag seat lug nuts built for secure, corrosion-resistant performance. These closed-end chrome lug nuts are a direct replacement for select Toyota models, including Camry, Corolla, RAV4, Sienna, Avalon, Highlander, Matrix, Venza, and Prius. Triple-chromium plating and cold-forged, heat-treated steel help deliver strength for daily driving and replacement needs.

The Trivd Frol 1/2" air impact wrench delivers high performance torque up to 1500 ft-lbs with a twin hammer impact mechanism for strong, balanced blows. It features an ergonomic grip, compact lightweight design, and quick-stop control with 3 forward speeds up to 8000 RPM plus a reverse speed. Built for demanding automotive repair and tire shop work, the rear exhaust helps keep debris away from the surface.

The 22800 wheel stud installer makes replacing wheel studs quick and secure, saving time and effort during tire service. It uses a ratchet or impact wrench to pull new studs firmly into place, helping when existing studs are too long. Compatible with most automotive wheels and light-duty truck wheel studs, it’s designed for easy, tool-assisted installation.
Why Star Pattern Matters
Tightening adjacent lug nuts around the wheel can trap the wheel slightly off-center or against debris. Alternating across the wheel applies clamping force more evenly.
For a six-lug wheel numbered clockwise from 1 through 6, one practical opposite-side sequence is:
- Position 1
- Position 4
- Position 2
- Position 5
- Position 3
- Position 6
The physical pattern matters more than the numbering. Move to a lug on the opposite side after each tightening step.
Proper Torque Technique
Use hand tools to start the lug nuts and a calibrated torque wrench for final tightening. An impact wrench may be used carefully for removal, but it should not be trusted to establish final torque.
Use this technique:
- Thread each lug nut by hand until its seat touches the wheel.
- Snug all nuts lightly using the crisscross pattern.
- Torque each nut to approximately half of the final specification.
- Repeat the pattern at the full specification.
- Make one confirmation pass without adding extra force after the wrench indicates the target value.
Do not continue pulling after a click-type torque wrench releases. Do not increase the specification because the vehicle will be used off-road or carry cargo. Higher torque does not compensate for the wrong hardware or an incompatible wheel.
Preventing Wheel Warping
Wheel and brake distortion is more closely associated with uneven or excessive clamping than with the centering-ring material itself. Prevent problems by cleaning the hub face, checking that the wheel is flush, tightening gradually, and using the correct torque.
Also inspect the lug-nut seat. Toyota factory wheels may use a washer-style or other vehicle-specific seat, while many aftermarket wheels use conical or spherical seats. A nut with the wrong seat may appear tight without clamping the wheel correctly.
What If Your Axle Doesn’t Protrude Past the Spacer?
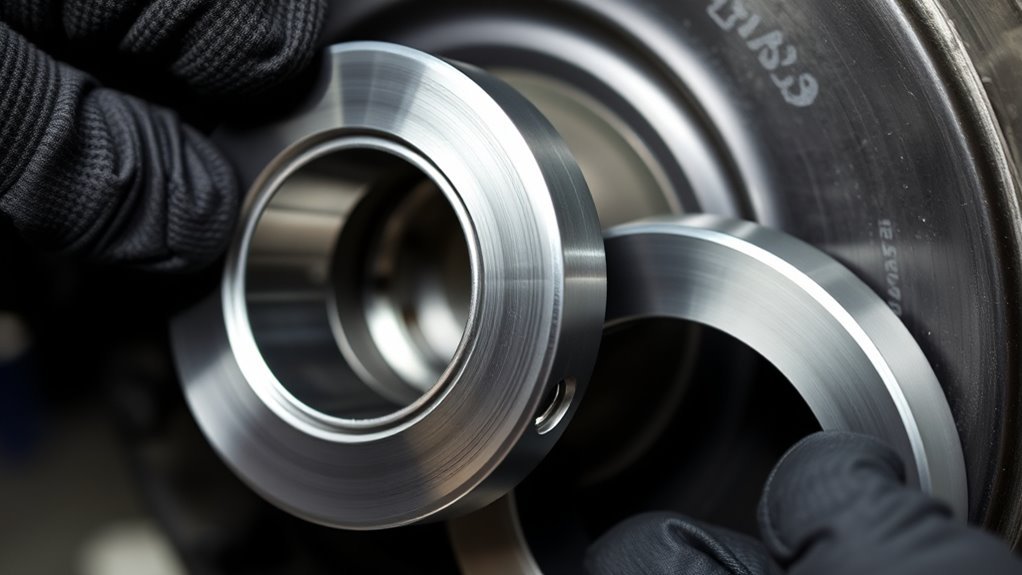
The relevant part is the hub pilot, not the axle shaft itself. If a spacer is thicker than the exposed hub pilot, the original pilot may no longer reach the wheel. A loose ring placed on a flat spacer does not create a secure, engineered outer pilot.
Use one of these solutions:
- A vehicle-specific hub-centric spacer with an inner bore that fits the hub and an outer pilot that fits the wheel
- A thinner spacer that preserves sufficient hub-pilot engagement and stud engagement
- A direct-fit wheel with the correct offset that eliminates the need for the spacer
- A professionally designed adapter when the wheel and vehicle use different approved dimensions
Do not stack universal slip-on spacers to reach a desired stance. Do not drive with lug nuts that engage only a few threads, bottom out before clamping, or sit partly outside the wheel’s lug seat.
If you cannot confirm the spacer design, wheel bore, stud length, and torque instructions, remove the spacer and have the combination inspected by a wheel specialist.
Signs Your Hub Centric Rings Are Missing or Failing
A missing, loose, cracked, or distorted ring can contribute to vibration after an aftermarket wheel installation. However, the symptom alone does not identify the cause.
Inspect the ring when you notice:
- Vibration that began immediately after changing wheels or adding spacers
- A ring that falls out of the wheel bore or rocks noticeably on the hub
- Cracks, melted areas, crushed edges, corrosion, or missing material
- Witness marks showing that the ring was trapped between mounting faces
- A wheel that shifts before the lug nuts are tightened
If the rings appear correct, continue troubleshooting:
- Verify tire and wheel balance.
- Measure radial and lateral wheel runout.
- Inspect for bent wheels, separated tires, uneven tread, and missing balance weights.
- Clean the hub and wheel mounting surfaces.
- Confirm the lug nuts match the wheel’s seat shape.
- Inspect spacer fit, spacer fasteners, and stud engagement.
- Check wheel bearings, tie rods, ball joints, control-arm bushings, and brake components.
Warning: Stop driving and arrange an inspection if you hear clunking from a recently installed wheel, find loose lug nuts, see damaged studs, feel severe steering shake, or discover that the wheel is not seated flush.
Inspecting Hub Centric Rings During Tire Rotations
Tire rotations provide a good opportunity to inspect every centering ring and mounting surface. Remove any ring that remains stuck to the hub before installing a wheel that uses a different bore or ring system.
Check each ring for:
- Cracks or splits
- Flattened or crushed edges
- Heat distortion
- Corrosion or seizure
- Excessive looseness
- Burrs that prevent full seating
- Incorrect dimensions or mixed ring sizes
Clean the hub pilot and wheel bore with suitable hand tools. Avoid aggressive grinding that removes metal or changes the fit. Replace a damaged ring rather than sanding, gluing, or reshaping it.
Before lowering the vehicle, rotate the wheel by hand and confirm that it clears the brakes and suspension. After final torque, check tire pressure and follow the wheel or installer’s retorque recommendation.
Frequently Asked Questions
Will not having hub-centric rings cause problems?
It can cause centering difficulty or vibration when a larger-bore aftermarket wheel was designed to use rings. It does not automatically prove that the wheel is unsafe or about to detach. Correct lug hardware, full thread engagement, clean mounting surfaces, proper torque, and complete wheel compatibility remain essential.
How long do hub-centric rings last?
An undamaged ring can last through many wheel-service cycles. Replace it whenever it becomes cracked, distorted, melted, corroded, loose, seized, or unable to sit fully in its locating bore. Inspect all rings during every tire rotation or wheel removal.
Are hub-centric rings supposed to be tight?
They should fit snugly enough to center the wheel without rocking, but they should not require destructive force. The ring must seat fully and must not hold the wheel away from the mounting face. Follow the ring manufacturer’s fit and installation instructions.
Do all Toyota 4Runners use 106.1 mm hub rings?
No. Many earlier 4Runner wheel references use approximately 106.1 mm, but Toyota introduced an all-new sixth-generation 4Runner for model year 2025. Verify the vehicle hub and wheel bore for your exact model year instead of ordering by vehicle name alone.
Are plastic hub rings safe?
Quality polymer rings are commonly used for approved street-wheel packages. They must be accurately sized and kept within their manufacturer’s temperature and load-related application limits. Replace them if they crack, deform, melt, or become loose.
Can a hub-centric ring fix an incompatible wheel or spacer?
No. A ring can reduce a larger wheel bore to match a smaller hub pilot. It cannot correct the wrong bolt pattern, a center bore that is too small, incorrect offset, insufficient brake clearance, the wrong lug seat, low wheel load capacity, inadequate stud engagement, or a spacer without the required hub structure.
Sources
- Toyota: The All-New 2025 Toyota 4Runner — confirms the sixth-generation model change and new platform context.
- Toyota Genuine TRD Pro replacement wheel — provides a Toyota wheel-specific hub-diameter example.
- Toyota 2023 4Runner Owner’s Manual — supports model-year-specific wheel-nut torque and wheel-service guidance.
- Toyota 2025 4Runner Owner’s Manual — supports sixth-generation wheel, hardware, and torque verification.
- Tire Rack: What Is a Wheel Centerbore? — explains wheel center bores and the centering function of hub rings.
- Tire Rack wheel-installation guide — supports clean mounting surfaces, thread engagement, crisscross tightening, torque-wrench use, restricted anti-seize placement, and post-installation checks.
Conclusion
Hub-centric rings are useful fitment components when an approved aftermarket wheel has a larger center bore than your Toyota 4Runner’s hub pilot. Their job is to keep the wheel accurately centered during installation, not to rescue an otherwise incompatible wheel or spacer.
Measure both diameters carefully, verify your exact model year, use the correct lug hardware, keep the mounting surfaces clean, and torque the wheel to the specification in the applicable Toyota and component manuals. If the spacer covers the original hub pilot, use a properly engineered hub-centric spacer rather than an improvised ring stack. Persistent vibration, damaged hardware, or uncertain fitment should be inspected professionally before highway or off-road driving.
[Products Worth Considering]

This car D-wheel lock nut key provides an anti-theft solution for D-shaped wheel lock bolts, helping keep your wheels secure. It features a flower-shaped internal pattern that resists micro-adjustment theft while allowing removal and mounting of compatible locking nuts. Made for reliable performance under high torque, it’s easy to use with standard socket wrench turning for quick tire maintenance and emergency repairs.

These aluminum alloy tire valve stem caps with an O-ring seal help protect valve stems from corrosion while adding a clean, stylish look to your vehicle. The universal fit works across cars, trucks, motorcycles, bicycles, and more, making them an easy upgrade for everyday driving and off-road use. Installation is quick, and the included four-pack keeps all your tires dressed and protected.

The SEESII cordless impact wrench delivers high tightening and loosening power for fast wheel bolt and industrial bolt work. Its brushless motor and variable-speed 3 forward/2 reverse modes help you control precision installs and stubborn nut removal. A dual-battery system with rapid charging and an included storage case make it ready for home, car, and jobsite use.

Related Articles

When to Switch From All-Season to Winter Tires on a 4Runner
Ineffective all-season tires in cold weather can jeopardize your safety—discover when to make the crucial switch for better traction and handling.
Read More
4Runner Tire Mileage: How Many Miles Should They Last
Curious about how long your 4Runner tires should last? Discover essential tips and factors that influence tire longevity.
Read More
How Long Do Toyota 4Runner Tires Typically Last
How long do Toyota 4Runner tires typically last? Discover the factors that influence tire longevity and essential tips for maintenance.
Read More