
How to Change a Flat Tire on a Toyota 4Runner Safely
To change a flat tire on your Toyota 4Runner safely, first find a stable, well-lit location away from traffic. Gather your tools: a tire jack, lug wrench, and wheel wedges. Loosen the lug nuts with a star pattern, then jack up the vehicle securely. Remove the flat tire and mount the spare, ensuring it’s properly aligned. Tighten the lug nuts in a star pattern, lower the vehicle, and check again for security. There’s more to explore on preventing common issues.
Find a Safe Location to Change Your Tire
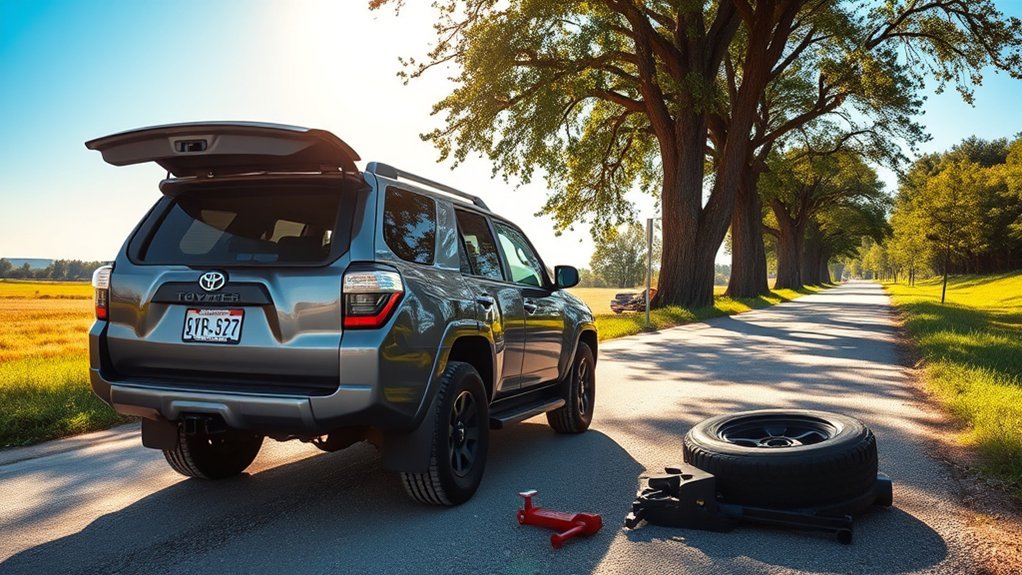
When you get a flat tire, the first step is finding a safe location to change it. Pull over to a flat, stable area away from traffic. This prevents accidents and guarantees your safety while working on the tire. If possible, choose a well-lit spot visible to other drivers, especially at night, to enhance your safety. Avoid soft or uneven surfaces; a jack can sink or tip, leading to injury or further damage to your vehicle.
Keep your hazard lights on to alert other drivers about your situation. If you can’t find a safe location, don’t hesitate to call for roadside assistance. It’s essential to prioritize your safety over trying to change the tire in a risky environment. Remember, taking these precautions not only protects you but also allows you to reclaim your time and freedom on the road.
Get Your Tools Ready for Tire Change
Before changing your tire, gather essential tools like a tire jack, lug wrench, and wheel wedges to secure your vehicle. Check the spare tire’s pressure and condition, ensuring it’s suitable for use. Don’t forget to keep a high-visibility vest handy for safety, especially in public areas.
Essential Tools Required
Changing a flat tire on your Toyota 4Runner requires three essential tools: a tire jack, a lug wrench, and wheel wedges. When selecting a tire jack, consider the various tire jack types available, such as scissor or hydraulic jacks, to guarantee stability. For the lug wrench, you have options like a standard cross wrench or a telescopic model, both designed to provide the leverage needed to loosen tight lug nuts. Wheel wedges are vital for preventing your vehicle from rolling while you work. Additionally, check your spare tire’s PSI with a tire air gauge to confirm it’s adequately inflated. Always refer to your owner’s manual for specific instructions tailored to your model.
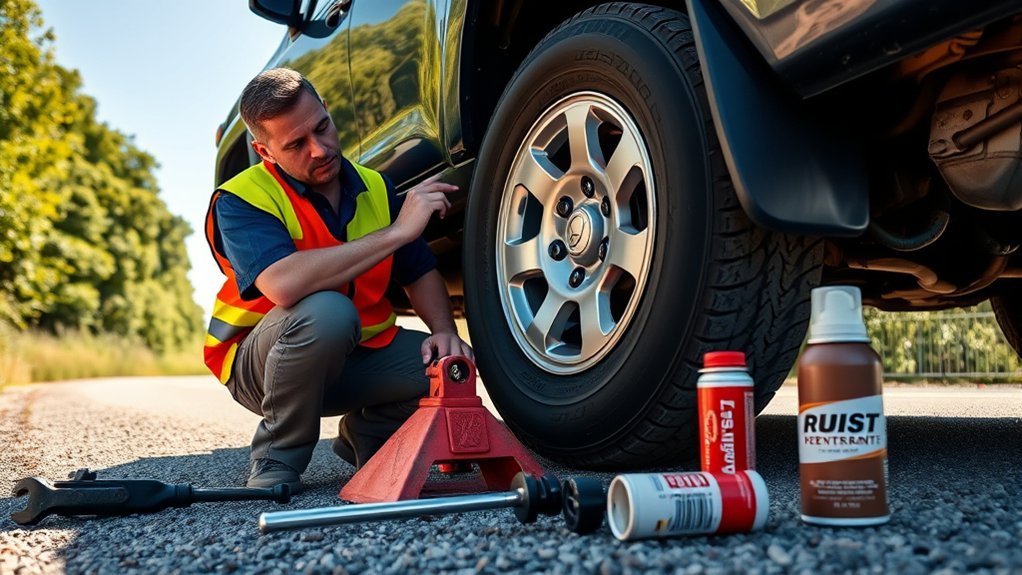
Safety Gear Considerations
Proper safety gear is essential for a smooth tire change on your Toyota 4Runner. Before you start, gather a tire jack, lug wrench, and wheel wedges. These tools facilitate the process and enhance your safety. When working in public areas, wear a high-visibility vest to improve your visibility to passing vehicles—this is a vital visibility enhancement. Keep a tire air gauge handy to check your spare tire’s pressure, ensuring it meets the necessary PSI for safe driving. Always refer to the Owner’s Manual for correct jack placement to prevent accidents. Additionally, consider wearing gloves to protect your hands from dirt and sharp edges while handling the tire and tools, adding another layer of safety.
Loosen Those Lug Nuts First
Loosen those lug nuts before you lift the vehicle. Use your lug wrench to turn each nut about half a turn counterclockwise while the tire remains on the ground. This prevents the wheel from spinning, allowing for better leverage. Employing proper lug nut techniques is essential; remember to loosen them in a star pattern for even pressure and to avoid warping the wheel.
| Step | Action | Note |
|---|---|---|
| 1 | Loosen each lug nut | Half a turn counterclockwise |
| 2 | Follow a star pattern | Guarantees even pressure |
| 3 | Don’t fully remove the nuts | Stabilizes the wheel |
| 4 | Check for corrosion | Use corrosion solutions if stuck |
| 5 | Refer to Owner’s Manual for specifications | Guarantees compliance |
If you encounter stubborn lug nuts, applying a penetrating oil can facilitate easier loosening.
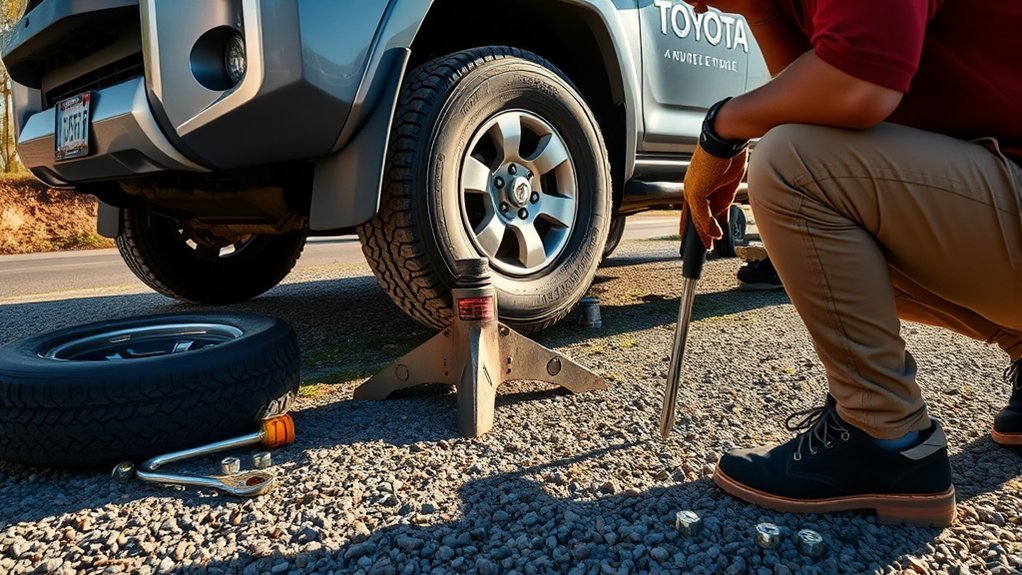
Jack Up Your 4Runner Safely
After you’ve loosened the lug nuts, it’s time to jack up your 4Runner safely. Follow these steps to guarantee jack stability and proper jack placement:
- Consult the Owner’s Manual: Identify the correct jack placement points for your model.
- Choose a Flat Surface: Make sure your 4Runner is parked on stable ground to prevent any rolling.
- Engage the Parking Brake: This secures the vehicle in place during the jacking process.
- Use Wheel Wedges: Place them against the opposite tires to further stabilize the vehicle.
Position the jack under the designated lifting points to guarantee safety. Lift the vehicle until you have enough clearance under the tire for easy removal and replacement. By following these steps, you empower yourself to handle this task confidently, ensuring your safety and that of your 4Runner.
Remove the Flat Tire and Prepare the Spare

With the vehicle securely lifted, it’s time to remove the flat tire and prepare the spare. First, loosen the lug nuts with the lug wrench. If the wheel is stuck, gently kick the sidewall or use a long-handled sledgehammer, making sure the lug nuts remain on to prevent the tire from flying off. Once the tire is free, inspect your spare tire for proper pressure and condition; this is vital for safety and functionality.
Slide the spare tire onto the lug bolts until it’s flush against the hub. Hand-tighten the lug nuts until you feel resistance. Lower the vehicle until the spare touches the ground but isn’t fully weight-bearing. Now, tighten the lug nuts in a star pattern to guarantee even distribution. Don’t forget to think about tire disposal options for the flat tire, and make sure regular spare tire maintenance to avoid future issues.
Install the Spare Tire Correctly and Securely
Once the flat tire is removed and the spare is prepared, you need to confirm the spare tire is installed correctly and securely. Follow these steps to guarantee proper tire alignment and maximize safety:
- Check Inflation: Verify your spare tire is properly inflated and in good condition; remember, a donut spare should not exceed 50 miles of driving.
- Position the Valve Stem: Align the spare tire’s valve stem outward to confirm correct mounting orientation on the lug bolts.
- Slide and Seat: Slide the spare tire onto the lug bolts until it’s flush against the hub, confirming it’s seated correctly.
- Hand-Tighten: Hand-tighten the lug nuts until you feel resistance, securing the spare tire to the hub.
Lower the Vehicle and Tighten the Lug Nuts
Carefully lower the vehicle until the spare tire just touches the ground, guaranteeing it remains stable during the tightening process. This is critical for tire stability, as an unstable spare can lead to improper attachment. Once it’s in place, use your lug wrench to tighten the lug nuts in a star pattern. This method promotes even distribution and secure attachment of the spare tire to the hub.
Tighten each lug nut until you feel resistance, which indicates a firm fit. This step is important to prevent any loosening while you drive. After fully lowering the vehicle, perform a final check by re-tightening the lug nuts to confirm they’re secure. Always inspect the spare tire for proper pressure and condition before installation, as a well-maintained tire is essential for safe driving. Following these steps guarantees that you’re ready to hit the road again with confidence.
Troubleshooting Stuck Tires During Your Change
When you encounter a stuck tire during your change, it’s essential to understand the techniques to free it effectively. Common causes include corrosion between the wheel and hub, which can be mitigated with proper preventive maintenance. Knowing how to troubleshoot these issues will guarantee a smoother tire change experience.
Techniques for Stuck Wheels
Stuck wheels can be a frustrating hurdle when changing a flat tire on your Toyota 4Runner. Employ these effective wheel removal techniques and tire loosening methods to liberate your vehicle:
- Kick the Sidewall: Gently kick the tire’s sidewall to loosen it, ensuring the lug nuts remain on.
- Use a Sledgehammer: Strike the tire with a long-handled sledgehammer, rotating it between hits to prevent warping.
- Drive in a Circle: As a last resort, carefully drive in a circle to pop the wheel loose, but proceed with caution.
- Prevent Future Sticking: Regularly rotate tires and apply grease around the hub cover to avoid future issues.
Always prioritize safety and avoid putting any body parts under the vehicle during this process.
Common Causes of Sticking
Corrosion between dissimilar metals often causes tires to stick, particularly in wet environments. This corrosion affects wheel bonding, making it difficult to remove the tire during a change. Regular maintenance can help mitigate this issue.
| Cause of Sticking | Solution |
|---|---|
| Corrosion | Apply grease around the hub cover |
| Uneven wear | Rotate tires regularly |
| Wet conditions | Drive in circles as a last resort |
| Accumulated dirt and grime | Clean the hub area before changes |
| Excessive torque on lug nuts | Verify proper torque settings |
Being aware of these common causes can help you troubleshoot effectively and promote a smoother tire change.
Preventive Maintenance Tips
To guarantee a smooth tire change, regular preventive maintenance is essential. By staying proactive, you can avoid the frustration of stuck wheels. Here are some tips to contemplate:
- Rotate your tires regularly to prevent corrosion and sticking, especially in wet environments.
- Apply grease around the hub cover to make future wheel removal easier.
- Clean the spare tire and wheel after removal to avoid dirt buildup that contributes to sticking.
- Use a rubber mallet or pipe for leverage to dislodge stuck wheels without damage.
Frequently Asked Questions
What Should I Do if My Spare Tire Is Flat?
If your spare tire’s flat, check your emergency supplies for a tire inflator or sealant. Regular spare tire maintenance is essential; consider getting it repaired or replaced to guarantee you’re prepared for future emergencies.
How Often Should I Check My Spare Tire’s Pressure?
You should check your spare tire’s pressure monthly for ideal spare tire maintenance. Regular pressure monitoring guarantees it’s ready when you need it, preventing surprises and securing safety during emergencies on the road.
Can I Drive on a Spare Tire Long-Term?
You can’t drive on a spare tire long-term; it’s like using a band-aid for a broken leg. For safety’s sake, prioritize spare tire longevity and replace it with a full tire as soon as possible.
What if I Can’t Loosen the Lug Nuts?
If you can’t loosen the lug nuts, try using a breaker bar or a torque wrench for better leverage. Applying penetrating oil can help too. These tire changing tips will empower you to tackle stubborn nuts effectively.
Is It Safe to Change a Tire in the Rain?
Yes, it’s safe to change a tire in the rain if you follow proper tire changing techniques. Use rain safety tips like wearing waterproof gear, ensuring your footing’s stable, and staying visible to passing vehicles.
Conclusion
Changing a flat tire on your Toyota 4Runner may seem intimidating, but with the right steps, it’s a breeze. Remember, safety’s your best ally—secure your vehicle and keep your tools at hand. Like a well-oiled machine, each step leads you closer to hitting the road again. Follow these guidelines, and you’ll not only replace that tire efficiently but also gain confidence in your ability to handle unexpected roadside challenges. Drive safe!
Related Articles

How to Store Seasonal Tires for Your Toyota 4Runner
Uncover the hidden storage mistakes that could ruin your 4Runner's tires before next season.
Read More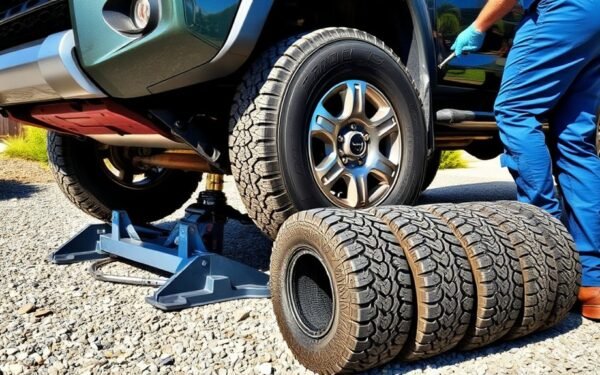
How to Rotate Tires on a 4Runner the Right Way
Unlock the secrets to properly rotating tires on your 4Runner for optimal performance; discover the essential steps to ensure a smooth ride.
Read More
4Runner Tire Pressure in Cold Weather: Adjusting for Winter
Maintaining proper 4Runner tire pressure in winter prevents dangerous blowouts, but most drivers ignore this critical adjustment until it's too late.
Read More