How to Store Inner Tubes the Right Way
How to Store Inner Tubes Safely
Last updated: July 7, 2026
To store an inner tube, deflate it fully, clean and dry it, roll it smoothly without sharp creases, cap the valve, wrap it in a soft cloth or sock, and place it in a sealed bag with a light dusting of talcum powder or tube-safe dusting powder. Keep it in a cool, dry, dark indoor spot away from sunlight, heat, solvents, and electric motors. Recheck stored tubes every 2–3 months by inflating them only enough to hold shape, then inspect for leaks, cracking, valve damage, and sticky or brittle rubber.
This method works because rubber lasts longer when you reduce friction, moisture, UV exposure, heat swings, and ozone exposure. Tire-storage guidance uses the same basic rubber-care logic: keep rubber clean, dry, out of direct sun, and away from ozone sources such as electric motors. Tire Rack’s tire storage guide gives the same core storage warnings for tire rubber.
Quick Answer
- Deflate and roll: Remove the air, flatten the tube gently, and roll it without twists or sharp bends.
- Protect the rubber: Wrap the tube in a clean sock or soft cloth, then place it in a sealed plastic bag with a tiny amount of talc.
- Protect the valve: Keep the valve cap on and avoid pressing the metal valve stem into the rubber.
- Store safely: Choose a cool, dry, dark place away from sunlight, heaters, solvents, fuels, pumps, and electric motors.
- Maintain it: Inspect and lightly inflate stored tubes every 2–3 months so you catch slow leaks, cracking, or brittle rubber early.
| Step | Do This | Why It Helps |
|---|---|---|
| 1 | Clean and dry the tube | Removes grit, moisture, and oils that can damage rubber |
| 2 | Roll without sharp creases | Reduces stress points and makes the tube easier to inspect |
| 3 | Wrap in cloth or a sock | Prevents rubbing against tools, bag seams, and valve stems |
| 4 | Seal in a plastic bag | Blocks dust and limits moisture exposure |
| 5 | Recheck every 2–3 months | Finds leaks, cracks, and brittle spots before a ride |
Quick Folding Steps for an Inner Tube
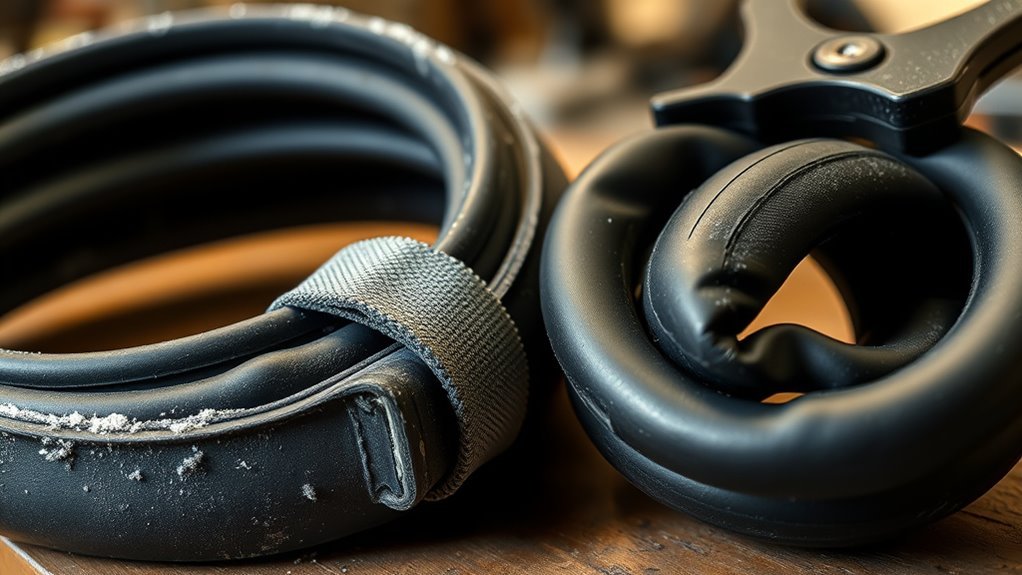
Start by fully deflating the inner tube. Press the tube flat with your hands instead of forcing it into a hard fold. Roll it from the end opposite the valve toward the valve area so trapped air can escape as you go. Keep the roll smooth and stop if a sharp crease forms.
Do not use rubber bands to hold the roll. They can press into the rubber, become sticky with age, and leave the tube compressed in one spot. Use a clean sock, cloth sleeve, or lightweight fabric wrap instead. Put the wrapped tube inside a resealable plastic bag, add only a light dusting of talcum powder, and keep the valve cap installed. Store the bag indoors in a stable, dry, dark place.
Tools and Protective Materials to Pack a Tube
You only need a few simple items to pack an inner tube safely: a soft wrap, a resealable plastic bag, a valve cap, and a tiny amount of talcum powder or tube-safe dusting powder. Add a patch kit and a compact pump if the tube will stay in a saddlebag or repair kit.
[Products Worth Considering]

High-performance Vulcanizing Fluid: The bike tire patch kit contains 24 ml quick-drying vulcanizing fluid with high viscosity, which can repair tires quickly and efficiently. Combined with the patch, you can start riding again in just a few minutes

Repair puncture related flats on ATVs, mowers, bicycles and wheelbarrows

Slime's SKABS are a simple, one step solution to a punctured tyre and no glue or cement required, means no mess
Protective Wrapping Options
A simple wrap protects the folded tube from grit and rubbing. An old sock, lightweight nylon sleeve, or clean lint-free cloth works well. Avoid oily rags, adhesive tape, and rubber bands. Always leave the valve cap on, and position the valve so it does not dig into the tube during storage.
| Wrap Option | Best Use | Watch Out For |
|---|---|---|
| Old sock | Saddlebag or garage storage | Shake out grit before reuse |
| Nylon sleeve | Low-bulk packing | Avoid rough seams |
| Soft cloth | Storage bin or drawer | Use clean, dry fabric only |
| Resealable bag | Dust and moisture control | Dry the tube before sealing |
Essential Packing Tools
Once your tube is wrapped and bagged, keep repair basics nearby. Proper packing prevents damage and makes the tube easier to install later. Secure the valve cap, skip rubber bands, and keep everything dry.
- Old sock, nylon sleeve, or lint-free cloth for a protective wrap
- Resealable plastic bag plus a small amount of talcum powder
- Valve cap, plus one spare cap in your repair kit
- Patch kit for small punctures found during inspection
- Compact pump or inflator for pre-ride leak checks
- Small labeled container or drawer for indoor storage
These items keep the tube clean, reduce friction, and protect it from moisture, heat, and sunlight.
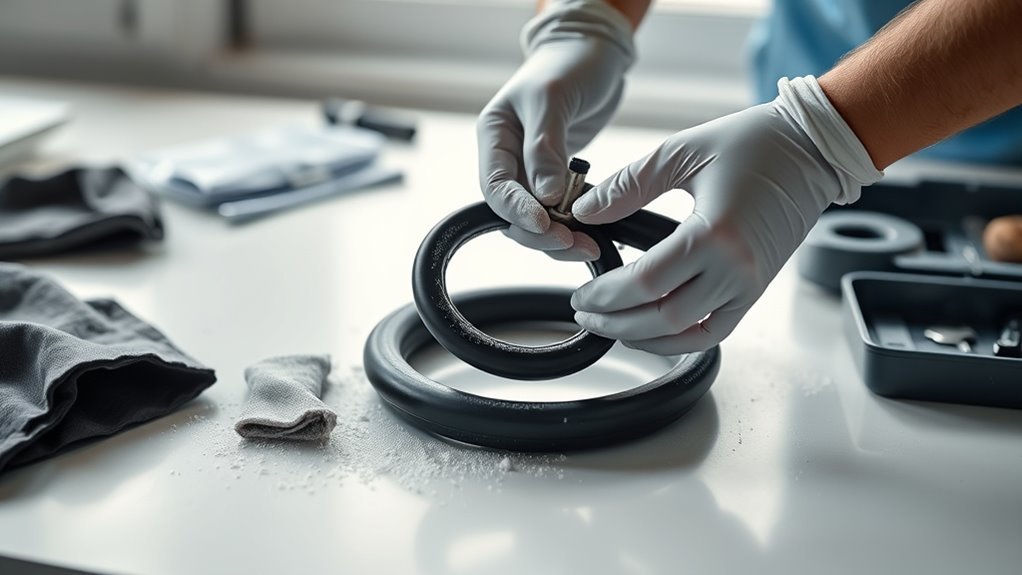
Inspect and Clean the Tube Before Storage
Before packing an inner tube away, inspect it closely. Look for cuts, punctures, thinning rubber, sticky areas, cracking, or other signs of wear. Inflate it just enough to give it shape, then run your fingers around the full tube. Pay special attention to the valve base, seams, and any area that sat near a tire cut or rim hole.
Clean the tube with mild soap and water if it has grit, sealant residue, or road oil on it. Rinse it thoroughly, pat it dry with a lint-free cloth, and let it air-dry completely away from direct heat. Do not apply tire dressing, oil, fuel, solvent, or harsh cleaner. If the tube feels brittle, cracked, or sticky after cleaning, replace it instead of storing it as a spare.
Roll and Fold an Inner Tube: Step-by-Step
Now that the tube is clean and inspected, it is time to fold and roll it. Start by flattening the tube to remove excess air. Roll it steadily from one end toward the valve. Do not trap air or create sharp kinks. Secure the rolled tube in a soft wrap. Place it in a sealed bag with a small amount of talc to reduce sticking.
Clean And Inspect Tube
Wipe the inner tube down with a damp cloth to remove dirt and oil. Inflate it slightly and run your hands over the surface to check for cuts, punctures, or slow leaks. Catching damage early prevents flat tires later on. Store your tubes in a stable environment away from sunlight and chemicals.
- Remove dirt and debris with a soft, damp cloth.
- Inflate slightly and listen or feel for escaping air.
- Mark and patch small punctures before folding.
- Replace tubes with large cuts, cracking, sticky rubber, or damaged valves.
- Avoid sharp bends or creases that stress the rubber.
- Place the clean tube in a protective wrap to block moisture and dust.
Inspect valves for corrosion, loose cores, tears at the base, or missing caps. Never store a compromised tube as your only spare.
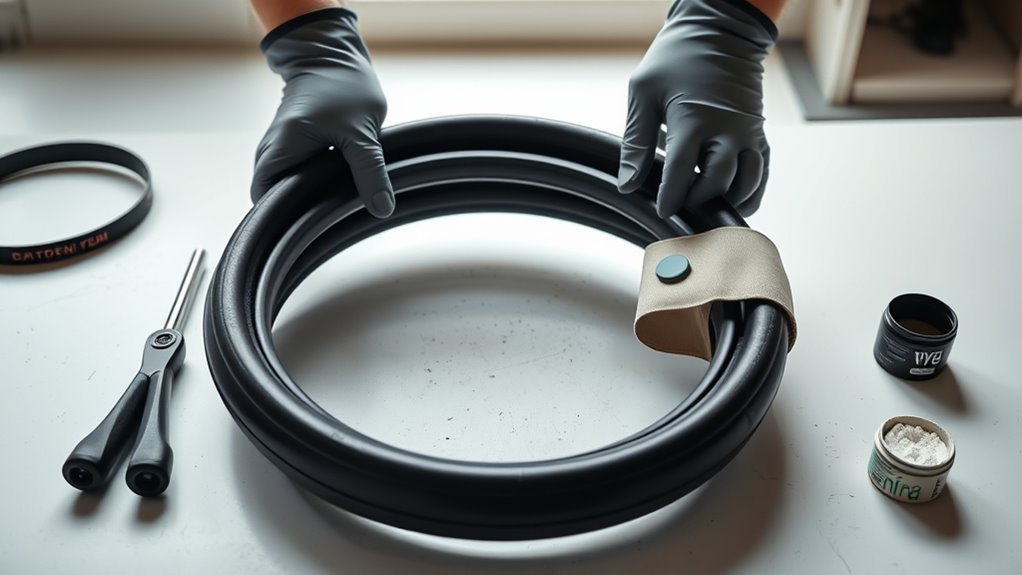
Fold And Roll Tightly
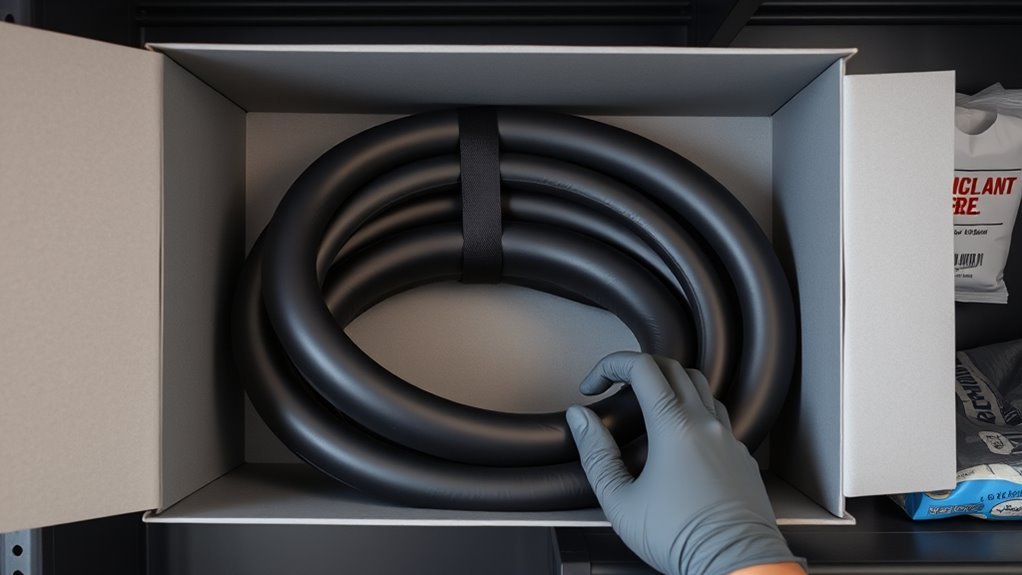
Deflate the tube completely. Start rolling it tightly from the end opposite the valve. Keep it flat and free of twists or kinks. Keep steady pressure as you roll, and stop if you feel a sharp fold forming. Once fully rolled, slip a lightweight cover, like an old sock, over the rubber. You can also fold the tube in half and then roll it, as long as the bends stay smooth. Drop the folded tube into a resealable plastic bag. Always cap the valve before storing it to prevent punctures and thread damage. These steps help keep the tube ready for your next repair.
Pack Tubes Safely: Socks, Ziplocks, Powder, Valve Caps
If you want your spare tubes to survive the ride in your saddlebag, pack them carefully. Wrap each one in an old sock or nylon sleeve. Place it in a resealable plastic bag with a small amount of talcum powder. Screw on the valve cap before sealing the bag. The powder helps reduce sticking, the sock stops rubbing, and the cap protects the valve stem.
Wrap spare tubes in a sock, add a little talc, cap the valve, and seal the bag so the tube stays clean, protected, and ride-ready.
- Wrap the tube in a clean sock or nylon sleeve.
- Add only a light dusting of talcum powder inside the bag.
- Screw on the valve cap before sealing.
- Use resealable bags to block dirt and moisture.
- Keep the tube away from multi-tools, tire levers, and sharp objects.
- Inspect periodically and inflate briefly.
Avoid rubber bands and tight straps because they can leave the tube compressed in one place. Rotate your spare tubes occasionally so one tube does not sit under the same pressure point for months.
[Products Worth Considering]

LARGE SPACE: Bike bag has enough inside room for long rides, holds a lot of stuff like phone, battery, energy gel, small tire pump, repair kits, keys, wallet etc. Perfect compatible with cellphones below 7 inches, compatible with the most popular phone, shake-proof bike front frame bag(Phone compatibility: fits phones up to 7 inches with slim cases only)

NEW INSTALLATION: The innovative binding system uses elastic cords to securely fasten at 3 points on the bike frame and can be tightened. This offers a potentially more secure and stable fastening solution compared to traditional hook-and-loop fastening methods.

Essential Bike Repair Tool Professional Kits: NDakter bicycle accessories include a bike triangle frame bag, 120PSI bicycle pump, 16 in 1 multi function bicycle tool, bike patch kit, metal rasp, and bike tire levers. Ensure safety in a harsh environment and immediately continues to ride without danger. Perfect mountain bike tire repair kit. The bike repair tool kit is an ideal gift for bikers.
Ideal Storage Conditions for Inner Tubes
Sunlight, moisture, heat, solvents, and ozone all shorten rubber life. Store tubes in a cool, dry, dark indoor place such as a closet, drawer, dry basement shelf, or sealed storage bin. Keep them away from windows, heaters, hot attics, fuel, chain-cleaning solvents, furnaces, sump pumps, and electric motors.
Do not chase an exact temperature number unless the tube manufacturer gives one. A stable indoor room-temperature space is better than a garage shelf that swings from cold nights to hot afternoons. Keep tubes wrapped, sealed, capped, and lightly dusted. Check them periodically, and inflate them only enough to help them hold their shape during inspection.
| Location | Good Choice? | Notes |
|---|---|---|
| Closet drawer | Best | Dark, dry, stable, and easy to check |
| Dry basement shelf | Good | Use a sealed bin if humidity changes |
| Bike repair box | Good | Keep sharp tools separated |
| Hot garage or attic | Poor | Heat speeds rubber aging |
| Near pump, motor, or furnace | Poor | Ozone exposure can crack rubber |
Avoiding Chemical, Heat, and Ozone Damage
You also need to protect your tubes from chemical, heat, and ozone exposure. Store them away from direct sunlight, radiators, hot machinery, fuels, lubricants, solvents, and harsh cleaners. Heat and UV exposure can make rubber age faster. Solvents and oils can soften or weaken the material. Ozone can trigger cracking in susceptible rubber, especially when the tube sits stretched, folded, or compressed for a long time.
Store tubes wrapped in a cool, dark spot, away from heat, solvents, fuels, and ozone-producing equipment.
- Store in a cool, dry, dark indoor place.
- Keep tubes wrapped in a sock, nylon sleeve, or cloth.
- Separate tubes from fuels, oils, solvents, and strong cleaners.
- Avoid ozone-generating equipment such as motors with brushes, furnaces, and pumps.
- Inspect before use for stiffness, cracking, stickiness, or valve damage.
These simple steps help extend tube life and reduce the chance of discovering a failed spare during a roadside repair.
Routine Checks: Inflate, Rotate, and Inspect Stored Tubes
Even when tubes sit unused, you should check them every few months. Inflate, rotate, and inspect them to catch slow leaks and prevent long-term compression marks. Inflate the tube only enough to give it shape. Listen and feel for escaping air. Mark any damaged tubes for repair or disposal. Rotate your stored tubes so none of them stay compressed in the same position for too long. Swap their positions and refold them gently to avoid creating stress lines. Inspect the valve stems, seams, and the rubber itself for brittleness.
| Task | Frequency | Notes |
|---|---|---|
| Inflate and leak test | Every 2–3 months | Inflate only enough to give the loose tube shape |
| Rotate positions | Every 2–3 months | Reduce long-term compression marks |
| Visual inspection | Every 2–3 months | Check valves, seams, cracks, and sticky areas |
| Repair-kit check | Each check | Confirm patches, pump, and spare caps are ready |
Common Mistakes and Troubleshooting Damaged Tubes
A few simple mistakes can ruin a perfectly good inner tube. Avoid these errors to keep your tubes ready for the road. Wrap your tubes, cap the valves, and store them away from heat and sunlight. Never use rubber bands or tight straps for long-term storage. Check stored tubes periodically for cracks, sticky rubber, valve damage, or soft spots. If you find a small puncture, patch it with a quality kit and leak-test it before storing the tube again. Replace the tube entirely if it has large cuts, torn valve rubber, brittle areas, or repeated leaks.
- Leaving tubes unwrapped exposes them to punctures and abrasions.
- Using rubber bands or tight straps can compress and mark the rubber.
- Forgetting valve caps can let the valve stem scratch or puncture the tube.
- Skipping inspections lets cracks, leaks, and valve problems go unnoticed.
- Storing tubes in heat, sunlight, or near solvents can speed aging.
[Products Worth Considering]

Note: When Using, Please be Sure to Follow Our Instructions.

Professional repair Patch:With 12 small round patches, 8 big round patches, and 4 big square patches, There is 24 patches in total, you can choose the appropriate patch for different perforation sizes, It is very simple to use, follow the example diagram every step, it can easily repair large and small puncture

【Professional repair Patch】Three sizes of 2.15, 1.47, 1.18 inch 24PCS vulcanized patch, you can choose the appropriate patch for different perforation sizes, you must paste the vulcanized patch according to the operation in the picture, and it can be integrated with the inner tube to achieve permanent repair.
Frequently Asked Questions
How do you store a spare inner tube?
Store your spare inner tube in a cool, dry, dark place. Deflate it, clean and dry it, roll it gently, cap the valve, wrap it in a sock or cloth, and place it in a resealable bag with a light dusting of talcum powder. Avoid rubber bands, heat, direct sun, solvents, and electric motors. Inspect the tube every few months.
Should you put talcum powder on an inner tube?
A very light dusting of talcum powder can help reduce sticking and friction during storage. Use only a small amount, keep the tube dry, and avoid oils, tire dressings, or sprays. Too much powder creates mess without adding much protection.
Do self-sealing inner tubes work?
Yes, self-sealing inner tubes can help with small tread-area punctures, but they are not foolproof. They may not seal sidewall cuts, valve damage, large holes, or tears near the seam. Check the tube maker’s instructions, keep the tube within its service life, and still carry a patch kit or backup tube for longer rides.
Should I deflate my bike tires for storage?
If the tube is installed inside a tire, do not let the tire sit completely flat for long-term storage. Reduce pressure slightly if the bike will sit for a season, but keep enough air for the tire to hold its shape. Check pressure monthly, and follow the tire sidewall range or the bike maker’s guidance.
How long do bike inner tubes last in storage?
There is no universal storage life because rubber age depends on material, packaging, heat, sunlight, ozone, and chemicals. A well-stored tube can stay usable much longer than one left loose in a hot garage, but you should inspect it before every ride. Replace it if you see cracks, stickiness, brittleness, valve-base tears, or repeated air loss.
Conclusion
Properly storing your inner tube keeps it ready when you need it most. Clean it, dry it, roll it without sharp creases, add a little talc, cap the valve, and tuck it into a sock or sealed bag. Then store it away from heat, sunlight, ozone, fuels, and harsh chemicals. Regularly check and rotate your stored tubes so you catch leaks or cracking before your next ride. A few minutes of care now can prevent a wasted spare during a roadside repair.
Related Articles

What Does THE P Stand For on a Tire? Full Meaning Explained
I’ll explain what the “P” on a tire really means and why it could change how you choose your next set.
Read More
How to Use a Tubeless Tire Repair Kit: Complete Field Guide
Learn how to fix tubeless tire punctures fast with the right kit, because one small mistake can leave you stranded on the trail.
Read More
How to Tell a Tire’s Diameter: Easy Guide to Reading Tire Size
Want to decode tire sidewall numbers and find the right diameter, but wonder what those hidden digits really mean?
Read More