
Tire Anatomy Explained: Every Part You Should Know

A tire looks simple from the outside, but it is a layered safety component. The bead holds it to the wheel, the inner liner keeps air inside, the carcass carries load, belts stabilize the tread, and the tread pattern manages grip, water, heat, and wear. Understanding these tire parts helps you choose the right replacement tire, spot damage early, and explain symptoms to a tire professional.
Quick Answer
The main tire parts are the tread, shoulder, sidewall, bead, inner liner, carcass plies, steel belts, cap plies, and undertread. Each part has a job: holding air, carrying load, gripping the road, resisting damage, managing heat, and keeping the tire stable on the wheel.
Key Takeaways
- The bead locks the tire to the rim; a damaged bead or corroded wheel can cause slow leaks.
- The inner liner is the airtight layer in most modern tubeless tires.
- The carcass, plies, belts, and cap plies control strength, shape, heat, and stability.
- The tread blocks, ribs, grooves, sipes, and void ratio determine how the tire grips, evacuates water, and wears.
- The sidewall markings tell you tire size, construction, load index, speed rating, DOT/TIN date code, and other safety details.
Who This Guide Is For and What You’ll Learn
This guide is for vehicle owners, DIY maintainers, fleet users, and anyone comparing tires before purchase. You will learn what each tire component does, how construction affects comfort and handling, how to read the most important sidewall markings, and what to inspect before a small tire problem becomes a safety issue.
The goal is not to replace a trained tire technician. It is to help you ask better questions, understand what a shop is explaining, and make safer choices about tire pressure, tread depth, load rating, rotation, replacement, and repair.
At a Glance: Basic Tire Inspection
| Time Required | 5–10 minutes per month |
| Difficulty | Easy visual check; professional help for repairs or internal inspection |
| Tools Needed | Tire pressure gauge, tread depth gauge or wear-bar check, flashlight |
| Cost | Low; most gauges are inexpensive and many tire shops inspect tires for free or low cost |
Tire Parts at a Glance
Use this table as a quick map before reading the deeper explanations below.
| Tire Part | Where It Is | Main Job | What to Watch For |
|---|---|---|---|
| Tread | Outer road-contact surface | Grip, braking, acceleration, water evacuation, wear life | Low tread depth, uneven wear, cuts, embedded objects |
| Shoulder | Outer edge where tread meets sidewall | Cornering stability and heat control | Shoulder wear, cracking, punctures near sidewall |
| Sidewall | Between bead and tread | Protects carcass, carries markings, flexes with load | Bulges, cracks, scrapes, exposed cords |
| Bead | Inner edge that seats against wheel rim | Locks tire to rim and helps seal air | Bead damage, rim corrosion, mounting leaks |
| Inner liner | Inside surface of tubeless tire | Holds inflation pressure | Slow leaks, improper patching, liner damage |
| Carcass and plies | Structural body under tread and sidewall | Shape, strength, load support, flex control | Impact damage, separations, bulges |
| Belts and cap plies | Under tread, above carcass | Tread stability, puncture resistance, high-speed shape control | Vibration, belt separation signs, irregular wear |
| Undertread | Between tread rubber and belts | Cushioning, heat control, bonding layer | Usually hidden; problems show as noise, separation, or abnormal wear |
Core Tire Structure: Bead, Inner Liner, Carcass, and Plies
The core structure is the tire’s foundation. It keeps the tire mounted, pressurized, shaped, and able to carry the vehicle’s weight. These parts are mostly hidden, but damage to any of them can quickly become a safety problem.
Bead and Wheel Fitment
The bead is the reinforced edge of the tire that sits against the wheel rim. It usually contains high-tensile steel wire encased in rubber. When the tire is inflated, air pressure pushes the bead into the rim seat, creating a secure fit and helping form an airtight seal.
Good bead fitment depends on three things: the correct tire size for the wheel, a clean and undamaged rim seat, and proper mounting technique. Corrosion, dents, old sealant, torn bead rubber, or an incorrectly seated bead can all cause air leaks or vibration.
Warning: Do not try to reseat a tire bead with makeshift methods, flammable sprays, or excessive air pressure. Bead seating can be dangerous and should be handled with proper tire-service equipment.
Inner Liner Air Seal
The inner liner is the airtight layer on the inside of most modern tubeless tires. In official U.S. tire terminology, the innerliner is the inside surface layer of a tubeless tire that contains the inflating medium. In plain English, it is the part that helps the tire hold air without an inner tube.
A slow pressure loss can come from a puncture, valve stem, rim leak, bead leak, or inner liner damage. If a tire keeps losing pressure after inflation, do not assume it is normal. Have the tire removed from the wheel and inspected from the inside before repair.
| Concern | Inspection | Likely Outcome |
|---|---|---|
| Slow leak | Leak test around tread, bead, valve, and rim | Repair, reseal, valve replacement, or tire replacement |
| Inner liner damage | Tire removed and inspected internally | Professional repair only if damage qualifies |
| Improper patch | Check repair type and location | May require correct plug-patch repair or replacement |
| Bead leak | Soapy water test at bead seat | Rim cleaning, bead service, or replacement if damaged |
Carcass and Ply Layers
The carcass is the tire’s load-bearing skeleton. It includes body plies made from rubber-coated cords, commonly polyester, nylon, rayon, steel, or other materials depending on tire type. These cords help the tire keep its shape while flexing over bumps and carrying load.
Radial passenger tires generally use body plies running from bead to bead with belts under the tread. This lets the sidewall flex while the tread area stays more stable. If the carcass is damaged by a pothole, curb impact, underinflation, or overload, the symptom may appear as a sidewall bulge, vibration, or sudden air loss.
Note: A sidewall bubble usually points to internal structural damage. It is not a cosmetic issue and should be inspected immediately.
Under-Tread Parts: Belts, Cap Plies, and Undertread
Under the tread is a stack of reinforcement layers that controls stability, durability, puncture resistance, heat, and ride feel. These parts are invisible during a normal visual inspection, but they strongly affect how a tire performs.
Steel belts are rubber-coated belt layers under the tread. They help keep the tread flat on the road, improve stability, and protect the carcass. Cap plies, often made of nylon or similar material, can sit above the belts to help control tread shape at speed. Undertread sits below the tread rubber and helps bond, cushion, and manage heat between the tread and belt package.
The tradeoff is balance. A stronger, stiffer belt package may improve steering precision and durability, but it can also make the ride firmer. A softer construction may feel more comfortable but may not offer the same response under heavy load, heat, or high-speed use.
Tread Anatomy: Blocks, Ribs, Grooves, Sipes, and Void Ratio
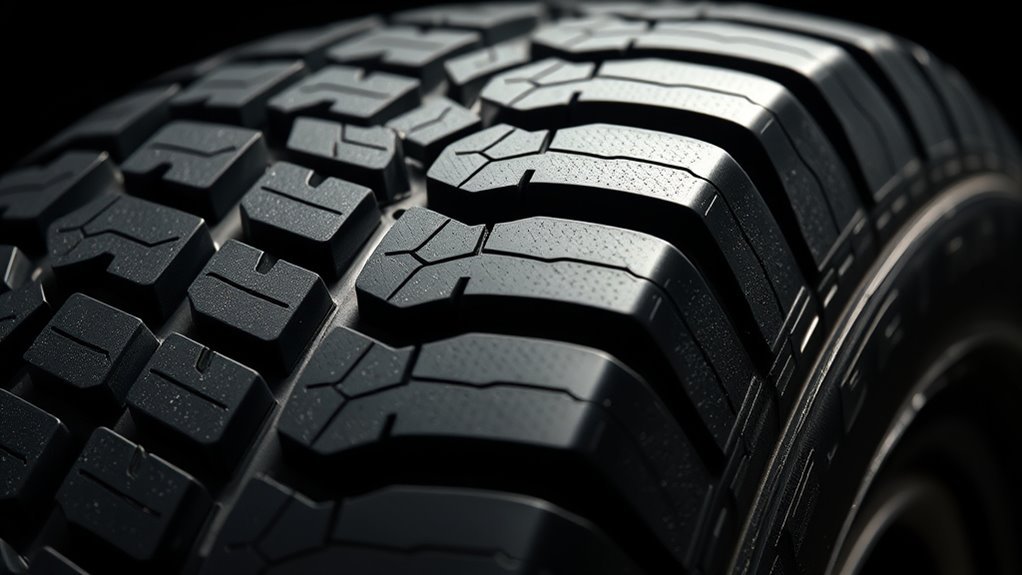
The tread is the part of the tire that meets the road. Its rubber compound and pattern decide how the tire grips, brakes, clears water, handles snow or mud, makes noise, and wears over time.
Tread design is a compromise: more open space can help evacuate water or mud, while more rubber contact can improve dry-road stability and wear life.
- Tread blocks are individual raised rubber sections. They create biting edges and help with braking, acceleration, snow grip, and off-road traction.
- Ribs are continuous bands around the tire. They improve straight-line tracking, steering feel, and highway stability.
- Grooves are the channels between tread elements. They help move water away from the contact patch and reduce hydroplaning risk.
- Sipes are small cuts in tread blocks. They create extra edges that can help on wet, snowy, or icy surfaces.
- Void ratio describes how much open space exists in the tread pattern compared with rubber contact area. Higher void ratios often help water, mud, or snow evacuation; lower void ratios often improve dry contact and reduce tread movement.
Tread depth matters as much as pattern. In U.S. passenger-vehicle guidance, tires are considered unsafe and should be replaced when tread is worn down to 2/32 inch. Many drivers replace earlier for wet or winter performance because traction usually declines before the legal minimum is reached.
Tire Sidewall and Shoulder: Protection, Load Capacity, and Handling
The sidewall and shoulder connect the tread to the bead. They protect internal plies, carry important markings, flex under load, and influence ride comfort and steering feel.
Sidewall Strength and Load
The sidewall runs from the bead area to the tread shoulder. It protects the carcass from weather, impact, and abrasion while allowing controlled flex as the tire rolls. A stiffer sidewall may improve response and load handling, but it can also transmit more road harshness. A more flexible sidewall can improve comfort but may feel less sharp during aggressive cornering.
Do not ignore sidewall damage. Cracks, exposed cords, cuts, bubbles, deep scrapes, or punctures in the sidewall area are serious because this zone flexes constantly and is not repaired the same way as a simple tread puncture.
Shoulder Design and Handling
The shoulder is the transition area where the tread wraps toward the sidewall. It handles a large share of cornering force, heat, and edge wear. A reinforced shoulder can improve steering response and cornering stability. A more rounded shoulder can make the tire feel smoother and quieter.
Shoulder wear often points to underinflation, aggressive cornering, alignment problems, or worn suspension parts. Because the shoulder is close to the sidewall, punctures in this area may not be safely repairable.
How to Read Key Tire Sidewall Markings
The tire sidewall is also an information label. It helps you confirm whether a tire matches your vehicle’s size, load, speed, and safety requirements.
A common example is P225/60R17 98H:
- P means passenger tire. Some tires may use LT for light truck or other designations.
- 225 is the section width in millimeters.
- 60 is the aspect ratio, meaning the sidewall height is 60% of the section width.
- R means radial construction.
- 17 is the wheel diameter in inches.
- 98 is the load index, a coded value tied to how much weight the tire can carry.
- H is the speed rating, a coded value tied to maximum speed capability under test conditions.
The DOT Tire Identification Number, or TIN, is also molded on the sidewall. In the United States, the last four digits identify the week and year of manufacture. For example, a code ending in 2525 means the tire was made in the 25th week of 2025.
Warning: The maximum pressure molded on a tire sidewall is not the recommended everyday pressure for your vehicle. Use the vehicle manufacturer’s cold tire pressure listed on the door placard or owner’s manual.
Sidewalls may also show UTQG ratings for treadwear, traction, and temperature resistance on many passenger tires sold in the United States. These ratings help compare tires, but they are not a substitute for matching the exact size, load index, speed rating, and tire type recommended for your vehicle.
Practical Features: Tread-Cleaning Bars, Tie Bars, Dimples, and Siping
Small tread features solve specific performance problems. They are not decoration.
- Tread-cleaning bars can help release mud, snow, gravel, or debris from grooves on tires designed for those conditions.
- Tie bars connect nearby tread blocks to reduce block squirm, improve steering response, and help control uneven wear.
- Dimples and small cavities may be used in some designs for heat management, stud seating, or traction tuning, depending on the tire.
- Siping adds small edges that can improve wet, snow, or ice grip, although too much tread movement can reduce dry precision.
These features change how the tire behaves under braking, cornering, acceleration, and temperature. Always judge them in context: an all-terrain tire, winter tire, touring tire, and summer performance tire use different tread priorities.
Construction Choices: Radial vs. Bias, Materials, and Sidewall Stiffness
Tire construction changes the way a tire flexes, carries load, builds heat, and responds to steering. The two basic construction families are radial and bias-ply, although most modern passenger vehicles use radial tires.
| Construction Type | How the Cords Run | Typical Strengths | Common Uses |
|---|---|---|---|
| Radial | Body cords run bead-to-bead, roughly perpendicular to the tread centerline, with belts under the tread | Lower heat buildup, better tread stability, good fuel efficiency, strong highway performance | Most passenger cars, SUVs, light trucks, and many commercial applications |
| Bias-ply | Body cords cross diagonally in layers | Flexible casing, strong sidewall feel in some applications, useful in certain trailers, agricultural, off-road, and specialty uses | Specialty vehicles, trailers, agricultural, vintage, and off-road applications |
Material choices also matter. Rubber compound, silica content, nylon cap plies, polyester or steel cords, bead filler stiffness, and sidewall thickness all change the final result. A tire designed for quiet commuting will not behave like a tire designed for towing, winter ice, track days, or mud.
Pro Tip: When replacing tires, match or exceed your vehicle’s required load index and speed rating unless the vehicle manufacturer or tire professional recommends otherwise.
How Tire Parts Affect Driving Feel and Common Problems
Many tire symptoms point back to a specific component or maintenance issue. This table helps you connect what you feel or see with what may be happening.
| Symptom | Possible Tire Area | Common Causes | What to Do |
|---|---|---|---|
| Slow pressure loss | Inner liner, tread puncture, valve, bead, rim | Nail, valve leak, bead leak, rim corrosion, improper repair | Have the tire leak-tested and inspected internally |
| Sidewall bubble | Carcass or sidewall plies | Pothole impact, curb strike, internal cord damage | Stop using the tire and seek replacement guidance |
| Feathered tread edges | Tread blocks and ribs | Alignment problem, worn steering or suspension parts | Check alignment and suspension; rotate if appropriate |
| Center tread wear | Tread contact patch | Possible overinflation or load mismatch | Set cold PSI to vehicle placard and inspect wear |
| Both shoulder edges worn | Shoulders and tread edges | Possible underinflation, overload, or hard cornering | Check pressure, load, alignment, and rotation schedule |
| Vibration at speed | Belts, tread, wheel balance, rim | Imbalance, belt damage, uneven wear, bent wheel | Have the assembly inspected and balanced |
Tire Inspection and Maintenance Checklist
A monthly tire check helps you catch pressure loss, damage, and uneven wear early. Include the spare tire if your vehicle has one.
- Check cold tire pressure. Measure before driving or after the vehicle has been parked long enough for the tires to cool. Set pressure to the vehicle placard, not the tire’s sidewall maximum.
- Inspect tread depth. Use a tread depth gauge or check treadwear bars. Replace at 2/32 inch or earlier if wet, snow, or load needs require more tread.
- Look for uneven wear. Cupping, feathering, center wear, and shoulder wear can point to pressure, alignment, balance, or suspension issues.
- Inspect the sidewalls. Look for cracking, bulges, cuts, exposed cords, or deep curb damage.
- Check the bead and rim area. Watch for corrosion, air bubbles, missing valve caps, or damage near the rim.
- Rotate on schedule. Follow the vehicle owner’s manual or tire manufacturer guidance.
- Recheck after temperature swings. A common rule of thumb is about 1 psi change for every 10°F change in ambient temperature.
When to Repair, Replace, or Ask a Professional
Not every puncture can be repaired. A repairable tire usually needs a small puncture in the tread area, no internal damage, enough remaining tread, and a proper internal inspection. Many tire makers and tire-service standards require a combined plug-and-patch style repair for qualifying punctures.
Replace or professionally inspect the tire immediately if you see any of these:
- Sidewall puncture, shoulder puncture, or deep sidewall cut
- Bulge, bubble, tread separation, or belt separation signs
- Exposed cords, body ply, or belt material
- Audible leak or tire that repeatedly loses pressure
- Tread worn to 2/32 inch or to the treadwear indicators
- Damage after being driven flat, severely underinflated, or overloaded
Run-flat tires are a special case. They are designed to help you reach a safe location after air-pressure loss, but only within the tire manufacturer’s speed and distance limits. Do not treat a run-flat as a normal tire after a puncture.
Frequently Asked Questions
How do tire manufacturers test tread wear and longevity?
Manufacturers use a mix of lab testing, proving-ground tests, real-world fleet testing, compound analysis, and regulatory comparison systems. In the United States, UTQG ratings help compare treadwear, traction, and temperature resistance for many passenger tires, but they are only one part of tire evaluation.
Can tire composition affect fuel economy differences between brands?
Yes. Rubber compound, tread depth, casing design, belt package, weight, and rolling resistance all affect how much energy a tire uses as it rolls. Low-rolling-resistance tires can improve fuel economy, but the best choice still has to match your vehicle, climate, load, and traction needs.
How do temperature changes influence tire pressure recommendations?
Tire pressure changes with temperature. A practical rule is about 1 psi for every 10°F change in ambient temperature. Always check tires cold and inflate to the vehicle manufacturer’s recommended cold PSI on the door placard or owner’s manual.
Are run-flat tires safe to drive on after a puncture?
Run-flat tires are designed for temporary mobility after air-pressure loss, not normal driving after damage. Follow the tire manufacturer’s exact speed and distance limit. Many run-flat tires require professional inspection and may not be repairable after being driven with low or zero pressure.
What maintenance extends sidewall and bead lifespan?
Maintain correct cold inflation pressure, avoid curb impacts, do not overload the vehicle, rotate tires on schedule, clean wheel corrosion during tire service, and inspect sidewalls for cracking, cuts, bubbles, and abrasion. Proper mounting lubrication and technique also help protect the bead during installation.
Which tire part prevents air leaks?
The inner liner is the main air-retaining layer in a tubeless tire, but the bead, rim, valve stem, and puncture repairs also affect air retention. A slow leak should be diagnosed instead of repeatedly topping off the tire.
Can sidewall damage be repaired?
Usually, no. Sidewall and shoulder damage is often not repairable because those areas flex heavily and carry structural load. A tire professional should inspect cuts, punctures, bubbles, exposed cords, or impact damage before the tire is driven again.
Conclusion
Every tire part has a safety role. The bead holds the tire to the rim, the inner liner keeps air inside, the carcass and plies carry load, the belts stabilize the tread, and the tread pattern manages grip and water evacuation. The sidewall and shoulder tie everything together while protecting the internal structure.
For everyday driving, the most useful habit is simple: check cold tire pressure, inspect tread depth and sidewalls, read the sidewall markings before buying replacements, and get professional help for leaks, bubbles, punctures, or uneven wear. A tire is not just rubber; it is a carefully engineered structure that performs best when every layer is matched to the vehicle and maintained correctly.
Sources
- NHTSA TireWise — tire pressure, tread depth, DOT/TIN, tire safety ratings, and consumer tire guidance
- U.S. Tire Manufacturers Association Tire Care & Safety — monthly inspection, inflation, tread wear, tire damage, and tire care essentials
- Michelin Tire Glossary — bead, belt, body ply, sidewall, tread, and other tire terminology
- 49 CFR 571.139 — official definitions for pneumatic radial tire terms including innerliner and groove
- 49 CFR 570.9 — tread-depth inspection requirements and treadwear indicator guidance
- Bridgestone Run-Flat Tire Guide — run-flat tire function and temporary driving limits after pressure loss
Related Articles

What Does THE P Stand For on a Tire? Full Meaning Explained
I’ll explain what the “P” on a tire really means and why it could change how you choose your next set.
Read More
How to Use a Tubeless Tire Repair Kit: Complete Field Guide
Learn how to fix tubeless tire punctures fast with the right kit, because one small mistake can leave you stranded on the trail.
Read More
How to Tell a Tire’s Diameter: Easy Guide to Reading Tire Size
Want to decode tire sidewall numbers and find the right diameter, but wonder what those hidden digits really mean?
Read More