
How to Put On a Spare Tire on a Hyundai Sonata (Quick Guide)
A flat tire on a Hyundai Sonata is manageable if the car is in a safe place, the ground is firm and level, and your Sonata is equipped with a spare tire. Before touching the jack, turn on the hazards, set the parking brake, confirm the spare and tools are present, loosen the lug nuts one turn, and use only the notched factory jack point closest to the flat tire.
Quick Answer
To change a Hyundai Sonata spare tire, park on firm level ground, set the brake, chock the opposite wheel, loosen lug nuts one turn, jack at the notched frame point, install the spare, hand-thread the nuts, lower the car, then torque in a crisscross pattern. Many recent Sonatas use 79–94 lbf·ft and a 60 PSI compact spare.
Key Takeaways
- Loosen the lug nuts before lifting the Sonata; remove them only after the tire is off the ground.
- Use the factory jack only on the designated notched jacking plate under the frame closest to the flat tire.
- For many recent Sonata models, the compact spare is inflated to 60 PSI and lug nuts tighten to 79–94 lbf·ft, but the spare label and your model-year manual are the final authority.
- A compact spare is temporary. Keep speed at or below 50 mph, avoid hard braking and sharp turns, and repair or replace the full-size tire as soon as possible.
At a Glance
| Time Required | 20–40 minutes in a safe location |
| Difficulty | Beginner to moderate; stop if the car is unstable or traffic is too close |
| Tools Needed | Spare tire, jack, jack handle, wheel lug wrench, wheel chock, tire-pressure gauge, torque wrench, gloves, and reflective warning gear |
| Cost | $0 if your Sonata already has the tools; possible repair, replacement, or roadside-assistance cost afterward |
Warning: Do not change a tire in an active traffic lane, on a hill, on soft dirt, on gravel that lets the jack sink, or on a narrow shoulder where passing traffic is close. Turn on the hazard lights, move as far from traffic as safely possible, and call roadside assistance if you cannot work on firm, level ground.
Quick Checklist: Tools, Spare Tire & Safe Parking
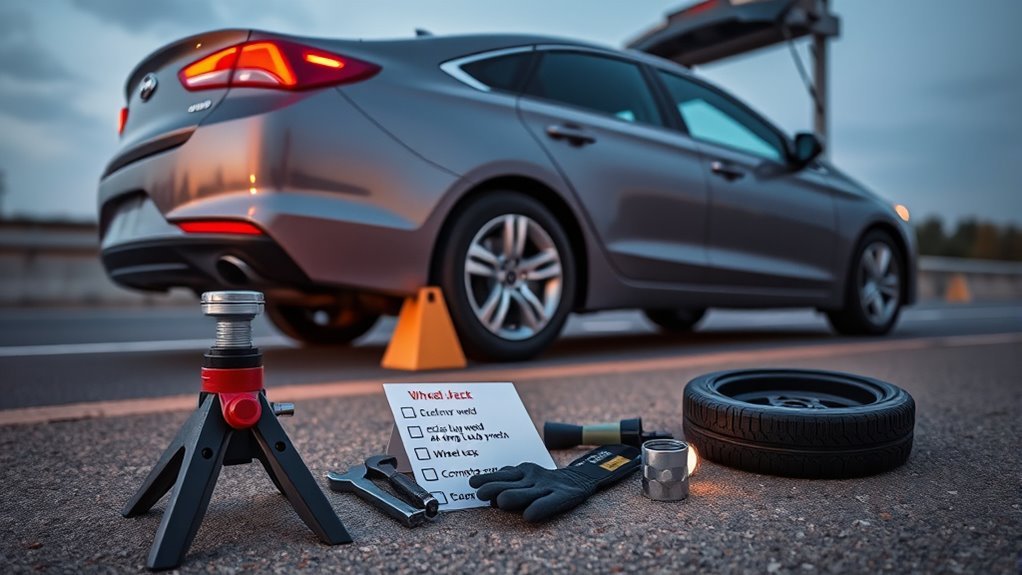
Start by confirming what your Sonata actually has under the trunk floor. Some Sonata models are equipped with a spare tire, jack, jack handle, and wheel lug wrench. Others may have a Hyundai Tire Mobility Kit with a compressor and sealant instead of a spare. If you have the kit rather than a spare, follow the kit instructions and do not use sealant on sidewall damage, large punctures, or more than one flat tire.
If your Sonata has a spare, gather the jack, jack handle, wheel lug wrench, tire-pressure gauge, and spare tire from the trunk storage area. A compact spare on many recent Hyundai models is listed at 60 PSI (420 kPa), but always confirm the pressure printed on your spare and in your model-year Hyundai owner’s manual. Do not install a spare with visible cracks, exposed cords, sidewall bulges, or a damaged valve stem.
- Park on a flat, hard, level surface away from traffic.
- Turn on the hazard lights and use reflective warning gear if you have it.
- Shift to Park, turn the vehicle off, and set the parking brake switch, lever, or pedal depending on your model year.
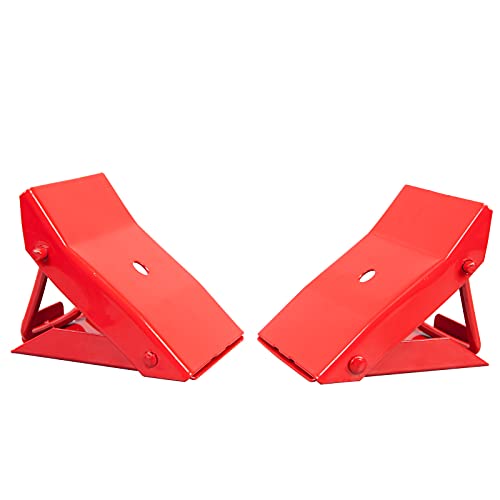
- Place a real wheel chock in front of and behind the tire diagonally opposite the flat. If you have no chock, use a large, stable block only as an emergency fallback.
- Keep passengers out of the vehicle and away from traffic while the car is on the jack.
Roadside work is risky. NHTSA campaign materials report about 33,000 traffic crashes along road shoulders in 2024, including 578 deadly crashes.
[Products Worth Considering]

This digital tire pressure gauge combines a sturdy pistol grip inflator with a backlit 0.1 PSI display for quick, accurate readings in any lighting condition. Its 360° swivel gauge and 20" rubber hose make it easy to use and store, while the integrated inflate/deflate trigger and ¼" NPT air inlet provide fast, reliable tire maintenance.

The Milton 555e digital tire inflator delivers fast, accurate pressure readings with a backlit display and multiple unit options, making tire inflation quick and easy. Its durable 20" EPDM rubber hose and grip‑head chuck provide reliable connection, while the ±1 PSI accuracy ensures precise inflation for cars, bikes, and trucks.
![Wheel Chocks for RV Trailer Camper Truck Car, [2pair/4pack with Rope] Versatile Rubber Chocks Block Stopper for Tire with Reflective Strips, Utility Boat Travel Trailer Camper RV Accessories Must](https://m.media-amazon.com/images/I/41q2Y29YvLL._SL500_.jpg)
Premium Quality: Our wheel chocks are made from durable rubber blocks.Size is 6.21" ×4.71" ×4.31" providing reliable tire traction for trucks, trailers, RVs, and small airplanes. Say goodbye to vehicle rolling and ensure safety with our high-performance wheel chocks.
Confirm Whether You Have a Spare or a Tire Mobility Kit
Before you loosen anything, look under the trunk floor. If you see a compact spare and the factory tools, use the spare-tire steps below. If you see a compressor and sealant bottle, your Sonata may be set up for a Tire Mobility Kit instead.
| What You Find | What To Do |
|---|---|
| Compact spare, jack, and lug wrench | Continue with the spare-tire procedure in this guide. |
| Compressor and sealant bottle | Use the Tire Mobility Kit only for a small tread puncture and only as a temporary fix. Call for help if the sidewall is damaged, the tire will not hold pressure, or more than one tire is flat. |
| Missing jack, missing wrench, damaged studs, or damaged tools | Do not improvise. Call roadside assistance or a tow service. |
Note: Equipment can vary by model year, trim, market, and previous-owner changes. The spare tire label and the owner’s manual for your exact VIN are the final references.
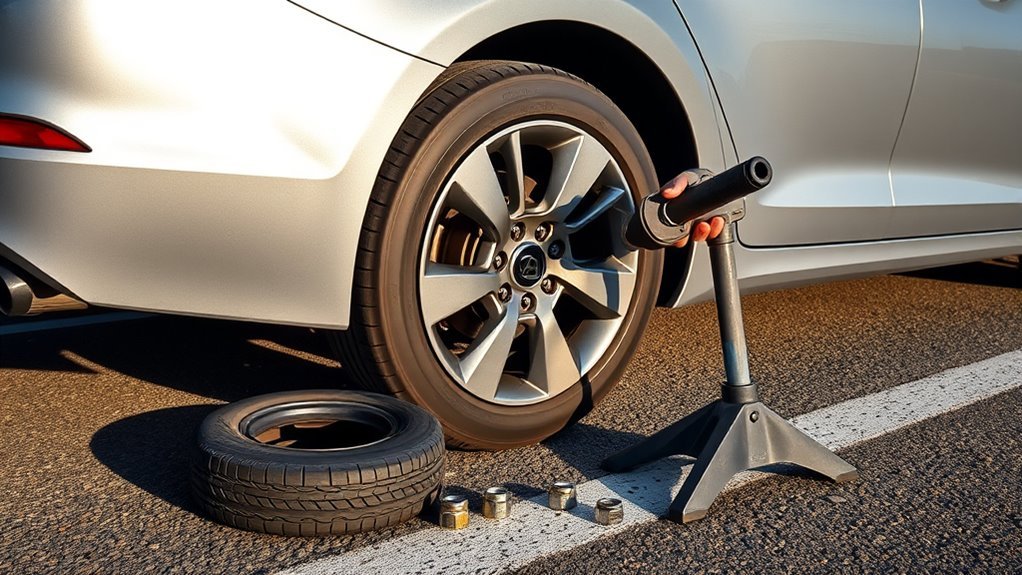
Lift the Sonata Safely: Jack Points, Wheel Chock & Brake
Use the designated jacking point only. Hyundai describes the jacking points as plates welded to the frame with two notches, located under the frame closest to the tire you are changing. Do not use the bumper, suspension parts, side skirt, floor pan, or any random metal edge as a lift point.
| Task | Location | Purpose |
|---|---|---|
| Parking brake | Parking brake switch, lever, or pedal | Helps prevent vehicle movement |
| Wheel chock | Front and rear of the tire diagonally opposite the flat | Helps prevent roll while lifting |
| Jack point | Notched plate under the frame closest to the flat tire | Supports the car at the factory lift location |
Set the jack squarely under the notched lift point with the base flat on the ground. Turn the jack handle slowly. Watch for tilt, sinking, or shifting. If the jack leans, the ground cracks, or the car moves, lower the vehicle and stop.
Warning: Never put any part of your body under a Sonata supported only by the emergency jack. The factory jack is for emergency wheel changes, not for working under the vehicle.
[Products Worth Considering]

Solid Heavy Duty Rubber Wheel Chocks - RV wheel chock adopts strong heavy duty hard rubber material. No deformation and stay in place for months. Rubber traction pad with oil resistant surface add slip resistance and durable compared with plastic or resin-made chocks. Keep vehicles staying in any climate safely with long service life

ULTIMATE JACK WHEEL PROTECTION: Heavy Duty Chock for Jack Caster Wheels ensures ultimate protection by evenly spreading weight, preventing rolling or sinking in soft ground, and eliminating sideways movement when your caravan is stationary. A perfect solution to trailer tongue problems, offering reliability and stability.
Crafted with heat-treated, drop-forged steel for added strength; Designed to perform better than plastic or resin-made wheel chocks
Loosen & Remove the Flat Tire Step by Step
The safest sequence is simple: loosen before lifting, remove after lifting. Do not fully remove the lug nuts while the tire is still on the ground.
- Break the lug nuts loose. With the tire still touching the ground, place the lug wrench on each lug nut and turn counterclockwise about one full turn. Use steady pressure; do not jump on the wrench.
- Position the jack. Put the jack under the notched frame jacking point closest to the flat tire.
- Raise the Sonata. Lift only until the flat tire clears the ground. The higher you lift, the less stable the setup becomes.
- Remove the lug nuts by hand. Keep them together in a pocket, cup, or clean spot where they cannot roll away.
- Pull the flat tire straight off. Hold it with both hands and slide it off the studs. Wheels can have sharp edges, so wear gloves if available.
- Lay the flat tire flat. Set it out of the work area so it cannot roll into traffic or against your legs.
- Clean the mounting face. Remove loose dirt, gravel, rust flakes, or mud from the hub, studs, and wheel-mounting surface so the spare can sit flush.
Pro Tip: If the wheel sticks to the hub, do not pry against the brake parts. Confirm the lug nuts are removed, then rock the tire gently at the 3 and 9 o’clock positions until it breaks free. If it still will not move, call for help.
[Products Worth Considering]

【Car Jack Capacity】Maximum lifting weight 2 Ton (4409 lbs),This Jack for Car Lifting Range from 4.33" (11cm) to 15.75"(40cm). The scissor lift jack provides a wider range to reach under low chassis sedans or elevate high-body SUVs effortlessly.

【Function】--4 In 1 car wrench set, come with telescoping lug nut wheel wrench and sockets, car jack hexagon ratchet wrench, allowing one wrench to meet multiple needs and save even more time and energy!

Heavy-Duty Lifting Capacity: This car jack is a scissor jack with a 3 ton (6610 lbs) capacity, , making it an excellent choice for roadside tire changes, lifting your vehicle in the garage, or at professional auto repair shops. Its 3.74" to 15.16" lift range is use for reaching low-profile sedans or lifting taller SUVs safely and effectively
Mount the Spare Tire: Hand-Thread, Lower & Torque in Crisscross

Lift the spare onto the studs and line up the holes with the hub. Keep the spare flat against the mounting surface. Install the lug nuts by hand first, with the tapered side facing the wheel. If a nut does not spin on smoothly by hand, stop and realign it; forcing it can cross-thread the stud.
| Step | Action |
|---|---|
| 1 | Align the spare with the wheel studs and slide it flush against the hub. |
| 2 | Hand-thread all lug nuts before using the wrench. |
| 3 | Snug the lug nuts in a crisscross or star pattern while the car is still raised. |
| 4 | Lower the Sonata until the spare touches the ground and cannot spin. |
| 5 | Final-tighten in a crisscross pattern. Many recent Sonata manuals list 79–94 lbf·ft (11–13 kgf·m), but confirm your exact model-year specification. |
A calibrated torque wrench is best for the final pass. If you only have the factory lug wrench, tighten the lug nuts firmly in the crisscross pattern, then have a tire shop or Hyundai dealer torque them correctly as soon as practical. After the final tightening pass, lower the vehicle fully and remove the jack.
Note: Do not use an impact wrench for final tightening unless you are using proper torque-control equipment. Over-tightening can damage studs; under-tightening can let the wheel loosen.
Aftercare: Pressure, Speed Limits, Troubleshooting & Next Steps
After the spare is installed, check its pressure before driving away if you have a gauge. Many Hyundai compact spares are specified at 60 PSI (420 kPa). If the pressure is low, drive slowly only as far as needed to reach air or service. Reinstall the valve cap after checking pressure so the valve stays clean and sealed.
Drive gently. A compact spare has less tread, different handling, and less ground clearance than a normal tire. Keep speed at or below 50 mph (80 km/h), avoid hard braking, avoid sharp turns, avoid potholes, and do not use cruise control. Do not take the car through an automatic car wash with a compact spare installed.
- Use only one compact spare at a time.
- Do not tow a trailer with the compact spare installed.
- Do not install tire chains on the compact spare.
- Repair or replace the original tire as soon as possible.
- Have the repaired or replacement full-size tire balanced by a tire shop before normal driving resumes.
If you feel vibration, pulling, wobbling, clunking, or hear a rhythmic thump, slow down and stop in a safe place. Recheck that the spare is seated flush, the lug nuts are tight in the crisscross pattern, and the tire has safe pressure. If anything looks damaged or unstable, call for roadside assistance instead of continuing.
When to Stop and Call Roadside Assistance
Changing a Sonata spare tire is not worth the risk when the setup is unsafe. Call for roadside assistance or a tow if any of these apply:
- The car is on a hill, soft shoulder, mud, loose gravel, or broken pavement.
- You cannot get fully away from moving traffic.
- The flat is on the traffic-facing side and there is no safe working space.
- The jack, lug wrench, spare, studs, or lug nuts are missing or damaged.
- A lug nut is stripped, rounded, seized, or will not thread by hand.
- The spare tire is flat, cracked, bulging, or the wrong size.
- More than one tire is flat.
- Your Sonata has a Tire Mobility Kit but the puncture is in the sidewall or the tire will not hold pressure.
Frequently Asked Questions
How do you change a Hyundai Sonata spare tire step by step?
Park on firm level ground, turn on hazards, set the parking brake, chock the opposite wheel, loosen the lug nuts one turn, jack at the notched frame point, remove the flat tire, mount the spare, hand-thread the lug nuts, snug in a crisscross pattern, lower the car, and final-tighten to the correct torque.
What PSI should a Hyundai Sonata spare tire be?
Many Hyundai compact spares are specified at 60 PSI (420 kPa). Check the pressure printed on the spare tire sidewall or label and confirm it in the owner’s manual for your Sonata’s model year. Do not use a visibly damaged or underinflated spare for normal driving.
What is the Hyundai Sonata lug nut torque?
Many recent Hyundai Sonata owner-manual specifications list wheel lug nut torque at 79–94 lbf·ft (11–13 kgf·m). Confirm the exact value in your model-year manual, then tighten with a calibrated torque wrench in a crisscross pattern after the spare is on the ground.
Where are the Hyundai Sonata jack points?
Use the designated jacking plate under the frame closest to the tire being changed. Look for the notched factory lift point. Do not place the jack under the bumper, rocker trim, suspension parts, floor pan, or any unmarked metal surface.
How fast can you drive on a Sonata compact spare?
Treat the compact spare as an emergency tire only. Keep speed at or below 50 mph (80 km/h), avoid abrupt steering or braking, skip automatic car washes, and go directly to a tire shop or safe repair location.
What if my Sonata has a Tire Mobility Kit instead of a spare?
Use the Tire Mobility Kit only for a small tread puncture and only as a temporary repair. Do not use it for sidewall damage, large punctures, more than one flat tire, or a tire that will not hold pressure. In those cases, call roadside assistance or a tow service.
Conclusion
A safe Hyundai Sonata spare-tire change depends on the order of the steps: secure the car first, loosen the lug nuts before lifting, use only the notched factory jack point, hand-thread the spare, and tighten in a crisscross pattern after lowering. Check the compact spare pressure, observe the 50 mph temporary-use limit, and get the original tire repaired or replaced quickly. If the location, tools, tire, or traffic conditions are unsafe, calling roadside assistance is the right move.
Sources
- Hyundai Owner’s Manual Portal — official model-specific Hyundai owner’s manuals and VIN/manual lookup.
- Hyundai Owner’s Manual: Changing Tires — jacking points, wheel-removal sequence, compact spare pressure, and lug nut torque guidance.
- Hyundai Owner’s Manual: Tire Mobility Kit — temporary sealant-kit limitations and when not to use the kit.
- Hyundai Tire Care and Maintenance — tire-pressure monitoring, inflation, and maintenance guidance.
- NHTSA: Move Over, It’s the Law — roadside safety and move-over guidance.
- NHTSA Traffic Safety Marketing: Move Over Safety — shoulder-crash statistics and roadside safety campaign facts.
Related Articles

Danger of Using Summer Tires in Winter on a Hyundai Sonata
Potentially perilous, using summer tires in winter on your Hyundai Sonata can compromise safety—discover the hidden dangers that await you on icy roads.
Read More
Can You Mix Nitrogen and Air in Hyundai Sonata Tires? Answered
Discover the implications of mixing nitrogen and air in your Hyundai Sonata tires—are the benefits worth the risks? Explore the answer inside!
Read More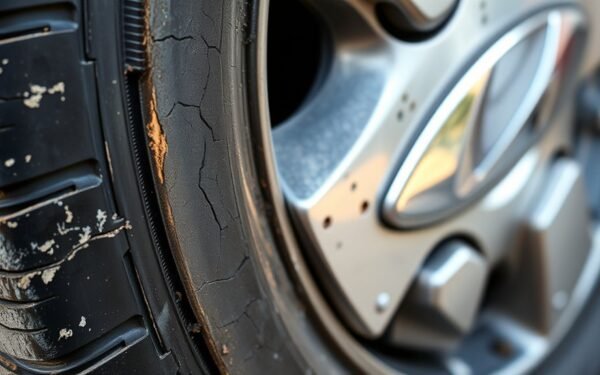
How to Tell If Hyundai Sonata Tires Are Too Old to Use Safely
Understand how to assess the age of your Hyundai Sonata tires and discover crucial signs of deterioration that could compromise your safety on the road.
Read More