
How to Use a Tire Mounting Machine: Step-by-Step Tutorial
Start by placing the tire mounting machine on a flat, stable surface, connecting air, and checking the manual. Wear safety glasses, gloves, and steel-toe shoes. Inspect the tire, wheel, and TPMS, then fully deflate the tire and break both beads. Clamp the wheel securely, apply tire lubricant, and mount the new tire with the machine head. Inflate slowly until the bead seats, then check for leaks and correct pressure. Next, you’ll learn the common mistakes to avoid.
Key Takeaways
- Set the machine on a stable surface, connect air supply, check guards, and review the owner’s manual.
- Wear safety glasses, gloves, and steel-toe work shoes before handling tires or operating the machine.
- Inspect the tire, wheel, and TPMS for damage, correct sizing, and compatibility before mounting.
- Deflate the tire, break both beads, lubricate the beads, then mount the new tire using controlled machine movement.
- Inflate slowly under 40 PSI until the bead seats, then check for leaks, verify pressure, and clean up.
Set Up the Tire Machine
Before you start, place the tire machine on a stable, flat surface so it won’t tip during use. This setup keeps your workspace controlled and lets you work with confidence. Next, connect the air supply to the tire machine and set the pressure regulator to the manufacturer’s specification. A correct air supply supports reliable operation and helps you avoid strain on the system. Check that every safety guard and built-in feature sits in place before you power up. Then review the owner’s manual so you understand the controls, switches, and functions unique to your model. Keep all required tools nearby, including tire lubricant and a valve core removal tool, so you can move without interruption. When you prepare the tire machine this way, you create a safe, efficient setup that respects your labor and gives you direct control over the task. Additionally, ensure you are familiar with the treadwear ratings to select the best tires for your vehicle.
Wear the Right Safety Gear
Safety gear isn’t optional when you’re mounting a tire. Put on safety glasses first; they shield your eyes from flying debris, bead fragments, and other hazards during tire mounting. Choose tight-fitting leather or mechanics gloves so you can handle rims and tires without exposing your hands to sharp edges or moving parts. Wear sturdy leather work shoes with steel toes and oil-resistant soles; they protect your feet from dropped equipment and slick floors. If you’re lifting heavy tires, add a back support belt to reduce strain and keep your body aligned. Additionally, ensure you understand the importance of choosing the right tires to avoid unnecessary accidents during the mounting process.
Check every piece of protective gear before you start. Replace cracked lenses, worn gloves, loose laces, or damaged soles. Make sure each item fits correctly, because poor fit cuts safety and limits control. Good protective gear helps you work with confidence, move freely, and stay in command of the job. When your equipment protects you, tire mounting becomes cleaner, safer, and more efficient.
Inspect the Tire, Wheel, and TPMS
First, verify that the tire size, construction, and sidewall diameter match the wheel rating and rim diameter before you mount anything. Inspect the tire and wheel for damage, rust, cracks, bent flanges, or uneven wear that could affect fit and safety. Then check the TPMS sensors to make sure they’re intact and properly positioned so you don’t create avoidable faults or extra replacements. It’s also advisable to consider the tire’s UTQG rating to ensure optimal performance and longevity.
Tire And Wheel Match
A proper tire-and-wheel match starts with inspection: confirm the tire size and construction suit the wheel’s rating, and verify the wheel diameter matches the tire sidewall diameter to prevent improper fitment. You also need to check tire, wheel, compatibility before you mount anything. Look over the tire bead and sidewall for cuts, bulges, or deformities. Inspect the wheel for cracks, rust, dents, or bent flanges that could compromise seating. If the components don’t align, stop and correct the mismatch now; forcing the assembly can cause leaks, vibration, and blowouts. Keep your process tight and deliberate so you stay in control of the machine and the job. Proper matching protects performance, saves labor, and lets you move on with confidence.
TPMS Sensor Inspection
Before you mount the tire, inspect the TPMS sensor for damage, corrosion, and proper seating in the wheel so it can read pressure accurately and won’t fail during installation. Use a TPMS tool to confirm location, signal, and battery life before you inspect the tire and wheel assembly. Check compatibility with the chosen tire and wheel, because mismatched parts can block reliable tire pressure monitoring. Align the sensor squarely, then verify it stays seated as you work. After mounting, test again to confirm the reading is stable and correct. Precise inspection keeps you in control, reduces waste, and protects your setup.
- No hidden damage
- No false alerts
- No wasted labor
- No costly repeat work
- No pressure drift
Break the Tire Bead
Remove the valve stem core and fully deflate the tire, then set it upright with the valve stem facing up near the bead breaker. Position the bead breaker on the bead and keep your hands and limbs clear as you use the foot pedal. Rotate the assembly to the 6 o’clock position and break both the inner and outer beads free from the rim. Additionally, ensure that you have a reliable tire repair kit on hand in case you encounter any punctures during your work.
Deflate Tire First
First, use a valve core removal tool to pull the core and let the tire deflate completely. Keep the valve stem at the top so air escapes cleanly and the tire stays upright for bead breaking. Once pressure is gone, you can work with control, not force. Apply the bead breaker arm to the sidewall and separate the bead from the rim. Rotate the tire and repeat on the inner and outer beads until both release. Keep your hands, legs, and face clear while the machine works.
- Feel the pressure drop away.
- Trust the machine, not brute force.
- Stay calm and deliberate.
- Protect your body and your freedom.
- Move to the next step with confidence.
Position Bead Breaker
Set the tire upright on the tread with the valve stem facing up, then align the bead breaker arm with the sidewall and confirm the tire is fully deflated. Remove the valve stem core first so air can’t resist the break. Now position the bead breaker so it contacts the bead squarely. When you activate the foot pedal, the machine applies controlled force and starts separating the tire bead from the rim. Work with precision; don’t overdrive the arm or you can scar the wheel. Rotate the tire to the 6 o’clock position, then the 12 o’clock position, and repeat the break as needed so both beads release. Watch the gap closely, keep pressure steady, and stop as soon as the bead unseats cleanly.
Separate Tire Bead
With the tire upright on the tread and the valve stem core removed, position the bead breaker arm so it contacts the sidewall near the valve stem. Press the bead breaker to force the tire bead away from the rim. Keep your hands clear and don’t lean over the tire; the release can be sudden. If the bead doesn’t separate fully, rotate the tire and repeat on the inner and outer beads until both are free. A fully deflated tire makes this step faster and safer, giving you clean control as you free the assembly.
- Feel the resistance give way
- Stay focused and steady
- Keep your limbs protected
- Gain control over the rim
- Move toward true mechanical freedom
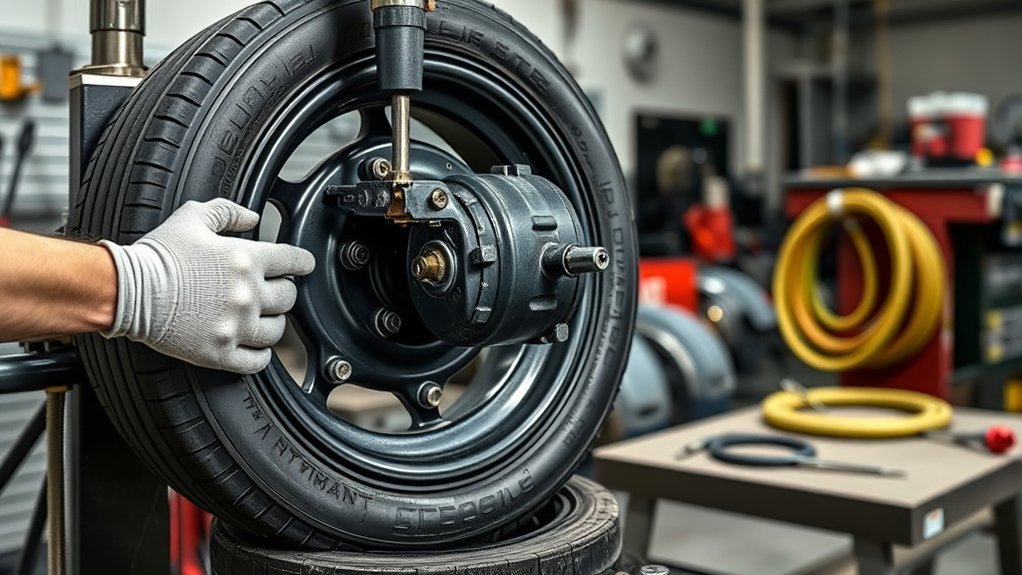
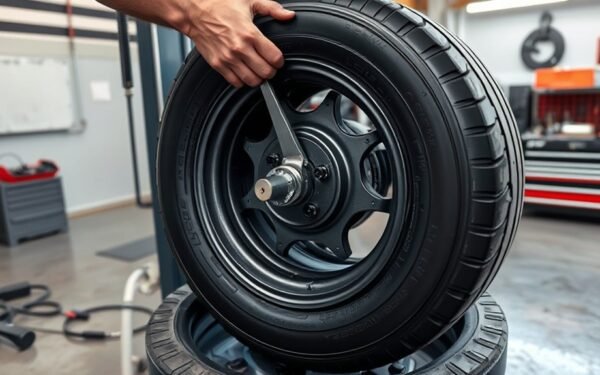
Clamp the Wheel the Right Way
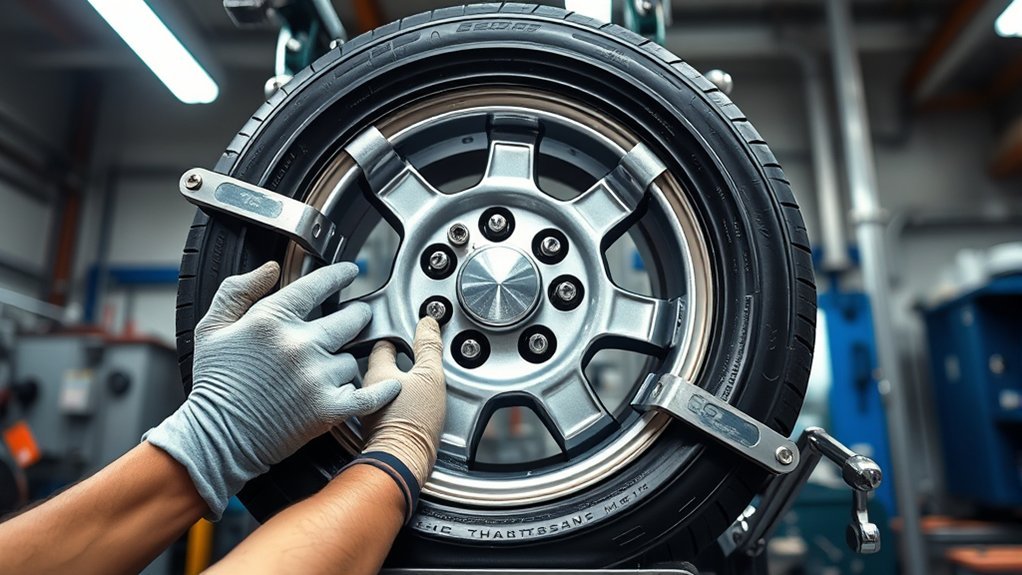
Before you clamp the wheel, make sure it’s clean and free of debris so you don’t damage the rim or compromise the hold. Center the wheel on the turntable and line it up with the machine’s clamps so the setup stays stable. Choose the clamping method that fits the rim: use inside clamping or outside clamping according to the wheel design. That choice helps you protect the rim and keep the wheel secure during mounting. Tighten each clamp firmly, but don’t overdo it. Too much force can distort the wheel or throw off alignment. Check the clamping jaws for wear before every job, and replace them if they’re damaged. If your machine uses plastic protectors, install them to prevent scratches on the wheel surface. When you clamp with care, you control the process, reduce risk, and keep the work moving with precision and confidence. Additionally, ensuring that you follow the inflation speed and maximum PSI guidelines from your tire inflator can contribute to better overall tire maintenance.
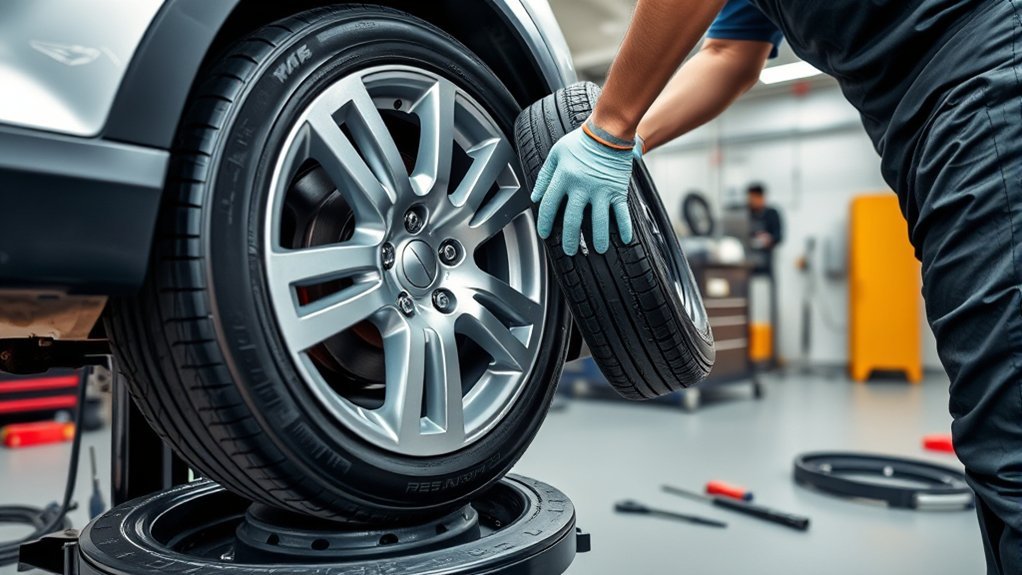
Remove the Old Tire
Once the wheel is clamped securely, fully deflate the tire with a valve core removal tool to eliminate pressure before dismounting. Position the tire upright on the tread, valve stem facing up, so you can reach it easily. Lock the tire and rim firmly on the machine to keep everything stable while you work. Activate the bead breaker and let the arm press the bead free from the rim with steady force. Keep your hands and face clear of the moving mechanism.
- Feel the control return as pressure drops
- Trust the machine to do the hard separation
- Stay focused and keep your stance balanced
- Work with precision, not brute force
- Enjoy the clean release of a stubborn tire
Additionally, ensure you’re aware that the 6-ply tubeless construction enhances puncture resistance, making it easier to handle tire removal without damage.
Next, use a tire lever bar to lift the tire edge over the rim. Move it carefully in small sections, protecting the wheel and tire from damage. Repeat on the opposite side until the old tire comes off completely.
Lubricate the Tire Beads
Apply a generous coat of rubber tire lubricant to the bead and the rim edge to reduce friction and help the tire seat smoothly. You’ll lubricate both tire beads so the mounting process stays controlled and the rubber slides without binding. Use a tire-specific lubricant; don’t substitute soap or grease, since they can contaminate the bead area and disrupt fit. Keep the coat generous, not thin, because full coverage helps prevent damage and supports a secure seat on the rim. Additionally, ensuring proper tire inflation is crucial for optimal performance after mounting.
| Check | Action |
|---|---|
| Dry spots | Reapply lubricant |
| Bead contact | Cover fully |
Inspect the bead as you work. If you see any dry spots during installation, stop and add more lubricant right away. That small reset keeps friction low and helps the tire move freely as pressure builds. With clean coverage and steady attention, you give the tire the best chance to seat evenly and move through the mounting process with less effort.
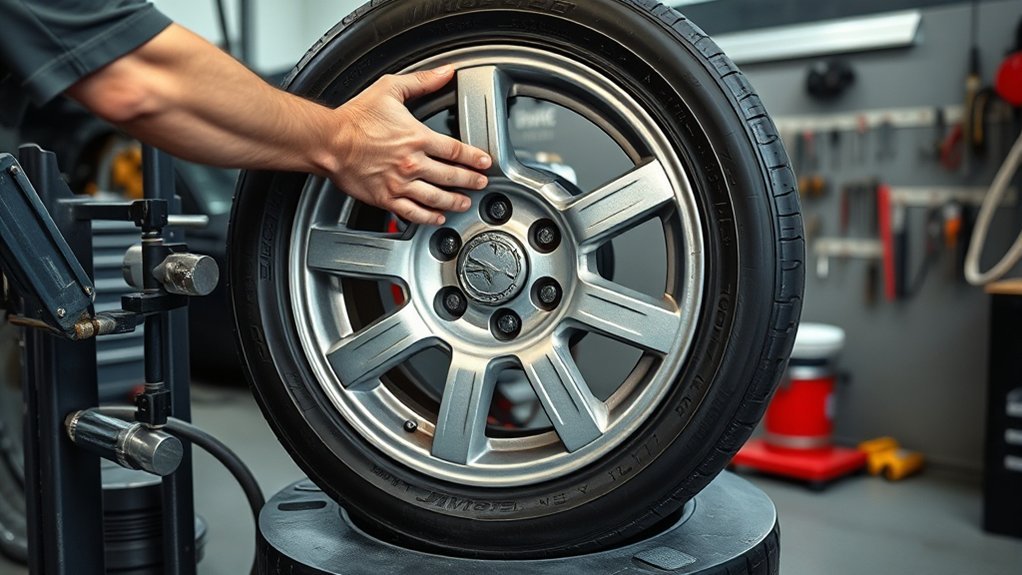
Mount the New Tire
Set the lubricated tire onto the rim at a slight angle, keeping the valve stem clear and the bead aligned with the rim edge. Use the machine’s mounting head to help you mount tires cleanly while you rotate the turntable. Keep steady pressure so the lower bead drops into the drop center and moves toward the bead seat without binding. Then repeat for the upper bead, guiding it into place with controlled motion and minimal force.
- Feel control replace strain
- Feel progress without wrestling steel
- Feel precision protect your hands
- Feel the wheel answer your command
- Feel freedom in a smooth install
When both beads sit properly, you’re ready to inflate the tire in the next step. For now, verify the beads are snug, the rim edge isn’t pinched, and the assembly stays centered. Choosing the right tires can significantly enhance traction and handling. Work calmly, stay clear of pinch points, and let the machine do the heavy lifting.
Inflate the Tire and Seat the Bead
Once the tire’s lubricated, attach the inflator to the valve stem and bring the pressure up gradually, watching for the beads to start seating at about 7 PSI. Keep a close eye on the gauge as you inflate, and don’t exceed 40 PSI. When you hear both beads pop into place, you’ve confirmed a secure bead lock on the rim. Proper tire recycling processes can ensure that old tires are disposed of safely and efficiently.
Bead Seating Pressure
Inflate the tire slowly and watch the bead seating pressure closely, since you’ll usually need at least 7 PSI to start the bead moving and should stay below 40 PSI to protect the tire and rim. As you inflate, keep the bead lubricated so it can seat cleanly and resist damage. Listen for the sharp pop that tells you the bead has locked against the rim, then confirm both sides seal evenly without leaks. If a stubborn tire won’t seat, follow the maker’s guidance; some setups need a brief high-volume burst to finish the job.
- Calm control
- Clean seal
- Safer rim
- Less struggle
- Freedom to finish
Monitor Inflation Progress
With the inflator attached to the valve stem, watch the gauge closely and keep your body clear of the tire while it fills. Use the tire changer machine to inflate in controlled steps, and monitor pressure as the beads settle on the rim. Stay below 40 PSI during seating, unless the manufacturer specifies a lower limit, because excess force can damage the tire and risk blowout. Listen for the audible pop that signals a bead has seated, then check the gauge again and adjust only as needed. Keep hands, face, and torso away from the sidewall, and never lean over the assembly. Careful inflation protects your work, your freedom, and everyone in the bay.
Confirm Bead Lock
If the beads haven’t locked yet, keep the tire moving into place by inflating it slowly and watching the pressure closely. Stay clear of the tire, and don’t let pressure exceed 40 PSI while the bead seats. Listen for the sharp pop that signals both beads have locked against the rim. Then stop, check each bead visually, and confirm they sit evenly all the way around. If one side looks high, release air and try again. Once seating’s complete, reinstall the valve stem core and set final pressure to the manufacturer’s spec. You’re not just mounting a tire—you’re taking control with precision.
- Calm focus
- Controlled power
- Quiet relief
- Safe distance
- Clean victory
Avoid Common Tire Machine Mistakes
A few common mistakes can turn a routine tire change into a safety risk, so always match the tire and wheel sizes before mounting, use proper clamping techniques without inside clamps, and keep the bead seated correctly so both beads pop into place with at least 7 PSI. On the tire machine, verify the bead breaker isn’t forcing the sidewall or pinching the rim. If the sizes don’t match, stop and correct them before you inflate, because leaks and damage can follow fast. Clamp the wheel evenly, not with inside clamps that scratch the finish or weaken the edge. Watch pressure closely; don’t exceed the manufacturer’s limit, usually 40 PSI, or you risk an explosion. Keep the bead centered as pressure rises so it seats cleanly, then inspect the tire changer for wear, loose parts, or damage. Regular checks keep your work safe, efficient, and in your control. Additionally, ensure you choose winter tires that are compatible with your vehicle to enhance safety and performance in cold conditions.
Frequently Asked Questions
How Do I Choose the Correct Tire Mounting Machine?
Choose a tire mounting machine by matching it to your wheel range, tire types, and workload. You should compare tire mounting techniques supported, machine safety features, and cost considerations before you buy. Pick a model with enough clamping force, bead-breaking power, and adjustable helpers for your jobs. If you service many low-profile or run-flat tires, invest in automation and protection that cut strain and keep you working freely.
What Tire Machine Accessories Are Most Useful?
Most useful tire machine accessories include bead clamps, plastic protectors, valve tools, and a tire lube brush. You’ll reduce rim damage, speed service, and improve control. Choose accessories with strong safety features, then match them to your workflow. For tire machine maintenance, keep adapters, air tools, and spare jaws clean and ready. Their accessory benefits help you work efficiently, protect your hands, and stay independent on every job.
How Often Should the Machine Be Professionally Serviced?
You should professionally service it every 6 to 12 months; a stitch in time saves nine. Follow a service schedule based on use, and tighten that interval if you run high volumes. You’ll cut downtime by cleaning, lubricating, and checking wear between visits. Pair routine maintenance tips with a professional inspection to catch leaks, alignment drift, and sensor faults early. That keeps you independent, efficient, and in control.
Can One Machine Handle Run-Flat and Low-Profile Tires?
Yes, one machine can handle both if you check run flat compatibility first. You’ll need proper low profile challenges support, like bead depressors, rim protectors, and a strong clamping system. Don’t force a standard machine on stiff sidewalls. Use tire safety features such as reverse mount heads and adjustable inflation control to protect the wheel and yourself. With the right attachments, you can work efficiently and keep your setup versatile.
What Are the Signs of a Worn Tire Mounting Head?
You’ll spot worn tire signs fast: rounded edges, gouges, cracked plastic, loose pivots, or metal-on-metal contact. During tire head inspection, check for burrs, excessive play, and damaged inserts. If the bead slips or scrapes, your mounting head’s tired. Don’t let the machine call the shots—do mounting head maintenance now, replace worn parts, and keep your workflow free, safe, and efficient.
Conclusion
You’ve set up the machine, checked the tire and wheel, broken the bead, clamped correctly, lubricated the beads, mounted the tire, and inflated it safely. You’ve also avoided the common mistakes that cause damage, delays, and risk. By working methodically, by using the right tools, and by following each step in order, you can mount tires accurately, efficiently, and safely every time. Finish with a final inspection, and you’re ready to return the wheel to service.
Related Articles
How to Operate a Tire Machine: Complete Beginner’s Tutorial
Master tire machine basics fast, but discover the crucial safety and setup steps that separate smooth swaps from costly mistakes.
Read More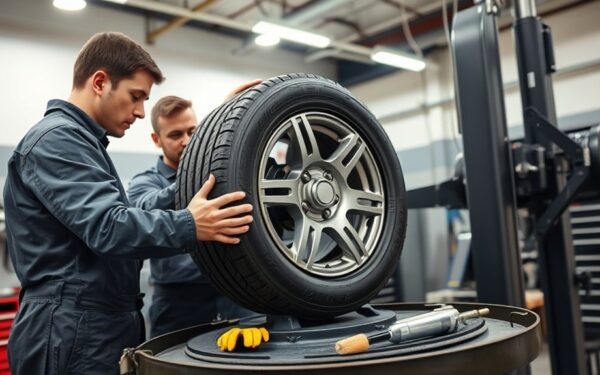
How to Use a Tire Changer Machine: Full Tutorial for Beginners
Master tire changing basics with this beginner-friendly guide—learn the essential steps, avoid costly mistakes, and discover the crucial final tips inside.
Read More
How to Remove Air From a Tire: Safe Step-By-Step Methods
Carefully learn how to release tire air safely and precisely, then discover the easiest ways to avoid over-deflating and get the pressure just right.
Read More