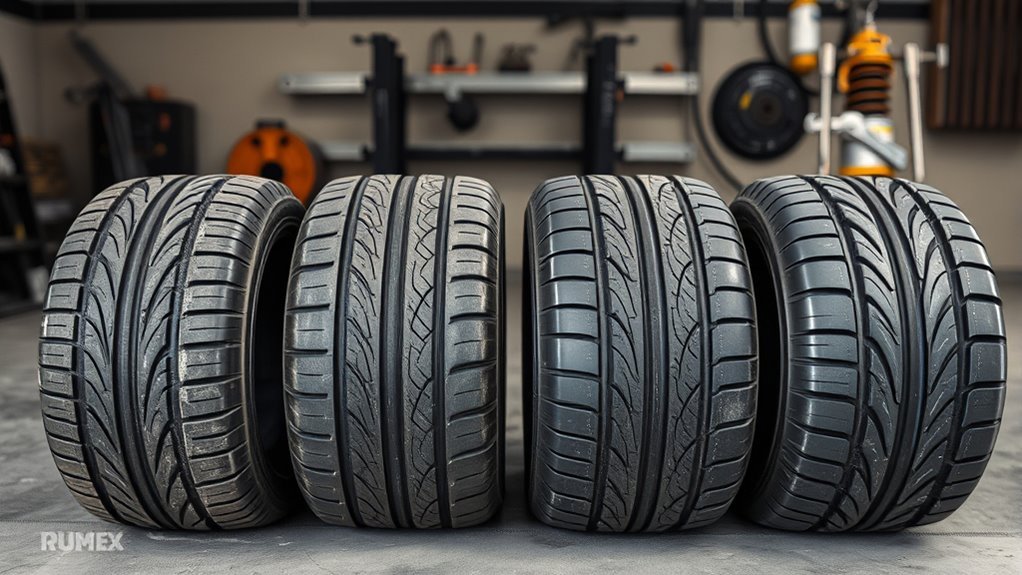
You can diagnose uneven tire wear by matching the tread pattern to the most likely cause: center wear usually points to overinflation, both-edge wear often points to underinflation, one-sided wear suggests alignment or suspension trouble, and cupping or scalloping often means a balance, shock, strut, bearing, or other rotating-component issue. Treat the pattern as a diagnostic clue rather than proof of a failed part. Measure tread depth across each tire, document the pattern, correct the root cause, and recheck the tire after service.
Last updated: August 18, 2026
Quick Answer
Uneven tire wear is usually caused by incorrect tire pressure, poor wheel alignment, worn suspension parts, wheel imbalance, hard braking, overloading, or delayed tire rotation. Measure the inner, center, and outer tread with a gauge and record any clear, repeatable difference as a diagnostic clue. Correct the pressure, alignment, balance, or damaged parts before the wear gets worse. If tread reaches 2/32 inch or the wear bars are flush, replace the tire.
Key Takeaways
- Center wear usually means the tire has been run overinflated; both-edge wear usually means underinflation or overloading.
- Inner-edge, outer-edge, or feathered wear needs an alignment and steering/suspension inspection.
- Cupping, scalloping, vibration, or a humming noise can point to imbalance, worn shocks or struts, wheel-bearing problems, runout, or other rotating-component faults.
- Use a tread-depth gauge instead of judging wear by sight alone. Compare the inner, center, and outer tread and record repeatable differences.
- Replace a tire when tread reaches the 2/32-inch replacement point, the wear bars are flush, structural damage is present, or a qualified tire technician says the tire is unsafe.
At a Glance
| Time Required | 10–20 minutes for a driveway inspection |
| Difficulty | Easy for inspection; professional service needed for alignment, balancing, mounting, and internal tire checks |
| Tools Needed | Tread-depth gauge, tire-pressure gauge, flashlight, notebook or phone camera, vehicle placard or owner’s manual |
| Cost | Low for inspection tools; shop costs vary for alignment, balancing, suspension repair, or replacement tires |
What Do Uneven Tire Wear Patterns Mean?
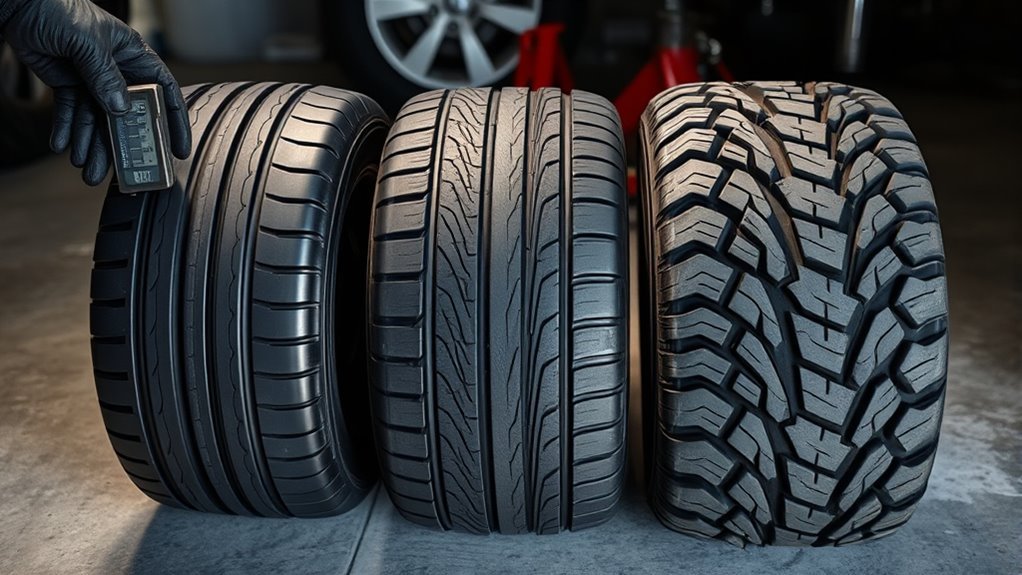
The fastest way to narrow down uneven tire wear is to compare the worn area with the tire’s contact patch. The contact patch is the part of the tread touching the road. Pressure, alignment, suspension movement, balance, braking, load, and tire or wheel condition can change how that patch carries load. The wear pattern helps narrow the diagnosis, but it does not prove which component has failed.
| Wear Pattern | What It Looks Like | Most Likely Cause | First Fix |
|---|---|---|---|
| Center wear | Middle ribs worn faster than shoulders | Overinflation or load/pressure mismatch | Set cold pressure to the vehicle placard |
| Both-edge wear | Both shoulders worn faster than center | Underinflation, overloading, or repeated hard cornering | Correct pressure and load |
| One-sided wear | Inner or outer shoulder worn heavily | Camber or toe misalignment; worn parts | Alignment and suspension inspection |
| Feathering | Tread feels smooth one way and sharp the other | Toe misalignment or another source of lateral scrub | Alignment; inspect tie rods and steering parts |
| Cupping or scalloping | Repeating dips or high-low spots | Worn shocks or struts, bearings, imbalance, runout, or loose components | Inspect the tire/wheel assembly and suspension |
| Flat spot | One localized bald or scuffed patch | Brake lock-up, skid, prolonged storage, brake fault, or tire damage | Inspect the tire and brake system |
For best results, combine a visual inspection with measurement. The National Highway Traffic Safety Administration recommends checking tire pressure, tread, sidewalls, and tire age as part of regular tire safety maintenance. Measure each tire at the inner shoulder, center, and outer shoulder and repeat the measurements at several positions around the circumference. Record any consistent difference instead of relying on a single reading. If tread reaches 2/32 inch or the wear bars are flush, the tire has reached the replacement point.
For a dedicated visual breakdown of the patterns themselves, see how to tell tire wear patterns.
Note: Always check tire pressure when the tires are cold. Use the pressure listed on the driver-door placard or owner’s manual, not the maximum pressure printed on the tire sidewall.
What Should You Check Before Diagnosing Tire Wear?
Do the inspection on level ground with the parking brake set. For an accurate cold-pressure reading, NHTSA defines a cold tire as one that has not been driven for at least three hours. Use a flashlight to inspect the inner shoulder, where damage and uneven wear can be easy to miss.
- Tread-depth gauge: Use this for accurate readings in 32nds of an inch or millimeters.
- Pressure gauge: Use a reliable gauge and compare the reading with the vehicle placard.
- Camera or notes app: Photograph each tire and label its position: front left, front right, rear left, rear right.
- Gloves: Run your hand lightly across the tread to feel feathering, scalloping, or raised edges.
Warning: Do not crawl under a vehicle supported only by a jack. If you need to remove a wheel or inspect suspension parts closely, use proper jack stands or have a qualified shop perform the inspection.
What Causes One-Sided Tire Wear?
When tread is worn heavily on only the inner or outer shoulder, the tire is usually not tracking squarely on the road. Common causes include toe or camber misalignment, worn ball joints, worn control-arm bushings, bent suspension parts, incorrect ride height, or other steering and suspension faults. Repeated hard cornering and pressure problems can also contribute to outer-shoulder wear. Continued driving can make the pattern worse and reduce available tread where the tire needs it.
| Pattern | Likely Cause | Quick Fix |
|---|---|---|
| Inner-edge wear | Negative camber, incorrect toe, worn suspension, or ride-height problems | Alignment check; replace worn parts first |
| Outer-edge wear | Positive camber, incorrect toe, hard cornering, or pressure/load problems | Verify pressure; inspect alignment and steering/suspension parts |
Do not treat an alignment adjustment as a substitute for repairing worn parts. If tie rods, bushings, bearings, ball joints, or other components have excessive play, they can prevent the vehicle from holding its intended alignment. Repair the mechanical problem first, then perform the final alignment.
For a deeper diagnosis of a single worn outer shoulder, see why a tire wears on the outside.
Pro Tip: If only the front tires show one-sided wear, inspect front steering, alignment, and suspension. If the rear tires show it, ask the shop to check rear toe, rear camber where adjustable, axle or thrust alignment, wheel bearings, and rear suspension condition rather than checking only the front end.
Why Do Tires Wear in the Center or on Both Edges?
Center wear and both-edge wear often point toward inflation or loading. Excessive inflation can concentrate wear toward the center ribs. Chronic underinflation can shift more load toward the shoulders and increase heat and internal stress. Overloading can also create abnormal shoulder wear even when the measured pressure looks normal for an unloaded vehicle.
The U.S. Tire Manufacturers Association recommends regular attention to pressure, tread, rotation, and alignment. Check pressure at least monthly and follow the vehicle manufacturer’s load and inflation guidance.
- Check pressure cold: NHTSA defines cold pressure as a reading taken after the vehicle has not been driven for at least three hours.
- Use the vehicle placard: The correct cold inflation pressure is normally listed on the Tire and Loading Information label or in the owner’s manual.
- Measure all four tires and the spare: Include the spare where applicable.
- Account for load: Towing, hauling, and repeated heavy cargo may require specific guidance from the vehicle manufacturer, owner’s manual, or approved tire load information.
- Recheck after correction: Compare the same tread locations again after service and during future tire inspections to confirm abnormal wear is no longer progressing.
The wear bars built into passenger tires identify the 2/32-inch replacement point, but available wet-road grip can decline as tread depth decreases. Treat tread depth as a safety measurement, not only a wear-limit number.
What Causes Tire Cupping, Scalloping, or Diagonal Wear?
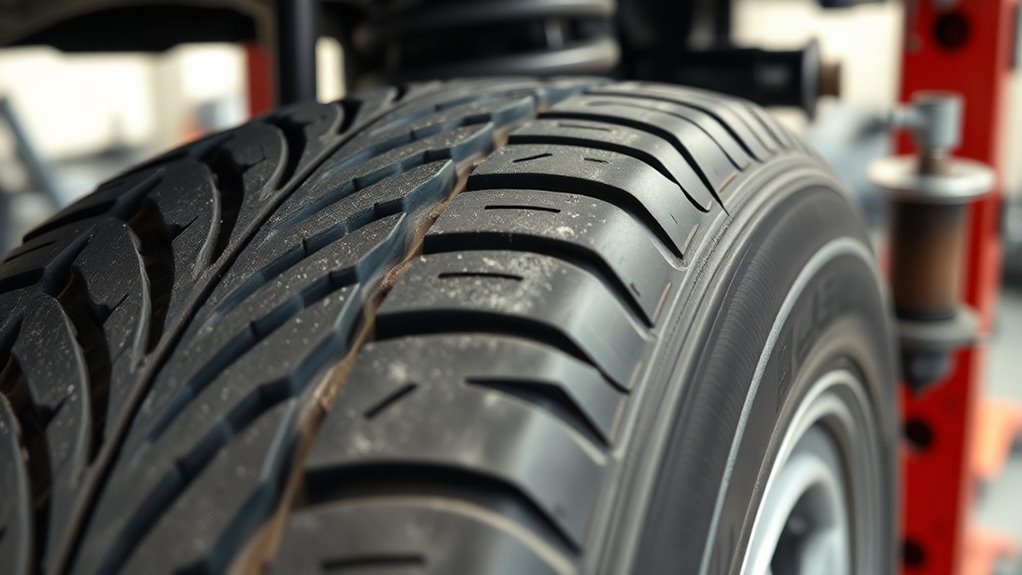
Cupping and scalloping are high-low wear patches that repeat around the tire. Unlike simple center or shoulder wear, these patterns often involve a dynamic problem: the tire may be bouncing, wobbling, running out of round, or being loaded unevenly as it rotates.
Possible causes include worn shocks or struts, loose or worn wheel bearings, wheel imbalance, bent wheels, radial or lateral runout, mounting problems, and loose suspension components. Michelin’s passenger-tire wear guidance also identifies uneven wear patterns such as cupping, one-sided wear, feathering, and flat spots as clues that pressure, alignment, balance, suspension, braking, or tire condition needs attention.
- Cupping: Repeating dips or scoops around the tread. Inspect the tire, wheel, balance, shocks or struts, bearings, and suspension.
- Scalloping: A wavy high-low pattern often felt as well as seen. Inspect suspension damping and rotating components.
- Diagonal wear: Oblique patches across the tread. Check alignment, tire/wheel runout, balance, wheel bearings, steering parts, and mounting condition.
- Vibration with wear: Have the tire and wheel assembly balanced and inspected for wheel runout or internal tire damage. Road-force testing may help diagnose vibration that remains after a conventional balance.
Do not install new tires without addressing the cause of severe cupping or diagonal wear. Otherwise, the replacement tires can develop abnormal wear as well. Correct the mechanical or tire/wheel problem first, then install, balance, align where needed, and monitor the new tread.
For more detail on this specific pattern, see what causes tire cupping.
What Causes Tire Feathering and Flat Spots?
Feathering feels like a sawtooth edge on the tread blocks. Run your hand lightly across the tread in both directions. If the blocks feel smoother in one direction and sharper in the other, incorrect toe or another source of lateral scrub should be investigated. The pattern is a clue; an alignment and steering/suspension inspection should confirm the cause.
What Should an Alignment Inspection Include?
A thorough alignment service should start with correct tire pressure and an inspection for mechanical problems. Depending on the vehicle, the technician may measure toe, camber, caster, thrust angle, and ride height while also checking the condition of steering, suspension, wheel bearings, wheels, and tires.
- Measure the relevant alignment angles with calibrated equipment.
- Inspect steering and suspension parts for looseness or damage before final adjustment.
- Correct tire pressure before alignment.
- Ask for the before-and-after alignment printout so you can see which angles changed.
What Causes Brake-Induced Flat Spots?
Flat spots form when one area of the tire is scrubbed or loaded differently from the rest. A skid, wheel lock, dragging brake, severe braking event, prolonged stationary storage, tire damage, or another rotating-system fault can produce localized wear. If the vehicle begins thumping or vibrating after a hard stop or brake problem, inspect the tire and brake system promptly.
Some temporary storage-related vibration can lessen as a tire warms and resumes its normal shape, but rubber removed by a skid does not grow back. Deep flat spots, exposed cords, structural damage, or vibration that remains after inspection and balancing require professional evaluation and may require replacement.
Commercial-Tire Patterns: Depression, River & Shoulder-Step Wear
Depression wear, river wear, and shoulder-step wear are terms used heavily in commercial and heavy-duty tire diagnostics. Do not automatically apply a commercial-tire diagnosis to a passenger car. The meaning can change with tire position and operating conditions.
Michelin’s commercial irregular-wear guide distinguishes several patterns. On commercial steer tires, shoulder-step wear can occur during slow-wearing radial service and may not require correction. On trailer tires, a shoulder-step condition can instead be associated with excessive camber, a misaligned or damaged axle, or bearing adjustment. Michelin also describes river wear as a condition commonly seen on slow-wearing free-rolling radial tires.
- Steer-tire shoulder step: Can be characteristic of slow-wearing commercial radial service; evaluate it using the tire maker’s commercial guidance.
- Trailer shoulder step: Can require inspection for camber, axle alignment or damage, and bearing adjustment.
- River wear: A circumferential worn channel beside a tread rib that can occur in slow-wearing free-rolling commercial applications.
- Depression wear: Depending on position, pressure, mismount, worn parts, bearing condition, or other wheel-end problems may need investigation.
For an ordinary passenger vehicle, unusual grooves or rib-height differences should trigger a pressure, tread, alignment, tire/wheel, steering, suspension, and bearing inspection rather than a self-diagnosis based on commercial terminology. Retreading decisions belong to commercial fleet and retread professionals following the casing and tire manufacturer’s requirements.
When Do Cuts, Punctures, or Tread Damage Require Tire Removal?
Physical damage needs a different decision process from ordinary wear. Cuts, chunking, punctures, bulges, exposed cords, air loss, and sidewall damage can affect the tire structure even when the tire still appears to hold pressure.
The Tire Industry Association states that a proper puncture repair requires removing the tire from the wheel and inspecting it internally. A plug alone or patch alone is not considered a proper permanent repair. TIA limits puncture repairs to the center tread area, says shoulder or sidewall punctures are not repairable, and says tread punctures larger than 1/4 inch (6 mm) should not be repaired.
- Remove the tire from service: Bulges, exposed cords or belts, visible separation, major structural damage, or damage causing significant air loss.
- Have it inspected before repair: Any puncture, deep cut, impact damage, or object embedded in the tread.
- Do not repair as a normal tread puncture: Shoulder or sidewall punctures, punctures larger than the applicable repair limit, overlapping injuries, or tires damaged by severe underinflation.
- Inspect sidewall cuts professionally: A superficial mark and a cut that exposes structural material are not the same condition. Any questionable sidewall injury should be evaluated by a qualified tire technician.
Warning: Do not treat sealant, a string plug, or an emergency inflator as a proper permanent repair. A permanent repair requires the tire to be removed and inspected internally using an approved repair procedure.
How Do You Measure and Map Uneven Tire Wear?
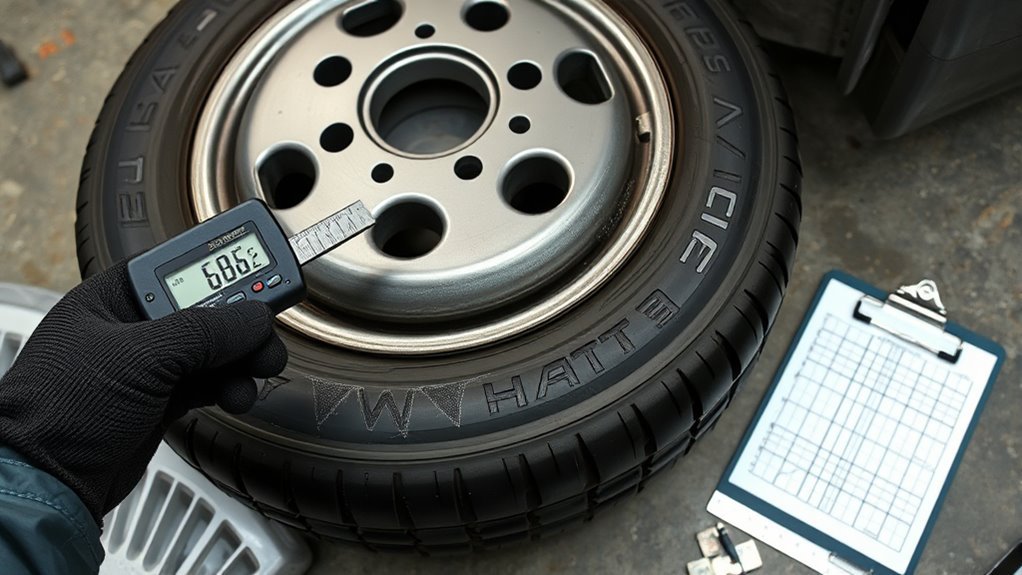
A tire-wear map turns a quick look into useful maintenance data. Measure tread depth at the same locations each time, record the vehicle mileage, and compare the results after pressure correction, rotation, alignment, balancing, or suspension service.
[Products Worth Considering]

The Ziopetru adjustable magnetic wheel alignment tool helps you check and restore camber and caster positioning after removing and reinstalling undercarriage components. With a clear leveling/bubble measurement system and an easy zeroing adjustment knob, it supports precise horizontal angle checking. The strong magnetic base mounts to metal surfaces for convenient use at home on cars, motorcycles, trucks, vans, and SUVs.

Measure tire tread depth quickly and accurately with this LUMITECO dial gauge that reads in 1/32" increments up to 14/32". The color-coded green/yellow/red zones make it easy to judge tire wear and know when replacement is needed. A rugged, compact design with a protective pouch helps keep the gauge ready for use on cars, trucks, motorcycles, and more.

Monitor tire tread wear with a smart, color-coded depth gauge that shows clear condition ranges at a glance. The bar is range marked for fast, easy readings, helping you maintain safer traction and performance. Each gauge is portable with a pocket clip, and the set includes 20 units for daily use and sharing.
How Should You Measure Tread Depth?
Take tread-depth readings across each tire at the inner area, center, and outer area where the tread design allows accurate gauge placement. Repeat the measurements at several positions around the circumference because a single reading can miss a flat spot or localized wear. Record the lowest tread measurement and any repeatable side-to-side difference.
- Use a tread-depth gauge for the most repeatable readings.
- Treat consistent differences across the tread as diagnostic clues rather than relying on one universal cross-tread difference rule.
- Compare front tires with rear tires to identify position-related wear.
- Look for wear bars, cracks, embedded objects, bulges, cuts, and exposed cords.
- Replace the tire if tread reaches the applicable 2/32-inch replacement point or the wear indicators are flush.
How Should You Record Wear Locations?
Write down exactly where the wear appears and how severe it is. Avoid vague notes such as “front tire bad.” Record the tire position, measurement points, tread depths, mileage, pressure, visible pattern, symptoms, and service performed.
| Tire Position | Wear Type | Example Note |
|---|---|---|
| Front Left | Outer shoulder wear | Outer 4/32, center 6/32, inner 6/32; inspect alignment and suspension |
| Front Right | Center wear | Center 3/32, shoulders 5/32; verify cold pressure and loading |
| Rear Left | Feathering | Sawtooth feel across tread; inspect rear alignment and suspension |
| Rear Right | Cupping | High-low patches; inspect tire, wheel, shock, bearing, balance, and runout |
How Do You Create a Tire-Wear Map?
Draw a simple rectangle for each tire and label the inner, center, and outer readings. Add the date, mileage, tire position, cold pressure, and any service performed. This gives you a repeatable record for checking whether the correction worked or the pattern is still progressing.
- Mark high-wear zones and note the suspected category of cause.
- Link each entry to pressure, rotation, alignment, balance, tire/wheel, brake, or suspension work.
- Photograph the tire beside the written measurement for a visual record.
- Recheck after corrective service and again during future inspections; inspect sooner if the wear was severe or appeared suddenly.
How Can You Prevent Uneven Tire Wear?
Preventing abnormal wear is easier than correcting it after tread has disappeared. Pressure, rotation, alignment, wheel condition, and steering/suspension condition should be checked on a schedule and whenever new symptoms appear.
- Monthly: Check cold pressure, tread, sidewalls, valve stems, visible damage, and the spare where applicable.
- Before long trips: Check pressure, tread, spare tire, visible wheel/tire damage, and the vehicle’s load limits.
- Every 5,000–8,000 miles if no manufacturer interval is specified: USTMA recommends tire rotation within this range. Follow the owner’s manual when it specifies another interval or rotation restriction.
- After potholes or curb impacts: Inspect for bulges, cuts, vibration, pulling, wheel damage, or steering-wheel changes.
- When uneven wear, pulling, or steering symptoms appear: Check alignment and inspect steering and suspension parts. Also follow any periodic alignment guidance in the owner’s manual.
Rotation can equalize normal position-related wear, but it does not repair the cause of abnormal wear. If a tire is already badly cupped, feathered, damaged, or heavily worn on one shoulder, first determine whether the tire is safe to continue using and correct the pressure, alignment, balance, wheel, brake, or suspension problem.
[Products Worth Considering]

The SAFELIFE dial tire tread depth gauge measures tread depth in 1/32 inch increments with clear, easy-to-read 2-inch dial face. Color zones using a traffic light system help you quickly judge whether tread is low, marginal, or ample for safer driving. Built with a durable zinc cast body and a metal detect probe for precise, comfortable use across cars, motorcycles, trucks, and buses.

Steelman white tire marking crayons provide high-contrast, semi-permanent marks for repairing and inspecting tires and equipment. They write on wet or dry, smooth or coarse surfaces including rubber, metal, glass, and wood, making them ideal for puncture location and damage outlining. The lead- and zinc-free crayons resist weather and fading yet wipe away when you no longer need the marks.

This heavy-duty tire pressure gauge combines measurement, inflation, and deflation in one compact tool for quick roadside and garage use. Its dual-head chuck helps reach inner and outer dual-wheel positions, while the clear indicator bar makes readings easy to see. Built for durability, it supports a wide pressure range and works across cars, trucks, RVs, SUVs, and motorcycles.
When Should You Replace a Tire Instead of Repairing It?
Replace the tire when tread reaches the 2/32-inch replacement point, when the tread-wear indicators are flush, when cords or belts are exposed, when structural damage is present, or when the tire cannot be repaired using an approved procedure. Current 49 CFR 570.9 specifies that tire tread must be at least 2/32 inch deep and also addresses conditions such as bulges, separation, and exposed cord or belting material.
Age matters even when tread looks usable. Bridgestone recommends professional inspection after five years and says tires manufactured 10 or more years earlier should be removed from service, including spares. Other vehicle or tire manufacturers may publish different service-life recommendations, so check the guidance for your vehicle and tire.
If you replace fewer than four tires on an AWD or 4WD vehicle, check the owner’s manual or vehicle manufacturer’s requirements for permitted tire-size, tread-depth, and circumference differences. Drivetrain requirements vary, so do not assume one generic tread-depth tolerance applies to every vehicle.
Note: The DOT Tire Identification Number includes a four-digit manufacture-date code. The first two digits identify the week and the last two identify the year, such as 2522 for the 25th week of 2022.
[Products Worth Considering]

Milton S-921 pencil tire pressure gauge helps you maintain optimal tire pressure for passenger cars with accurate readings in PSI and kPa. It features a built-in deflator valve for convenient pressure adjustments, plus a single chuck head and nylon indicator bar for easy use on the go. Built from durable plated brass and designed for reliable performance, it’s a practical road trip and cold-weather maintenance tool.

Accurately measure tire tread depth with a calibrated gauge marked from 0 to 1 inch in 1/32 inch increments. The color-coded bar helps you quickly identify tread condition ranges, supporting safe driving for trucks, motorcycles, automobiles, and passenger vehicles.

This tire inflator with pressure gauge delivers long-lasting performance with a durable rubber-protected gauge and sturdy build. The longer hose and 360 swivel air chuck help you seal the valve securely and keep your hands free while measuring, inflating, or deflating. It’s battery-free for reliable use and provides ±2 PSI accuracy in the mid-range for most typical tires, with universal compatibility for 1/4 NPT compressor outputs.
Frequently Asked Questions
What are the most common causes of uneven tire wear?
Common causes include incorrect tire pressure, wheel-alignment problems, delayed rotation, worn shocks or struts, loose or worn steering and suspension components, wheel imbalance, wheel or tire runout, overloading, braking problems, and aggressive driving. The wear pattern helps narrow the diagnosis: center wear often points to inflation, one-sided or feathered wear points toward alignment, and cupping suggests a dynamic tire, wheel, bearing, or suspension problem.
Can uneven tire wear be corrected?
You can correct the cause of uneven tire wear, but you cannot restore tread that has already worn away. Correcting pressure, rotating tires where appropriate, balancing the wheel and tire assembly, aligning the vehicle, or replacing worn mechanical parts can stop additional abnormal wear. A severely worn, damaged, cupped, or flat-spotted tire may still need replacement.
Is it safe to drive with uneven tire wear?
It depends on the severity and cause. Minor unevenness with adequate tread still needs diagnosis, but exposed cords, bulges, structural damage, air loss, tread at the replacement point, strong vibration, or severe one-sided wear can make continued driving unsafe. If the vehicle feels unstable or the tire has visible structural damage, stop using it and have it inspected.
Will an alignment fix uneven tire wear?
An alignment can correct uneven wear caused by incorrect toe, camber, caster, or thrust-angle settings where those angles are adjustable, but it will not fix every wear pattern. Pressure problems, wheel imbalance, bent wheels, damaged tires, worn bearings, brake faults, and worn steering or suspension parts may require different repairs. An alignment also cannot replace tread that has already worn away.
How often should I rotate my tires?
Use the rotation interval in your owner’s manual first. If no interval is specified, the U.S. Tire Manufacturers Association recommends rotating tires every 5,000 to 8,000 miles. Some staggered, directional, or vehicle-specific tire setups have different rotation limits, so follow the instructions for your vehicle and tires.
Is it safe to drive on cupped tires?
Cupping should not be ignored because it can indicate a tire, wheel, balance, bearing, or suspension problem. Whether the tire can remain in service depends on tread depth, severity, structural condition, vibration, and the underlying cause. If the tire vibrates or thumps strongly, exposes cords, has structural damage, or is at the replacement tread depth, stop using it until a qualified tire professional inspects it.
Conclusion
Uneven tire wear is a diagnostic signal, not a diagnosis by itself. Center wear points first toward inflation, both-edge wear toward inflation or loading, one-sided and feathered wear toward alignment or suspension, and cupping or scalloping toward tire/wheel, balance, damping, bearing, or suspension problems. Measure the tread, document where the wear occurs, correct the root cause, and recheck it. Replace the tire when tread reaches the replacement point or when structural damage, exposed cords, severe vibration, or another unsafe condition is present.
Sources
- National Highway Traffic Safety Administration TireWise — tire pressure, tread, sidewall, tire age, cold-pressure checks, and general tire-safety guidance.
- U.S. Tire Manufacturers Association Tire Care Essentials — pressure, tread, rotation, and alignment maintenance guidance, including the 5,000–8,000-mile rotation interval when no vehicle-manufacturer interval is specified.
- Tire Industry Association Tire Repair — puncture repair limits, internal inspection requirements, and shoulder/sidewall repair restrictions.
- Michelin Wear Problems — passenger-tire wear patterns including center wear, shoulder wear, one-sided wear, feathering, cupping, and flat spots.
- Michelin Irregular Tire Wear 101 — commercial-tire irregular wear patterns, including shoulder-step, river, depression, diagonal, and cupping wear.
- Bridgestone Tire Replacement Guidance — replacement guidance for tread depth, tire condition, aging tires, and spares.
- 49 CFR 570.9 Tires — federal vehicle-in-use tire inspection criteria for tread depth, matching tires, general condition, and exposed cords or belting.