
How To Trim the Fender Liner on a Toyota Tacoma
Trimming the fender liner on a Toyota Tacoma is a practical way to stop light tire rubbing after installing larger tires, changing wheel offset, or adjusting suspension height. The key is to cut only the plastic that actually contacts the tire, work in small passes, and test clearance before you call the job finished.
Quick Answer
To trim a Tacoma fender liner, first find the exact rub point, mark a conservative cut line with painter’s tape, remove or loosen the liner, cut a small section with a sharp utility knife or oscillating tool, smooth the edge, reinstall the liner securely, then test steering at full lock both ways.
Key Takeaways
- Trim only where the tire rubs; tire size alone does not tell you where to cut.
- Use the tire-and-loading label and owner’s manual as the starting point for tire size, load rating, and pressure guidance.
- Work in small cuts, test fit often, and keep the liner secured with proper clips or fasteners.
- If the tire rubs metal, cab mounts, body mounts, wiring, or hoses, stop and use a different clearance method.
At a Glance
| Time Required | 45–90 minutes for both front liners, depending on access and how much test fitting is needed |
| Difficulty | Easy to moderate DIY, but accuracy matters |
| Tools Needed | Painter’s tape, marker, measuring tape, trim clip tool, 10mm socket if applicable, utility knife or oscillating tool, sandpaper or rotary tool, safety glasses, gloves, and dust protection |
| Cost | Usually $0–$40 if you already own the cutting tool; more if buying a rotary or oscillating tool |
Why Trim Your Fender Liner? Understanding Tire Clearance Issues
When you install larger tires or wheels with a different offset, the tire may contact the plastic fender liner during turns, braking, backing up, or suspension compression. That rubbing is more than an annoying sound. It can chew up the liner, polish the tire shoulder, loosen clips, or pull the liner into the tire.
Before cutting anything, confirm your tire setup is appropriate for the truck. The National Highway Traffic Safety Administration advises drivers to check the owner’s manual or the Tire and Loading Information Label for the correct tire size, and Toyota’s Tacoma owner materials also point owners back to tire and vehicle specifications for safe tire use. A liner trim is a clearance adjustment, not a substitute for the correct tire load rating, inflation pressure, or safe wheel fitment.
Warning: Do not cut metal structure, wiring, brake lines, washer-fluid parts, air ducts, or any component you cannot identify. If the tire is rubbing metal or the body mount area, trimming the plastic liner alone is not the right fix.
Fender liner trimming is most useful for light contact with the plastic liner at the front or rear of the wheel well. If your Tacoma rubs heavily at the cab mount, body mount, pinch weld, bumper cover, or mud flap area, you may need a different solution such as liner pushback, mud flap removal, bumper trimming, a different wheel offset, alignment changes, or professional fabrication.
Safety and Prep Before Cutting
Park on a flat surface, set the parking brake, and chock the wheels before you begin. If you remove a wheel for better access, support the truck with properly rated jack stands on approved lift points. Never rely on a jack alone while working near the wheel well.
Wear safety glasses because cutting plastic can throw chips toward your face. Use gloves that still let you control the tool, and wear dust protection when sanding or grinding plastic. OSHA’s eye protection and hand protection standards are workplace rules, but the same hazards apply in a garage. For sanding dust, a NIOSH-approved respirator is better than a loose paper mask.
- Clean the wheel well so you can see rub marks and fasteners.
- Take photos before removing clips so reassembly is easier.
- Keep removed clips, screws, and bolts sorted by side.
- Keep the cutting tool away from the tire, paint, wiring, and hoses.
- Use a sharp blade; dull blades slip and create ragged cuts.
How to Find the Rub Point Before You Trim
The safest trim is based on the actual contact point, not a guess. Look for shiny plastic, scuffed liner texture, black tire marks, loose clips, or a polished spot on the tire sidewall or shoulder. Then test the truck at normal ride height.
- Turn the steering wheel fully left and inspect the front and rear of both front wheel wells.
- Turn the steering wheel fully right and inspect again.
- If possible, have someone slowly turn the wheel while you watch from a safe position outside the tire path.
- Mark the suspected contact area with painter’s tape.
- Back up and turn slowly in both directions, then recheck the marks.
Note: Off-road suspension articulation can create contact that does not appear in the driveway. If your Tacoma is used off-road, leave extra margin and recheck the liner after the first trail drive.
Essential Tools for Trimming Your Fender Liner
You do not need a large tool collection, but you do need control. A clean, conservative cut is better than a fast cut that removes too much liner.
Necessary Cutting Tools
- Painter’s tape and marker: Use them to outline the cut and protect the visible edge.
- Measuring tape: Helpful for making both sides even, but do not rely on measurements alone.
- Trim clip tool or flat trim tool: Removes plastic clips with less damage.
- Socket set: Many Tacoma liners use clips and small bolts; a 10mm socket is commonly useful, but verify your truck’s fasteners before forcing anything.
- Sharp utility knife: Works well for thin plastic and small trims.
- Oscillating multi-tool or rotary tool: Useful for controlled cuts, especially on thicker plastic.
- Sandpaper, file, or deburring tool: Smooths the edge after cutting.
- Replacement clips or fasteners: Old clips often break during removal.
Safety Gear Essentials
Use safety glasses, gloves, and dust protection every time you cut or sand the liner. Keep a small first-aid kit nearby, and avoid loose sleeves or jewelry that could catch on a rotary or oscillating tool.
How to Trim Your Fender Liner Successfully
The goal is not to remove as much plastic as possible. The goal is to create enough clearance while keeping the liner secure so it still blocks road spray, rocks, mud, and debris.
Step 1: Mark the Cut Line
Use painter’s tape to outline the area that actually rubs. Start with a small cut line about 1/4 inch beyond the rub mark. You can always remove more later, but you cannot put the original liner back once too much is cut away.
Step 2: Remove or Loosen the Liner
Remove the clips and/or bolts holding the affected liner section. Some Tacoma setups give enough access by loosening the liner; others are easier with the wheel removed. If you remove the wheel, support the truck safely before working.
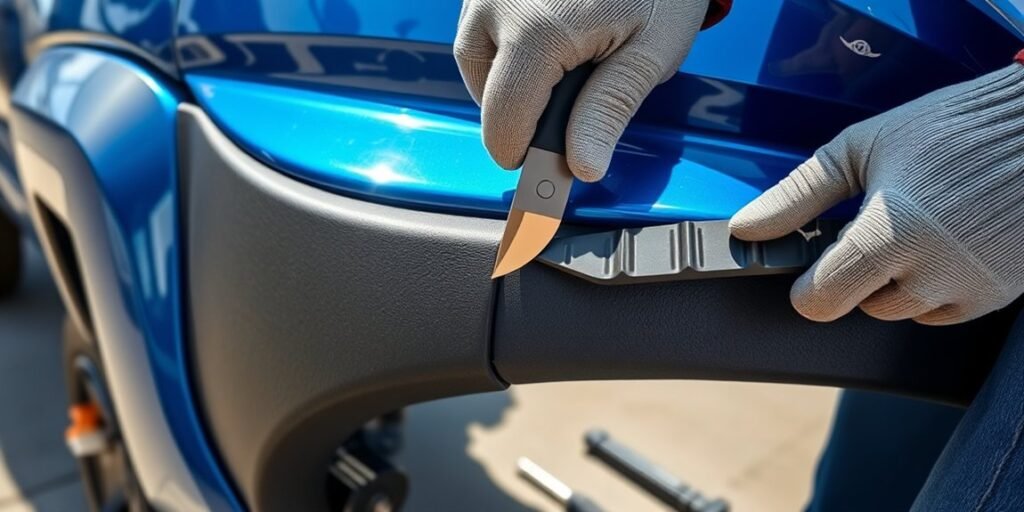
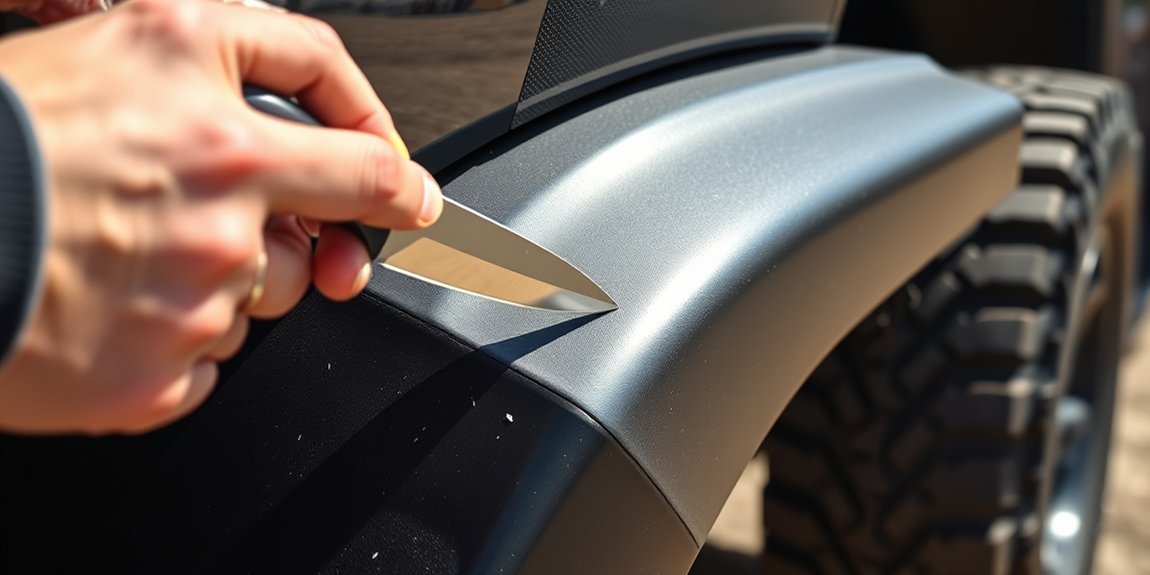
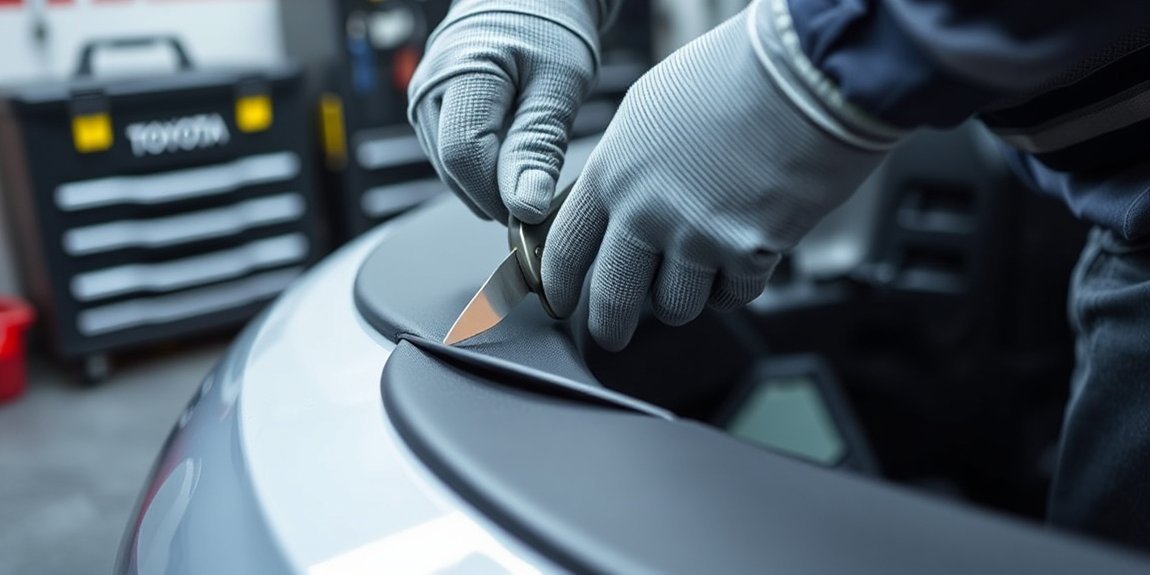
Step 3: Cut in Small Passes
Cut along the taped line with a sharp utility knife, oscillating tool, or rotary tool. Keep the tool speed controlled, support the plastic with your free hand away from the blade, and avoid forcing the cut. If the plastic starts to melt or smear, slow down and let the tool do the work.
Pro Tip: Cut less than you think you need on the first pass. Reinstall the liner, test the steering, and mark the next small section if the tire still touches.
Step 4: Smooth the Edge
After cutting, smooth the edge with sandpaper, a file, or a deburring tool. A smooth edge looks cleaner and is less likely to catch the tire, trap debris, or cut your hand during future service.
Step 5: Secure the Liner
Reinstall the liner with factory clips, bolts, or replacement automotive trim clips. Use zip ties only as a temporary trail repair or backup support, not as the main long-term fastener. A loose liner can sag back into the tire and create a worse rubbing problem than you started with.
Step 6: Test Clearance
With the truck back on the ground, turn the steering wheel fully left and fully right. Check the tire sidewall, shoulder, liner edge, bumper cover, mud flap area, and rear wheel-well area. Then take a slow test drive with gentle turns, reverse turns, and driveway-angle turns. Recheck the liner afterward.
How Much Fender Liner Should You Trim?
Trim the smallest amount that stops contact. A clean 1/4-inch to 1/2-inch adjustment around the rub point is often enough for light plastic contact. More aggressive tire setups may need a larger cut, but a big cut should be the result of repeated test fitting, not a guess.
Do not remove large sections just because another Tacoma owner did. Tire rubbing changes with tire brand, true tire diameter, tread shoulder shape, wheel width, wheel offset, alignment, lift height, suspension compression, and even how worn the tires are.
Measure the setup you actually have. A careful trim that fixes one rub point is better than a large cut that exposes the wheel well and still does not solve the real contact area.
Essential Tips for Successful Fender Liner Modification
- Work on one side at a time: Use the untouched side as a reference if needed.
- Match both sides carefully: The driver and passenger sides may not rub the same way, but visible cuts should look balanced.
- Protect painted edges: Tape near the cut line and keep tools away from the bumper and fender paint.
- Replace broken clips: Missing clips let the liner flap or sag.
- Check tire pressure: Use the pressure shown on the tire-and-loading label or owner guidance for your setup, not the maximum pressure printed on the tire sidewall.
- Recheck after driving: Fresh rub marks after a test drive show where more trimming or a different fix is needed.
Common Trimming Mistakes to Avoid
The biggest mistake is cutting too much too soon. Fender liner plastic is forgiving, but an over-cut liner can look messy, let in more debris, and lose some of its ability to shield the wheel well.
- Skipping rub diagnosis: Do not trim a random arc. Find the actual contact point first.
- Cutting with the liner loose: Support the plastic so it does not flex away from the blade.
- Using a dull blade: Dull blades slip, tear plastic, and make the edge harder to clean.
- Leaving sharp edges: Rough edges can catch debris and make future service unpleasant.
- Forgetting fasteners: A trimmed liner still needs to be firmly attached.
- Ignoring other contact points: If the tire rubs the cab mount, body mount, metal seam, or bumper, plastic trimming may not solve it.
Alternative Techniques for Achieving Fender Clearance
Trimming is not the only way to gain clearance. In many cases, a liner pushback or small relocation gives enough room while keeping more of the liner intact.
Fender Liner Pushback or Relocation
Loosen the liner, push it away from the tire path, and secure it using existing holes or carefully drilled new mounting points. This method can keep a cleaner factory look than cutting, especially when the rub point is near a flexible liner section.
Heat Reshaping
A heat gun can soften some liner plastics enough to reshape them slightly. Use low heat, move constantly, and avoid melting the plastic or damaging paint. Heat reshaping is best for light contact, not heavy tire interference.
Mud Flap or Bumper Adjustments
Some rubbing comes from mud flaps, splash guards, or the lower bumper cover rather than the fender liner itself. Remove or adjust only the part that contacts the tire, and check local requirements if your area has tire coverage rules.
High-Clearance Liners or Professional Work
For larger tire setups, aftermarket high-clearance liners or professional body-clearance work may be cleaner and safer than aggressive DIY cutting. If the tire touches metal, structural areas, or anything close to wiring and hoses, get help from an off-road shop or qualified technician.
Warranty and Safety Notes
In the United States, modifying or trimming a fender liner does not automatically void the entire vehicle warranty. The Federal Trade Commission explains that a manufacturer or dealer must prove an aftermarket or recycled part caused the damage before denying warranty coverage. However, if your trimming damages a related part, creates a liner failure, exposes components, or causes tire contact, that damage may not be covered.
Keep photos of the work, save receipts for replacement clips or parts, and inspect the liner after the first few drives. If you are unsure whether the cut affects a covered component, ask a Toyota dealer or qualified shop before cutting.
Frequently Asked Questions
Can I trim the fender liner without removing the wheel?
Yes, small trims can often be done without removing the wheel if you have enough room to work safely. Removing the wheel gives better visibility and tool control, but only do that if the truck is supported correctly with jack stands.
What type of utility knife is best for trimming a fender liner?
Use a heavy-duty retractable utility knife with a fresh sharp blade. For thicker plastic, an oscillating multi-tool or rotary tool can give more control. Avoid dull blades because they tear the plastic and increase the chance of slipping.
How do I know where to cut on the liner?
Look for shiny plastic, scuff marks, tire dust, or a polished spot on the tire. Turn the wheel fully left and right, mark the contact point with tape, and trim only that area in small passes.
Is it safe to drive with a trimmed fender liner?
It can be safe if the liner is secured, the edge is smooth, no components are exposed to contact, and the tire clears at full steering lock and during normal driving. Do a slow test drive and inspect the liner again before driving normally.
Will trimming affect my vehicle’s warranty?
Trimming the liner does not automatically void the whole warranty. But if the modification causes damage, a related claim may be denied. Keep the work clean, avoid damaging nearby components, and ask a dealer or qualified shop if you are unsure.
Should I trim, push back, or heat-shape the liner?
Use the least aggressive method that solves the rubbing. Try pushback or small relocation for light contact, heat reshaping for minor plastic interference, and trimming when the tire clearly needs material removed from the contact path.
Will trimming the liner stop all tire rubbing?
No. Trimming only helps when the tire rubs the plastic liner. If the tire hits the bumper, mud flap, cab mount, body mount, pinch weld, or metal structure, you need a different clearance solution.
Do I need an alignment after trimming the fender liner?
Trimming the liner itself does not require an alignment. However, if the rubbing is caused by wheel offset, suspension lift, caster settings, or uneven tire position in the wheel well, an alignment check may help improve clearance.
Conclusion
Trimming a Tacoma fender liner is a manageable DIY job when the tire is only contacting plastic. The best results come from careful diagnosis, conservative cutting, smooth edges, secure fasteners, and repeated clearance checks. If the tire rubs metal, structural areas, or nearby components, stop before cutting more plastic and choose a better fix.
Sources
- NHTSA TireWise — tire size, tire label, and tire maintenance safety guidance
- Toyota 2025 Tacoma Owner’s Manual: Tires — official Tacoma tire guidance
- FTC Auto Warranties and Auto Service Contracts — warranty guidance for aftermarket or recycled parts
- OSHA 1910.133 Eye and Face Protection — flying-particle eye protection guidance
- OSHA 1910.138 Hand Protection — selecting gloves for task hazards
- NIOSH Dust Respirator Guidance — dust-control respirator information
Related Articles

Why Toyota Tacoma Speedometer Reads Wrong With Bigger Tires
Understanding why your Toyota Tacoma's speedometer reads inaccurately with bigger tires is crucial; the solution might be simpler than you think.
Read More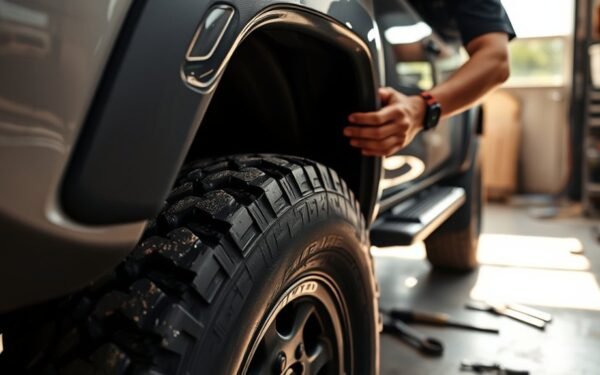
Toyota Tacoma Tire Rubbing on Fender Liner Fix
Nip tire rubbing issues on your Toyota Tacoma's fender liner with simple fixes—discover the essential steps to prevent further damage.
Read More
Toyota Tacoma Tire Rubbing at Full Turn Solutions
Uncover effective solutions to eliminate tire rubbing on your Toyota Tacoma during full turns and discover essential tips for improved performance and safety.
Read More