
How to Patch an Inner Tube: Step-by-Step Repair Guide
You’ll want a vulcanizing kit, a clean bench, bright light, and safety glasses. Inflate the tube to find the leak, mark it, then clean and lightly abrade the area. Apply cold vulcanizing cement until tacky, center the patch, and roll outward to push out air and lock the bond. Let it cure briefly. Test under water for bubbles, dust with talc, and reinstall carefully to avoid pinches. Keep reading for troubleshooting tips, larger damage fixes, and replacement criteria.
Quick Answer
- Inflate the tube to find the leak. Mark it with pen dots so you can center the patch later.
- Clean the area with pre-buff solvent, then lightly sand the rubber to help the patch grip.
- Spread a thin coat of cold vulcanizing cement and wait until it turns tacky (about 5 to 15 minutes).
- Press the patch firmly over the hole, roll outward with a stitcher, and let the bond cure.
- Test for leaks in water or with soapy spray. Dust with talc, reinstall the tube, and inflate to the recommended pressure.
- Replace the tube instead of patching if the hole is larger than 2 to 3 mm, the valve is damaged, or there are multiple punctures.
Essential Tools, Workspace, and Safety
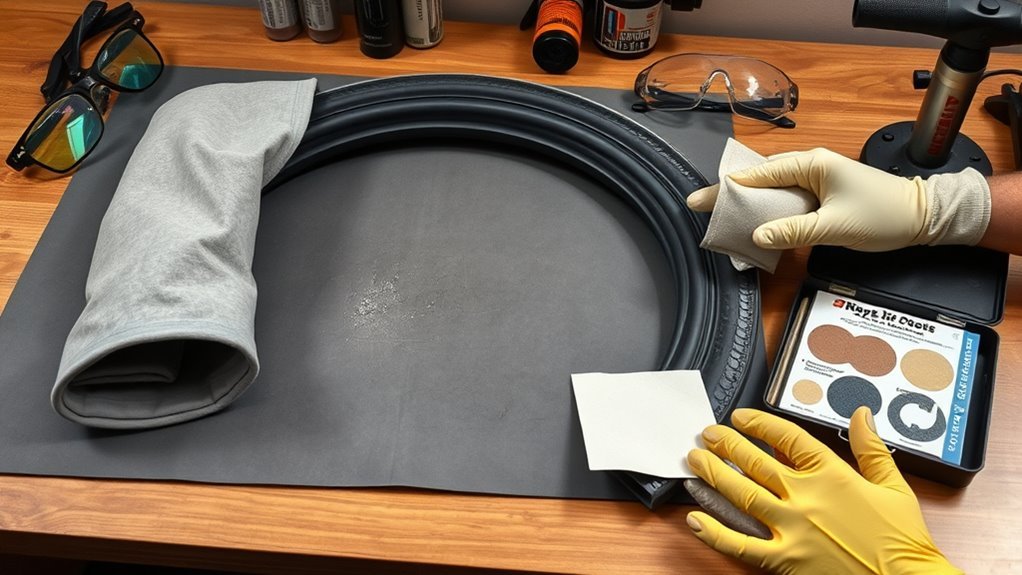
Before you start, gather a basic tube-repair kit: safety eyewear, brass bristle brushes, scissors, a rubber scraper, a buffer wheel, a tube stitcher, and an awl. Set up a warm, dry workbench where you can handle and prepare the tube comfortably.
Organize your tools logically. Keep adhesives, patches, and applicators grouped by manufacturer to guarantee chemical compatibility and reduce the risk of patch separation. Use trays or magnetic strips so you won’t misplace small items.
Position a focused task lamp to eliminate shadows. Good workspace lighting prevents missed defects and unsafe handling. Wear protective eyewear at all times to shield against flying debris.
Consult the Rema Tip Top Tube Repair Manual for specified procedures and product pairings, and keep the manual within reach during repairs.
[Products Worth Considering]

【Oval Shape for Slits & Cuts】 Contains 96 pieces of 24x35mm (approx. 0.94 x 1.38 inch) oval tube patches. Unlike round patches, this oval shape is specifically designed to cover linear cuts, slits, or "snake bite" punctures (two holes side-by-side), providing a more secure seal along the damage line.

Repair puncture related flats on ATVs, mowers, bicycles and wheelbarrows

Slime's SKABS are a simple, one step solution to a punctured tyre and no glue or cement required, means no mess
Locate the Puncture and Decide If It’s Repairable
Once you’ve inflated the tube to at least twice its normal width, listen and watch for leaks. Use a quiet room to catch hissing, or submerge sections in water and look for steady bubbles. Mark the puncture with four small pen dots around the hole so you can align the patch precisely.
For puncture identification, scan the tube systematically. Trace seams, the valve area, and tread-contact zones. Measure or estimate the hole diameter. Anything over 2 to 3 mm needs a larger patch or a full tube replacement.
Run your fingers along the surface to feel for stress cracks, nicks, or thin spots. If you find multiple defects, seam separation, or ragged tears, classify the tube as non-repairable. Record your findings for repair assessment and proceed only if the damage fits patch specifications.
Prepare the Repair Area (Clean, Buttonhole, and Buff)
To guarantee the patch bonds reliably, clean and prepare the puncture area with care. Use a pre-buff cleaner to remove oils and debris. Lightly abrade the rubber with sandpaper or fine emery cloth to promote adhesion. Cut 1/16-inch buttonhole reliefs at each end of the tear to stop cracks from spreading.
Use controlled sanding techniques and strict cleaning methods. Do not use compressed air or cloths, as they can introduce contaminants. Buff with a pneumatic buffer at no more than 5,000 rpm to produce a uniform, matte surface. If dust appears, clean the area again before moving on.
| Task | Specification |
|---|---|
| Cleaner | Pre-buff solvent, degreasing |
| Abrasion | Sandpaper/fine emery cloth, light |
| Buttonholes | 1/16‑inch diameter at ends |
| Buffing | Pneumatic buffer ≤5,000 rpm |
[Products Worth Considering]

Permanent Repairs That Last: Unlike temporary peel-and-stick patches, this bike tire repair kit uses professional vulcanizing glue to create a strong chemical bond with the inner tube. Designed to repair punctures, leaks, cracks, and flats with a durable seal that stays secure ride after ride, helping you avoid costly tube replacements.

Emergency & Permanent Fix: The bike tube patch kit contains 18PCS tire patches (3 Sizes) & 2 tubes of high-strength repair Glue. Use this Rapid-drying high-viscosity vulcanizing fluid for 10-minute roadside repairs & long-lasting repairs

Tire Repair Glue Refill: As a refill for bike tube patch kit, it includes 8 pieces of high-strength, high-quality glue (6 ml Tube) and a small storage box
Patch an Inner Tube : Step‑by‑Step (Vulcanize, Apply, Stitch)
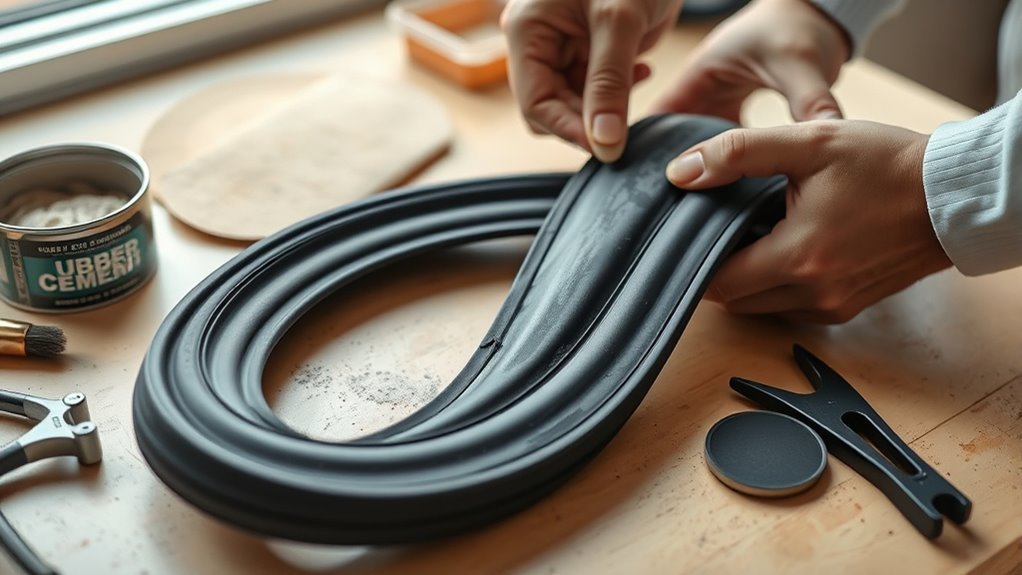
With the tube cleaned and the puncture area abraded and marked, spread a thin coat of cold vulcanizing cement and let it dry until tacky. Center the patch over the hole, press firmly, then use a tire stitcher to roll from the center outward. This removes trapped air and locks the bond. Inflate the tube partially to test the seal, then dust the surface with talc before reinstalling.
[Products Worth Considering]

3 Sizes Combo: you will receive 60 pieces of patches for tires in 3 sizes, including approx. 32 mm/ 1.26 inches, 42 mm/ 1.65 inches, 58 mm/ 2.28 inches, 20 pieces for each size; The package also contains 1 piece of tire repair stitcher tool, measuring about 7 mm/ 0.28 inches thick and 18 cm/ 7.09 inches long; The kit makes tire repair more convenient and quicker

Note: When Using, Please be Sure to Follow Our Instructions.

An absolute must for any cyclist which ever discipline you ride
Prepare The Repair Area
Start by thoroughly cleaning the damaged area so the patch bonds properly. Remove contaminants with pre-buff cleaner. Lightly abrade the surrounding rubber with fine sandpaper, but avoid deep grooves. Buttonhole the puncture ends to stop the tear from spreading.
Apply a thin coat of cold vulcanizing fluid and let it become tacky before placing the patch. Do not overapply. Center the patch, press firmly, and use a tire stitcher to push out air and guarantee full contact. Finish by dusting with tire talc to prevent sticking.
| Step | Tool | Purpose |
|---|---|---|
| Clean | Pre-buff cleaner | Remove oils/dirt |
| Abrade | Sandpaper | Promote adhesion |
| Buttonhole | Cutter | Prevent tear spread |
Apply Vulcanizing Cement
Apply a thin, even coat of cold vulcanizing fluid around the puncture and let it dry until tacky. This readies the rubber for a permanent bond. Coat the scored area uniformly using precise vulcanizing techniques to get the best adhesive performance. Avoid pools or gaps in the cement layer.
When the cement is tacky, position the patch centered over the hole and press firmly from the center outward. This pushes out air and seats the patch properly. Keep steady, even pressure throughout. Misalignment or trapped air will weaken the bond.
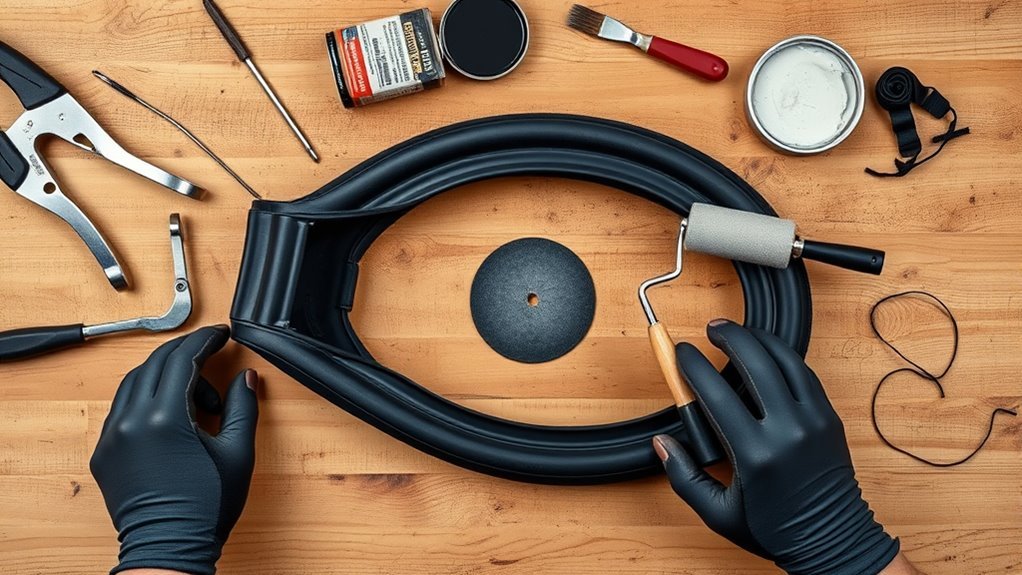
A tire stitcher helps apply targeted pressure at the patch edges, which reinforces adhesion and lowers peel risk. Allow the assembly to cure undisturbed for the recommended 5 to 15 minutes so the vulcanized joint builds initial strength before you move on.
Stitch And Test Patch
Once the patch is seated and the vulcanizing fluid has turned tacky, use a tire stitcher to press firmly from the center outward. This pushes out trapped air and bonds the edges fully. If you haven’t already, sand the surrounding rubber and verify the patch sits flush without folds.
Use consistent stitch techniques: steady, overlapping strokes radiating to the perimeter. This guarantees uniform contact and prevents localized stress points. Lightly dust tire talc over the cured patch so it won’t stick to the tire carcass.
Let the bond cure 5 to 15 minutes per the manufacturer’s guidance. Partially inflate the tube and inspect for leaks around the patch. Listen and feel for seepage. Only fully inflate once you confirm the patch is holding. This approach maximizes patch durability and reduces failure risk.
Test the Patched Inner Tube, Talc, and Reinstall
Inflate the patched tube slightly and inspect the repair for any escaping air. This confirms the patch sealed correctly. Sprinkle talc evenly over the tube surface to reduce friction and prevent chafing during reinsertion. Reinstall the tube carefully, avoiding pinches, then inflate to the recommended pressure and check again for leaks.
Inflate And Inspect
Before you put the tube back in the tire, pump it up just enough to give it shape and check the patch for any leaks or lifting at the edges. This lets you spot failures without stretching the tire or pinching the repair.
Inflate to low pressure, then submerge the patched area in water or spray it with soapy water to detect bubbles. Bubbles mean the patch has poor air retention or weak adhesion. If you see them, remove adhesive residue, re-roughen the area, and reapply patching materials.
Once no leaks appear, deflate slightly to a manageable profile for installation. Do a final visual inspection for edge lifting, glue squeeze-out, or cuts. Keep the tube clean and ready for talc and careful reinstall to avoid pinches.
Talc And Reinstall
Test the patch one more time, then dust the tube generously with talc before you seat it back in the tire. Inflate slightly and listen or submerge to confirm no leaks at the repair site. Talc cuts friction and keeps the patch from sticking or folding during installation.
- Spread a smooth, even talc layer on the tube surface. Avoid clumps.
- Align the valve and position the tube so the patch clears the bead.
- Inflate slightly after seating the tube to check for pinches or movement.
Work methodically. Tuck the tube into the tire with your fingers only, and roll the bead on rather than forcing it. Inflate to the recommended pressure and perform a final inspection to confirm integrity and secure tube seating.
Common Mistakes to Avoid
Even with good technique, a few common errors can ruin an otherwise solid patch job. Here are the ones to watch for:
Skipping the buffing step. Smooth rubber won’t grip the cement well. Always lightly sand the area to create a matte texture before applying any adhesive.
Applying too much cement. A thick layer takes longer to dry and can create weak spots. One thin, even coat is all you need.
Not waiting for the cement to get tacky. Placing the patch on wet cement traps solvent underneath, which prevents a proper bond. Be patient and wait until the surface feels sticky but not wet.
Reusing old patches or cement. Dried-out cement and old patches lose their bonding ability. Check expiration dates on your kit and replace supplies as needed. The Sheldon Brown flat tire guide is a helpful reference for choosing reliable repair materials.
Forcing the tire bead during reinstallation. Using tire levers aggressively can pinch the freshly patched tube and create a new hole. Use your hands whenever possible.
When to Replace vs. Emergency Fixes (Large Holes, Valve Damage, Boots)
When a tube has a hole larger than about 2 to 3 mm, or the damage is clustered near the valve or in several places, replace it rather than patching. Standard repairs won’t reliably restore strength and can fail under load.
Use clear repair criteria: hole size, valve proximity, puncture type, and total number of breaches all determine the right action. If the valve body or base is damaged, swap the tube. Valves are failure points you can’t trust after trauma. Multiple punctures raise integrity concerns and shorten tube lifespan beyond safe limits.
For emergency situations, you can use a tire boot or folded patch as a temporary solution, but don’t treat it as permanent. Maintain spares, inspect tubes regularly, and plan prompt replacements after any major damage.
Frequently Asked Questions
How Long to Let Rubber Cement Dry Before Applying Patches?
Let the rubber cement dry 5 to 15 minutes until it feels tacky before placing the patch. In high humidity or cool temperatures, you may need to wait a bit longer. Always follow the manufacturer’s instructions for specific drying times.
Can I Use E6000 to Patch a Tire?
No. E6000 is flexible, but it’s not designed for pressurized tire repairs. Think of it like a bandage on armor: it’s temporary at best. Use proper vulcanizing patches or dedicated tire patching products for durable, pressure-resistant repairs.
Conclusion
You’ve got the basics: the right tools, a clean patch area, proper vulcanizing, and a solid test. If the leak is small and the valve is fine, a stitched patch will get you rolling again. For large tears, valve damage, or repeated failures, replace the tube. Keep talc handy, work methodically, and you’ll be back on the road before you know it.
Related Articles

What Does THE P Stand For on a Tire? Full Meaning Explained
I’ll explain what the “P” on a tire really means and why it could change how you choose your next set.
Read More
How to Use a Tubeless Tire Repair Kit: Complete Field Guide
Learn how to fix tubeless tire punctures fast with the right kit, because one small mistake can leave you stranded on the trail.
Read More
How to Tell a Tire’s Diameter: Easy Guide to Reading Tire Size
Want to decode tire sidewall numbers and find the right diameter, but wonder what those hidden digits really mean?
Read More