
How to Use a Tire Changer: Step-by-Step Guide for Beginners
To use a tire changer, first match the machine to your wheel size, wear gloves and safety glasses, and fully deflate the tire. Clean the rim, remove the valve core, then clamp the wheel securely on the turntable. Use the bead breaker to separate both beads, apply tire lubricant, and guide the tire off with the mounting arm. Mount the new tire, then inflate slowly until the bead seats. A few more steps can help you avoid costly mistakes.
Key Takeaways
- Wear safety glasses and gloves, inspect the machine, and fully deflate the tire before starting.
- Choose a tire changer that matches your wheel size, vehicle type, and workspace requirements.
- Clean the rim and tire, remove the valve core, and position the wheel securely on the turntable.
- Use the bead breaker to unseat both beads, then remove the tire carefully with the lever bar.
- Lubricate the bead, mount the new tire with the mounting arm, and inflate only to the manufacturer’s limit.
Tire Changer Basics
A tire changer is a specialized machine that lets you remove and install tires on wheels faster and with less risk of rim damage than doing it by hand. You use a tire changer machine to reduce strain and take control of the job. The bead breaker separates the tire bead from the rim so you can start removal cleanly. The turntable holds the wheel steady while the mounting arm guides the tire on or off. Before you begin, clean the tire and rim, then inspect both for cuts, bends, or corrosion. Wear protective gear, including eye protection and gloves, because compressed parts and sharp edges can injure you. Follow the manufacturer’s instructions exactly, and keep your hands clear of moving points. Different machine styles exist, but the core workflow stays the same: break the bead, secure the wheel, and guide the tire with precision. Additionally, consider the treadwear ratings of tires when replacing them to ensure optimal performance and longevity.
Choose the Right Tire Changer
To choose the right tire changer, match the machine to the vehicles you service, the wheel sizes you handle, and the space you have available. Pick from swing arm, tilt back, leverless, heavy-duty, or motorcycle tire changers based on your workload. For mixed shops, versatility matters; for specialty work, precision frees you from wasted motion.
Check capacity considerations first. Make sure the machine handles your maximum wheel diameter and width, plus the weight of the assemblies you expect. If you work on larger or tougher tires, choose a model built for that demand.
Measure your bay before you buy. You need enough clearance for safe operation and maintenance access, not just floor space.
Among the features to look for, prioritize a bead breaker, adjustable clamps, and a smooth turntable. These reduce effort and wheel damage. Balance price against long-term return; a better machine can save time, cut repairs, and keep your work independent. Additionally, consider all-season tire options that can enhance your service offerings for diverse customer needs.
Prep the Tire and Wheel
Once you’ve chosen the right tire changer, prep the tire and wheel so the machine can work cleanly and safely. Clean the tire and rim thoroughly to remove dirt, brake dust, and debris that can throw off the setup or damage the bead area. Inspect the rim for cracks, corrosion, or bent flanges; if you spot structural damage, stop and replace the wheel. Use a valve core removal tool to take out the valve stem core, then let the tire deflate completely before you move on. Position the tire and wheel assembly vertically, with the valve stem accessible and correctly oriented. That makes handling easier and keeps your workflow controlled. Set your tools, lubricant, and protective gear within reach so you don’t waste motion. A prepared workspace helps you work faster, reduce strain, and stay focused. When you control the setup, you control the task. Additionally, ensure the tire size matches your vehicle’s specifications to avoid fitment and performance issues.
Break the Bead Safely
With the valve stem core removed, set the tire upright and keep the valve stem facing up near the bead breaker so you can work with clear access. This fully vents the tire and cuts pressure on the bead. Align the bead breaker against the sidewall, then activate it smoothly to push the bead free from the rim. Use steady force, not speed, so you don’t scar the wheel or pinch the tire. Keep your hands, knees, and face clear of the tire path; safety precautions matter because the bead can release suddenly. After one section pops loose, rotate the tire and repeat until the outer bead is unseated. Then reposition and break the inner bead the same way. Check your progress as you move around the circumference. A fully released bead gives you freedom to remove the tire cleanly and move to the next step with control. Additionally, having a reliable spare tire kit on hand can enhance your preparedness for tire changes.
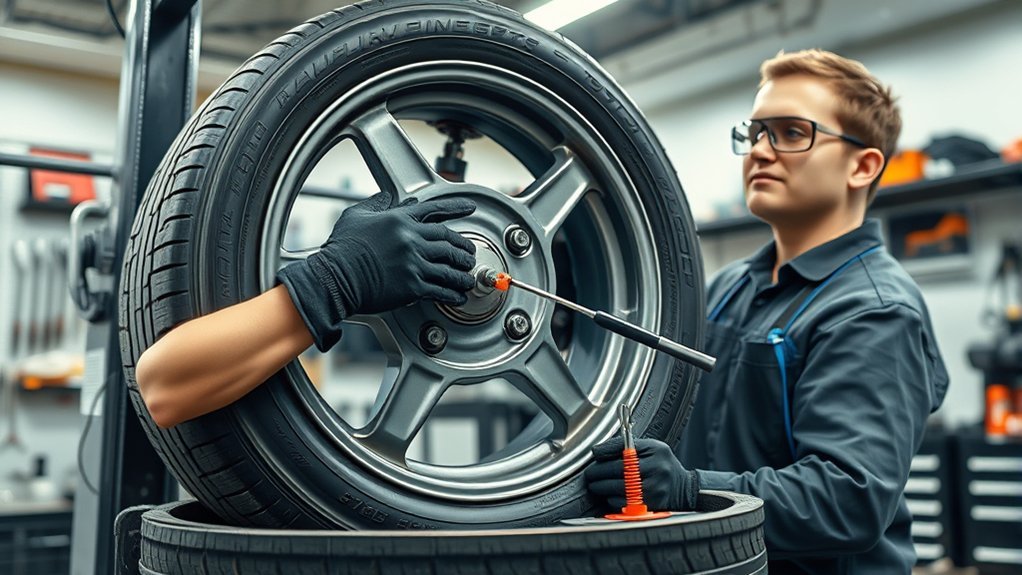
Clamp the Wheel Securely
Clean the wheel and center it on the turntable before you clamp it, so you avoid misalignment and keep the setup stable. Choose the correct clamp style for the rim, then set the jaws so they grip firmly without marking the wheel. You should confirm the wheel’s secure hold before you start dismounting the tire. Properly clamping the wheel helps ensure tire selection and performance are optimal during the changing process.
Proper Clamp Placement
Before you start rotating the turntable, center the wheel securely on the tire changer and choose the correct clamping method—inside or outside—based on the wheel type. Place the clamps at the bead seat area so they bite with stability, not abuse. Tighten them snugly; don’t overdrive the jaws, or you’ll deform the rim. Proper placement keeps the wheel true and lets you work with control.
| Check | Action | Result |
|---|---|---|
| Centering | Align wheel on turntable | Less slippage |
| Clamp type | Match wheel design | Rim stays protected |
| Clamp force | Tighten snugly | Secure hold |
| Clamp position | Bead seat area | Maximum stability |
| Jaws | Inspect for wear | Safe grip |
Inspect the jaws often and replace damaged parts fast.
Secure Wheel Before Dismounting
Once the wheel is centered and the correct inside or outside clamping method is chosen, clamp it firmly so it stays fixed during dismounting. Clean the wheel and turntable first; debris can let clamps slip and waste your effort. Align the wheel squarely on the machine, then tighten each clamp evenly until the wheel won’t shift. Use inside clamping for wheels that need rim protection, and outside clamping when the design allows it. Keep your grip on precision: a secure setup gives you control and protects the rim. Before you start the bead break or pry bar work, check that the wheel stays stable under load. Inspect the clamping mechanism for wear or damage often, because reliable hardware keeps your operation safe, efficient, and free.
Remove the Tire Without Damage
First, fully deflate the tire by removing the valve stem core, then use the bead breaker to separate both beads from the rim. Lock the wheel and tire securely on the machine so nothing shifts during dismounting. With the bead free, use a lever bar to lift the tire off the rim gently and avoid damaging the wheel. It’s important to remember that this process is similar to the way you would handle small tread punctures with a tire repair kit, ensuring you take care not to cause additional damage.
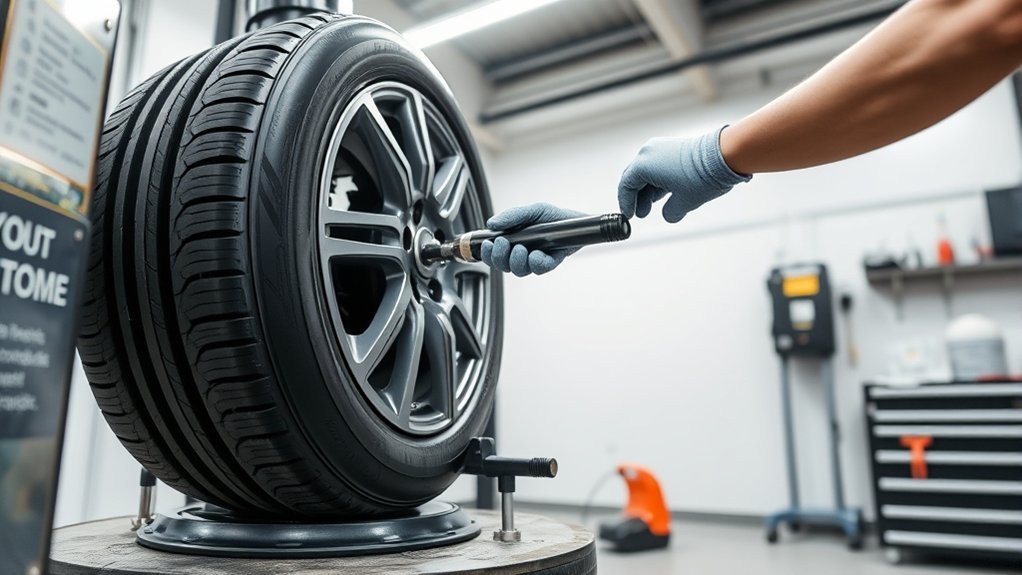
Deflate and Break Bead
Start by removing the valve core with a valve core removal tool to fully deflate the tire, which helps make bead separation safer and easier. With no air pressure, you can work the bead breaker cleanly and keep control.
- Stand the tire upright on the tread, valve stem up near the bead breaker.
- Activate the bead breaker arm and apply steady pressure to pop the bead free.
- Rotate the assembly and repeat on the opposite side for full separation.
- Keep your hands clear of moving parts and watch the rim edge.
You’re not forcing the tire; you’re freeing it. This method reduces damage, improves safety, and gives you the control you need to move on with confidence.
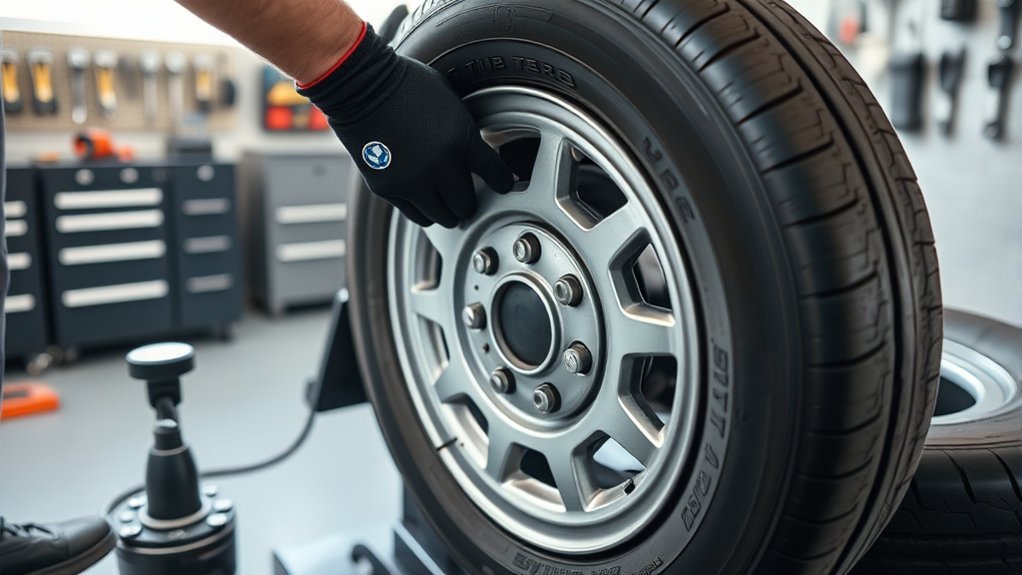
Secure Wheel Properly
Clean the wheel thoroughly to remove dirt and debris, then position the tire and wheel assembly vertically for easier access. Use the turntable to clamp the wheel so it securely holds the wheel and stays centered. This keeps alignment tight and cuts the chance of misalignment during removal. Next, engage the mount/demount head carefully and lock it in place with a small clearance from the rim; don’t let metal touch the edge. Lubricate the tire beads before demounting to reduce friction and help guarantee a smooth, controlled release. Check the setup once more before you start the removal stroke. When you secure the wheel properly, you protect the rim, limit stress on the tire, and keep the process efficient.
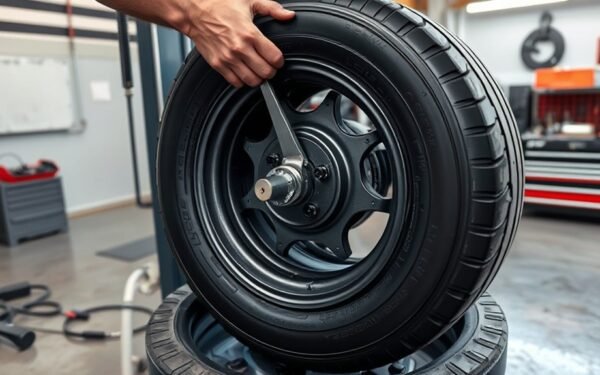
Lift Tire Carefully
With the wheel locked securely on the tire changer, remove the valve stem core to fully deflate the tire before you lift it. Position the assembly with the valve stem at the top, then use the tire machine to keep the rim stable. Apply rubber lubricant to both beads so they slide free without gouging the metal. Work the lever bar with steady pressure; don’t pry hard or twist the sidewall.
- remove valve stem core completely.
- Confirm full deflation.
- Lubricate bead edges.
- Lift the tire evenly off the rim.
Keep your hands clear of pinch points and move in controlled steps. A careful lift protects the tire, preserves the rim, and gives you clean, efficient removal every time.
Mount the New Tire
Lubricate the rim and tire bead before mounting so the tire slides on smoothly without damage. This prep keeps the mounting process controlled and helps you work with less force. Position the tire at a slight angle above the rim, then engage the mounting head so it guides the tire bead onto the edge cleanly. Keep steady pressure as you rotate the turntable; let the machine do the work instead of fighting it. Watch the lower bead settle into the drop center before you move on to the upper bead. That alignment frees the tire from binding and reduces strain on the casing. After mounting, inflate only as needed to confirm seating, and keep your eyes on the pressure gauge. Stop at the manufacturer’s limit, usually no more than 40 PSI during bead seating. Check for proper fit before you release the wheel. Additionally, using tires like the Crosswind HP010 can enhance traction during this process, making it easier to manage the tire installation.
Inflate and Seat the Bead

Use the inflation pedal to add air slowly, and keep your body clear of the tire while the beads seat. Watch for both beads to pop into place against the rim, and don’t exceed 40 PSI during this first inflation. If the beads don’t seat, raise pressure gradually and use bead lubricant or a bead sealing jet if needed. Ensure that the tire is compatible with your vehicle’s full-size spare tire requirements for optimal performance.
Seat The Bead
Position the tire so the valve stem is at the top, then apply rubber lubricant to both the upper and lower beads to help the tire seal and reduce damage during inflation. Next, seat the bead with controlled air and watch the pressure closely.
- Confirm the tire sits evenly on the rim.
- Inflate slowly, starting above 7 PSI.
- Listen for the pop that shows the bead has seated.
- Stop at 40 PSI or the maker’s limit.
Keep your body clear of the tire while you work. If one side won’t seat, release air, re-lube, and reset the tire. This method gives you control, protects the rim, and helps you finish the job fast without surrendering to guesswork.
Inflate Safely
With the bead set and the tire sitting evenly on the rim, attach the inflation system to the valve stem and start the air flow while keeping clear of the tire. Before you inflate, confirm both beads are seated evenly against the rim. Use a pressure gauge to track pressure as it builds, and never exceed 40 PSI during seating. Keep your body out of the tire’s path; a sudden blowout can injure you. Listen for the audible pop that signals the bead has locked into place. If the beads don’t seat at lower pressure, increase pressure gradually, but stay within the tire maker’s limits. Once seated, stop the airflow, verify the gauge, and release the setup only after you’ve confirmed safe, stable inflation.
Safety Tips for Tire Changer Use
Before you start, wear safety glasses and mechanic’s gloves, and make sure the tire is fully deflated with the valve stem core removed before breaking the bead. Your proper protective gear keeps you ready, and your attention to safety protocols keeps the work controlled. Follow these safety protocols to protect your eyes, hands, and movement.
Wear safety glasses and gloves, fully deflate the tire, and remove the valve core before breaking the bead.
- Inspect the tire changer for wear, loose parts, or damage before use.
- Keep the workspace clean and clear of debris, cords, and obstacles.
- Use tire-specific lubrication only; skip soapy water or grease.
- Follow the manufacturer’s operating steps exactly, without improvising.
You work best when the machine works within its design limits. Confirm the tire is pressure-free before clamping or bead breaking, and stay positioned where moving parts can’t catch you. A disciplined setup gives you more freedom, less risk, and faster results. Additionally, ensure you choose low-noise tires to enhance driving comfort and reduce distractions during operation.
Common Tire Changer Mistakes
Common tire changer mistakes usually show up as avoidable setup errors, and they can damage both the tire and the wheel. Before you start the tire changing process, inspect the tire and rim for cracks, rust, or deformation. Don’t mount a damaged rim; it can fail when you inflate the tire. Lubricate the bead thoroughly so it seats smoothly and doesn’t tear during installation. Position the wheel correctly on the machine, because a crooked setup creates uneven pressure and leaks. Choose clamps that match the rim width; inside clamps on wide rims can scratch the finish and cost you money. When seating the bead, keep inflation controlled and never exceed 40 PSI. Overinflation can weaken the tire and trigger a blowout. Work methodically, check your setup twice, and keep each step tight. Small corrections now protect your gear, your time, and your freedom on the road. Additionally, ensure that you select tires with strong wet grip to enhance safety during various driving conditions.
Frequently Asked Questions
What Is the 3 Rule for Tires?
The 3 Rule for tires means you check tread depth, tire pressure, and alignment. You need at least 2/32 inch tread, 30–35 PSI for most vehicles, and proper wheel alignment to keep handling sharp and wear even. Use these tire maintenance tips and tire safety precautions to protect your ride and your freedom on the road. A solid tire buying guide should also factor in these checks.
What Is the Procedure for Changing a Tire Step by Step?
You deflate the tire fully, then break both beads from the rim with a bead breaker. Next, you secure the wheel on the changer, remove the old tire, and inspect the rim. Mount the new tire with lubricant, then inflate it slowly to seat the beads. Follow Tire safety tips, avoid Common mistakes, and apply Maintenance advice. You’ll work efficiently, protect the wheel, and keep control throughout.
What Are the Common Problems With Tyre Changers?
Common tire changer problems include tire bead issues, misalignment, overinflation, clamp mistakes, and poor tire changer maintenance. You’ll see failed bead seating when you skip lubrication or inflate incorrectly. You can damage rims if you use the wrong clamps or mount the tire off-center. Neglecting wear checks can cause breakdowns and hazards. For rim damage prevention, inspect pads, align carefully, and follow the manufacturer’s pressure limits every time.
Do It Yourself Tire Changer?
Yes, you can build your own tire changer; about 1 in 3 DIY mechanics saves money this way. You’ll need a rigid frame, bead breaker, and mounting arm, plus tire changer safety gear like gloves and eye protection. Use proven tire mounting techniques, clamp the wheel securely, and work slowly. It won’t match tire shop maintenance machines for large or low-profile tires, but it gives you freedom and control.
Conclusion
Now you know the basics of using a tire changer safely and efficiently. Choose the right machine, prep the wheel, break the bead, clamp it securely, mount the tire, and inflate it until the bead seats properly. Follow safety steps every time, and avoid common mistakes like poor clamping or overinflation. Do it right, and you’ll save time, protect the wheel, and make the process feel like a breeze in a tornado.
Related Articles
How to Operate a Tire Machine: Complete Beginner’s Tutorial
Master tire machine basics fast, but discover the crucial safety and setup steps that separate smooth swaps from costly mistakes.
Read More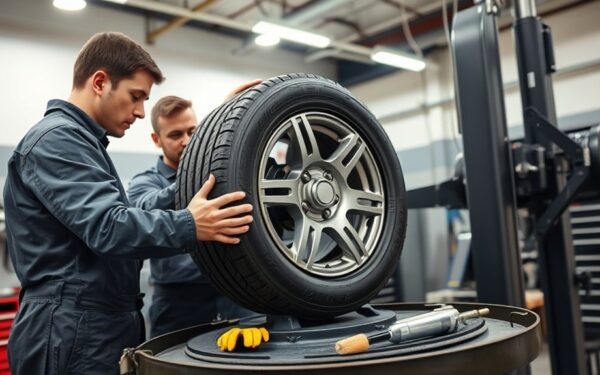
How to Use a Tire Changer Machine: Full Tutorial for Beginners
Master tire changing basics with this beginner-friendly guide—learn the essential steps, avoid costly mistakes, and discover the crucial final tips inside.
Read More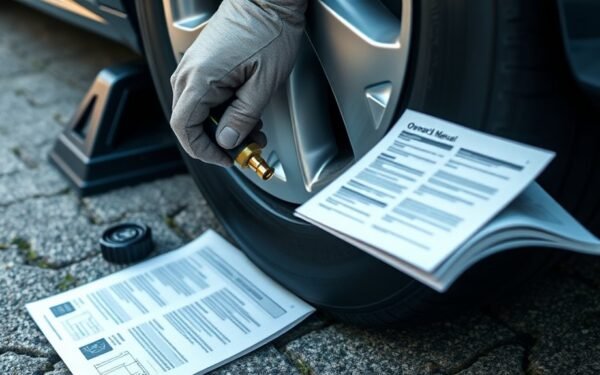
How to Remove Air From a Tire: Safe Step-By-Step Methods
Carefully learn how to release tire air safely and precisely, then discover the easiest ways to avoid over-deflating and get the pressure just right.
Read More