
Underinflated Tire Symptoms: Performance & Safety Clues
You should treat even a few PSI low as a safety and performance risk: underinflation flattens the contact patch, shifts load to tire shoulders, and boosts rolling resistance, reducing fuel economy and braking performance. Watch for sagging sidewalls, bulges, uneven shoulder wear, pulling or sluggish turn response, increased stopping distances, and TPMS alerts. Measure cold with a calibrated gauge and top up to manufacturer PSI. Continue for practical checks, triage steps, and cold‑weather tips to prevent failures.
Check Tires: Quick Tests for Underinflated Tires
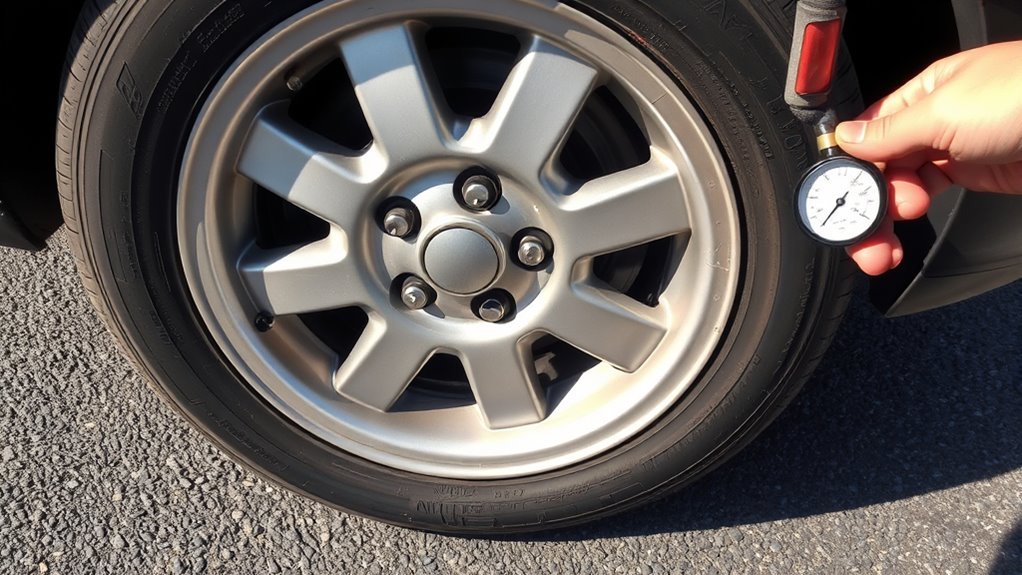
Start by visually inspecting each tire for sagging sidewalls and a flattened contact patch at the bottom—those are clear, immediate signs of underinflation. You perform a systematic tire inspection: look for edge wear, uneven tread patterns, and any bulges that indicate pressure loss affecting alignment and traction. Then carry out a pressure measurement with a calibrated gauge when tires are cold; compare readings to the vehicle’s recommended PSI on the door jamb or manual (typically 30–35 PSI). If one tire reads low, restore air to spec and recheck to confirm the fix. Monitor handling too: pulling, instability in turns, or sluggish response point to underinflation compromising control. Treat these checks as routine maintenance for your freedom on the road—consistent, preventive actions that reduce risk and preserve performance. You’re not just maintaining tires; you’re preserving mobility and autonomy through disciplined inspection and accurate pressure measurement.
TPMS & Warning Lights Explained
When the TPMS warning light appears, it’s signaling that one or more tires are at or below the system’s threshold (commonly about 25% under recommended pressure) and requires immediate inspection. You should safely pull over, visually check each tire and use a pressure gauge to confirm readings, inflating any low tires to the manufacturer’s spec. Also verify the TPMS itself (direct sensor battery/status or indirect system calibration) so a malfunction won’t leave you unprotected.
TPMS Light Meaning
The TPMS (Tire Pressure Monitoring System) light tells you there’s a pressure issue that needs immediate attention: a steady light means one or more tires are considerably underinflated, while a flashing light indicates a system malfunction. You should understand TPMS functionality and how it reports tire pressure deviations—typically when pressure drops about 25% below the manufacturer’s recommended PSI (commonly 30–35 PSI). This warning protects your mobility and autonomy by preventing sudden failures.
- Steady light: confirms underinflation in at least one tire.
- Flashing light: indicates TPMS sensor or circuit fault.
- Thresholds: most systems trigger near a 25% pressure loss.
- Maintenance: regular TPMS checks preserve accuracy, safety, and fuel efficiency.
Treat the indicator as a preventive safety command, not optional.
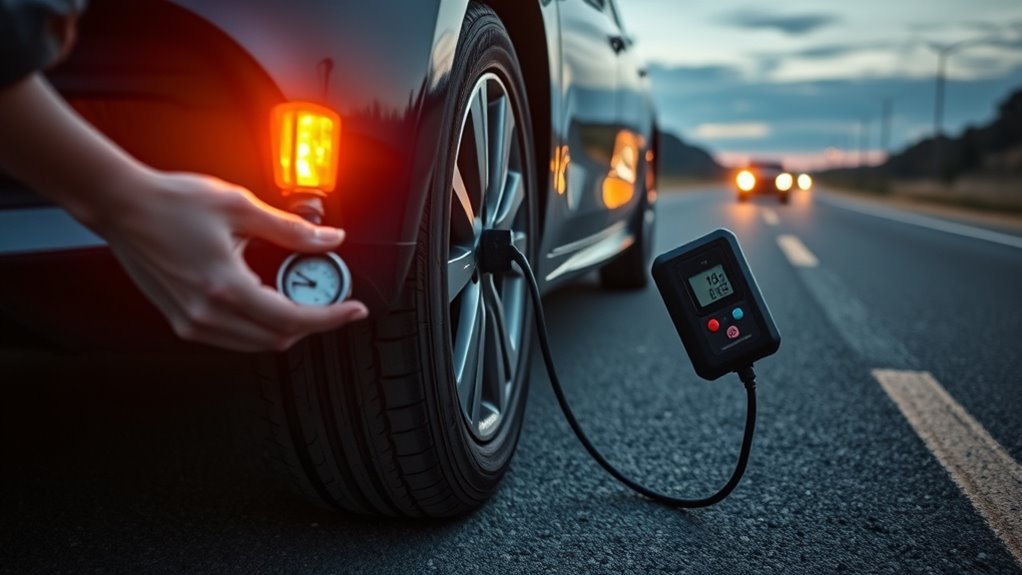
Immediate Driver Actions
You’ve seen what the TPMS light means, so act immediately if it illuminates: pull safely off the road, park on level ground, engage the parking brake, and inspect all four tires for visible deflation or damage. You’ll then take a measured immediate response: check the pressure with a gauge, compare to manufacturer specs, and note any rapid loss or bulges. If pressure’s low, inflate to the recommended PSI or call roadside assistance if you can’t safely do so. Observe safety precautions: use hazard lights, wheel chocks, and avoid traffic flow. Regularly test TPMS function and learn dashboard symbols so alerts prompt swift action. Don’t ignore warnings—prompt response preserves control, reduces blowout risk, and reclaims your freedom on the road.
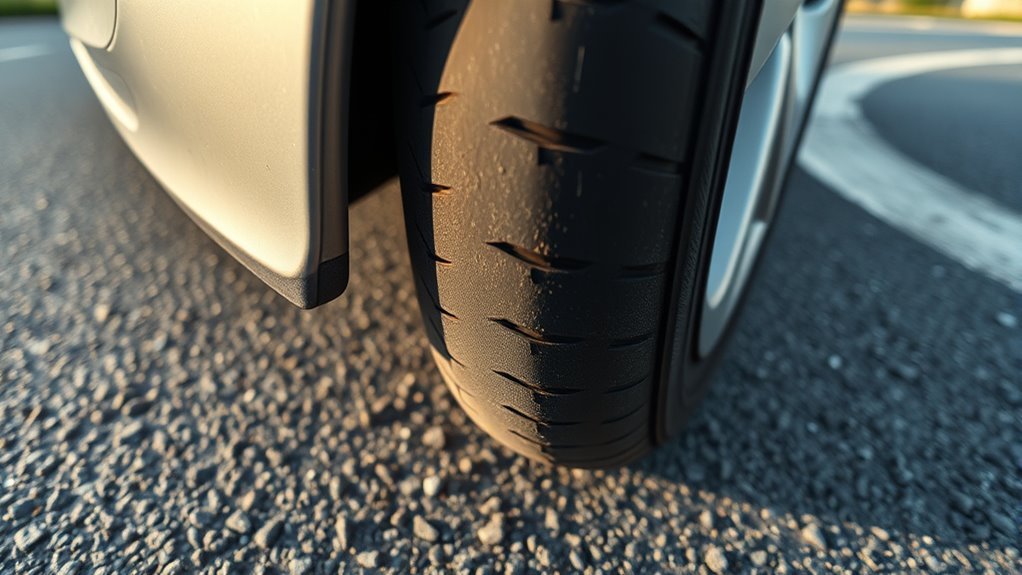
Visual Wear Signs: Sidewall, Shoulders, and Tread Indicators
Inspecting three key areas—sidewalls, shoulders, and tread indicators—lets you spot underinflation before it causes failure. You’ll check for sidewall bulging and visible cracks; bulging shows excessive flexing that weakens the carcass, and cracks indicate progressed damage needing prompt replacement. Shoulders with uneven tread wear, especially pronounced on outer edges, tell you pressure’s been low and life is being lost from the contact patch. Tread indicators and bald spots reveal traction compromise; if indicators sit flush with the tread, remove the tire from service.
- Sidewalls: look for bulging, cuts, or cracking that signal structural compromise.
- Shoulders: inspect outer-edge tread wear patterns for consistent low-pressure erosion.
- Tread indicators: measure depth; exposed indicators mean immediate corrective action.
- Record and act: log findings, inflate to spec, or replace if structural damage exists.
You’ll prevent failure by disciplined, regular inspections and decisive remediation that restore control and freedom.
Driving Symptoms: Handling, Braking, and Ride Changes
Having checked sidewalls, shoulders, and tread indicators for visible damage, shift focus to how underinflation affects vehicle behavior on the road. You’ll notice the vehicle may pull to one side as uneven pressure changes contact patch geometry, signaling compromised alignment and reduced directional stability. Reduced tire pressure also increases braking distances: the tire’s altered shape lowers effective road contact and grasp, so stopping requires more distance and precise anticipation.
Expect a rougher, bumpier ride because underinflated tires can’t absorb impacts efficiently, degrading driving comfort and overall stability. You might feel vibrations or thumping that indicate irregular tire deformation at speed. During turns or heavy braking, responsiveness degrades—corner entries feel sluggish and corrective inputs demand more force. Monitor tire responsiveness continuously; subtle changes are early warnings. Act preventively: treat handling, braking, and ride anomalies as liberation tools—recognize them, regain control, and restore proper pressure to reclaim precise, safe vehicle behavior.
Immediate Triage: Can You Drive? How to Safely Top Up Pressure
How do you decide whether it’s safe to drive when the tire-pressure warning lights up or you suspect low pressure? You’ll inspect visually for sagging or bulging and immediately check PSI with a reliable gauge. If pressure sits markedly below the 30–35 PSI recommended range, don’t drive—inflate first to prevent blowouts and loss of control.
- Measure: use a calibrated tire pressure gauge at the cold valve to get accurate PSI readings.
- Evaluate: visible sagging/bulging or PSI well under spec = no driving; tow or repair.
- Top up: at a service station, add air to reach manufacturer pressure; recheck with your gauge.
- Emergency measures: if you must move, limit speed, drive minimally, and avoid highway use to prevent overheating.
You’ll act with preventive discipline: accurate measurement, decisive restraint, and only responsible, limited movement under emergency measures until proper inflation is restored.
Prevent Underinflation: Monthly Checks, Tools, and Cold-Weather Tips
Check tire pressure monthly with a quality gauge, aiming for the manufacturer’s recommended 30–35 PSI and before long trips or major temperature shifts. In cold weather, monitor more frequently because pressure falls roughly 1 PSI for every 10°F drop and may require incremental top-ups. Keep a portable inflator and visual checks for sagging or bulges to catch underinflation before it degrades handling or causes premature wear.
Monthly Pressure Checks
At least once a month, you should measure each tire’s pressure with a reliable gauge and compare the reading to your vehicle manufacturer’s recommended range (typically 30–35 PSI), since temperature swings can drop PSI enough to cause underinflation. You’ll use a calibrated pressure gauge during cold starts for consistency, recording values and noting deviations. Regular monthly checks free you from roadside vulnerability, preserve handling, and cut fuel waste. Keep a portable inflator and sealant accessible to restore proper inflation quickly.
- Set a monthly reminder tied to a routine task.
- Use a digital or high-quality analog pressure gauge and log readings.
- Carry a compact tire inflator and basic repair kit.
- Treat any persistent drop as a maintenance cue.
Cold-Weather Inflation Tips
When temperatures fall, your tire pressure can drop roughly 1 PSI for every 10°F decrease, so you should monitor and top up pressures more often in winter to avoid underinflation-related handling, wear, and fuel loss. Check pressures with a reliable gauge before long trips and after major temperature shifts; visual inspection won’t reveal low PSI. Inflate to the manufacturer’s recommended range (typically 30–35 PSI) and record readings so you detect trends. Keep a portable inflator and a can of sealant in the vehicle for rapid correction during cold weather emergencies. Make tire maintenance routine: monthly checks plus spot inspections after cold snaps liberate you from roadside vulnerability and preserve control, tread life, and fuel efficiency.
Frequently Asked Questions
What Are the Signs of Underinflated Tires?
You’ll notice tire wear on outer edges, visible sidewall sag, TPMS warnings, sluggish steering and handling issues, reduced responsiveness in turns, increased heat and uneven tread degradation—check pressures promptly to prevent performance loss and safety hazards.
What Is the 3% Tire Rule?
A 3% tire rule says you’ll keep tire pressure within 3% of manufacturer PSI to maximize safety and efficiency. You’ll use pressure monitoring and regular tire maintenance to prevent wear, improve fuel use, and reclaim driving freedom.
Can I Fix a TPMS Error Myself?
Yes — you can often fix a TPMS error yourself: perform a TPMS reset per your manual, use DIY solutions to check and inflate pressures, but seek professional diagnostics if the light persists or sensors seem faulty.
What Tire Pressure for Kia Forte?
Like tuning a violin, you should set tire pressure for your Kia Forte to the Kia specifications—usually 30–35 PSI. Check monthly, use a calibrated gauge, and don’t ignore TPMS warnings to stay safe and free.
Conclusion
You’ll catch underinflation early if you look, listen and feel: coincidence often puts a slow leak next to a missed check. When your TPMS flashes, tread wears at the shoulders, or steering drifts, act immediately — don’t assume it’s coincidence. Inflate to the manufacturer’s PSI, recheck after a short drive, and inspect for punctures. Monthly pressure checks, a calibrated gauge, and colder-weather vigilance prevent performance loss, uneven wear, and the safety risks that follow.
Related Articles
Latex vs TPU Tubes: Best Performance Guide
Uncover whether latex’s unbeatable rolling resistance or TPU’s lighter, tougher profile wins your rides — and what trade-offs you’ll actually feel in the saddle.
Read More
Wide vs Narrow Tires: Ultimate Grip vs MPG Guide
A concise guide comparing wide and narrow tires for grip, speed, and fuel efficiency—discover which suits your driving needs and why it matters.
Read More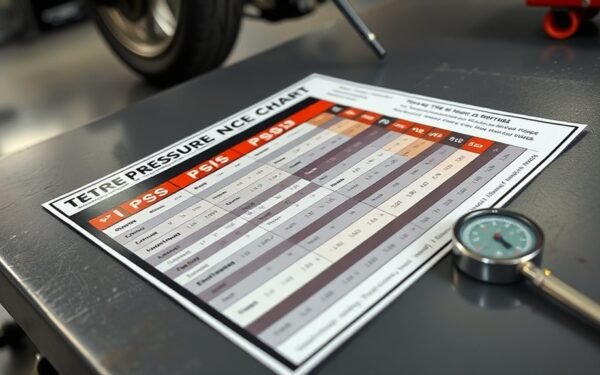
Motorcycle Tire Pressure Chart: Recommended PSI by Type
Discover ideal PSI ranges for road, track, and wet motorcycle tires — practical tips and adjustments await to optimize grip and safety.
Read More