
4Runner Tire Pressure for Sand: How Low Should You Go

Airing down your 4Runner for sand is one of the fastest ways to improve flotation, reduce digging, and keep momentum without abusing the throttle. The safe pressure depends on your tires, wheels, load, and sand conditions, but most 4Runner drivers on standard wheels should start conservative and adjust slowly.
Quick Answer
Start your 4Runner around 18–20 PSI for sand on standard wheels. Drop to 15–18 PSI for softer beach sand, and use 12–15 PSI only for very soft dunes or short climbs at low speed. Reinflate to the door-jamb placard pressure before pavement.
Key Takeaways
- 18–20 PSI is the best first setting for most 4Runners on standard wheels in general sand driving.
- 15 PSI is a cautious lower limit for many standard wheel setups; going lower increases bead-loss risk.
- Lower tire pressure means lower speed. Avoid sharp steering, hard braking, and pavement while aired down.
- Do not use a fixed road PSI for every 4Runner. Reinflate to the tire placard or owner’s-manual pressure before highway driving.
At a Glance
| Time Required | 5–10 minutes to air down; 10–25 minutes to reinflate depending on compressor and tire size |
| Difficulty | Easy, but pressure choice requires judgment |
| Tools Needed | Accurate tire gauge, deflator, portable air compressor, valve caps, shovel, traction boards, recovery strap |
| Cost | $10–$30 for a gauge/deflator; $80–$400+ for a portable compressor |
Start at 18–20 PSI: Your Safe Baseline for Sand

For most 4Runners on standard wheels, 18–20 PSI is the right place to start. It gives the tire a longer footprint, helps the vehicle float over sand instead of digging into it, and still keeps enough bead security for careful driving.
This range is especially useful for packed beach sand, mild dunes, and drivers who are new to airing down. If the 4Runner still feels like it is plowing, hopping, or needing too much throttle, lower pressure in small steps instead of jumping straight to extreme numbers.
Pro Tip: Drop pressure in 2–3 PSI steps, then drive a short distance and recheck. Sand changes quickly, and a loaded 4Runner with passengers, camping gear, or larger tires may need a different setting than an empty daily driver.
4Runner Sand Tire Pressure by Condition
| Sand / Situation | Starting PSI | Best Use |
|---|---|---|
| Firm beach access roads or damp packed sand | 20–25 PSI | Conservative first pass when traction is already decent |
| General beach sand or light dunes | 18–20 PSI | Best baseline for most standard-wheel 4Runners |
| Soft dry sand, bowls, or mild climbs | 15–18 PSI | More flotation with manageable risk on many standard wheels |
| Very soft dunes or short recovery attempts | 12–15 PSI | Experienced drivers only; keep speed low and steering gentle |
| Beadlock-equipped off-road setup | Below 12 PSI only when wheel/tire manufacturer allows it | Specialized use; inspect hardware and air up before road use |
The softer the sand, the more flotation you need. The tradeoff is that every PSI you remove also reduces sidewall support and increases the chance of rim contact, tire damage, or bead loss.
How to Air Down a 4Runner for Sand
- Stop before the soft sand. Air down on a flat, safe pullout before the tires start digging.
- Check your current cold pressure. Use a real tire gauge, not just the TPMS display.
- Set all four tires evenly. Start at 18–20 PSI for general sand or 20–25 PSI for firmer beach access roads.
- Replace valve caps. Sand in valve stems can cause slow leaks.
- Drive a short test section. If the 4Runner still digs, reduce pressure by 2–3 PSI and retest.
- Watch the sidewalls. A little bulge is normal; severe folding, rim contact, or tire movement on the wheel means you have gone too low.
- Recheck after a few minutes. Heat, shade, load, and gauge accuracy can change readings.
Warning: Do not drive on pavement at sand pressures. Underinflated tires flex more, build heat, reduce handling, and can fail at road speed. Reinflate to the pressure listed on your 4Runner’s tire placard or owner’s manual before highway driving.
Tire Type and Wheel Setup: What Sets Your Minimum Pressure
Your wheel and tire setup decides how low you can safely go. A stock-size all-terrain on a factory wheel, an LT tire on an aftermarket wheel, and a beadlock setup all behave differently at the same PSI.
Standard Rim Limits
Most 4Runner owners run standard, non-beadlock wheels. On that setup, treat 15 PSI as a conservative lower limit for normal sand driving. Some drivers go lower, but the risk rises quickly because the tire bead is held in place by air pressure, wheel shape, and careful driving—not by a mechanical beadlock ring.
Below 15 PSI, avoid sudden steering, side loads, and high speed. A sharp turn in soft ruts can roll the sidewall enough to burp air or unseat the bead. If you feel the tire folding over itself or hear popping from the bead area, stop and add air.
Beadlock Wheel Advantages
Beadlock wheels mechanically clamp the tire bead to the wheel, which can allow much lower pressures in soft terrain. That does not make low PSI automatically safe. You still need the correct wheel hardware, proper torque, a tire with enough load capacity, and very low speed.
Note: Some beadlock wheels are intended for off-road use only. Check the wheel manufacturer’s instructions before using beadlocks on public roads, and always reinflate before pavement.
What Changes Your Safe PSI?
- Vehicle load: Passengers, water, tools, rooftop tents, and camping gear need more air support.
- Tire construction: LT tires often have stronger sidewalls than P-metric tires but may feel stiff until aired down.
- Wheel width: Tire and wheel width affect how securely the bead sits at low pressure.
- Tire size: Taller tires often gain more footprint when aired down, but they still need sidewall support.
- Driving style: Smooth inputs keep the bead seated. Sharp steering and throttle spikes increase risk.
How Low Should You Go? 15 PSI to 10 PSI Explained
For a 4Runner on standard wheels, 15 PSI is usually the practical low end for sand. It gives a large traction improvement without entering the highest-risk range. Going down to 12 PSI may help in very soft sand, but use it only for short sections, low speed, and gentle steering.
Lower PSI is not automatically better. The goal is the highest pressure that lets the 4Runner float and maintain momentum without excessive wheelspin.
- 18–20 PSI: Best all-around starting point for sand on standard wheels.
- 15–18 PSI: Better flotation for soft beach sand and mild dunes.
- 12–15 PSI: Short, slow, soft-sand use only; monitor sidewalls closely.
- Below 12 PSI: Beadlock or specialized setup territory; not recommended for normal standard-wheel driving.
Tire Pressure Warning Signs: How Low Is Too Low?
You are too low when the tire no longer supports the vehicle cleanly. Stop and add air if you notice severe sidewall folding, the rim getting close to the sand, the tire slipping on the wheel, sudden air loss, or popping near the bead.
Bead Loss Risks
Bead loss happens when the tire separates from the wheel enough to dump air. It is more likely at very low PSI, with heavy loads, sharp steering, side-hill pressure, or sudden impacts. Sand can also pack into the bead seat, making reseating harder.
If you lose a bead, do not keep driving on the flat tire. Clear the bead area, inspect for damage, reseat the tire only if you have the correct equipment and experience, and use your spare if the tire or wheel is damaged.
Handling Changes
As pressure drops below road settings, steering gets slower and body movement increases. That is normal, but it means you must drive differently. Give steering inputs earlier, brake gently, and avoid fast direction changes.
If the 4Runner wanders badly, feels like it is rolling onto the sidewalls, or needs constant correction, add air. Sand driving should feel smooth and controlled, not loose and unpredictable.
Drive Low and Slow: Steering and Speed for Aired-Down Tires
Once aired down, your driving technique matters as much as the PSI. Select the right 4WD mode before you need it, keep momentum steady, and avoid digging holes with wheelspin.
- Use 4H for most beach and open sand driving. It keeps power moving to both axles without forcing you into overly low gearing.
- Use 4L only for slow, controlled sections. It can help for recovery, steep climbs, or crawling out of soft holes, but too much throttle in 4L can dig quickly.
- Be smooth with throttle. Gradual power keeps the tires on top of the sand.
- Steer gently. Sharp steering at low PSI can roll the tire and increase bead-loss risk.
- Do not slam the brakes. Ease off and let the sand slow you when possible.
Warning: Keep speed low when aired down, especially below 20 PSI. Lower pressure improves flotation off-road, but it also reduces load capacity at speed and increases heat if you drive too fast.
What to Do If Your 4Runner Gets Stuck in Sand
If the 4Runner stops moving, do not keep spinning the tires. Spinning digs the chassis down and makes recovery harder.
- Stop early. The moment forward progress fades, lift off the throttle.
- Clear sand from the tires and undercarriage. Use a shovel around all four tires and under low points.
- Straighten the wheels. Turning adds drag.
- Try backing out in your own tracks. Use gentle throttle, not wheelspin.
- Use traction boards if needed. Place them tight under the tire in the direction of travel.
- Air down slightly only if safe. If you are at 18 PSI, dropping to 15 PSI may help. If you are already near 12–15 PSI on standard wheels, focus on digging and boards instead of going lower.
- Reinflate after recovery. If you had to drop very low to get unstuck, add air before continuing.
Reinflate Before Pavement: Completing Your Sand Drive
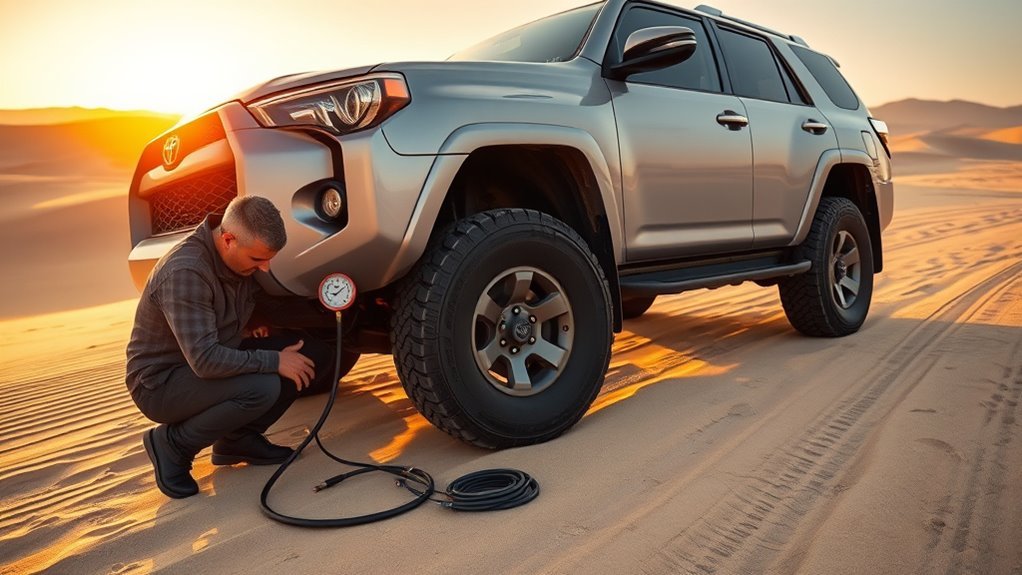
Before your tires touch asphalt, pump them back to the correct road pressure. For most 4Runners, that means the pressure shown on the tire information placard inside the driver’s door area or in the owner’s manual—not a random number from the trail.
Many 4Runner setups land somewhere around the low-to-mid 30 PSI range for road use, but tire size, load rating, model year, and vehicle load can change the correct number. If your tires are a different size or load range than stock, use a tire professional’s load-inflation guidance instead of guessing.
Use a digital or dial gauge on every tire. Uneven reinflation can cause pulling, uneven treadwear, and poor handling. Keep your compressor accessible, because airing down without a way to air back up is a bad plan.
Pro Tip: Reinstall valve caps after reinflation and check for leaks if a valve stem was exposed to sand. A slow leak can turn into a highway problem miles after you leave the beach.
Frequently Asked Questions
What PSI should I run on sand in a 4Runner?
Start at 18–20 PSI for most sand driving on standard wheels. Use 15–18 PSI for softer beach sand or mild dunes. Only go below 15 PSI when conditions demand it, your setup can handle it, and you are driving slowly with gentle steering.
Is below 30 PSI too low for sand?
No. Below 30 PSI is normal for sand driving because it increases flotation and reduces digging. It is too low for normal pavement driving, though, so air back up to the placard pressure before returning to road speed.
Can I run 10 PSI on standard 4Runner wheels?
Ten PSI is risky on standard non-beadlock wheels. It may work briefly in very soft sand for some setups, but bead-loss risk is high. For most drivers, 15 PSI is a smarter lower limit, and 12–15 PSI should be reserved for short, slow sections.
Should I air down all four tires or only the rear tires?
Air down all four tires evenly. Equal pressure keeps the 4Runner predictable, spreads the load across all four contact patches, and helps the front tires float instead of plowing through soft sand.
Can I use TPMS instead of a tire gauge?
Use TPMS as a backup only. A dedicated tire gauge is more practical when airing down because you need controlled, repeatable readings at each tire. TPMS may also lag or trigger warnings once you intentionally reduce pressure.
What should I reinflate to after sand driving?
Reinflate to the road pressure listed on your 4Runner’s tire information placard or owner’s manual. Do this before driving on pavement at normal speed. If your tire size or load range has changed, get a tire-shop load-inflation recommendation.
Conclusion
For most 4Runner sand driving, start at 18–20 PSI, adjust in small steps, and treat 15 PSI as a cautious lower limit for standard wheels. Go lower only when the sand demands it, your setup supports it, and your speed stays low.
The most important habit is finishing the job: reinflate before pavement. Low pressure helps in sand, but on the road it hurts braking, steering, tire temperature, and tire life. Air down with a plan, carry the gear to air back up, and your 4Runner will handle soft sand with far less drama.
Sources
- U.S. National Park Service — Tips for Beach Driving — supports airing down before sand, lowering more for softer sand, carrying recovery gear, and reinflating before pavement.
- BFGoodrich — Tyre Pressure — supports placard pressure, reduced speed when lowering tire pressure, and reinflation before sealed roads.
- BFGoodrich USA — Off-Road Air Pressure — supports the point that no single air-down PSI fits every vehicle, tire, terrain, and load.
- Tire Industry Association — Why Do Tires Fail — supports warnings about underinflation, over-flexing, heat buildup, and tire failure.
- NHTSA TireWise — Tire Safety — supports tire-pressure safety, tire maintenance, and TPMS context.
- Toyota Owners — 4Runner Tire Inflation Pressure — supports checking and adjusting tire inflation pressure using a tire gauge.

Related Articles

When to Switch From All-Season to Winter Tires on a 4Runner
Ineffective all-season tires in cold weather can jeopardize your safety—discover when to make the crucial switch for better traction and handling.
Read More
4Runner Tire Mileage: How Many Miles Should They Last
Curious about how long your 4Runner tires should last? Discover essential tips and factors that influence tire longevity.
Read More
How Long Do Toyota 4Runner Tires Typically Last
How long do Toyota 4Runner tires typically last? Discover the factors that influence tire longevity and essential tips for maintenance.
Read More