
Bike Tyre Size Guide: ISO/ETRTO, 700C & 26-Inch Fit
A tyre that looks close can still fail to fit your rim. The safest way to choose a replacement starts with the numbers stamped on the sidewall. Use the European Tyre and Rim Technical Organisation (ETRTO)/International Organization for Standardization (ISO) code first because it gives the nominal tyre width and bead seat diameter in millimetres. Inch and French labels help as cross-checks, but they can be ambiguous, so don’t rely on them alone.
Quick Answer
Use the ETRTO/ISO size on the tyre sidewall first. A code such as 37-622 means the tyre is about 37 mm wide and fits a 622 mm bead seat diameter rim. Match the second number to your rim, then check rim width, brake fit, pressure limits, and frame clearance before you buy.
Key Takeaways
- Use the ETRTO/ISO code as your main tyre size reference.
- Match the bead seat diameter before you compare width labels.
- Check the rim maker’s tyre width range before fitting a wider tyre.
- Leave at least 6 mm of clearance around the tyre when possible.
- Use tubeless tyres only with tubeless-compatible rims and parts.
Quick Answer: Which Tyre Size Label Matters Most
Use the ETRTO/ISO label first. It gives the nominal width in millimetres and the bead seat diameter, so you can check tyre compatibility with the rim more directly. For example, 37-622 means a tyre about 37 mm wide for a 622 mm rim.
Inch and French labels can still help when you compare older sizes, but they don’t give the same clear rim fit data. Convert any inch or French size to the ETRTO/ISO pair before you buy. Treat the ISO/ETRTO numbers as the final check across brands.
Decode Tyre-Sizing Systems: Inches, Millimetres, and ISO/ETRTO
Most bike tyres show one or more size systems. Each system tells you something useful, but not all of them tell you enough to confirm rim fit. Start with the ETRTO/ISO number, then use inch or French labels as supporting clues.
- Inch labels: A size such as 26 x 1.75 gives a nominal outside diameter and tyre width in inches.
- French labels: A size such as 700 x 35C gives a nominal outside diameter and width class.
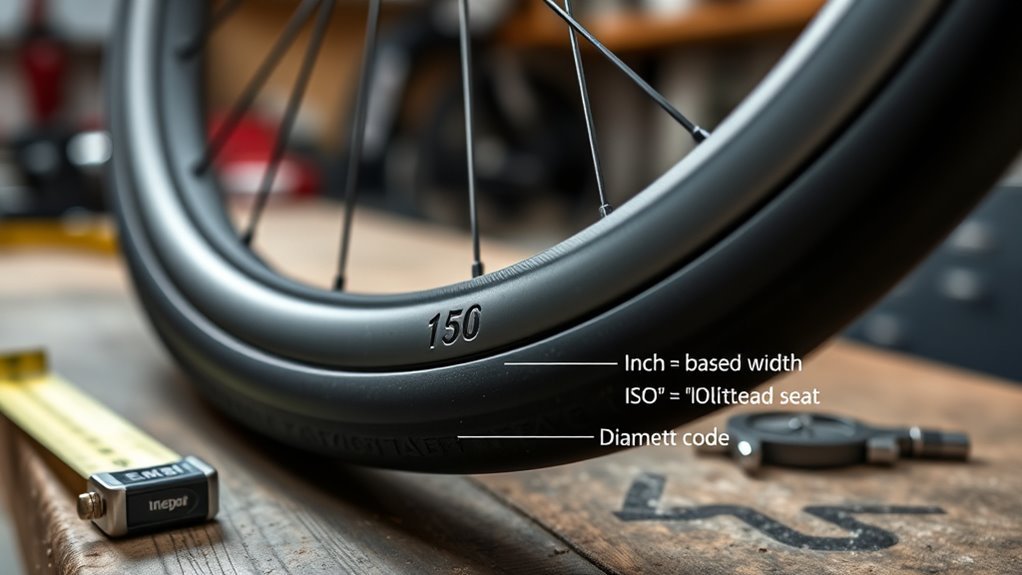
- ETRTO/ISO labels: A size such as 37-622 gives tyre width and bead seat diameter in millimetres.
The second ETRTO/ISO number matters most for rim fit. If that number does not match your rim’s bead seat diameter, the tyre won’t seat safely.
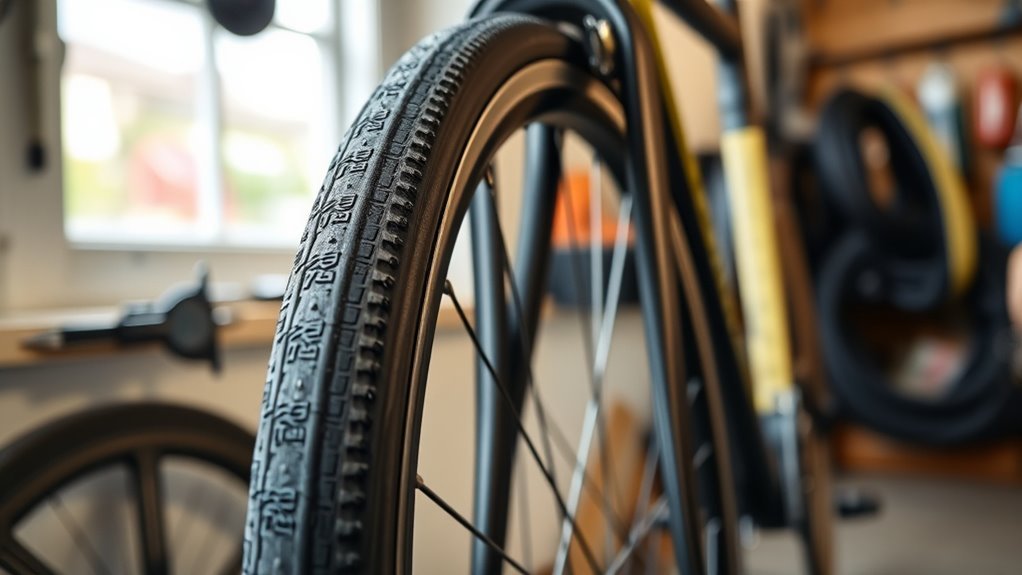
Read Tyre Sidewall Markings: Examples and Equivalents
Start by reading the markings stamped on the sidewall. You may see ETRTO sizing, English inch sizing, and French sizing on the same tyre. Use the ETRTO width-bead diameter format as your main reference.
English and French labels help when you cross-reference legacy sizes or shop across regions. Watch for size variations between brands because nominal widths can differ from measured widths. Check the maker’s size chart if the sidewall is worn or unclear.
Read the sidewall markings, then use ETRTO as your precise tyre reference.
- Find the ETRTO code, such as 37-622.
- Match the bead seat diameter to the rim.
- Use inch and French labels only as cross-checks.
- Confirm the maker’s data before you change tyre width.
Match Tyre to Rim: Bead Diameter, Rim Width, and Safe Ranges
Match your tyre to the rim by checking the bead seat diameter first. The ETRTO code gives the exact bead diameter after the hyphen, so 37-622 fits a 622 mm rim. A mismatch can stop the bead from seating safely.
Next, compare the tyre’s nominal width with the rim maker’s approved range. Tyres usually need to sit on rims that support their width, not rims chosen by guesswork. Also leave at least 6 mm of frame and fork clearance when possible.
Warning: Don’t fit a tyre when the bead seat diameter does not match the rim.
Use only tubeless-ready rims, valves, tape, and tyres if you plan to run a tubeless tyre. Respect pressure limits printed on the tyre and listed by the rim maker. Recheck clearance after inflation because mounted width can change with rim width.
Measure Your Tyre and Confirm Fit: Step-by-Step
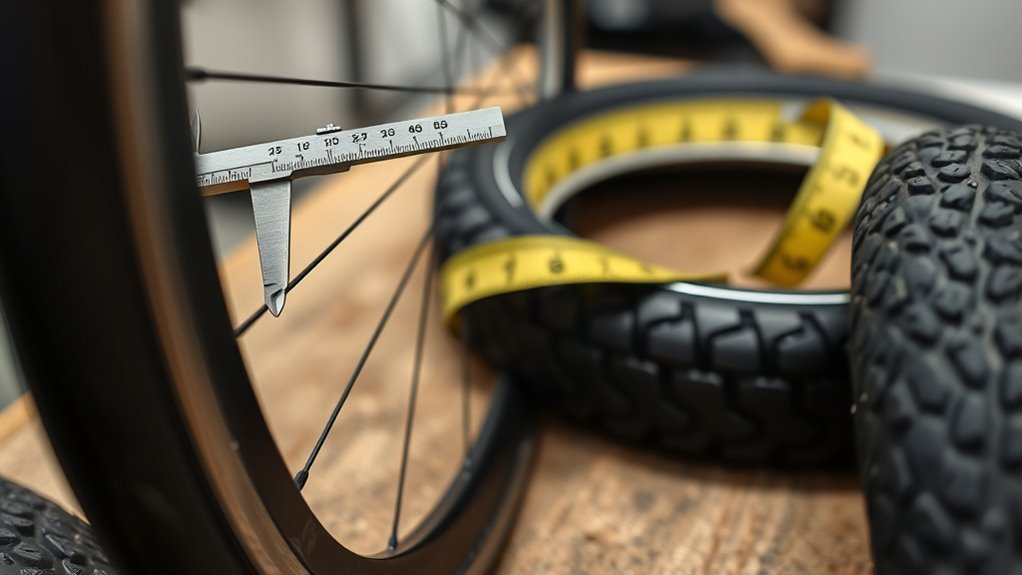
Stand the bike upright and secure it so it can’t shift while you work. Check the sidewall first, then confirm key measurements on the mounted tyre and rim. Use a ruler for basic checks and a caliper when you need more accuracy.
Measure Bead Seat Diameter
The bead seat diameter determines whether a tyre can sit safely on your rim. You can often find it stamped on the rim or listed by the wheel maker. If the marking is missing, remove the tyre and measure carefully across the bead seat area.
- Remove the tyre so you can see the rim bed and bead seats.
- Use a vernier or digital caliper for the most accurate measurement.
- Compare the measured value with the tyre’s ISO number.
- Reject any tyre that does not match the rim bead seat diameter.
Check Frame Clearance
Measure the tyre’s widest point while it is mounted and inflated to the recommended pressure. This gives you the real width you need to clear the frame, fork, brakes, and fenders. Also check the tyre’s height because a taller tyre can rub at the fork crown or seatstay bridge.
Measure side clearance at the chainstays, seatstays, and fork blades. Measure radial clearance from the top of the tyre to the closest frame or fork part. Aim for at least 6 mm of space on each side when your bike design allows it.
Common Tyre-Size Pitfalls and Troubleshooting
Most fit problems come from clearance, brake reach, rim width, or tubeless setup errors. Check these items before your first ride on a new tyre. Small mismatches can cause rubbing, weak braking, leaks, or bead failure.
Clearance and Frame Fit
Check physical clearance at the tightest frame and fork points. Wider tyres can grow even wider on modern rims, so don’t rely on the sidewall number alone. Account for mud, fenders, wheel flex, and small frame differences.
- Measure static clearance at the seatstay, chainstay, fork crown, and fork blades.
- Leave room for mud, fender hardware, and wheel flex.
- Confirm the rim and tyre bead interface before inflation.
- Recheck clearance if you change rim diameter or tyre height.
Brake Reach Adjustments
When you change rim or tyre size, brake reach may need adjustment. Moving from a 630 mm to a 622 mm bead seat diameter rim changes the brake track position by about 4 mm at the radius. Rim brakes need the pad to contact the rim squarely, not the tyre or empty air.
Center the caliper, align the pads, and spin the wheel to check contact around the full rim. If the pads cannot reach the rim safely, use a correct brake or wheel setup. Don’t ride until the brakes feel firm and contact the rim in the right place.
Tubeless Seal and Safety
Tubeless setups can reduce pinch flats, but they need the right parts and careful setup. Confirm your rim and tyre support tubeless use before you install them. Fit the correct rim tape, valve, and sealant for your wheel system.
- Verify rim and tyre compatibility before inflation.
- Fit the correct rim tape and valve.
- Seat the bead fully and test for steady air retention.
- Respect the lower pressure limit from the tyre and rim makers.
- Inspect sealant, tape, and beads as part of routine bike checks.
How to Choose a Replacement Bike Tyre Size
Start with the ETRTO/ISO number on your current tyre. Buy a tyre with the same bead seat diameter unless you also change wheels. Then choose a width that fits your rim, frame, fork, brakes, and riding needs.
If you want a wider tyre, compare its mounted width with the tightest clearance on your bike. A tyre that fits one 700C bike may rub on another because frames and rims vary. When in doubt, choose the narrower safe option or check the bike maker’s maximum tyre size.
Frequently Asked Questions
What Does 700C Mean on a Bike?
700C refers to a common road, hybrid, and gravel wheel size. Most 700C tyres use a 622 mm bead seat diameter, which you can confirm with the ETRTO/ISO code. Always match the 622 number before you compare tyre width.
What Does ISO Mean on Bike Tires?
ISO on a bike tyre means the standard size code that lists nominal width and bead seat diameter in millimetres. A size such as 37-622 tells you the tyre width first and rim bead seat diameter second. This format gives you the clearest fit check.
What Does 26X1.95 Bike Tire Mean?
26 x 1.95 means the tyre has a nominal 26-inch outside diameter and a 1.95-inch width. The exact rim fit comes from the ETRTO code, often 50-559 for many 26 x 1.95 tyres. Check the sidewall because not every inch label maps cleanly across all older sizes.
What Does 700×28/32c Mean?
700 x 28/32C usually means a 700C tyre or tube intended for widths from 28 mm to 32 mm. For tyres, choose a specific width that fits your frame and rim. For tubes, the range means the tube can stretch across that width span.
Can I Fit a Wider Tyre on the Same Rim?
You can fit a wider tyre only if the rim maker approves that width and the bike has enough clearance. Check the rim’s internal width, the frame and fork space, and the brake or fender position. Inflate the tyre and remeasure before you ride.
Is 700C the Same as 29er?
700C and many 29er tyres share a 622 mm bead seat diameter. That shared diameter does not mean every tyre fits every bike. Width, clearance, rim strength, and tyre type still decide safe fit.
Conclusion
The ETRTO/ISO number gives you the safest starting point for any bike tyre size check. Match the bead seat diameter first, then confirm tyre width, rim width, brake fit, pressure limits, and clearance. Measure twice before you buy or inflate a new setup. With those checks in place, you’ll choose tyres that fit safely and ride well.
Related Articles

What Does THE P Stand For on a Tire? Full Meaning Explained
I’ll explain what the “P” on a tire really means and why it could change how you choose your next set.
Read More
How to Use a Tubeless Tire Repair Kit: Complete Field Guide
Learn how to fix tubeless tire punctures fast with the right kit, because one small mistake can leave you stranded on the trail.
Read More
How to Tell a Tire’s Diameter: Easy Guide to Reading Tire Size
Want to decode tire sidewall numbers and find the right diameter, but wonder what those hidden digits really mean?
Read More