
How to Pump a Schrader Valve: Steps, Tips, and Common Mistakes
Remove the cap, inspect the Schrader valve for debris, and align your pump head squarely to get a tight seal. Press firmly, listen for hissing, and pump steadily while watching the gauge to reach the tire’s recommended PSI without going past the sidewall limit. Use a floor pump for accuracy or a mini pump for portability, and carry a spare core and cap. If you hear leaks or the core feels stuck, use a valve-core tool to service or replace it. More practical tips follow.
Quick Answer
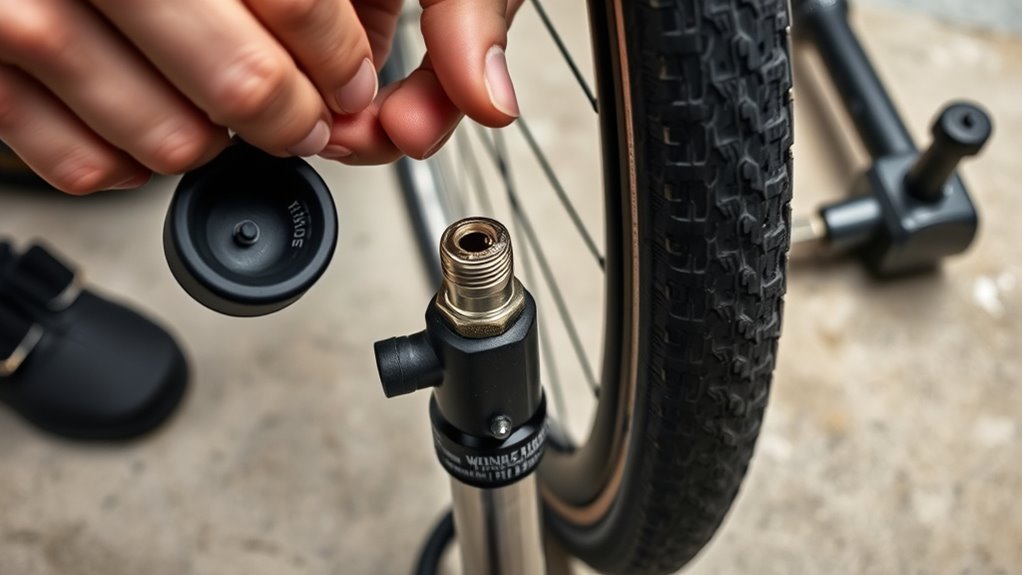
- Unscrew the black plastic cap, check for dirt, and press the pump head straight onto the Schrader valve until it locks or seats firmly.
- Pump in short, steady strokes while watching the gauge. Stop just below the maximum PSI printed on the tire sidewall.
- Use a floor pump at home for accuracy. Carry a mini pump or CO2 inflator on rides for emergencies.
- Replace the valve cap right after inflating to keep dirt and moisture out of the valve core.
- If you notice slow leaks or a stuck core, remove and replace it with a valve-core tool. Cores and caps are cheap and widely available.
Pump a Schrader Valve : Quick Steps
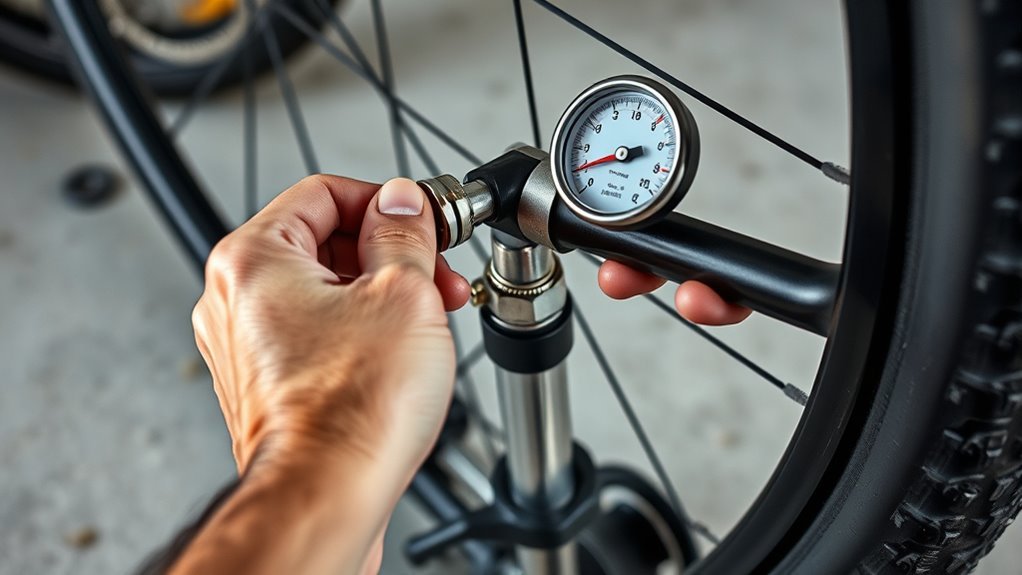
Start by removing the black plastic valve cap to expose the Schrader valve, then firmly attach the pump head. Press or thread it on to form a tight seal. Use steady, controlled strokes while watching the gauge, and avoid sudden pressure spikes. Stay within the recommended pressure shown on the tire sidewall and stop before the maximum rating to prevent blowouts.
When you hit your target pressure, release the pump head using its quick-release lever or unscrew it to minimize air loss. Put the valve cap back on right away to complete basic valve maintenance and protect the valve core from debris. Finally, inspect around the valve stem for any leaks and re-seat the cap if needed.
Prep the Tyre and Valve for Pumping
Start by removing the black plastic cap from the Schrader valve to expose the stem. Check the tire sidewall for the recommended pressure range (PSI or bar) so you know your target. Confirm your pump head is compatible with Schrader valves and look over the valve stem for debris or damage before attaching.
Remove Valve Cap
Unscrew the black plastic cap from the Schrader valve and set it somewhere safe so it won’t get lost during inflation. If the cap is already missing, plan to pick up a replacement at your next bike-shop visit.
With the cap removed, inspect the valve core and the surrounding area for dirt or debris. Clean gently with a dry cloth or compressed air to ensure a reliable seal. Confirm your pump or compressor head is Schrader-compatible before connecting to avoid damage.
Keep valve maintenance tasks like cleaning and cap replacement on the same schedule as your inflation routine to prevent leaks. Position the pump head straight onto the valve, engage the locking mechanism if present, and inflate to the tire’s specified PSI.
Inspect Tire Sidewall
With the valve cap removed and the stem clean, examine the tire sidewall to find the manufacturer’s recommended pressure range (PSI or bar) and any damage indicators. Only inflate within that range to maintain performance and safety.
Check sidewall markings for maximum and recommended tire pressure and note the units (PSI or bar). Visually scan the sidewall for cuts, bulges, dry rot, or embedded objects that could compromise inflation. Confirm the valve stem is free of dirt and shows no cracking or bending, since a damaged stem can leak even at correct tire pressure.
Only proceed if the sidewall condition and markings look satisfactory. If you see damage or unclear markings, repair or replace the tire before inflating to avoid failure or unsafe operation.
Prepare Pump Head
Remove the black plastic cap and inspect the Schrader valve for dirt or damage, then confirm your pump head fits the wider, flat-topped Schrader profile. Check the valve core and stem. Perform valve cleaning with a soft brush or compressed air if you see debris. As part of routine pump maintenance, verify that seals and connections on the pump head are intact and free of grit.
Align the pump head squarely, press firmly onto the valve to form an airtight seal, and engage the lever-lock if applicable. Watch the valve for air escape. Reseat the head or repeat cleaning if you detect leaks. Only begin pumping once the attachment is stable and all components pass visual inspection.
Choose the Right Pump for Schrader Valves
Choose a pump based on the airflow you need and where you’ll be inflating the tyre. Use a stable floor pump with a Schrader-compatible head and gauge for home use because it delivers high volume and accurate pressure. Carry a mini-pump or CO2 inflator on rides when portability matters. Always match the pump head to the valve pin design and set pressure to the tyre’s sidewall recommendation.
[Products Worth Considering]

The GERCHWAY Presta Valve Adaptor Pump offers a versatile dual‑head chuck that fits both Presta and Schrader valves, eliminating the need for extra adapters. Its precision gauge accurately reads 5–100 PSI with ±2 PSI tolerance, ensuring safe and optimal tire inflation for bikes, motorcycles, SUVs, and cars. The 18‑inch hose provides flexible reach, while the 3‑in‑1 design lets you check pressure, release air, or inflate directly from an air compressor.

The CO2 Inflator Kit provides rapid tire inflation for road and mountain bikes, delivering up to 100 psi in seconds with threaded 16 g cartridges. Its compact design fits easily in a saddle bag, and the included insulated sleeve protects hands from the cold discharge. Compatible with both Presta and Schrader valves, it offers a lightweight alternative to hand pumps for quick repairs on the trail.

The CO2 Bike Tire Inflator provides fast, precise inflation for road and mountain bikes with a CNC‑machined aluminum body and brass internals. Its control lever lets you regulate gas flow, preventing freezing and ensuring safe, leak‑free connections to both Presta and Schrader valves. Compact and lightweight, it’s ideal for race, group rides, and timed events, delivering reliable performance with premium threaded CO2 cartridges.
Pump Type Selection
Although many pumps work with Schrader valves, you should match the pump type to your needs. Floor pumps give fast, controlled inflation and often include a gauge. Hand pumps are portable for roadside repairs. CO2 inflators deliver rapid top-ups. Gas-station compressors can inflate quickly but risk overpressure if you’re not careful.
Choose based on required pressure, frequency, and maintenance capability. Make sure the attachment is firm to prevent air escape, and use gauges to hit sidewall-specified pressure. Follow pump maintenance schedules and know your valve types to avoid mismatches.
| Pump Type | Best Use | Risk/Note |
|---|---|---|
| Floor pump | Home/service | Low risk, accurate gauge |
| Hand pump | Emergency | Slower, portable |
| CO2 | Quick top-up | Single-use cartridges |
Portability Versus Power
When you need to balance portability against inflation power, match the pump to how and where you’ll use it. Carry a compact hand pump or CO2 inflator for roadside repairs and emergencies. Keep a floor pump at home for fast, accurate fills on Schrader valves.
Floor pumps deliver high power, stable flow, and precise pressure through an integrated gauge. Use them for routine maintenance. For rides, prioritize portability: hand pumps and CO2 inflators are small, lightweight, and quick to deploy.
Note the trade-offs. Hand pumps require repeated strokes and can be slow. CO2 cartridges lack pressure control and are single-use. Always confirm pump head compatibility with Schrader valves and monitor tire sidewall pressure to avoid over-inflation.
Schrader vs. Presta: Know the Difference
Schrader and Presta are the two most common valve types on bicycles, and mixing them up is a frequent mistake. A Schrader valve has a wider 8 mm stem with a spring-loaded pin, while a Presta valve is narrower at 6 mm and uses a locknut you loosen before pumping.
Most car, truck, and mountain bike tires use Schrader valves. Road bikes and many hybrid bikes use Presta. Before buying a pump, check which valve type your tires use. Many modern floor pumps come with a dual head that fits both types, which saves you the hassle of carrying an adapter.
If you do need an adapter, a simple brass Presta-to-Schrader adapter threads onto the Presta valve and lets you use any Schrader-compatible pump or gas-station compressor.
Attach the Pump and Make an Airtight Seal
1. Position the pump head squarely over the Schrader valve. Proper pump alignment is critical. Remove the valve cap first, then press down firmly so the head seats fully. A slight wobble means a poor seal. Hold the head steady with one hand while engaging a locking lever if present to clamp the connection.
Listen and feel for hissing. Any audible leak points to misalignment or a damaged valve core. If you hear hissing, reseat the head and re-secure, or check the valve core. Pump with the head secured and keep steady pressure on the connection to prevent air loss. When finished, disengage and remove the pump head quickly but smoothly to minimize air escape, and replace the valve cap right away.
Pump to the Correct Pressure (Read Gauges)
Before you start pumping, check the tire sidewall for the recommended pressure range and set a target on your gauge. Add air slowly while watching the gauge so you hit the target without exceeding the maximum PSI marked on the tire.
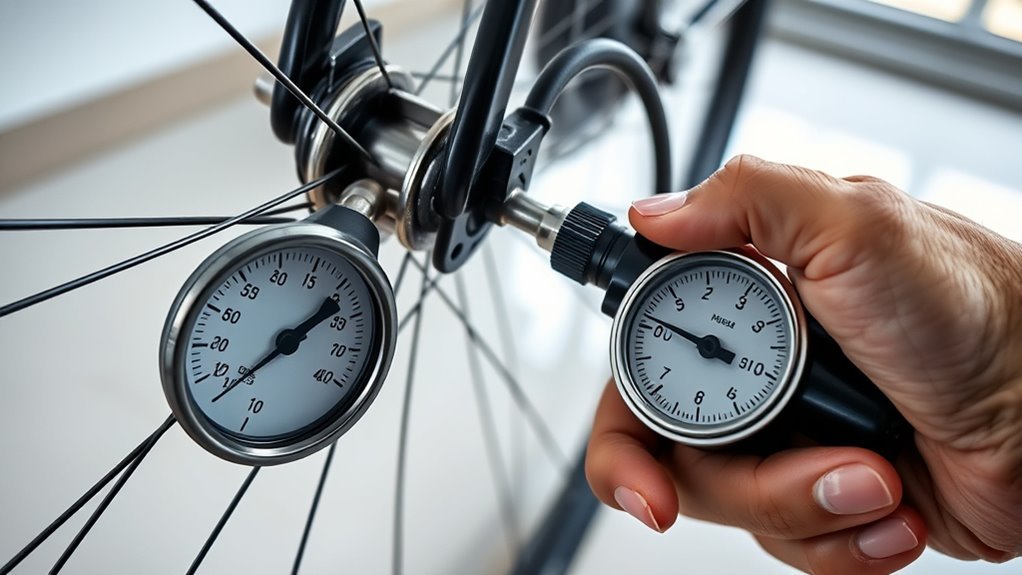
Confirm gauge calibration before use. A miscalibrated gauge gives false readings, so compare it to a known reference if possible. Pump in short bursts, pause to let the gauge stabilize, and perform continuous pressure monitoring until you reach the target.
Account for temperature: expect roughly 1 to 2 PSI change per 10°F shift. For high-pressure road tires, recheck after a minute since rapid fluctuations are common. Stop slightly below the max, then fine-tune to the exact PSI and reseat the valve cap. For more detail on recommended pressures, the Tire Rack pressure guide is a helpful reference.
Common Schrader Valve Mistakes and Fixes
After you’ve set the correct pressure, take a moment to check for common Schrader valve pitfalls that can undo your work or cause inaccurate readings.
First, verify the valve cap is removed. Inflating with the cap on blocks airflow. Next, inspect the pump head and seating. Make sure you have a tight connection to prevent air hissing and lost pressure during inflation. Confirm your pump attachment matches Schrader valves, since mismatched heads won’t engage the pin.
Don’t exceed the tire’s maximum PSI printed on the sidewall. Overinflation risks blowouts and poor handling. Finally, build valve maintenance into your routine checks: monitor pressure at least monthly (tires naturally lose about 1 to 3 PSI per month through normal permeation) and address loose valves, damaged stems, or bent cores promptly to maintain accurate inflation.
Emergency Options: Compressors, Adapters, Temporary Fixes
When you can’t use a floor pump, several emergency options will get air into a Schrader-valved tire quickly. You can use a gas station compressor, a hand pump, or an adapter and sealant combo.
For gas station compressors, follow compressor safety: attach briefly, inflate in short bursts, and verify pressure with a separate gauge to avoid over-inflation. Carry a Presta-to-Schrader adapter if you swap valve types. Check valve compatibility before connecting to prevent damage and leaks.
Use a mini hand pump for controlled, portable inflation when power or stations aren’t available. For punctures, deploy a tire sealant as a temporary fix to seal small holes and ride to a shop. Check tire pressure regularly since tires naturally lose 1 to 3 PSI per month, and adjust as needed.
[Products Worth Considering]

The Tiny Pump Mini Bike Tire Pump delivers rapid inflation up to 120 PSI with a compact, lightweight design that fits in any pocket or backpack. Its digital screen and auto‑stop function ensure precise pressure control, while the 4000mAh battery provides long‑lasting power and quick charging via Type‑C. Includes multiple valve adapters and accessories for bicycles, e‑bikes, and sports balls, making it a versatile tool for every cyclist.

The AZUNO digital tire inflator gauge offers precise pressure readings for both Presta and Schrader bike valves, eliminating the need for separate adapters. Its bright LCD backlight and automatic shut‑off conserve battery life, while the included 18‑inch hose and accessories make setup quick and hassle‑free. Built with durable steel and brass components, it provides reliable performance for bicycles, motorcycles, and other vehicles.

Convert Presta to Schrader: Allows for a Schrader inflator, gauge or pump to be used with your bike's Presta valve tires
Keep Schrader Valves Reliable: Caps, Cores, Replacement
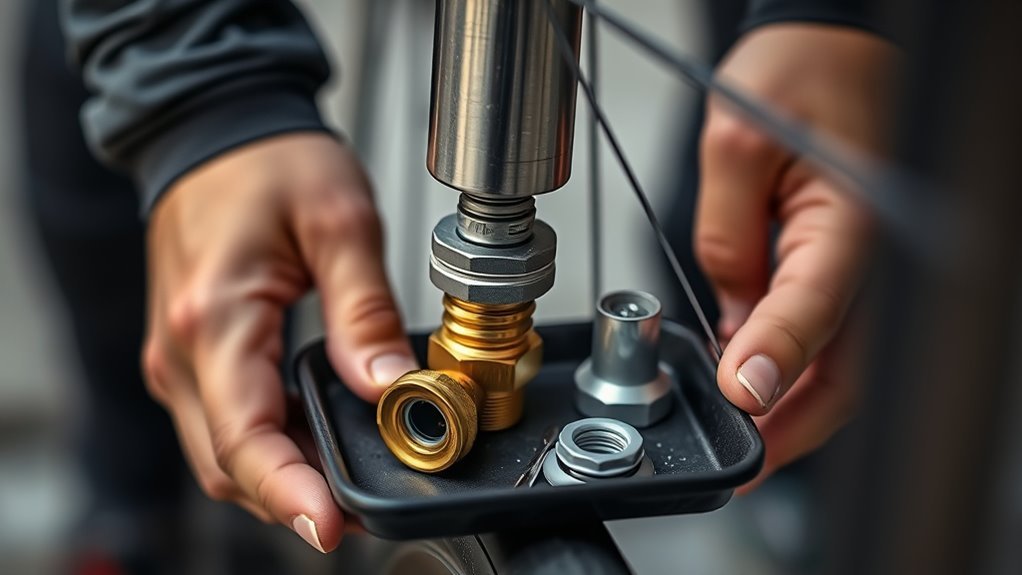
Dirt and moisture quickly compromise a Schrader valve, so always reinstall the black plastic cap after inflating. Inspect the core for proper seating and movement. A stuck or damaged core will leak and should be removed with a valve-core tool and replaced.
For valve maintenance, follow this procedure: clean around the valve, remove the cap, depress the core briefly to confirm movement, then torque the core to manufacturer spec using a valve core tool. If you detect sealing issues or persistent air loss, replace the core. Cores and caps are cheap and available at bike shops and online.
Reinstall the cap to maintain its role as a first line of defense. Record inspection intervals and carry a spare core and cap for field core replacement.
[Products Worth Considering]

What You Get - 4 x valve core remover, 1 x 4-way valve tool,10 x valve stem caps ,20 x valve cores.
Safety Assurance: This valve cores undergo rigorous air-tightness testing to guarantee secure tire sealing. They maintain optimal tire pressure throughout use, preventing pressure loss while driving to enhance safety and significantly extend your tires' service time

A innovative, small, multifunction, handy tool designed to install and remove Schrader and Presta valve cores, also Presta valve extenders with 5mm wrench flats. CNC machined, anodized finish, slim, lightweight and easy to carry out. A must have tool in your saddle bag!
Frequently Asked Questions
Can I Use a Schrader Pump on Presta Valves With a Simple Adapter?
Yes. You can use a Schrader pump on Presta with a simple brass adapter. Check adapter compatibility, confirm valve types, tighten securely, purge trapped air first, attach the pump head, monitor pressure, and avoid overtightening to prevent leaks or damage.
How Do Temperature Changes Affect Tyre Pressure After Pumping?
Temperature swings cause noticeable pressure changes, roughly 1 to 2 PSI per 10°F (about 7 kPa per 5.6°C). Check and adjust your tyres after big temperature shifts to stay at your target pressure.
Can I Overinflate a Tyre and What Are the Risks?
Yes, you can overinflate a tyre. Doing so risks reduced traction, uneven wear, blowouts, and a harsher ride. Always check recommended tyre pressure, add air incrementally, and remeasure with a calibrated gauge.
Is It Safe to Inflate Tyres While They’Re Still Warm After Riding?
Warm tyres give inflated readings. One commuter added pressure after a hard ride and found the reading was 8 PSI higher than reality. Wait for the tyres to cool, or adjust your target pressure downward, then recheck when cold.
How Often Should I Replace Valve Cores for Regular Cycling Use?
Replace valve cores every 1 to 2 years for regular cycling use, or sooner if you detect leaks, corrosion, or sticking. Perform valve maintenance during routine service to preserve cycling performance and prevent slow-pressure loss.
Conclusion
You’ve learned the key steps: prep the tyre, pick a pump, seal the head, and pump to the right PSI. But routine care is what makes the real difference. Quick fixes and compressors offer speed, while valve caps, tight cores, and timely replacements deliver lasting reliability. Emergency air can get you moving, but proper tools and small maintenance habits keep you from running into the same problem again. Act precisely, and you’ll save yourself repeated headaches.
Related Articles

What Does THE P Stand For on a Tire? Full Meaning Explained
I’ll explain what the “P” on a tire really means and why it could change how you choose your next set.
Read More
How to Use a Tubeless Tire Repair Kit: Complete Field Guide
Learn how to fix tubeless tire punctures fast with the right kit, because one small mistake can leave you stranded on the trail.
Read More
How to Tell a Tire’s Diameter: Easy Guide to Reading Tire Size
Want to decode tire sidewall numbers and find the right diameter, but wonder what those hidden digits really mean?
Read More