
Tire Pulling to One Side: Alignment, Pressure & Other Causes
If your car pulls to one side, start by checking tire pressures and matching PSI across all four tires; small differences or slow leaks often cause drift. Inspect tires for uneven wear, conicity, or mismatched sizes, and check brakes for drag or sticking calipers. Verify camber, caster and toe, plus suspension bushings, tie rods and wheel bearings. Bent rims or imbalance can also steer you off line. Continue for a step‑by‑step troubleshooting and repair priority checklist.
Quick Guide: What to Do If Your Car Pulls to One Side
If your car pulls to one side, start by checking the tires: confirm pressures match the manufacturer’s specs and inspect for uneven wear or visible damage, since both can create directional bias. Next, perform a visual alignment check on a straight, level road to verify consistent pulling; note whether drifting occurs only under braking or during steady travel. If pulling happens under braking, inspect brake calipers and pads for sticking or uneven wear that can introduce lateral force. Use tire rotation and scheduled seasonal checks to reveal patterns of asymmetric wear; rotate tires per interval to extend life and expose hidden issues. If pressures, tread, calipers and rotation don’t correct the bias, schedule a professional inspection to evaluate alignment, suspension components, and wheel bearings. You’ll regain control by following this diagnostic sequence methodically—liberating yourself from uncertainty and restoring predictable handling.
How to Tell If Your Car Is Really Pulling (Simple Road Tests)
Start on a straight, level road and note whether you need constant steering correction to keep the wheel centered — that straight road drift test isolates pulling. Re-check tire pressures cold and inspect for uneven wear, since small pressure imbalances often cause a gentle drift. Finally, brake firmly in a safe area to see if the vehicle pulls more under braking, which points toward a sticking caliper or brake system issue.
Straight Road Drift Test
Begin by driving at a steady speed on a flat, even surface and hold the steering wheel lightly; if the car drifts to one side without your input, you’ve confirmed a pulling condition that requires further diagnosis. Use a controlled drift test in both directions to verify consistency: repeat the run returning the other way. Before testing, set all tire pressures to spec so rolling resistance isn’t skewing results. Note whether the drift is constant one-way — that points to alignment, tire pressure, or asymmetric wear. Perform a close tire analysis after the road test: look for irregular wear patterns or conicity. These observations free you to target corrective action (alignment, pressure correction, or tire replacement) rather than chasing symptoms.
Braking Pull Check
One quick way to confirm a braking-related pull is to drive the car on a straight, level road at a moderate speed and apply the brakes gently while holding the wheel lightly; if the vehicle veers consistently to one side under braking but tracks straight when coasting, you’ve isolated the issue to the brake system rather than alignment or tire imbalance. You’ll perform controlled stops at several speeds, noting whether pull direction and severity are consistent. If pulling intensifies, suspect uneven pad wear or a sticking caliper. Follow with a caliper inspection and check pad thickness and carrier movement. Also inspect brake fluid condition and level—contaminated or low fluid can mask hydraulic issues. These checks let you diagnose brake-origin pulls confidently and pursue corrective action.
Tire Pressure Re-Check
After checking the brakes, verify tire pressures cold—under-inflation on one corner often causes a steady pull toward that wheel. Start by inflating all tires to the manufacturer-recommended PSI, then perform a straight-road test on a flat, quiet stretch: hold the wheel lightly and note any consistent drift. If the vehicle pulls toward the lower-pressure tire, that identifies pressure imbalance as the primary cause rather than alignment. Inspect tread for uneven wear patterns; significant differences corroborate chronic under- or over-inflation. Rebalance pressures and repeat the road test to confirm correction. Adopt monthly tire pressure checks as routine maintenance tips to prevent handling issues and extend tire life. This disciplined approach frees you from guesswork and restores control.
Tire Pressure and Pulling: Check, Correct, and Why It Matters
Check tire pressures monthly and before long trips so you catch differences that cause pulling. Inflate each tire to the manufacturer’s specified PSI and correct any side-to-side or front-to-rear imbalances. Monitor for slow leaks—uneven pressure over days is a common, fixable source of steering drift.
Check Tire Pressures Regularly
Regularly verifying tire pressures prevents a common cause of directional pull: an under-inflated tire increases contact patch and rolling resistance on that side, steering the vehicle toward the low-pressure wheel. You’ll check cold pressures monthly to get accurate readings and preserve the control you deserve. Use a calibrated gauge, compare each tire to the vehicle’s placard, and note deviations. Prioritize the front tires; a low front tire creates the most pronounced pull. Keeping tire pressure at spec gives tangible safety benefits and improved fuel economy while preventing uneven wear that undermines control.
- Check pressures when tires are cold, before driving.
- Record readings for all four tires each month.
- Correct small differences immediately to restore balance.
- Replace faulty valves or gauges promptly to guarantee accuracy.
Inflate To Specified PSI
When tires sit even a few psi below the vehicle’s door-placard spec, you’ll notice measurable pull toward the under-inflated side because the larger contact patch increases rolling resistance and steering torque. You should check pressures cold and restore each tire to spec to regain neutral steering. Proper inflation reduces uneven grip, improves fuel economy, and cuts wear — core tire maintenance that frees you from avoidable handling limits.
| Action | Effect |
|---|---|
| Measure cold PSI | Accurate baseline |
| Inflate to placard | Neutralizes pull |
| Recheck after drive | Confirms stability |
| Address persistent pull | Inspect alignment/wear |
A single correct pressure adjustment often resolves pull; if it doesn’t, treat that as diagnostic evidence of deeper alignment or tire wear issues.
Monitor For Slow Leaks
Keep an eye on slow leaks by visually inspecting tires for embedded objects, sidewall damage, or uneven wear and by rechecking PSI after 24–48 hours when you suspect a loss. You’ll prevent subtle pressure imbalances that cause pulling and reduce control. Use a tire pressure gauge to confirm specs from the door placard, and act quickly on deviations.
- Scan tread and shoulder for punctures, nails, or cuts—note patterns during tire wear analysis.
- Pinpoint slow leak detection by measuring PSI morning and evening over two days.
- Inspect valve stems and rim beads for corrosion or damage that lets air escape.
- Repair or replace affected tires to restore handling, improve fuel efficiency, and oppose needless replacement cycles.
Tire Problems That Cause Pull: Uneven Wear, Conicity, and Mismatches
If your car drifts to one side, check the tires first: uneven wear, internal conicity, or mismatched tires on an axle all change contact patch and lateral grip and will produce a steady pull. You should begin tire maintenance by inspecting tread visually and with wear indicators; feathering, cupping, or one-sided shoulder wear point to decreased lateral bite and likely pull toward the worn side. Measure pressures—underinflation increases contact area and resistance, shifting direction toward the softer tire. Consider conicity when symptoms persist across rotations: internal belt misalignment forms a subtle cone and creates a speed-dependent steering drift that regular pressure and tread checks won’t fix. Finally, confirm tires on each axle match in size, tread design, and compound; paired mismatches yield asymmetric handling and amplify pull. Diagnose methodically: rotate tires, equalize pressures, document wear patterns, and replace or match tires as needed to restore balanced grip and reclaim confident control.
Wheel Alignment: How Camber, Caster, and Toe Create Pulling
After you rule out tire issues, check wheel alignment: camber, caster and toe each alter contact patch geometry and steering response, and small deviations will produce a steady pull. You want control, so diagnose alignment precisely. Camber effects change how the tire contacts the road; negative camber pulls opposite the tilted wheel and accelerates inner-edge wear. Caster adjustments influence self-centering and stability; incorrect caster can bias steering, especially in turns. Toe settings create drag when wheels point inward or outward; the side with greater toe-in or toe-out will pull.
Rule out tires, then precisely align camber, caster, and toe — correct specs restore neutral tracking and control.
- Inspect camber with a gauge and compare to manufacturer spec; even slight camber deviation causes directional bias.
- Measure caster per spec; asymmetric caster produces unequal steering return forces.
- Check toe with a toe plate or alignment rack; toe-induced scrub feels like constant tug.
- Prioritize alignment importance: correct each wheel to spec to restore neutral tracking and prolong tire life.
Align to specs, regain freedom on the road.
Brake Causes of Pull: Sticking Calipers and Pull Under Braking
If your car pulls more strongly when you brake, a sticking caliper is a likely culprit — you’ll feel a drift toward the affected wheel and may notice grinding or a burning odor. Check for brake drag by measuring wheel temperature after a short drive, observing uneven pad wear, and testing rolling resistance with the vehicle lifted. Depending on the diagnosis you can rebuild, replace, or service the caliper and related hardware to restore balanced braking.
Stuck Caliper Symptoms
One common brake-related cause of a vehicle pulling to one side during braking is a stuck caliper, which applies uneven braking force and can quickly show itself through specific symptoms. You’ll want to prioritize caliper maintenance and routine brake inspection to reclaim control and safety. A stuck caliper can overheat, cause uneven pad wear, and escalate to failure if left unchecked. Diagnose by observing odor, sound, heat, and wear patterns; act promptly to avoid handling loss.
- Grinding or metallic noises when braking indicating uneven contact or debris.
- A persistent burning smell after short drives suggesting excess heat from a seized caliper.
- Vehicle pulling to one side under braking due to asymmetric force.
- Noticeably uneven brake pad wear on one wheel compared to the other.
Brake Drag Diagnosis
Sticking calipers often show the most obvious signs during braking, so once you’ve noticed grinding, burning smells, or uneven pad wear, focus on diagnosing brake drag next. You’ll confirm brake-related pull by noting straight tracking under acceleration but consistent veer during deceleration. Follow basic brake maintenance tips: test-stop runs at low speed, compare rotor temperatures, and check for wheel drag with wheel-off rotation. Use caliper inspection techniques—visualize piston retraction, probe slide-pin mobility, and inspect pad seating and hardware. Record asymmetries in pad thickness and rotor scoring. Prioritize diagnosis that isolates caliper versus hose or master-cylinder causes before moving to repairs. Prompt identification preserves tire and suspension life and restores vehicle control so you remain free to drive safely.
Caliper Repair Options
A seized or sluggish caliper will produce uneven braking torque and a pronounced pull to one side under deceleration, so you’ll want to move quickly from diagnosis to targeted repair. You’ll confirm sticking calipers via brake system inspection: look for asymmetric pad wear, feel for a hot wheel after a short drive, and note grinding noises or sharper pull at speed. For liberation from unsafe braking, act decisively.
- Clean pistons and slides; remove corrosion and old grease per caliper maintenance tips.
- Lubricate guide pins with high-temp brake grease; restore free movement.
- Replace seals or rebuild a caliper if boots or pistons are compromised.
- Swap the caliper or retrofit a reman unit when wear or damage exceeds rebuild limits.
Suspension, Steering, and Wheel Bearings That Shift Geometry
When suspension or steering components wear or get damaged, you’ll notice the car pulling to one side because alignment and geometry have shifted; worn bushings, bent control arms, loose tie rods, or failing wheel bearings all change wheel angles and loading. You’ll diagnose suspension wear by inspecting bushings and control arm mounts for play or deformation—bushing failure and a bent control arm produce asymmetric camber/toe and prompt wheel misalignment. Check for steering play at the tie rods and rack; steering play creates delayed response and a drift tendency. Spin each wheel and listen for bearing noise; bad wheel bearings add friction, alter load distribution, and force a geometry shift under load. Road impacts (curbs, potholes) can abruptly move suspension points; verify measured alignment numbers against spec. Regular inspections and prompt replacement of worn components restore predictable handling, prevent uneven tire wear, and free you from the constant corrective steering that limits control and autonomy.
Rims, Wheel Balance & Torque Steer: Dents, Imbalance, and FWD Quirks
Rims with dents or improperly balanced wheels will quickly introduce vibrations and lateral pull that mimic alignment problems, so inspect rims and balance before chasing suspension issues. You’ll find rim damage disrupts the tire-to-road contact patch, driving uneven wear and a steady tug. Wheel imbalance adds speed-dependent vibrations that translate into directional bias, while torque steer in high-performance FWD cars amplifies pull under throttle. Together these issues degrade control and reduce confidence—liberation comes from diagnosing and correcting them.
- Dented rim distorts bead seating, shifts contact patch, causes asymmetric wear and pull.
- Unbalanced wheel creates oscillation, transfers lateral forces, worsens steering feedback.
- Torque steer sends unequal drive torque to wheels, producing transient pull on acceleration.
- Regular balancing and rim inspection mitigate wheel imbalance and limit performance impact.
Check rims and balance first; fixing wheel-related faults restores stability and frees you from chasing unrelated alignment fixes.
Step-by-Step Troubleshooting: Home Checks vs. Shop Repairs
Start with a quick checklist you can do at home: verify all tire pressures match the vehicle placard, scan each tire for uneven wear, and drive a straight-road test at varied speeds to confirm whether the pull is constant or speed/acceleration-dependent. If the pull changes with speed or acceleration, note when it occurs.
| Home Checks | Shop Repairs |
|---|---|
| Pressure monitoring with gauge | Wheel alignment and thrust angle |
| Visual tire wear scan | Suspension component inspection |
| Straight-road drive test | Brake system load and drag test |
| Tire rotation schedule (5k–7.5k mi) | Road-force balance and rim check |
Use pressure monitoring and consistent tire rotation to liberate yourself from repeat trips. If home checks don’t stop the pull, bring precise notes to the shop: describe speeds, load, and which side pulls. Technicians will verify alignment, inspect control arms, tie rods, and brakes, and correct what home tools can’t—ensuring safe, predictable handling without wasted time or expense.
When Alignment Won’t Fix It: Repair Priorities and Service Checklist
If an alignment doesn’t stop your car from pulling, you need to prioritize mechanical and tire issues that undermine geometry and braking performance. Start with brake performance: inspect pads, rotors and calipers for uneven wear or sticking; correct brake faults before re-aligning. Conduct a suspension inspection to identify worn tie rods, ball joints, control arms or loose steering links and replace damaged components to restore correct toe and camber.
- Verify tire condition: tread depth, mismatched patterns, and uneven wear; replace or rotate as needed.
- Check and set proper tire pressures; low or unequal pressure defeats alignment.
- Repair or replace any sticking calipers, perform brake system service and road-test braking symmetry.
- After mechanical repairs, perform a final alignment and confirm straight-line tracking at speed.
You’ll free the vehicle from persistent pull by fixing brakes, tires and suspension first, then validating alignment and steering geometry.
Frequently Asked Questions
Which of the Following Will Most Likely Cause the Vehicle to Pull to One Side?
Misaligned wheels will most likely cause the vehicle to pull to one side; you’ll see tire wear and suspension issues, so you should inspect alignment, pressures, brakes, and steering components to reclaim control and freedom.
Why Does My Car Feel Like It’s Pulling Me to the Side?
Your car’s pulling likely stems from alignment settings, uneven tire wear, suspension problems, steering issues, brake imbalance, or adverse road conditions; check tires, steering linkage, brakes, and suspension so you can reclaim confident, liberated control.
How to Fix a Car That Pulls to One Side?
First, correct tire pressure, perform tire rotation, and get a wheel alignment; inspect brakes and suspension issues, replace worn components, and road-test—you’re restoring control so you can confidently reclaim freedom on every drive.
Conclusion
You’ll start by checking the easy, fixable items: tire pressure, tread condition, and visible rim damage. You’ll then verify wheel alignment, suspension play, and steering components, and you’ll measure camber/caster/toe if symptoms persist. You’ll replace or repair the faulty part—tire, wheel, bearing, or suspension—before re-aligning. You’ll test-drive and re-inspect until the pull’s gone. Diagnose methodically, fix logically, and confirm results rigorously.
Related Articles
When to Replace Tubeless Sealant: Timing & Signs
Be warned: tubeless sealant can fail in weeks or months—learn the signs, testing tips, and exact replacement timing to avoid flats.
Read More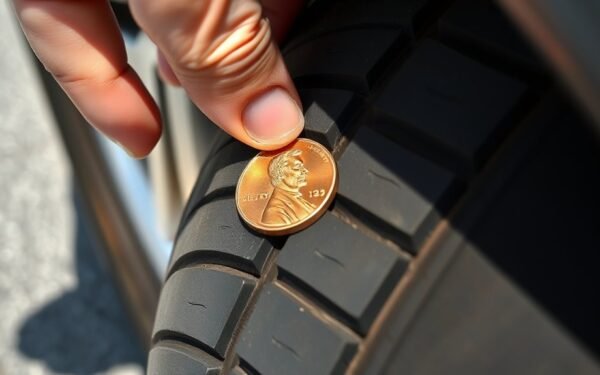
The Penny Test for Tread Depth: How to Do It Right
Better learn the penny test correctly—discover when Lincoln’s head reveals dangerous tread wear and what to do next.
Read More
Tire Rotation Schedule: How Often & Why It Matters
Optimizing tire life? Discover why rotating every 5,000–8,000 miles matters for safety and savings—read on to learn exact patterns and tips.
Read More