
TPMS Sensor Battery: Toyota RAV4 Replacement Guide

A tire pressure warning that won’t clear can point to a weak tire pressure monitoring system (TPMS) sensor battery. In most Toyota RAV4 models, you don’t replace that battery as a normal service item because the sensor battery comes sealed inside the sensor. This guide explains what you can check yourself, what tools you may need, when a full sensor replacement makes more sense, and how to confirm the system works after service.
What’s in This Article
- Why TPMS Sensor Battery Service Matters
- What Tools Do You Need Before TPMS Service?
- Step-by-Step Guide to Removing the TPMS Sensor
- Can You Replace the Battery in a TPMS Sensor?
- Reassemble and Install the Sensor Back on the Valve Stem
- How Do You Program a New TPMS Sensor?
- Troubleshooting Issues After TPMS Service
- How to Maintain Your TPMS System for Better Performance
- Frequently Asked Questions
- Conclusion
- References
Quick Answer
Most RAV4 TPMS sensor batteries are sealed inside the sensor, so Toyota owners usually replace the whole sensor rather than the battery alone. A DIY battery swap may work only if you open the sealed casing, solder or fit the correct cell, reseal the sensor, and then register it with the vehicle. For most drivers, a new compatible TPMS sensor is the safer and more reliable fix.
Key Takeaways
- Check tire pressure first because low pressure can trigger the same warning light as a weak sensor.
- Replace the full TPMS sensor if the sealed battery has failed or the casing shows damage.
- Use a TPMS scan tool to confirm the sensor ID, signal, pressure reading, and battery status.
- Register or relearn the sensor after replacement so your RAV4 can read the new ID.
- Ask a tire shop for help if you need to break the tire bead or reseal a valve stem.
Why TPMS Sensor Battery Service Matters
Your tire pressure monitoring system (TPMS) helps you spot tire pressure problems before they turn into unsafe driving conditions. A weak or dead sensor battery can stop the sensor from sending pressure data to your RAV4. That failure may trigger a dashboard warning light even when the tire pressure looks normal.
Most direct TPMS sensors use sealed internal batteries. Many last several years, but battery life depends on sensor age, driving habits, climate, and sensor design. Once the battery fails, many shops replace the whole sensor because opening a sealed sensor can damage the casing, seal, or electronics.
Good TPMS service helps you avoid poor pressure readings, tire wear, and missed warnings. It also helps you decide whether you need air, a reset, sensor registration, or a new sensor.
What Tools Do You Need Before TPMS Service?
Before you work on a TPMS sensor, gather the right tools and confirm what repair you plan to make. A tire pressure check needs simple tools. Sensor removal or replacement usually needs more care because the sensor sits inside the wheel assembly.
[Products Worth Considering]
🚗2023 UPDATED FOR WIDER COMPATIBILITY: Specifically designed to work with most GM vehicles 2006-2023 (Chevy / Buick / GMC / Opel /Cadillac and more) equipped with 315/433 MHz. Your vehicle deserves the best tire pressure sensor reset tool.(It is not suitable for heavy trucks with more than 4 tires or vehicles with an external TPMS system.)Tip:Based on factory and customer-tested models shown in A+, please refer to the car model list to confirm compatibility with the VXDAS TPMS tool.

✿REMINDING: ❶ GM VEHICLES ONLY: ONLY for Chevrolet, GMC, Cadillac and Buick, Check Compability List before buying. NOT support Ford, Toyota, Nissan, Honda and other non-GM brands; ❷ SENSOR REQUIREMENTS: Optimized for OE/OEM sensors. Most aftermarket sensors can work BUT some may be failure due to incompatible parameters as the original. NOT for UNIVERSAL TPMS sensors.❸ Requires a 9V battery for operation BUT NOT included.❹NOTE: If one or some sensors can't be activated after multiple attempts (because they were dead, low power or damaged, not our tool's not work), please replace them with new sensors then try again.
Essential Tools Required
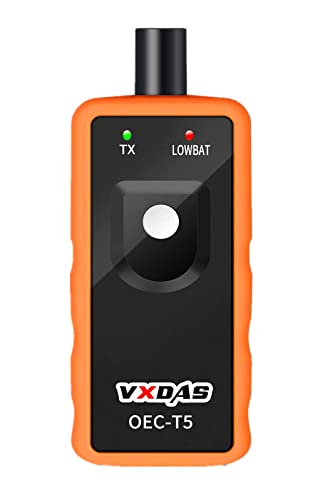
You may need a tire pressure gauge, valve core tool, small wrench, and clean cloth for basic checks. You may also need a TPMS scan tool to read the sensor ID, pressure, temperature, signal strength, and battery status.
If you remove the sensor from the wheel, you may need tire service equipment to unseat the tire bead. Many drivers let a tire shop handle this step because the tire must seal correctly after service.
Recommended Battery Types
Do not assume every RAV4 TPMS sensor uses a CR1632, BR2450, or any one coin-cell battery. Sensor designs vary by model year, supplier, and replacement brand. The correct fix depends on the exact sensor installed in your wheel.
If you attempt a battery-only repair, match the original battery type, tab style, voltage, and fit. Many TPMS batteries come welded or soldered into place, so a loose consumer coin cell may not make a reliable connection. Replacing the full sensor often gives you a better seal and a more dependable repair.
Safety Equipment Needed
Wear gloves and eye protection when you handle wheel parts, valve stems, or small batteries. Keep batteries away from children and pets. Dispose of used batteries through a proper recycling program when possible.
Warning: Do not drive on a tire that loses air after sensor service because a leaking valve stem can cause rapid pressure loss.
Step-by-Step Guide to Removing the TPMS Sensor
Removing a TPMS sensor takes more than unscrewing a cap from the outside of the valve stem. In most direct TPMS setups, the sensor mounts inside the wheel. You must remove the wheel, deflate the tire, and unseat part of the tire bead to access it.
- Check the tire pressure: Set all tires to the pressure listed on the driver-side door placard before you remove parts.
- Scan the sensor: Use a TPMS tool to confirm which sensor has a weak signal, dead battery, or no response.
- Remove the wheel: Follow safe lifting steps and support the vehicle before removing the wheel.
- Deflate the tire: Remove the valve core only after you confirm the tire can be serviced safely.
- Unseat the bead: Use proper tire equipment to create access near the valve stem.
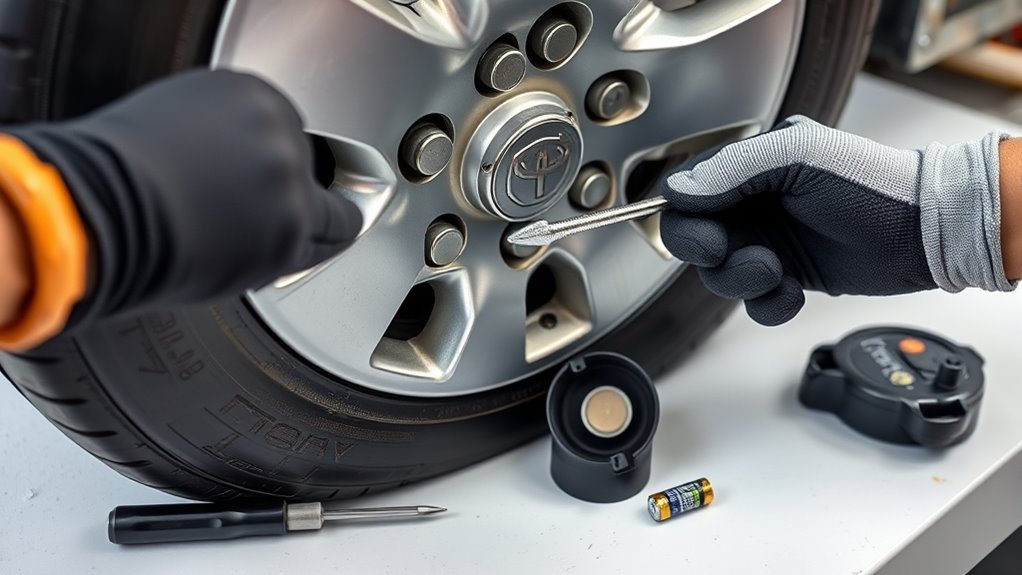
- Remove the sensor nut or screw: Hold the sensor steady and loosen the retaining hardware without twisting the valve stem.
- Lift out the sensor: Remove the sensor carefully so you do not crack the body or damage the valve hole.
Inspect the rubber seal, nut, washer, valve stem, and sensor body. Replace damaged seals and hardware before you reinstall the sensor.
[Products Worth Considering]

Durable steel construction with rubber overmold to protect wheels and rims from possible damage

【Upgrade Design】 - The valve tool's head is equipped with pivot and can be off-set, which provides leverage against the rim, can be locked directly for easy rotation when attaching to or removing from a valve stem.

Package Included: 1 Piece of Wrench, 4 PCs of Anti-Thief Nuts
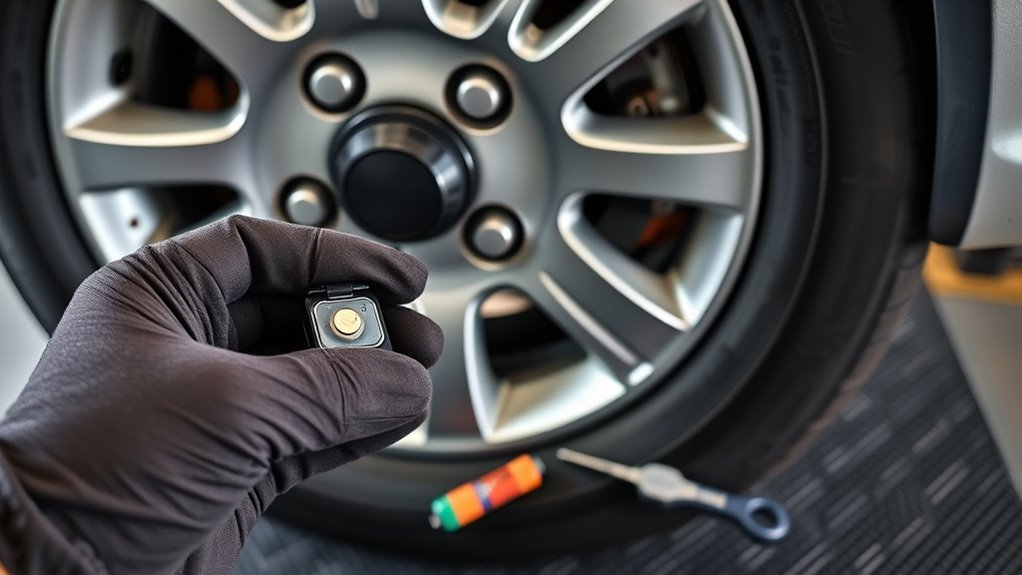
Can You Replace the Battery in a TPMS Sensor?
You can replace a TPMS sensor battery only on some sensor designs, and the repair usually involves opening a sealed casing. That makes this a repair for skilled DIYers, not a standard maintenance task. If you crack the casing or fail to reseal it, moisture can damage the sensor.
If you still choose a battery-only repair, follow these general steps with caution:
- Identify the sensor: Record the part number, sensor ID, frequency, and battery type before you open the casing.
- Open the casing carefully: Use controlled pressure so you avoid cutting wires, bending contacts, or cracking the housing.
- Remove the old battery: Note the polarity and connection style before you detach it.
- Install the matching battery: Use the same voltage, size, tab style, and polarity as the original cell.
- Test the sensor: Scan the sensor before reinstalling it to confirm it wakes up and sends data.
- Reseal the casing: Use a sealant that protects the electronics from moisture without blocking the pressure port.
For most RAV4 owners, replacing the whole TPMS sensor saves time and lowers the risk of repeat failure. A new sensor also gives you fresh seals and a known battery life.
Note: A battery repair may not clear the warning light if the sensor circuit, antenna, valve stem, or registration data has failed.
[Products Worth Considering]

[VEHICLE FITMENT]: Compatible with Toyota Avalon 2013-2015, Camry 2012-2014, Corolla 2014-2019, Corolla iM 2017-2018, Highlander 2014-2019, Land Cruiser 2015-2015, Mirai 2016-2020, Prius C 2012-2021, Prius Prime 2017-2018, Prius V 2017-2018, RAV4 2013-2018, Yaris 2012-2020; Compatible with Scion iM 2016; Compatible with Subaru BRZ 2013-2020

[FITMENT]: The CARORAV tire pressure sensor fit for 2003-2019 Toyota 4Runner, 2006-2012 Toyota Avalon, 2013 Early Toyota Avalon, 2006-2011 Toyota Camry, 2007-2013 Toyota Corolla, 2007-2014 Toyota FJ Cruiser, 2007-2013 Toyota Highlander, 2005-2016 Toyota Land Cruiser, 2007-2014 Toyota Matrix, 2006-2015 Toyota Prius, 2012-2016 Toyota Prius V ect. Please refer to Product Description for specific application of model and year

Application: Marsflex tire sensors are compatible for Toyota 4 Runner, Avalon, Camry, Corolla, FJ Cruiser, Highlander, Land Cruiser, Matrix, Prius, Prius V, RAV4, Sequoia, Solara, Tacoma, Tundra, Venza, Yaris
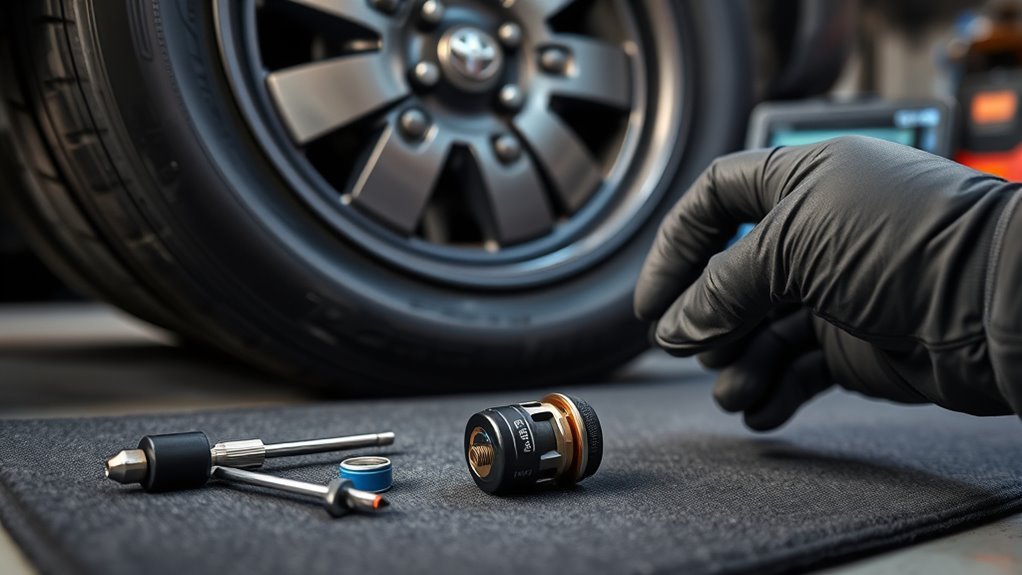
Reassemble and Install the Sensor Back on the Valve Stem
Clean the valve hole and the sensor sealing area before you reinstall the sensor. Dirt, corrosion, or old seal material can cause a slow air leak. Use new service parts if the sensor kit includes a nut, washer, seal, cap, or valve core.
Position the sensor at the correct angle inside the wheel. Tighten the retaining nut or screw to the sensor maker’s torque specification. Do not overtighten it because excess force can crack the sensor or deform the seal.
| Step | Action |
|---|---|
| 1. Clean the valve area | Remove dirt and old seal material before installation |
| 2. Position the sensor | Align it inside the wheel without forcing the body |
| 3. Tighten the hardware | Use the correct torque and avoid overtightening |
| 4. Inflate and check | Set the tire pressure and check for leaks |
After installation, inflate the tire to the pressure shown on the door placard. Check the valve stem with soapy water to confirm no bubbles form. A leak means you need to reseat the sensor or replace the service kit.
How Do You Program a New TPMS Sensor?
A new TPMS sensor must communicate with your RAV4 before the warning light will clear. Some models support an initialization process, while others need sensor ID registration through a scan tool. The exact process depends on your model year and sensor type.
Required Tools Overview
A TPMS scan tool can read sensor data and help register a new sensor ID. Some tools connect through the on-board diagnostics (OBD) port and write sensor IDs into the vehicle. A Toyota-compatible diagnostic tool may work best when the vehicle needs formal ID registration.
You may also need the sensor ID printed on the new sensor. Record that number before the tire goes back on the wheel. Once the sensor sits inside the tire, the printed ID becomes hard to read.
Programming Steps Explained
Follow your tool’s instructions, but the process usually follows this order:
- Wake each sensor: Trigger the sensor with the TPMS tool near each valve stem.
- Read the sensor IDs: Confirm each wheel reports pressure, temperature, and an ID.
- Connect to the OBD port: Use a compatible tool to access TPMS registration if your RAV4 requires it.
- Write the sensor IDs: Register the new ID in the correct wheel position when the tool asks for it.
- Initialize the system: Use the vehicle reset process or scan tool command if your model requires it.
- Drive the vehicle: Drive at a steady speed long enough for the system to confirm the readings.
| Step | Action | Why It Matters |
|---|---|---|
| Check sensor compatibility | Match frequency and part type | Prevents registration failure |
| Record sensor IDs | Write down each new ID | Keeps setup accurate |
| Use a TPMS tool | Trigger and read each sensor | Confirms the sensor works |
| Register the IDs | Write them through a compatible tool | Lets the vehicle recognize the sensor |
| Road test | Drive until the system updates | Confirms the repair |
Troubleshooting Common Issues
If programming fails, check sensor compatibility first. The wrong frequency, wrong part type, or wrong ID format can stop the vehicle from recognizing the sensor. A weak tool battery or poor OBD connection can also interrupt registration.
Set all tire pressures to the placard value before you initialize the system. Do not use the maximum pressure printed on the tire sidewall as your normal setting. That number shows the tire’s limit, not your RAV4’s recommended pressure.
Troubleshooting Issues After TPMS Service
If the TPMS warning light stays on, check the basics before you replace more parts. Confirm every tire, including the spare if your model monitors it, has the correct pressure. Then scan each sensor to see which one fails to respond.
Common causes include a dead sensor battery, wrong sensor type, unregistered sensor ID, damaged valve stem, or slow air leak. A scan tool can help you find the problem faster than guessing. If the tool shows no signal from one wheel, the sensor may need replacement.
If the light flashes before it stays on, your RAV4 may detect a system fault instead of a simple low-pressure condition. In that case, scan the TPMS module and sensor data. A tire shop or Toyota service center can handle this if you don’t have the right tool.
How to Maintain Your TPMS System for Better Performance
Good TPMS care starts with simple tire checks. Check tire pressure when the tires are cold, and use the pressure listed on the door placard. This habit helps your sensors report accurate data and helps your tires wear evenly.
Protect the valve stems during tire service. Ask the shop to replace TPMS service kits when needed, especially if the seals look worn or corroded. Avoid metal caps on aluminum valve stems unless the manufacturer approves them because corrosion can lock them in place.
Keep a record of sensor replacement dates and IDs. That record helps you troubleshoot future warning lights and makes tire rotations easier to manage.
Frequently Asked Questions
Can You Replace a TPMS Battery Yourself?
You can replace some TPMS batteries yourself, but most RAV4 sensors use sealed batteries. Opening the sensor can damage the casing and let moisture reach the electronics. Replacing the whole sensor usually gives you a more reliable repair.
How long does a RAV4 TPMS sensor battery last?
Many TPMS sensor batteries last several years under normal use. Heat, cold, mileage, and sensor design can shorten or extend that life. If one original sensor fails from age, the others may fail soon after.
Do you have to program a new RAV4 TPMS sensor?
Most replacement sensors need registration or relearning so the vehicle can read the new sensor ID. Some programmable aftermarket sensors can clone an old ID, but the tool and sensor must support that feature. Always confirm compatibility before installation.
Why is my TPMS light still on after replacing a sensor?
The light may stay on if the sensor ID was not registered, the tire pressure remains incorrect, or the replacement sensor does not match your RAV4. A leaking valve stem can also trigger a new warning. Scan the sensors and check pressure before replacing more parts.
Can you drive with a bad TPMS sensor?
You can usually drive with a bad TPMS sensor, but you lose an important tire-pressure warning. Check your tire pressure manually until you repair the system. Fix the sensor soon so you don’t miss a real low-pressure problem.
Conclusion
A RAV4 TPMS battery problem usually means the sensor has reached the end of its service life. Check tire pressure first, scan the sensors, and confirm whether the issue comes from low pressure, a dead sensor, or missing registration. Replace the full sensor when you want the safest and most dependable repair. Once the system reads correctly again, you’ll drive with better tire awareness and fewer warning-light surprises.
References
- Tires — National Highway Traffic Safety Administration
- Toyota Owner’s Manuals and Warranty Information — Toyota
- Maintaining Your Vehicle — U.S. Environmental Protection Agency
Related Articles

Toyota RAV4 TPMS Reset: Easy Steps That Work
Unlock the secrets to resetting your Toyota RAV4's TPMS effortlessly—discover the essential steps to ensure your tires are always safe.
Read More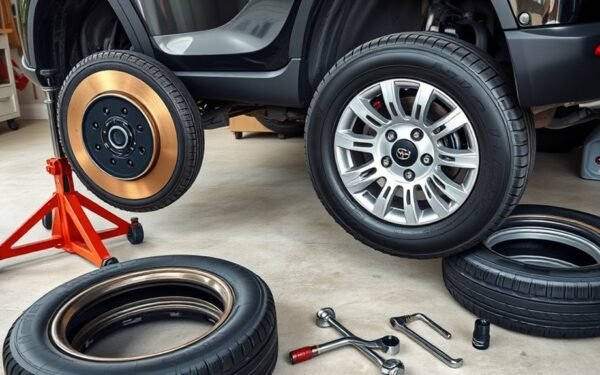
Toyota RAV4 Tire Rotation: DIY Steps & Pattern
Take control of your Toyota RAV4's tire maintenance with our simple DIY rotation guide—discover the best steps for optimal performance and longevity!
Read More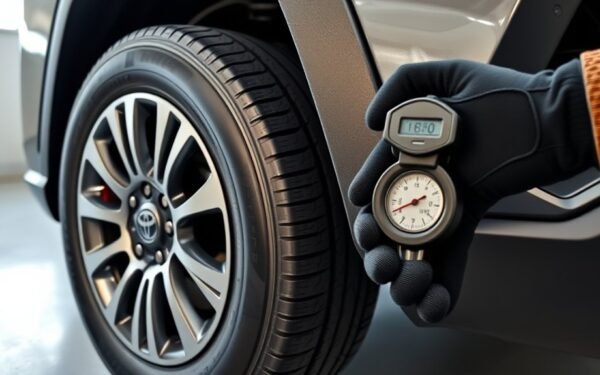
Mix Tire Brands on a Toyota RAV4? Expert Guide
Keeping your RAV4 safe? Learn when mixing tire brands risks traction, ABS/TCS and AWD damage — and what exact matches you must insist on.
Read More