
How to Use a Tire Changing Machine: Easy Beginner’s Tutorial
Start by gathering your tire-changing tools, then remove the valve stem and fully deflate the tire. Break both beads, clamp the wheel securely on the machine, and use the mounting arm and duck head to pry the old tire off. Lubricate the new bead, guide it onto the rim, and inflate until both beads seat. Reinstall the valve stem, check pressure, and follow all safety steps so each change gets smoother from here.
Key Takeaways
- Gather the tire machine, valve tool, lubricant, pressure gauge, and safety gear before starting.
- Deflate the tire, remove the valve stem, and use the bead breaker to separate both beads from the rim.
- Clamp the wheel securely on the machine and position the mounting arm or duck head correctly at the rim edge.
- Lubricate the tire beads, then lever the old tire off and guide the new tire onto the rim carefully.
- Inflate the tire until both beads seat, then reinstall the valve stem and verify the final air pressure.
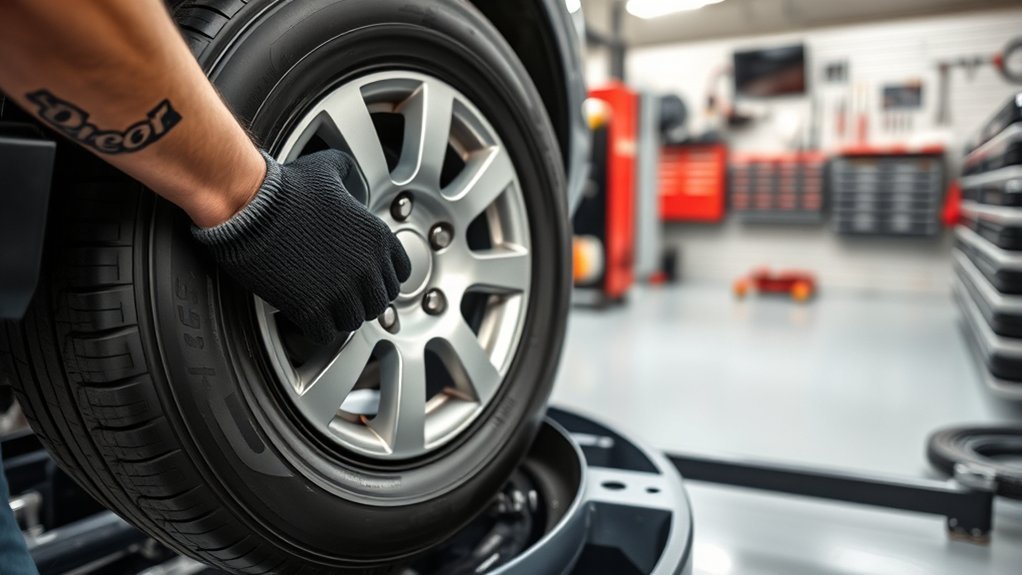
Gather Your Tire-Changing Tools
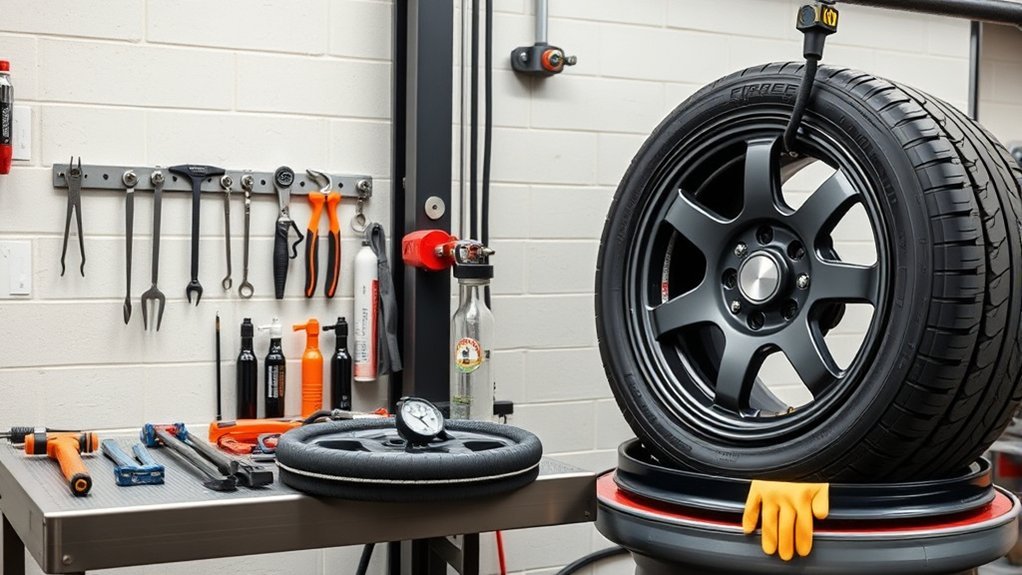
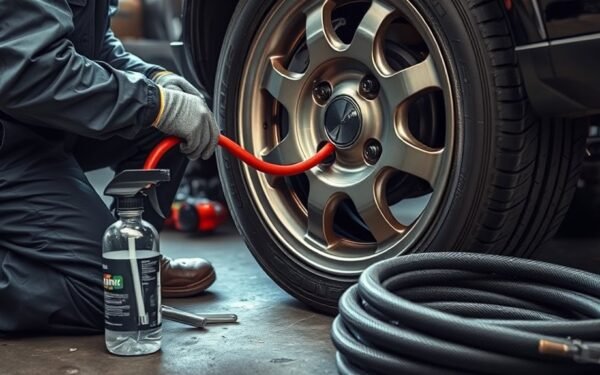
Before you start, gather every tool you’ll need for the job: a tire changing machine, a valve stem tool, lubricant such as Ru-Glyde, gloves, goggles, and a pressure gauge. Always put your safety gear on first, then make sure the machine’s bead breaker, mounting arm, and air inflation system are within reach. Keep a tire lever or shovel nearby for extra leverage when you need to break the bead or guide the tire off the rim. Organize everything on a clean, dry surface so debris can’t slow you down or compromise control. A little bit of preparation saves time and helps you work with precision. Check that the pressure gauge reads correctly before you begin. When you set up your tools in order, you reduce strain, protect your hands and eyes, and keep the process efficient. Additionally, having compact tire spoons on hand can assist in making tire changes easier if needed. You’re not just changing a tire—you’re taking command of the task safely and effectively.
Remove the Valve Stem
Locate the valve stem on the wheel, then press down on the valve stem core to release all air from the tire. Once the tire is empty, use a valve stem tool to unscrew the stem completely. This step can feel a little hard the first time, but steady pressure keeps the work controlled and safe.
- Grip the small cylindrical stem firmly.
- Turn it counterclockwise until it comes free.
- Place it in a clean, secure spot.
Keep the removed stem where you can find it later, because you’ll need it when you re-inflate the tire. Handle it carefully; a bent or damaged valve can cause leaks and undermine your freedom to drive without worry. By removing the stem fully now, you clear the way for the next stages of tire service and avoid pressure issues during removal. Precision here saves time, protects the wheel, and keeps the process smooth. Additionally, ensuring tire pressure consistency is crucial for optimal performance and safety while driving.
Break the Tire Bead on the Machine
Position the bead breaker shovel against the rim edge without contacting the rim, then step on the right pedal to apply controlled pressure and break the bead. Confirm the tire edge moves toward the center of the rim as the bead separates, and keep your hands clear of moving parts throughout the operation. After one side is free, rotate the tire 180 degrees and repeat the process on the opposite side. Additionally, using foam-filled tires can help minimize downtime from flats, making tire changes less frequent in harsh environments.
Position the Bead Breaker
Set the bead breaker shovel against the rim edge without contacting the rim, then step on the right pedal to begin breaking the bead and apply pressure gradually for better control. You’ll use bead breaker techniques that protect the wheel while freeing the tire’s grip. Keep the tire edge pushed toward the center of the rim so the tool can work cleanly and the bead releases faster.
- Align the shovel squarely with the sidewall.
- Press the pedal in controlled increments.
- Keep your hands and body clear of moving parts.
These tire maintenance tips help you work efficiently and keep control of the machine. Follow safety precautions every time, because precision gives you freedom from avoidable damage and injury.
Rotate To Break Bead
After the bead breaks on one side, rotate the tire 180 degrees and repeat the process on the opposite side. Use tire rotation methods that keep the tire centered while you reposition it for the second break. Place the shovel against the rim edge, but don’t let it touch the rim itself. Step on the right pedal with steady pressure to apply bead breaking techniques and push the tire edge toward the center of the rim. This movement helps separate the bead cleanly. Keep your hands clear of moving parts at all times, and follow all safety precautions before, during, and after the break. When both sides are loose, you’ve freed the tire from the rim and made the next removal step easier.
Lock the Tire on the Machine
Position the tire securely on the machine and center it so the rim sits evenly and the load stays stable. Press the middle lock pedal to clamp the tire in place, and make sure the locking mechanism’s fully engaged. Give the tire a gentle push to confirm it doesn’t move before you start the next step. A properly secured tire ensures optimal traction in wet conditions during the changing process.
Secure Tire Position
Lock the tire in place with the machine’s middle pedal so it doesn’t shift during the change. You’re establishing control, and that freedom starts with stability. Use these tire stability techniques to keep the setup solid:
- Verify the tire sits snug against the machine’s surface.
- Run alignment checks; importance matters because a crooked tire can slip under force.
- Inspect locking mechanism maintenance needs before you continue.
Press the lock firmly, then test the tire by applying light pressure to confirm it won’t move. If it shifts, reset it immediately. A secure tire lets you work without fighting the machine, reducing risk and keeping every motion precise. Stay alert for wear, looseness, or damaged parts, because reliable locking protects you during removal and installation.
Engage Middle Lock
Press the middle pedal firmly to engage the tire’s center lock and keep the assembly from spinning during bead breaking and removal. Use tire alignment techniques before you lock it, so the tire seats cleanly against the machine and doesn’t shift under load. Once the pedal is down, check that the lock mechanism maintenance is current and that the clamp acts smoothly; a sticky lock can compromise control. Give the tire a gentle tug to confirm it’s held fast, then proceed with confidence. Follow basic safety precautions: keep hands clear of moving parts, and don’t force the machine if the tire slips. When the job’s done, release the middle lock so you can free the tire without strain.
Check Rim Alignment
With the middle pedal engaged, you’ll want to verify that the rim sits flat against the machine’s platform and lines up with the mounting points before you continue. Use the locking mechanism to keep the tire stable so it can’t shift during bead breaking or mounting. Apply these rim inspection techniques:
- Confirm the rim contacts the platform evenly.
- Check all mounting points for proper alignment.
- Recheck lock pressure before you spin or pry.
If the tire sits crooked, stop and correct it now; misalignment can create uneven tire wear patterns and damage the wheel. Keep an eye on machine calibration tips, too, because accurate settings help you work faster and with less strain. When the setup stays square and secure, you control the process instead of fighting it.
Pry Off the Old Tire
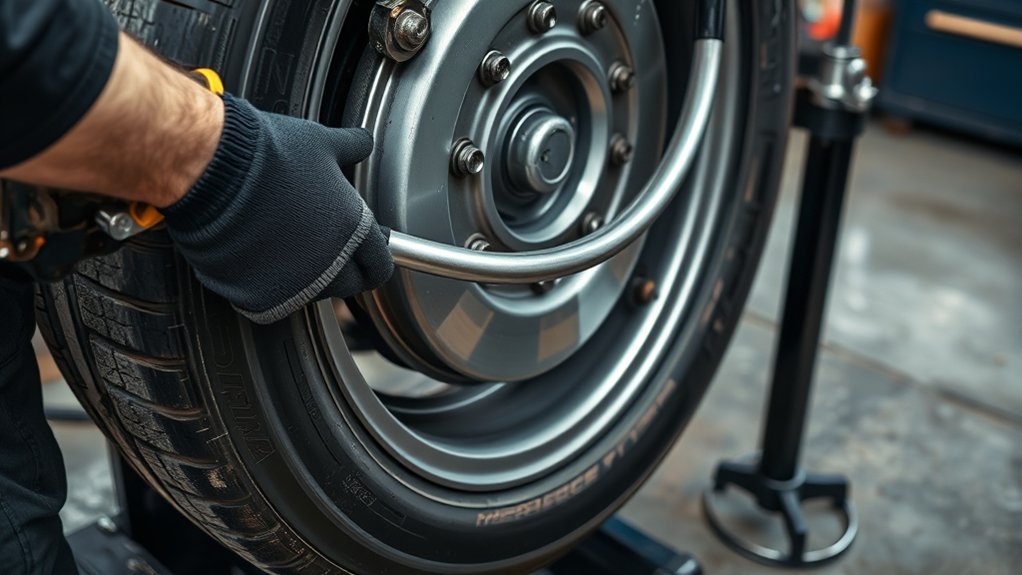
Once the tire is secured, lower the machine’s arm to the rim edge and clamp it in place with the knob so you’ve got solid leverage for removal. Lock the wheel with the middle pedal first, because any shift fights your control and can turn a simple job into tire wear. Set the duck so its beak sits against the bead, then pry on that point only; this is rim protection in practice. Keep steady pressure on the bar as you rotate the tire, letting the machine do the hard work while you guide the bead over the lip. Don’t rush or twist the bar sideways. As the bead clears, continue rotating until the first side releases, then repeat on the opposite side. When both beads are free, lift the tire off the rim carefully. Cleaning the machine afterward is essential; good tool maintenance keeps the setup ready for the next liberation from worn rubber.
Lubricate the New Tire Bead
Apply a generous bead lubricant to the new tire’s bead and the rim edge. Spread it evenly with a brush or cloth so you don’t leave dry spots or excess that can drip. This coating reduces friction and helps the tire mount smoothly without damaging the tire or rim. Additionally, using a lubricant can enhance the tire’s wet traction performance, ensuring a more secure fit during installation.
Apply Bead Lubricant
Spread a generous amount of bead lubricant, such as rube glide, onto both the tire bead and the rim edge to make mounting easier and reduce friction during installation. Use these bead lubrication techniques to solve tire mounting challenges while protecting seal integrity importance.
- Apply the lubricant evenly around the full bead.
- Wipe only enough to keep buildup from attracting dirt.
- Follow the tire maker’s recommended product and quantity.
You should coat both contact surfaces with a clean, controlled layer, then check for dry spots before mounting. Even coverage lets the tire seat smoothly and helps the bead form a reliable seal during inflation. After installation, remove excess lubricant with a clean cloth so debris won’t cling to the assembly. Stay within manufacturer specs; different tires can need different amounts.
Coat Rim Edge
Coat the tire bead and rim edge with a generous, even layer of tire-specific lubricant, such as rube glide, before mounting the new tire. You’ll lower friction and help the bead slide onto the wheel without scuffing the rim or stressing the rubber. Apply the lubricant evenly around the full circumference, because thin spots can cause uneven resistance and poor seating. Stick with approved lubricant types; mixed compounds can react badly with tire materials. Check the manufacturer’s recommendations for amount and compatibility, then follow them exactly. These tire maintenance tips support clean, controlled bead seating techniques and reduce the chance of pinching or tearing the bead. When you prep the rim correctly, you keep the process efficient, precise, and safer for your gear.
Ease Tire Mounting
Ease the new tire bead into place by working a generous layer of tire-specific lubricant, such as rube glide, onto both the bead and the rim edge. This lowers friction, protects the rubber, and keeps mounting techniques smooth and controlled.
- Set the tire at a slight angle so the tire bead starts feeding cleanly.
- Adjust the machine knob to hold the duck away from the rim edge and prevent scratches.
- Guide the lower bead over the duck’s tail and under its head before moving to the top side.
Keep your hands and knuckles clear while you apply pressure with the mounting tool. Follow these safety precautions every time, and you’ll mount the tire with less force, better alignment, and more freedom from struggle.
Mount the Tire With the Duck Head
Position the tire at a slight angle against the duck head so it starts onto the rim more easily. Use this tire angle adjustment to reduce drag and keep the bead tracking clean. Set the lower bead over the duck’s tail and under the head before you tighten the knob; that locks the setup and supports controlled bead seating techniques. Keep the knob adjusted so the duck head stays clear of the rim edge, because contact can scar the wheel and weaken your leverage. As you move to the top bead, align it carefully to avoid pinching and protect your knuckles. Then rotate the tire while you maintain steady pressure on the mounting bar. These pressure application methods help the tire climb smoothly and fit snugly onto the rim without forcing it. Working with precision and understanding the importance of proper tire maintenance will ensure a successful mounting process. Stay in control, and let the machine do the heavy lifting.
Seat the Tire Bead With Air
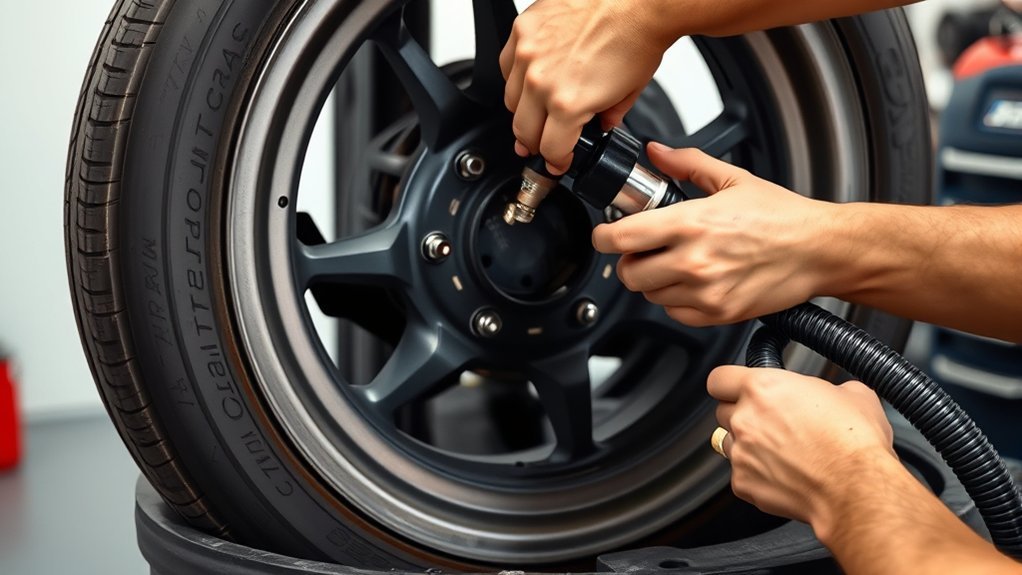
After mounting the tire, attach the air hose to the valve stem and use the machine’s black pedal to deliver a quick blast of air that helps seat the bead against the rim. This is one of the simplest quick inflation methods, and it gives you control without forcing the tire. Keep your hands and body clear; tire inflation safety means staying outside the possible path of a pop or sudden shift.
- Watch the sidewall as air enters.
- Listen for sharp pops that show the bead is locking in place.
- Stop once both beads seat cleanly.
These bead seating techniques free you from guesswork: the sound confirms the seal, and the rim tells you when the tire’s ready. Stay focused, use short bursts, and don’t chase pressure yet. Your goal is clean seating, smooth engagement, and safe control. Additionally, using tires with low rolling resistance can enhance your vehicle’s fuel efficiency, making this step even more crucial for overall performance.
Reinstall the Valve Stem and Check Pressure
Clean the valve stem before reinstalling it so debris won’t compromise the airtight seal. Reinsert it by hand first, then tighten it securely with the proper tool if needed so you don’t cross-thread the valve core. Good valve stem maintenance gives you control over the seal and prevents avoidable leaks. Check that the stem sits straight and fully seated; a tilted stem can vent air and undo your work. Once the tire holds air, use a tire pressure gauge to verify the PSI against the manufacturer’s recommendation. Apply pressure adjustment techniques by adding air if it’s low or releasing air if it’s high until you hit the target. These sealing tips keep the tire stable, responsive, and ready for service. Recheck the reading after a moment to confirm it stays consistent, because freedom on the road starts with accurate pressure and a reliable seal.
Follow Tire Machine Safety Tips
Before you operate the tire changing machine, put on safety goggles and gloves to shield yourself from debris and sharp edges. Use the right safety equipment every time, because you’re working near powerful moving parts that can injure you fast. Keep your hands, sleeves, and body clear of the mount, bead breaker, and turntable while the machine runs. Freedom in the shop starts with control, not risk.
Wear safety goggles and gloves, and keep clear of moving parts to stay in control.
- Review the manufacturer’s instructions before setup and operation so you can avoid malfunctions and use the machine correctly.
- Learn the emergency procedures, especially the emergency stop button, and confirm you can reach it instantly.
- Maintain workspace organization by clearing tools, cords, and loose parts from the floor and machine area.
A clean, organized workspace reduces tripping hazards and helps you move confidently. When you follow these tire machine safety tips, you protect yourself and keep the process efficient, precise, and under your command. Additionally, using all-season tires can help ensure your vehicle is prepared for a variety of driving conditions, enhancing safety during tire changes.
Frequently Asked Questions
How to Change a Tire for Beginners?
You change a tire by removing the valve stem, breaking the bead on both sides, and securing the wheel in the machine. Use essential tools, apply tire changing tips, and follow safety precautions: keep fingers clear, lubricate the bead, and pry the tire off with the arm. Mount the new tire at an angle, inflate it from a safe distance, listen for bead seating, then restore pressure and reinstall the valve stem.
How to Use a Tire Pressure Machine at Home?
Start by removing the valve stem cap—why risk inaccurate readings? You’ll connect the tire pressure machine’s hose securely, set the recommended PSI, and watch the pressure gauge closely. Follow tire maintenance tips by checking for leaks and listening for odd sounds during inflation. Observe all safety precautions, then stop at target pressure, reattach the valve stem cap, and confirm the tire holds air before driving.
Do It Yourself Tire Machine?
Yes, you can use a do-it-yourself tire machine to mount and unmount tires at home. You’ll save time and gain control by choosing equipment with a bead breaker, mounting arm, and inflator. Follow safety precautions: wear gloves, keep hands clear, and use lubricant on beads. For reliable results, handle tire machine maintenance regularly, check pedals and clamps, and practice each step until you’re confident and independent.
What Are the Key Features of a Tire Changer Machine?
A tire changer machine gives you a bead breaker, a mounting arm with a duck head, and locking pedals or knobs for control. You’ll see tire changer types with built-in sensors, pressure tools, and lubrication systems that reduce friction and damage. These safety features help you work faster and safer. For maintenance tips, keep moving parts clean, inspect hoses, and lubricate regularly so you stay independent and keep every job precise, efficient.
Conclusion
Using a tire changing machine makes tire swaps faster, cleaner, and more controlled than doing the job by hand. Remember, proper bead seating matters: a tire can lose most of its pressure in days if the bead isn’t sealed correctly. Always reinstall the valve stem, check inflation, and follow safety steps every time. If you stay methodical and use the machine correctly, you’ll protect the tire, the wheel, and yourself while getting professional results.
Related Articles
How to Set a Bead on a Tire: Easy Methods That Actually Work
Discover simple, safe ways to set a tire bead, and find out what to do when the bead still won’t seal.
Read More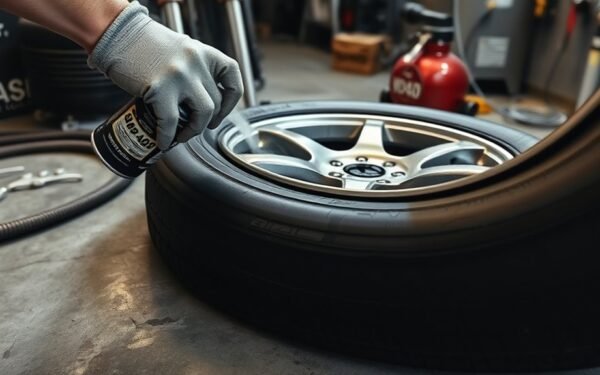
How to Seat a Tire Bead With WD-40: Step-By-Step Guide
Need a quick, safe way to seat a tire bead with WD-40? Discover the step-by-step method and the one caution that could save your tire.
Read More
How to Manual a Bicycle: Lifting the Front Tire Off the Ground
Manualing a bicycle starts with the right body position, but one small shift can make all the difference—discover the key to lifting the front tire.
Read More