How to Use Bicycle Tire Levers Without Pinching the Tube
Keep the tube pushed down into the rim bed with one hand while you hook the lever under the tire bead and lift it over the rim edge, starting opposite the valve and keeping the valve straight; use a shallow lever angle, a second lever to hold lifted sections, and light, steady pressure so the lever does the work and the tube stays clear; check the bead and rim valley before inflating and, if you want step-by-step tips for stubborn beads and fixes, keep going.
Quick Answer: One-Line Technique to Avoid Pinching the Tube
Start by holding the tire bead away from the rim with one hand while you use a lever to lift the opposite bead over the rim edge, keeping the tube pushed down into the rim bed so it can’t get caught; begin at the side opposite the valve, keep the tube evenly stretched and free of folds, and maintain a firm grip as you work the bead into the rim valley to avoid pinching. You’ll use controlled lever techniques to pry small sections, advancing around the rim while monitoring tube tension. Keep the tube seated low in the rim well, preventing it from riding up as you lever. Pause to smooth any slight folds before continuing. Work deliberately, using short lever motions and a steady grip to minimize risk.
Prep the Wheel and Tube: Valve, Seating, and Tire Checks
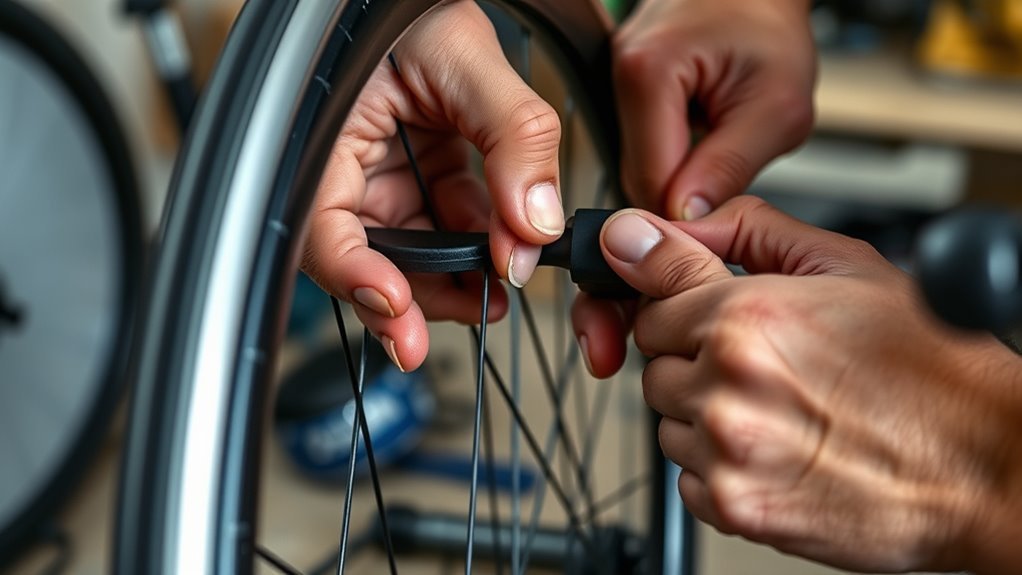
Before you pry the tire with levers, remove the Presta valve cap and loosen the lockring, check both tire and tube for embedded debris or damage, and lay the tire flat so you can easily tuck the tube in without twisting it. Start valve preparation by pushing the valve stem through the rim hole and seating it straight; that gives you room to work and avoids bending the valve. Perform a thorough tube inspection for cuts, pinches, or embedded shards and remove any debris from the tire bed and bead. Lay the tire flat to keep the tube untwisted while you work. As you fit the tube, monitor its placement continuously so the tube stays seated evenly and won’t get trapped between rim and bead.
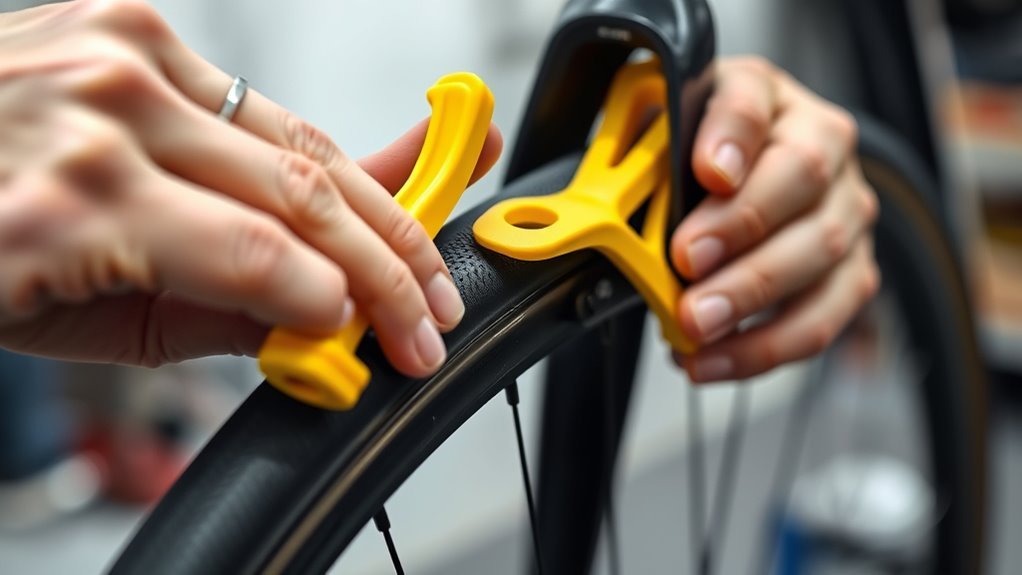
Hook the Lever Correctly: Angle and Placement Near the Rim
With the valve seated and the tube checked, bring a tire lever to the rim edge and hook it just beneath the bead so the hook catches the tire without digging into the tube. Keep a shallow angle between lever and rim for smooth insertion; excessive angle forces the bead and can pinch the tube. Insert the hook beneath the bead, lift gently, and maintain rim alignment as you work around the wheel. Use a second lever to hold lifted bead sections so you can progress without trapping the tube. Before fully seating the tire, run a visual and fingertip check around the rim to confirm the tube sits clear.
| Action | Purpose |
|---|---|
| Shallow angle | Smooth insertion, less pinch risk |
| Hook beneath bead | Secure grip without tube damage |
| Second lever | Maintain tension, prevent trapping |
Keep the Tube Clear With Your Hands While Levering
While you lever the tire, keep one hand on the tube and gently push it toward the rim’s center so it can’t slip between the bead and rim. You’ll control tube positioning as you work the lever, using light, steady pressure to maintain clearance and follow correct lever mechanics. Keep fingers between the bead and the tube, not under the bead, and reposition them as the bead moves. Check the tube’s seat frequently and avoid forcing the lever; small adjustments prevent pinches.
- Insert the lever at a slight angle to reduce catching the tube.
- Use minimal force on the lever; let leverage, not strength, do the work.
- Push the tube inward with fingertips as the bead clears.
- Stop and re-seat the tube if it bulges toward the rim.
Dealing With a Stubborn Bead Without Forcing the Lever
Start by using your hands to seat the bead evenly so you preserve its seating before any lever contact. Use two levers opposite each other and work small sections, rotating the tire around the rim as needed to spread the force. If you meet resistance, stop, reposition the levers or rotate the tire, and never force a single lever.
Preserve Bead Seating
If the bead won’t drop easily, insert levers at opposite ends of the stubborn section so you spread pressure and avoid pinching the tube, then hold gentle tension on the bead while you work it into the rim’s valley rather than forcing the lever. You’ll focus on bead alignment and tension management: keep the lever close to the rim, use steady pressure, and let the bead settle instead of prying hard. Use your hands to guide a stiff bead down while the lever supports the edge, checking the tube’s position frequently to prevent pinches. Move gradually and re-seat small sections until the entire bead sits correctly.
- Keep levers near the rim to reduce leverage distance.
- Apply even tension, not sudden force.
- Check tube placement after each shift.
- Use fingers to push the bead into the rim.
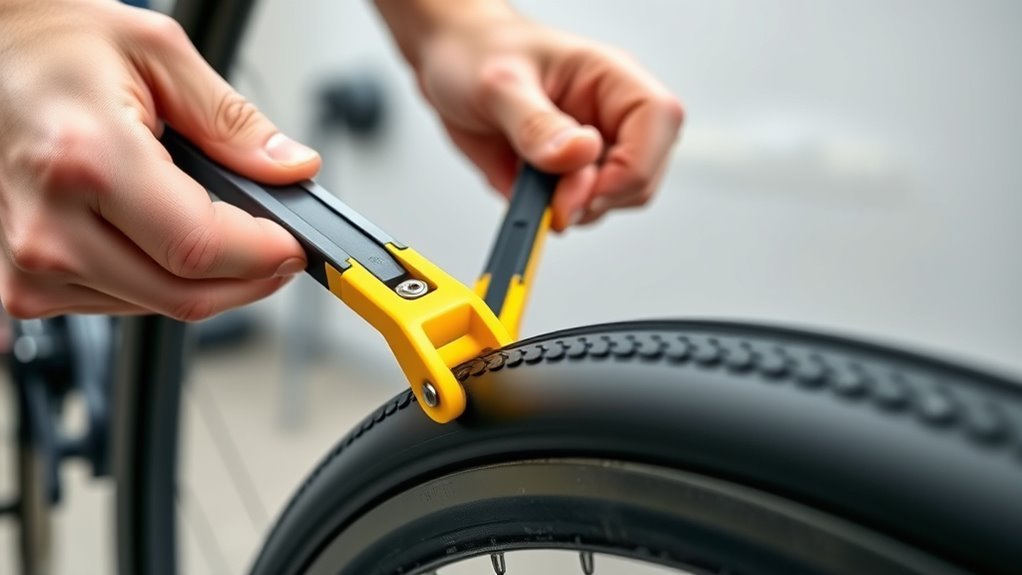
Use Multiple Levers
When the bead won’t move easily despite seating efforts, reach for a second lever to share the load so you don’t pinch the tube. Use two levers as a deliberate lever techniques approach: seat one at the bead’s starting point and place the second a few inches away. Work them forward incrementally, maintaining even pressure distribution between levers to ease the bead off the rim. Keep the tube partially inflated so it holds shape and stays clear of the rim edge. If you hit resistance, don’t force a lever; reposition both slightly and try again so the bead relaxes naturally. Regularly inspect the tube’s position as you progress. These steps minimize tube pinches while making stubborn beads manageable.
Rotate Tire Position
Try rotating the tire a few inches around the rim to find a spot where the bead relaxes and the lever will work more easily. You’ll use tire rotation to locate the least tensioned section before applying any lever technique. Rotate, inspect, then insert the lever gently with a rocking motion so the bead eases over the rim without forcing it.
- Position the lever where bead tension is lowest to reduce pinch risk.
- Use a gentle rocking insertion; don’t pry aggressively with a single motion.
- If resistance persists, shift the tire further or employ a second lever to spread pressure.
- Before finishing, confirm the tube sits untwisted and fully inside the tire to prevent pinch flats.
This approach keeps control and protects the tube.
Inspect the Bead and Rim Valley Before Final Inflation
Before you fully inflate the tire, visually inspect and feel the junction between the tire bead and rim valley to make sure the tube isn’t pinched or trapped. Do a careful bead inspection and confirm rim alignment: press the sidewalls down, run your fingers around the bead, and look for bulges, folds, or exposed tube. Check the valve stem is straight and that the tube sits evenly inside the rim. Inflate slowly, listening for hissing so you can stop and adjust. If anything feels off, deflate and reseat the bead before continuing. Use the quick reference below to guide checks and corrective actions.
| Check | What to feel/look for | Action if problem found |
|---|---|---|
| Bead seating | Smooth, even bead | Reseat tire, press sidewall |
| Valve alignment | Stem straight | Reposition stem |
If You Pinch the Tube: Repair and Prevention Steps
If you pinch the tube during installation, stop and remove the tire so you can inspect the tube for cuts, nicks, or stretched areas—small tears can still leak. Perform a careful tube inspection, marking any damage. Clean around the puncture, roughen the surface if required, and follow the patch application instructions from the kit to guarantee a secure seal. Replace the tube if damage is too large.
- Re-seat the tube fully into the rim, avoiding twists or folds that cause future pinches.
- Keep tension on the tire bead while mounting and use your hands rather than levers when possible.
- Verify tire and rim compatibility to reduce installation stress.
- Re-check bead seating and tube inspection before final inflation to confirm a safe repair.
Frequently Asked Questions
Can Tire Levers Damage Tubeless Tire Beads?
Yes — you can damage a tire bead if you use levers incorrectly. You’ll prevent damage by using proper lever techniques: work slowly, avoid prying at the bead edge, use multiple levers, and follow tubeless maintenance best practices.
Are Plastic Levers Better Than Metal for Carbon Rims?
Like a knight with a smartphone, you should prefer plastic levers for carbon rims more often; plastic durability protects the finish, while metal strength risks scratching. Use stiff plastic, avoid prying, and work slowly and evenly.
How Do I Carry Levers on Long Rides Without Noise?
Carry levers in a lever pouch or inside your saddle bag for silent storage; wrap them in cloth or use rubber bands to prevent rattling, tuck them between tubes or under straps, and secure everything tightly before riding.
Can Tire Levers Be Used on Tight Clincher-Road Tires?
Yes — it’s possible and common: with tight tire techniques, you’ll use two levers near the valve, pry one bead, then slide the second, easing slowly. These lever usage tips prevent pinches and protect the tube.
How Often Should I Replace Worn Tire Levers?
You should replace worn tire levers every 1–2 years or sooner if damaged; inspect tire lever materials and lever design features regularly, and swap levers when plastic deforms, edges dull, or clips and grips fail to guarantee safe removal.
Conclusion
Like threading a needle without prick, using tire levers asks for patience and a steady hand. Treat the tube as a fragile songbird—keep it centered, watch the valve, and let the lever do the lifting, not your fingers. When the bead resists, coax it along the rim instead of forcing. Inspect the seating before you inflate. Do that, and you’ll close the job cleanly—no tears, no frantic repairs, just a smooth, confident ride ahead.
Related Articles

How to Read Motorcycle Tire Size: Complete Breakdown
Often misunderstood, this guide decodes motorcycle tire sizes like 180/55ZR17—learn what each number and letter means to ensure safe, perfect fitment.
Read More
How to Read Bicycle Tire Size: Inches, Metric & ISO
Get the essential trick to decoding ETRTO/ISO codes so you’ll always pick rim-compatible tyres—discover what to check next.
Read More
How to Read Tire Size Numbers: Decode the Sidewall
Step-by-step guide to decode tire sidewalls—sizes, load, speed, DOT and winter symbols—so you’ll know what fits and when to replace.
Read More