How to Change a Motorcycle Inner Tube at Home

You can change a motorcycle inner tube at home by supporting the bike, removing the wheel, and checking the rim and tire for damage. Fully deflate, break the bead with levers or a breaker, then remove the old tube and clean the rim. Slightly inflate the new tube, guide the valve straight, seat both beads with talc or lube, and inflate to spec while watching for pinches or leaks. Follow the next steps for detailed troubleshooting and tips.
Quick: Change a Motorcycle Inner Tube (Step‑by‑Step)
Start by safely supporting the bike and removing the wheel, then lay out your tools so you can work methodically. Deflate fully and use tire levers to pry one bead over the rim; keep the opposite bead seated. Reach in and extract the damaged inner tube, avoiding spoke or rim damage. Slightly inflate the replacement tube to remove folds, then seat one tire bead onto the rim and insert the valve stem through the rim hole. Tuck the tube clear of the bead and work the second bead onto the rim, using approved lever technique to avoid pinches. Inflate to the manufacturer’s pressure and perform tire pressure monitoring with a gauge; check around the bead for pinches or leaks. Reinstall the wheel and torque fasteners to spec.
Tools and Spares to Have on Hand
Keep a small kit of essentials so you can change a tube quickly and correctly: at minimum carry matched spare inner tubes, quality tire levers, a valve core tool and valve threader, talc or mounting lube, a compact pump or CO2 inflator with a pressure gauge, and a basic patch kit (with glue replaced annually). Pack spare tubes sized to your rims and riding conditions so you won’t gamble on roadside repairs. Use tire lube or talc to ease mounting and reduce pinch risks. Carry heavy duty zip ties to secure tires or retain components during assembly. The valve threader saves time and prevents cross-threaded stems; the valve core tool lets you deflate or seat cores quickly. Keep a fresh patch kit for emergencies, inspect contents before every trip.
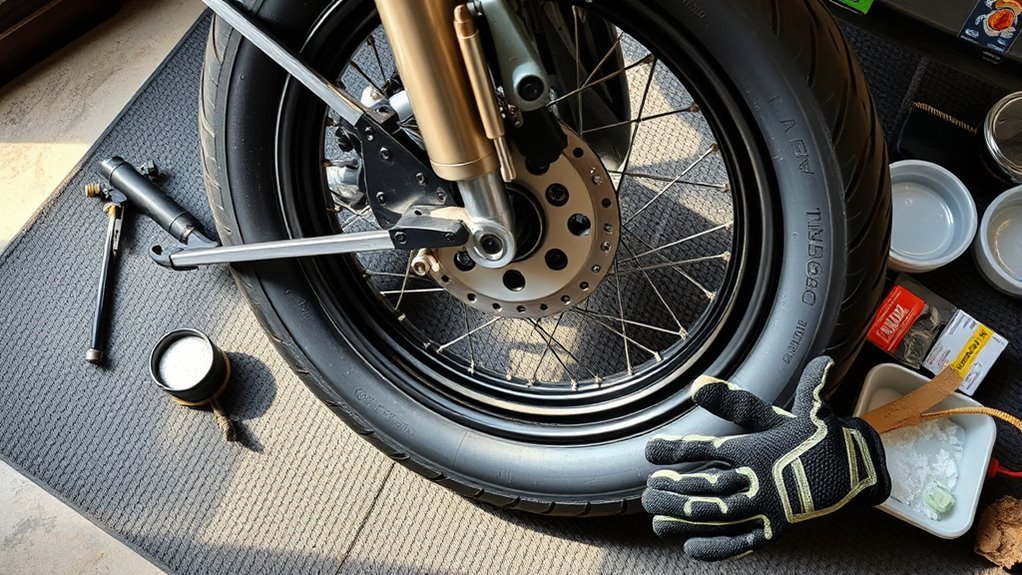
Remove the Wheel and Inspect Rim and Tire
With your roadside kit ready and the bike stabilized on a firm stand, loosen the axle nut with a socket wrench and support the wheel as you slide the axle free—don’t let the wheel drop or the bike tip. Maintain wheel stability throughout removal, backing up each step with a secondary support or helper. Once off, perform a methodical rim inspection and tire check before touching the tube.
- Verify wheel stability on the ground and recheck stand placement.
- Inspect the rim for dents, cracks, corrosion, or sharp edges.
- Clean the rim thoroughly to remove dirt, rust, or residue.
- Scan the tire for embedded debris, punctures, or abnormal wear patterns.
- Note valve stem condition and rim tape integrity for replacement if needed.
Document any damage; repairs may be required before fitting a new tube.
Break the Bead and Remove the Old Tube Safely
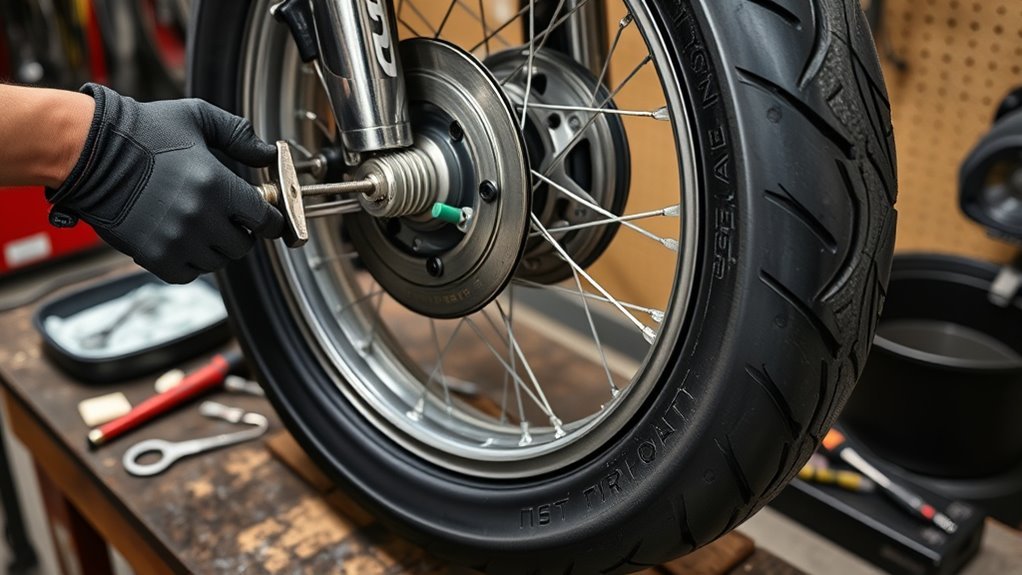
Make sure the tire is fully deflated, then use a bead breaker or tire lever to apply steady pressure around the circumference until the bead separates from the rim. If the bead’s stubborn, warm the tire slightly with low-pressure air to soften the rubber before trying again. Once the bead’s broken, work a tire lever under the bead and slide it around the rim to free and remove the old tube, then inspect rim and tire for debris or damage.
Break The Bead
Start by seating the wheel securely and using a bead breaker or a C‑clamp to apply steady pressure along the tire edge, beginning at the valve stem and working your way around to release the bead evenly. Use proper bead breaking techniques and reliable bead breaker tools to avoid rim damage. If the bead’s stubborn, slightly deflate and warm the tire with low heat or sunlight to loosen the rubber.
- Apply consistent pressure; don’t pop the rim lip.
- Progress in small increments around the circumference.
- Use tire levers only after the bead is partially freed.
- Protect the valve stem when working nearby.
- Inspect rim strip, spoke holes, and tire interior for debris.
After the bead’s freed, you’ll be ready to remove the tube safely.
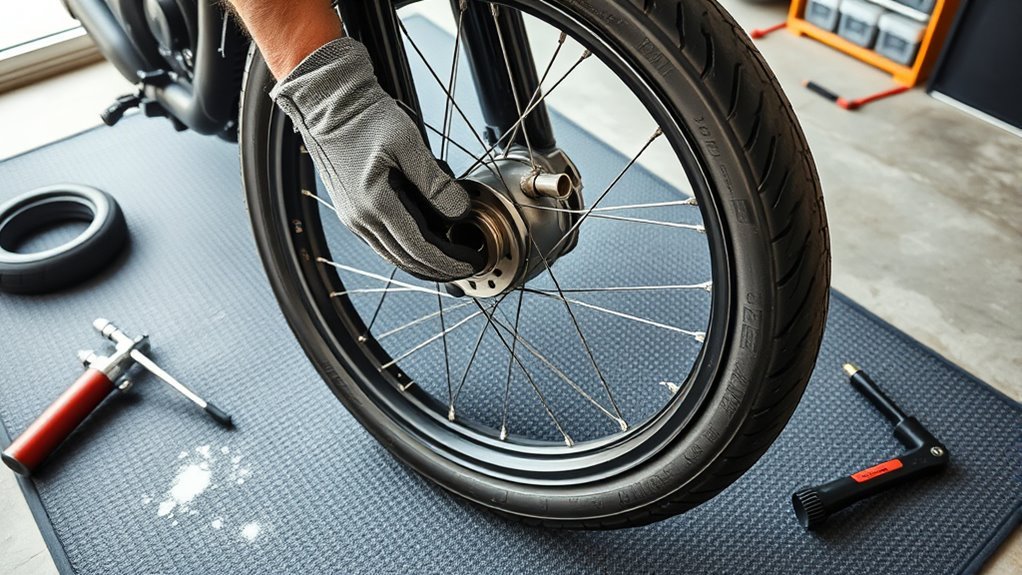
Remove The Tube
Use a tire bead breaker to fully separate the beads from the rim while the tire is completely deflated, then work tire levers carefully around the rim to pry one bead over the edge without pinching the tube or scratching the rim. Once the bead’s loose, continue with levers to roll the tire bead down and expose the tube. Extract the valve stem from the rim straight out; don’t twist or pinch it. Pull the tube free, feeding it past the opposite bead. Inspect the tire interior and rim bed for glass, nails, or sharp edges—this is essential tire inspection techniques. Dispose of the old tube properly. Before fitting a new tube, apply tube maintenance tips: clean the rim, check rim tape, and re-check the tire for embedded debris or wear.
Fit a New Tube Without Pinching the Valve
Slightly inflate the new tube before you fit it so it holds shape and won’t snag when you work the beads. Use a bead buddy to lift the bead while you guide the valve stem through the rim hole, ensuring the stem sits square and straight. Keep the tube aligned and talced as you seat the second bead, then rotate the wheel to confirm the tube isn’t pinched.
Slightly Inflate The Tube
Inflate the new tube just enough to give it shape—about 10–15% of full pressure—so the valve stays straight and the tube won’t fold or get pinched as you work. You’ll use tube inflation to maintain valve positioning and simplify seating the tube in the tyre. Light inflation prevents the tube from getting trapped between bead and rim while you feed the valve through the hole.
- Check valve alignment from both sides before tucking the bead.
- Use a valve threader to guide the stem through the rim hole.
- Keep pressure low; don’t fully inflate until bead is seated.
- Tuck the tube evenly to avoid folds near the valve.
- After seating, inflate to recommended pressure and inspect for bulges.
Confirm final alignment and pressure before riding.
Use A Bead Buddy
One simple tool that saves time and prevents pinched valves is a bead buddy; clamp it opposite the valve stem to hold the tire bead down while you guide the stem through the rim hole. Use the bead buddy benefits to stabilize the bead so you don’t have to over-inflate the tube during installation. Position it opposite the stem, seat the bead, then insert the valve through the rim with steady pressure. Installation tips: keep the bead seated under the clamp, check alignment before releasing the tool, and work remaining bead onto the rim evenly to avoid trapping the tube. Once the tube’s fitted, remove the bead buddy, confirm the stem is straight and secure, then inflate to recommended pressure.
Position Valve Carefully
Start by keeping the valve stem at the 12 o’clock position and slightly pressurizing the tube so it holds shape; this makes it much easier to guide the stem through the rim without pinching. You’ll control valve alignment and simplify tube maintenance by following precise steps. Use a bead buddy to lift the bead while you feed the stem, then work the tube into the cavity evenly.
- Slightly inflate tube to maintain shape before insertion.
- Align stem at 12 o’clock and push gently through the rim hole.
- Use bead buddy to prevent bead trapping the valve.
- Rotate and center the tube so it isn’t twisted around the stem.
- Verify stem is straight and free of stress after seating.
Confirm final valve alignment and perform a brief pressure check.
Reseat Beads, Inflate, and Confirm Proper Seating
Before you pump the tire up, press down around the rim so both beads sit evenly, then slowly add air so the beads can pop into place while you watch for gaps or uneven seating. Use a bead buddy or your thumbs to hold the bead while you insert the valve stem; this simplifies bead seating and aligns the stem. Inflate gradually, monitoring bead seating and tire inflation pressure against the spec. Visually inspect and run your hand around the tire to detect bulges or misalignment. Once at recommended pressure, confirm there are no leaks and the valve stem is straight and secure. If everything’s even, you’re ready to remount and test ride with confidence.
| Checkpoint | Action |
|---|---|
| Bead seating | Press and align |
| Valve stem | Straighten and secure |
| Inflation | Gradual to spec |
| Final inspect | Leak and alignment check |
Troubleshooting: Pinches, Air Loss, and Storage Tips
With the beads seated and pressure confirmed, check for common problems that can cause pinches or slow air loss. You’ll prevent damage by inflating the tube slightly before mounting and keeping it partially pressurized during fitment—this is key for pinch prevention. After mounting, inspect the tire interior for debris that can cause punctures and compromise air retention. Use talc or a light lubricant to reduce friction and ease tube positioning.
With beads seated and pressure checked, slightly inflate the tube, inspect for debris, and use talc for smooth seating
- Inflate tube slightly before installation to reduce pinch risk
- Inspect tire carcass and rim strip for embedded objects
- Apply talc or lube to the tube and bead seats for smoother seating
- Monitor pressure frequently after mounting to verify air retention
- Store patch kit/tools accessibly; replace glue annually for reliable repairs
Frequently Asked Questions
Can I Replace a Bike Tube Myself?
Yes — you can replace a bike tube yourself: with DIY motorcycle maintenance mindset, gather inner tube tools (tire levers, pump, replacement tube), remove wheel, mount slightly inflated tube, seat beads, inspect debris, and test pressure.
Can I Change a Motorcycle Tire Myself?
Yes—you can; like learning to ride, motorcycle maintenance pays off. You’ll need proper tire tools, spare tubes, talc or lube, and technique: pre-inflate slightly, seat beads in center, use levers carefully, follow tutorials.
Can You Change a Bike Inner Tube Without Taking the Wheel Off?
Yes — you can change a bike inner tube without taking the wheel off by deflating, levering one bead, removing the tube, inspecting debris, inserting the new tube with proper inner tube installation, seating beads, and following tire maintenance steps before inflation.
What Kind of Glue Can I Use to Patch an Inner Tube?
Want a reliable fix? You should use vulcanizing rubber cement for patching techniques; it bonds flexibly to rubber. Know adhesive types, prep and tackiness matter, avoid super glue, and refresh your kit’s glue yearly for safety.
Conclusion
You’ve turned a fiddly roadside nightmare into a tidy, confident routine. With simple tools and careful technique, you’ll trade panic for precision: quick loosening becomes methodical leverage, frantic prying turns into gentle bead work, and a nervous patch job finishes as a reliable mile-maker. Keep spares, watch the rim and valve, and rehearse the steps at home—so when the unexpected happens, your calm, practiced hands solve it cleanly and efficiently.
Related Articles

How to Read Motorcycle Tire Size: Complete Breakdown
Often misunderstood, this guide decodes motorcycle tire sizes like 180/55ZR17—learn what each number and letter means to ensure safe, perfect fitment.
Read More
How to Read Bicycle Tire Size: Inches, Metric & ISO
Get the essential trick to decoding ETRTO/ISO codes so you’ll always pick rim-compatible tyres—discover what to check next.
Read More
How to Read Tire Size Numbers: Decode the Sidewall
Step-by-step guide to decode tire sidewalls—sizes, load, speed, DOT and winter symbols—so you’ll know what fits and when to replace.
Read More