How to Break a Tire Bead: Safe Methods That Work
You should break a tire bead with controlled, incremental force while the wheel is secured, wearing eye and hand protection and fully deflating the tire. Choose a method that fits your tire and tools: bumper jack for gradual force, C‑clamp or large-faced clamp with wood blocks for containment, loader bucket for heavy-duty rims, or a rim‑clamp machine for repeatable work. Improvised techniques like roll or board‑over can work if you secure and monitor deformation. Continue for detailed steps, tips, and hazards.
Quick Guide: Break a Tire Bead Safely
When you need to break a tire bead, prioritize safety and control: work on a flat, stable surface, chock the opposite wheels, wear eye and hand protection, and deflate the tire fully by removing the valve core before attempting any method. For many rigs you can roll the tire back and forth while removing the valve stem to rupture the seal; this low-tech approach is effective where stability helps, like sidecar outfits. Tubed tires usually separate easier than stiffer tubeless rims, so anticipate more effort with tubeless. You can also use a large C-clamp, a jack to lower the vehicle, or a loader bucket for downward pressure—apply force incrementally and monitor bead movement. Follow tire maintenance tips and safety precautions, and consult experienced community members when unsure.
How to Choose a Bead-Breaking Method: Tire Type, Tools & Safety
You’ve covered basic safety and simple techniques; now pick the bead-breaking method that matches your tire type, tools on hand, and risk tolerance. Consider tubed vs tubeless tires, inspect tire condition, and secure the assembly before applying force. Prioritize tire maintenance principles and follow equipment safety guides.
Choose a bead-breaking method suited to tire type, tools, and risk—inspect, secure, and proceed cautiously.
- Evaluate tire type: tubed tires flex easier; tubeless require controlled force to avoid rim damage.
- Match tools to task: use available bumper jacks, C-clamps, or hydraulic drawbars; choose methods you can control precisely.
- Risk controls: secure tire to prevent flipping, wear PPE, and avoid techniques that stress damaged casings.
Experiment cautiously with bead breaking techniques, document what works, and stop if the tire shows unexpected failure.
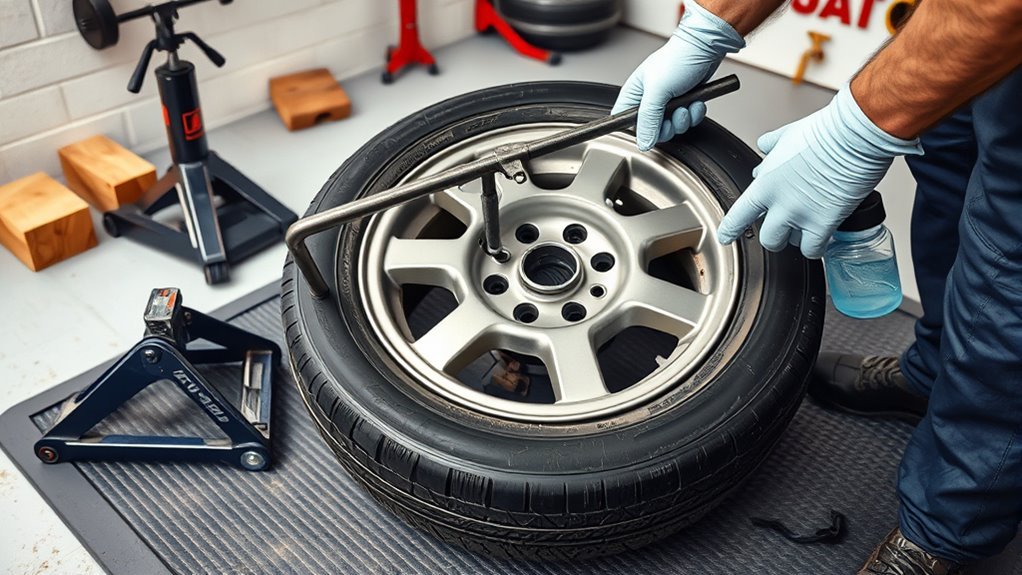
Jack, C‑Clamp, Loader & Rim‑Clamp Techniques for Bead Breaking
Start by selecting the bead-breaking method that matches your tools, tire type, and workspace constraints: a bumper jack or C‑clamp gives controlled, low-cost force for occasional work; a loader bucket delivers consistent pressure for large, stiff tires on-site; and a rim‑clamp tire machine offers repeatable, safer results for frequent use.
Use the bumper jack by seating its base against the rim flange and levering gradually, watching bead movement. The C‑clamp method requires large clamp faces with wooden blocks to distribute load and prevent rim damage; tighten slowly and alternate positions. For heavy equipment, position the loader bucket edge squarely on the bead and apply steady downward force. A rim‑clamp machine centers and clamps the rim, then pushes the bead off mechanically. Always secure the rim against flipping, wear PPE, and follow tire maintenance tips and bead breaking techniques to minimize risk.
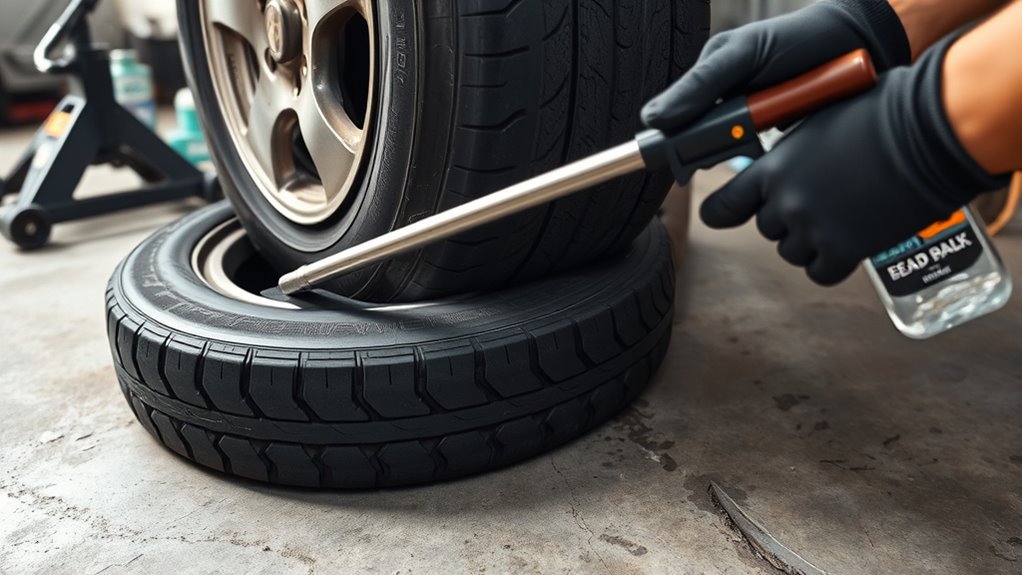
Safe Improvised Bead‑Breaking Methods When You Have No Tools
If you lack specialized gear but need to break a bead, prioritize stabilizing the wheel and controlling force to avoid sudden releases or rim damage. Remove the valve stem to lower tire pressure fully, sit the wheel flat, and plan controlled force points. Use steady, incremental actions rather than sudden shocks.
- Roll technique: Roll the tire back and forth while the bead edge is pushed against the rim lip; repeated motion plus low tire pressure encourages bead separation.
- Board-over-wheel: Place a wide wooden board over the bead area and drive a vehicle slowly onto it; the board spreads load and limits rim contact—monitor deformation closely.
- Jack/C-clamp substitute: Use a bottle jack or heavy C-clamp with wood blocks to apply slow, centered pressure at the bead until it breaks.
Common Problems When Breaking a Tire Bead : How to Avoid Them
Breaking a bead raises a few predictable hazards you should address before applying force. You’ll prevent common failures by maintaining even pressure—especially on stiffer tubeless tires—to avoid flipping or tearing the bead. Secure the tire when using a loader or bottle jack, monitor technique to avoid excessive force on old or compromised tires, and handle valve stem removal carefully. Experiment with angles (C-clamp, driving-over) to find the safest effective method.
| Problem | Consequence | Feeling |
|---|---|---|
| Uneven pressure | Bead tears | Frustration |
| Unsecured tire | Sudden movement | Alarm |
| Excessive force | Rim or tire damage | Regret |
| Valve stem error | Injury or leak | Anxiety |
Follow bead damage prevention and tire safety tips: control force, secure the tire, clear the area.
Frequently Asked Questions
How Much Force Does It Take to Break a Tire Bead?
You’ll generally need about 200–500 pounds of force to break a tire bead. Use proper breaking techniques, leverage, and mechanical aids; prioritize safety, secure the rim, wear protection, and avoid improvising with unsafe tools.
Conclusion
You’ve learned safe, reliable ways to break a tire bead—pick the method that fits your tire, tools and skill, and prioritize PPE, correct jack and clamp placement, and gradual force. Don’t rush; treat the bead like a coiled spring—controlled release prevents injury and rim damage. If you’re unsure, stop and get professional help. Following these steps keeps you and your equipment safe while getting the job done efficiently and predictably.
Related Articles

How to Read Motorcycle Tire Size: Complete Breakdown
Often misunderstood, this guide decodes motorcycle tire sizes like 180/55ZR17—learn what each number and letter means to ensure safe, perfect fitment.
Read More
How to Read Bicycle Tire Size: Inches, Metric & ISO
Get the essential trick to decoding ETRTO/ISO codes so you’ll always pick rim-compatible tyres—discover what to check next.
Read More
How to Read Tire Size Numbers: Decode the Sidewall
Step-by-step guide to decode tire sidewalls—sizes, load, speed, DOT and winter symbols—so you’ll know what fits and when to replace.
Read More