How to Add Tubeless Tire Sealant the Right Way
Deflate the tire, remove the valve core, and measure sealant for your tire size; shake the bottle and have a rag ready. For on-wheel injection, draw sealant into a syringe, push through the valve stem, reinstall the core, inflate, then spin and bounce the wheel to coat the interior. For off-wheel, pour sealant into the tire before reseating the bead. Check for leaks with soapy water and monitor pressure—keep going to learn tips for maintenance and troubleshooting.
Quick Guide: Add Tubeless Sealant Step-by-Step
Start by deflating the tire and removing the valve core with a valve-core tool so you can inject sealant easily. You’ll choose sealant types based on tire compatibility and riding conditions, then use an injector syringe to measure sealant. For refreshes, inject the smaller dose; for new installs, use the larger volume appropriate to tire size. Reinsert the valve core, inflate to recommended pressure, and check the bead seal. Shake, bounce, and rotate the wheel so sealant coats the inner surface and seals punctures. Monitor sealant performance and refresh every 4–8 months, sooner with heavy use or harsh environments. Keep records of refresh dates and amounts so you maintain consistent protection.
Tools and Sealant Amounts (By Tire Size)
Grab a sealant injector syringe and a rag — precise measurement and clean handling make the difference when dosing tubeless tires. You’ll use an injector syringe to control flow and measure by tire size; always shake or roll the container so sealant types are well-mixed before drawing. Follow injector techniques that prevent spills and air pockets.
Grab an injector syringe and rag—measure carefully, shake sealant well, and use spill‑free techniques for clean, accurate tubeless dosing
- Road tires: 30–45 mL (2–3 scoops).
- MTB 26”/27” & Cross 700C: 60–75 mL (4–5 scoops).
- MTB 29” / Downhill: 105–140 mL (7 scoops) and 120–140 mL (8 scoops/whole pouch) respectively.
Keep a rag handy for cleanup, recheck volumes after a slow leak, and store sealant per manufacturer instructions.
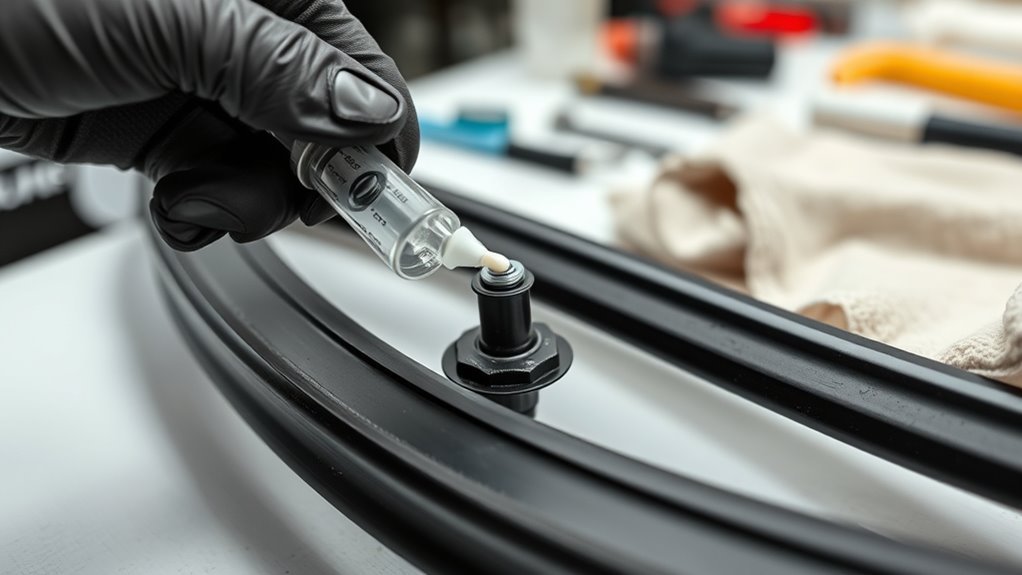
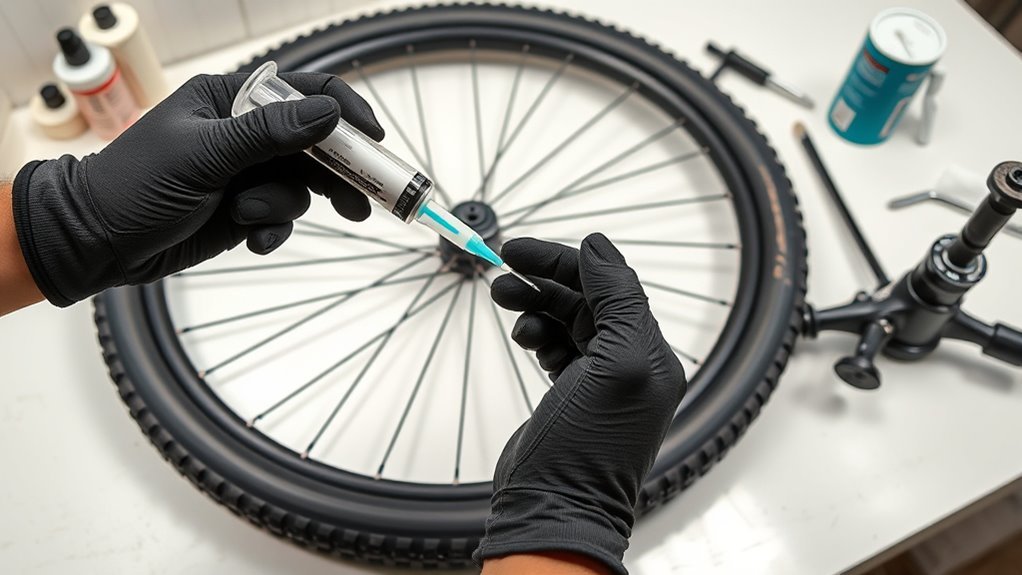
How to Inject Sealant With the Tire On
Make room for the sealant by fully releasing the tire’s air with a valve core tool, then draw the measured amount into your injector syringe; gently push the sealant through the valve stem (watch for drips and avoid trapping air), reinstall the valve core, and inflate to the recommended pressure. Use the syringe to measure the correct volume—typically 2–4 ounces depending on tire size and whether you’re topping up or freshening. Work cleanly to prevent spills and minimize air bubbles during injection. After reinflation, spin the wheel and bounce it gently to spread the sealant evenly around the bead and tread. Check that your chosen sealant types match tire compatibility recommendations to guarantee proper adhesion and longevity.
How to Add Sealant With the Tire Off
Take the wheel off and use a valve core tool to fully release any residual air so the tire’s loose. Unseat the bead with Rim Stix and squeeze the measured amount of sealant (about 60–75 mL for a 26–27″ MTB) directly into the tire. Push the bead back into the rim, spin the wheel to coat the inside, then reinflate to the correct pressure.
Remove Wheel And Deflate
Start by fully deflating the tire: use a valve core removal tool to let all the air out, then unseat the bead with Rim Stix so you can access the inside of the tire. After wheel removal, work on a flat, clean surface and keep track of axle hardware.
- Remove wheel and perform tire deflation: take out the valve core, confirm no air remains, then pry the bead with Rim Stix to expose the interior.
- Measure sealant volume for your tire size so you’re ready (don’t inject yet — that’s next). Have a rag and gloves to catch drips.
- With the bead unseated, tilt the wheel so the valve faces up; you’ll have clear access to add sealant and reseat the bead cleanly.
Reinstall the wheel only after the bead is securely seated.
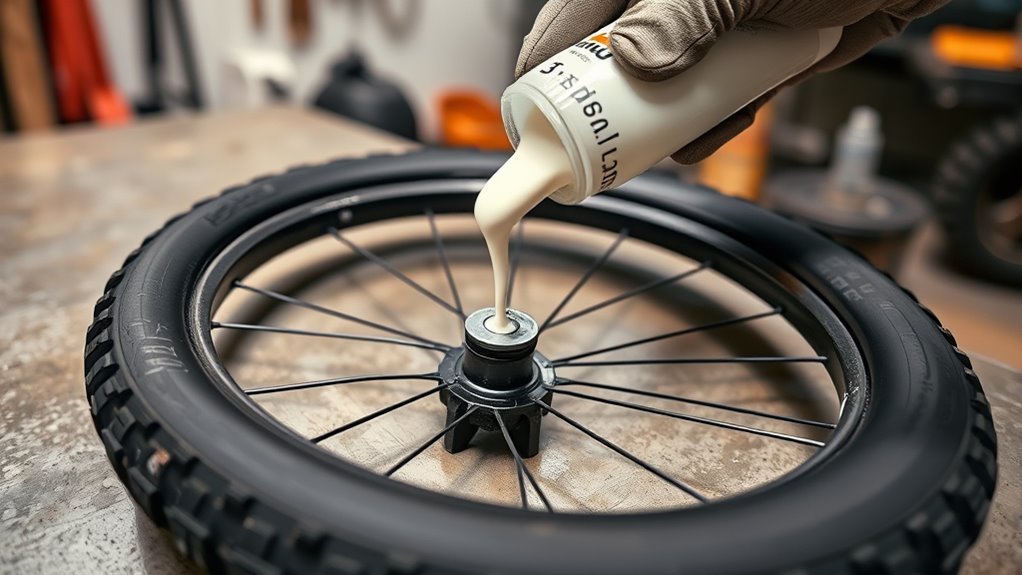
Inject Sealant Directly
Once you’ve fully deflated the tire and unseated the bead, pour the measured sealant directly into the tire (about 60–75 mL for 26”–27” MTB tires), then push the bead back into the rim and spin the wheel to coat the interior evenly before inflating to the recommended pressure. Remove the valve core with a tool first so all air escapes. Use Rim Stix to unseat the tire safely and create room for pouring. Choose sealant types appropriate for temperature and puncture protection. After pouring, reseat the bead carefully to avoid pinches. Spin the wheel several revolutions and tilt to distribute sealant evenly. Inflate to the recommended pressure and check for leaks. These application techniques are quick, clean, and effective.
| Step | Tool | Tip |
|---|---|---|
| Deflate | Valve core tool | Full release |
| Unseat | Rim Stix | Create gap |
| Pour | Bottle | 60–75 mL |
Post-Injection Checks for Tubeless Sealant and Leak Testing
After inflating the tire to the recommended pressure, spin it for about 30 seconds so the sealant coats the interior. Visually inspect the tread, bead, and valve area and listen for hissing to spot any obvious leaks. If you suspect a leak, apply soapy water and watch for bubbles, then monitor pressure over the next few hours to confirm a proper seal.
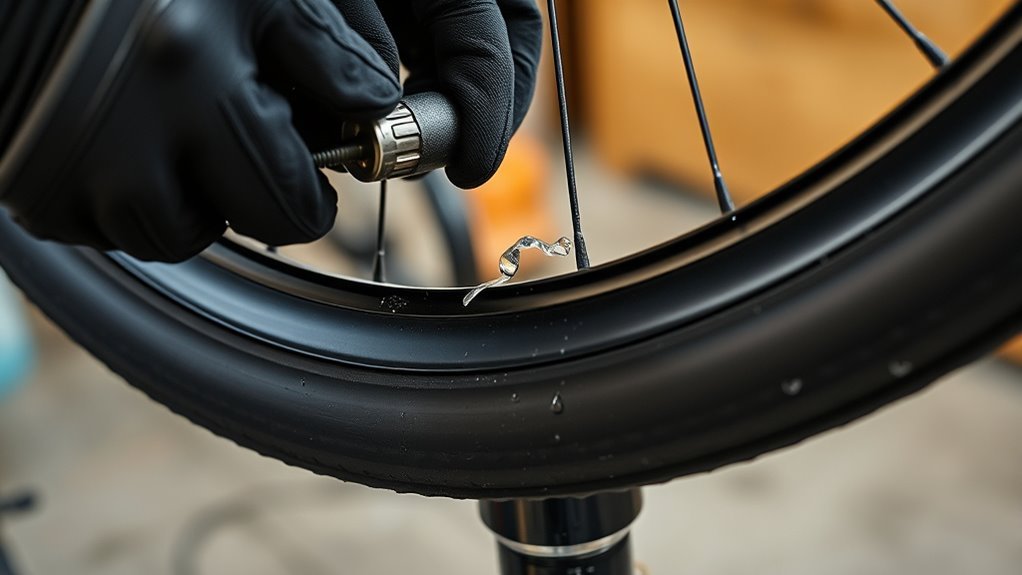
Visual Leak Inspection
A careful visual inspection will quickly show whether your sealant job is holding: spin the wheel slowly and watch the bead, valve area, and both tire surfaces for any escaping air or visible sealant. For effective leak detection and basic tire maintenance, follow these targeted checks:
- Use soapy water in a spray bottle and mist the bead, valve base, and suspected areas; bubbles pinpoint leaks fast.
- Inspect inner and outer tire surfaces for sealant weeping—steady oozing usually means a puncture or poor seating.
- Verify the valve core is tight and watch around the stem while spinning; valve leaks are common and often easy to fix.
If you spot persistent leaks, re-evaluate seating and add sealant as needed.
Pressure Hold Test
Now that you’ve inspected the tire for visible seepage and valve issues, check that the pressure holds to confirm the sealant did its job. Inflate to the recommended pressure so the sealant spreads; then rotate and bounce the tire to distribute fluid and improve sealing techniques. Use pressure monitoring to track PSI over 24 hours—note any significant drop. While monitoring, listen and watch for hissing or wet spots; these pinpoint leaks that need attention. If pressure falls or you see a leak, re-inflate to force sealant into the breach or add a small extra dose and repeat rotation. Once pressure remains stable after 24 hours and no leaks appear, the tire is ready for normal use. Regular checks help catch slow leaks early.
Maintenance Schedule and Troubleshooting (Sealant Won’t Seal?)
When sealant starts failing to plug holes, check factors you can control: valve cores, sealant freshness and quantity, tire pressure, and the size or nature of the puncture. You should follow a simple tire maintenance rhythm to preserve sealant effectiveness: refresh every 4–8 months and monitor pressure so sealant doesn’t pool. If a failure occurs, troubleshoot methodically.
- Inspect valve core and bead area for debris or damage; a loose or clogged core stops sealing.
- Verify sealant age and volume; add per tire-size guidelines if levels are low.
- Examine puncture size; larger holes often need a plug or patch, not just sealant.
Keep logs of refresh dates and failures to refine your maintenance schedule.
Frequently Asked Questions
Can Sealant Damage Tubeless Tire Valves Over Time?
Yes — sealant composition can affect valve longevity. You’ll prevent damage by using compatible sealants, cleaning valves periodically, avoiding corrosive formulas, and replacing worn cores or rubber grommets to maintain airtight seals and reliable performance.
Is Sealant Safe for Latex Inner Tubes if Accidentally Used?
Bad luck, but you’re mostly fine — sealant can upset latex compatibility over time, so rinse quickly. You’ll still get sealant benefits briefly, yet you should swap tubes if deterioration, stickiness, or leaks start to appear.
How Do I Dispose of Old or Unused Sealant Responsibly?
You’ll follow sealant disposal guidelines: don’t pour down drains; check local hazardous-waste programs and bike shops for sealant recycling options; seal containers, label them, and drop off at approved collection sites to prevent pollution.
Can Sealant Affect Tire Pressure Readings on a TPMS?
Like a thin film on glass, sealant effectiveness rarely alters TPMS tire pressure readings considerably; you’ll see minor fluctuations from temporary weight or temperature changes, but TPMS sensors stay accurate unless sealant coats or damages the sensor.
Will Sealant Clog a Floor Pump or CO2 Inflator?
Yes — sealant can clog a floor pump or CO2 inflator if it’s old or sticky. You’ll check inflator compatibility, clean fittings promptly, and replace sealant per recommended sealant longevity to avoid buildup and blockages.
Conclusion
You’ve got the steps down: measure sealant, inject cleanly, reseat the bead, and test for leaks. Keep amounts matched to tire size and check every 2–6 months. If a sealant won’t seal, clean and reapply or replace it—don’t let one bad bottle ruin the ride. Stay proactive with maintenance and you’ll keep punctures from turning into big headaches; a little prep now saves you a lot later.
Related Articles

How to Read Motorcycle Tire Size: Complete Breakdown
Often misunderstood, this guide decodes motorcycle tire sizes like 180/55ZR17—learn what each number and letter means to ensure safe, perfect fitment.
Read More
How to Read Bicycle Tire Size: Inches, Metric & ISO
Get the essential trick to decoding ETRTO/ISO codes so you’ll always pick rim-compatible tyres—discover what to check next.
Read More
How to Read Tire Size Numbers: Decode the Sidewall
Step-by-step guide to decode tire sidewalls—sizes, load, speed, DOT and winter symbols—so you’ll know what fits and when to replace.
Read More