
How to Replace a Valve Stem Without Removing the Tire
You can replace many rubber valve stems without demounting the tire. The basic process: deflate the tire, stabilize the wheel, and use a quick-change puller or QuikStem kit to pull the old stem out from the outside. Before you start, inspect the rim, check for TPMS, and remove the valve core. If the stem is stuck, a left-hand drill bit can break it free for extraction. Install the new stem with a proper puller or glue-on insert, test for leaks, and read on for detailed tips.
Quick Answer: Replace Valve Stem Without Demounting
Yes, you can often replace a valve stem without fully removing the tire from the rim. Your success depends on the method and tire type.
Start by identifying your valve type and confirming TPMS compatibility. Some tools won’t work with modern TPMS stems. For fluid-filled or tube-type tires, a QuikStem or glue-on valve stem typically takes about 5 minutes to install. Follow the product instructions, clean the area, apply sealant if needed, and torque fittings to spec.
A Quick Valve Change Tool speeds up installation on many tires, though older tire constructions may resist and still require demounting. For damaged stems, an emergency valve works as a temporary measure, but keep an eye on it for leaks if the inner tube is compromised. If access or seal integrity seems questionable, stop and demount the tire instead.
Can Your Wheel/Tire Be Repaired In Place?
First, inspect the tire and rim for corrosion, a damaged bead, or stripped valve threads that could block a secure seal. Then check valve accessibility. If you can reach the stem with a Quick Valve Change Tool or QuikStem, and the rim threads look solid, an in-place swap is usually feasible.
Finally, weigh the risk and the tools you have on hand. If you lack the right equipment or the rim threads are compromised, pull the tire off and let a pro handle balancing and bead cleaning.
Inspect Tire And Rim
Before replacing the valve stem, take a close look at the tire and rim. You need to know whether the wheel can be repaired in place.
Look for cracks, bulges, or excessive tread wear that weaken the tire. Check the rim around the valve opening for corrosion, dents, or sharp edges that could prevent a proper seal. Examine the valve stem itself for brittleness or visible damage. Also confirm whether the tire has an inner tube, since tubes change the repair approach.
For a thorough tire inspection, run your hand and a bright light around the sidewall and tread. Watch for cuts, dry rot, or bubbles. For rim condition, clean the bead area and valve seat, then look for pitting, bends, or sharp corrosion that would prevent a leak-free repair.
Assess Valve Accessibility
Once you’ve inspected the tire and rim, figure out whether you can swap the valve stem without pulling the tire off.
Check the valve stem accessibility and surrounding condition. Corrosion, a bent stem, or damaged threads may block in-place removal. Verify if a tube is present or the tire is fluid-filled. Both complicate access and may require dismounting.
For older models (a John Deere 2130, for example), expect fragile threads and tight clearances. Make sure your work environment gives safe, stable access to the valve before moving forward. Keep in mind that specialized Quick Valve Change Tools work well for rubber stems but may not suit TPMS-equipped wheels. Use these checks to decide whether an in-place repair is practical and safe.
Evaluate Risk And Tools
If the valve stem and surrounding rim look solid, you can sometimes replace the stem in place. But take a moment to evaluate risks and required tools before starting.
Start with a risk assessment: inspect the stem, rim opening, and tire for corrosion, cracked rubber, or an internal tube. Signs of internal damage or heavy corrosion mean you should get professional service.
For tool selection, go with purpose-built options like the Quick Valve Change Tool or QuikStem to avoid full dismounting. If remnants of the old stem remain, a left-hand drill bit can extract them, but don’t force it into fragile valve threads. Tubes complicate reuse of the old stem and may require full disassembly. Only proceed if your inspection and chosen tools make in-place repair safe.
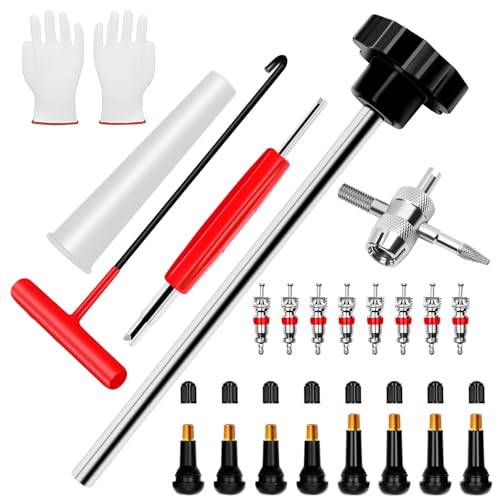
Tools & Parts for an In-Place Valve Stem Swap
A couple of specialty tools make this job practical. You’ll want a Quick Valve Change Tool (for rubber stems), a left-hand drill bit for extracting broken stems, and a valve-stem puller/installer that matches your stem size. Add a QuikStem or similar replacement stem if you need a fast fix for fluid-filled tires.
Use the Quick Valve Change Tool when valve stem compatibility is confirmed. It works best on rubber stems and rarely on TPMS-equipped rims. Carry a left-hand drill bit to back out seized or broken stems, but drill gently to avoid thread damage. Match the puller/installer to the new stem’s diameter and length.
For tubed tires, pack a glue-on valve stem and sealant. Keep spare stems, caps, and a valve core tool handy.
[Products Worth Considering]

The Milton 555e digital tire inflator delivers fast, accurate pressure readings with a backlit display and multiple unit options, making tire inflation quick and easy. Its durable 20" EPDM rubber hose and grip‑head chuck provide reliable connection, while the ±1 PSI accuracy ensures precise inflation for cars, bikes, and trucks.

This digital tire pressure gauge combines a sturdy pistol grip inflator with a backlit 0.1 PSI display for quick, accurate readings in any lighting condition. Its 360° swivel gauge and 20" rubber hose make it easy to use and store, while the integrated inflate/deflate trigger and ¼" NPT air inlet provide fast, reliable tire maintenance.

The Steelman Straight Air Chuck Tire Inflator offers a compact, durable solution for inflating tires with a built‑in gauge and flexible hose. Its push‑on chuck eliminates the need for clamps, while the polished steel casing and brass fittings ensure long‑lasting performance. Compatible with any portable or fixed tank air compressor, it delivers precise pressure readings from 10 to 90 PSI, making it ideal for cars, trucks, and other vehicles.
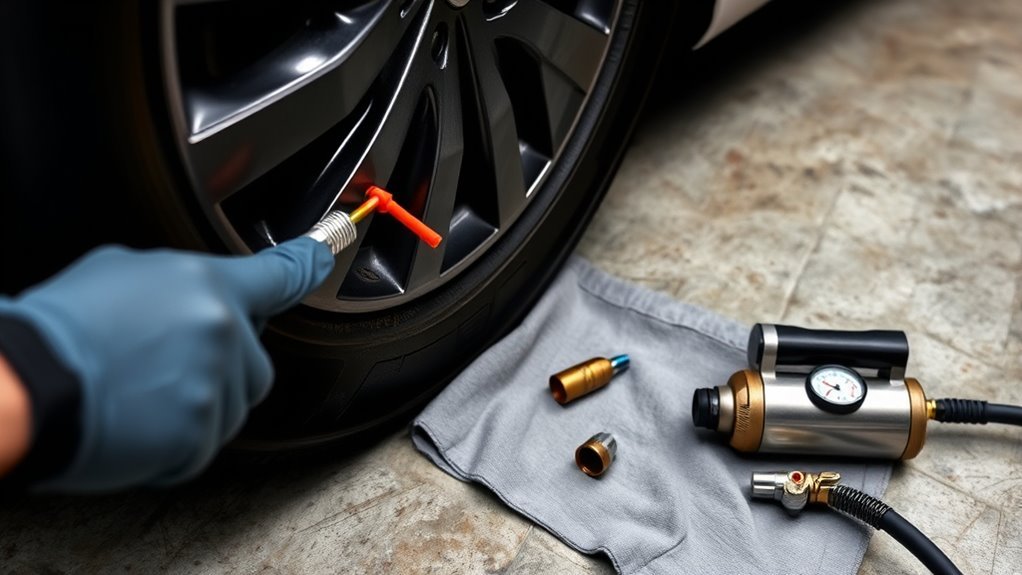
Safety Prep: Deflate, Stabilize, Protect the Wheel
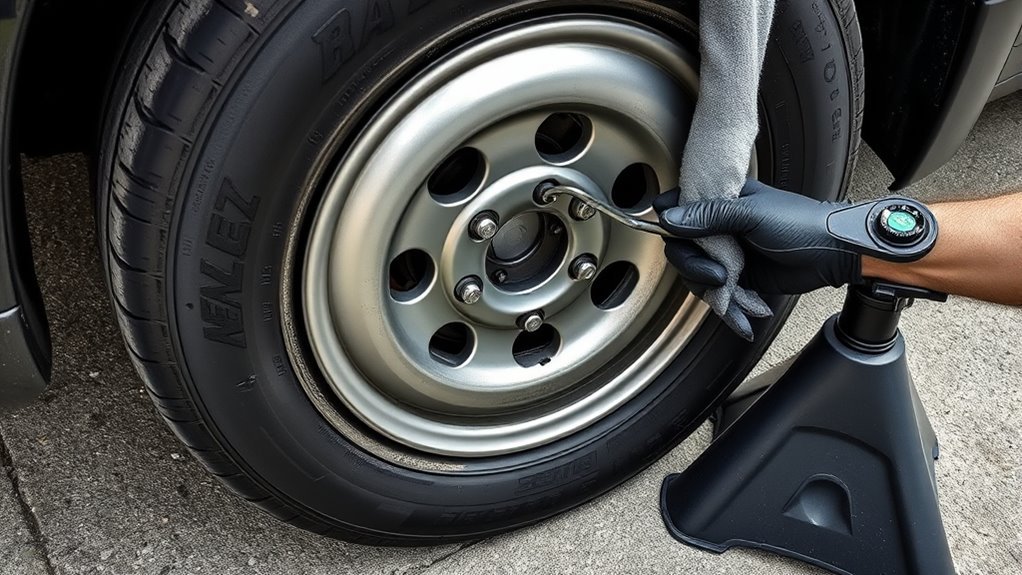
Start by fully deflating the tire to relieve pressure on the valve stem. Park the vehicle on a flat, solid surface and set wheel chocks to prevent movement. Cover the wheel with a cloth or protective pad to avoid rim damage. Put on safety goggles and gloves, and inspect the area around the valve stem for corrosion or other damage before you proceed.
After deflation, confirm there’s no residual pressure by pressing the valve core briefly with a cap or tool. Position chocks both forward and rearward of the opposite wheels. Use a cloth or dedicated pad to shield the rim while you work. Keep your safety gear on at all times.
These steps reduce risk, protect the wheel, and follow basic tire maintenance protocols for a smooth in-place replacement.
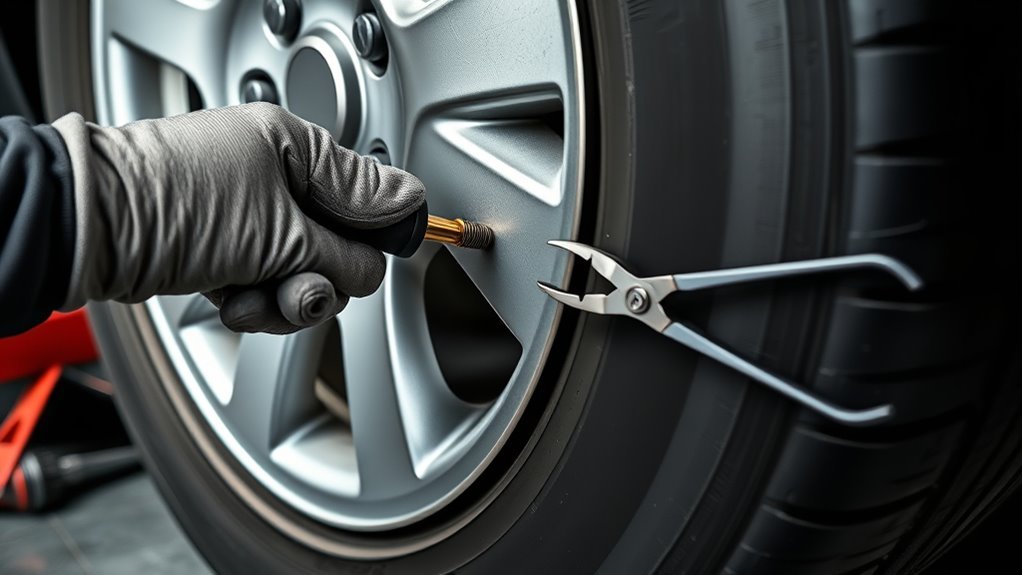
Removing a Broken Valve Stem From the Rim
Remove the broken valve stem carefully to avoid damaging the rim or remaining threads. First, confirm the tire is fully deflated and the wheel is stabilized. Then use a left-hand drill bit to bore out the inner core of the damaged stem. This often loosens it for extraction without harming the valve hole.
Inspect the exposed threads for fragility as you work, and have a Quick Valve Change Tool ready if the drill method doesn’t free the stem. Drill slowly, back out any seized material, and extract with pliers or the Quick Valve Change Tool. Check for valve damage and internal tube leaks. If threads are too fragile, consider a glue-on valve stem as an alternative.
| Step | Tool | Note |
|---|---|---|
| 1 | Left-hand drill | Drill core gently |
| 2 | Pliers/Tool | Extract loosened stem |
| 3 | Inspect | Assess threads, leaks |
If It’s Stuck: Drill-Out and Extraction Methods
If the drill method from the previous step doesn’t free the stem, you’ll need a more controlled drill-out and extraction approach to protect the valve hole.
First, inspect the rim for corrosion. Compromised metal raises extraction risks and may change your plan. Use a left-hand drill bit to bore out the inner core. This often grabs and backs the core out as you drill, reducing thread damage.
Apply steady, low RPM pressure. Avoid aggressive feeds that shred aged threads. If you have a Quick Valve Change Tool, try it carefully. Expect to use significant force and watch for bending. If drilling or tools fail, consider non-invasive alternatives like glue-on or emergency valves rather than forcing a damaged rim.
Installing a New Rubber Valve Stem Without Removing Tire
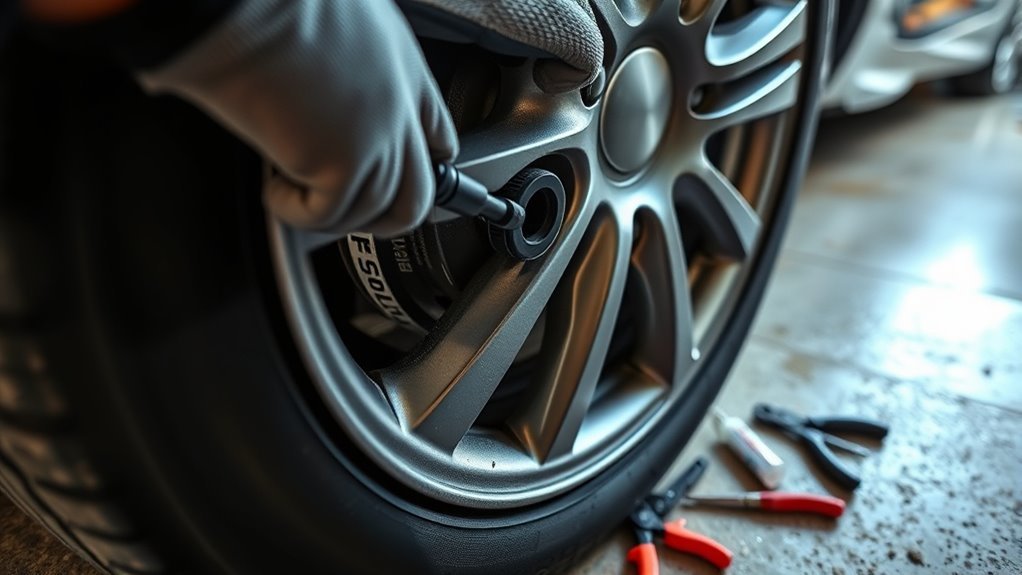
When working on a tubeless tire and you don’t want to pull it off the rim, you can install a new rubber valve stem from the outside. Specialty tools like a Quick Valve Change Tool or QuikStem let you seat and seal a replacement in minutes. But careful prep matters: inspect the rim for corrosion, confirm TPMS compatibility, and make sure the valve hole and surrounding bead area are clean and dry before you start.
Follow these steps: remove the core, inspect the hole, and choose a stem rated for valve compatibility with your wheel and sensor. Seat the stem with the tool, tighten per the tool’s instructions, and pressure-test.
| Step | Check |
|---|---|
| 1 | Rim clean/dry |
| 2 | TPMS & compatibility |
| 3 | Pressure test |
Understanding Valve Stem Types
Not all valve stems are the same, and knowing the type on your wheel helps you pick the right replacement and tool.
Rubber snap-in stems (TR413, TR414) are the most common on passenger vehicles. They press into the rim hole and seal with a rubber grommet. These are the easiest to replace without demounting.
Metal clamp-in stems use a hex nut to secure the stem to the rim. They’re more common on alloy wheels and TPMS-equipped vehicles. Replacing these in place is trickier and often requires tire removal.
TPMS sensor stems house a battery-powered tire pressure sensor. If your vehicle has TPMS (most cars sold after 2007 in the U.S., per the NHTSA TPMS mandate), check compatibility before attempting any in-place swap. Damaging the sensor during removal can trigger dashboard warnings and cost more than a shop visit.
[Products Worth Considering]

The WORKPRO digital tire pressure gauge with inflator offers precise 0.1 PSI resolution and ±1% accuracy for reliable tire inflation across vehicles and inflatables. Built with heavy‑duty aluminum alloy, brass, and rubber, it resists rust and drops while delivering deflation, inflation, and pressure checking functions. The kit includes valve caps, adapters, a twist‑on chuck, screwdriver, nozzles, needle, seal tape, and a storage bag with batteries, making it a versatile, portable solution for on‑the‑go tire maintenance.

The GERCHWAY tire inflator combines a durable rubber‑protected gauge with a 360° swivel air chuck for hands‑free operation and reliable sealing on any valve. Its 100 PSI range delivers ±2 PSI accuracy, making it ideal for most passenger and light‑truck tires. The battery‑free design ensures you can measure, inflate, or deflate without worrying about power loss, while the universal ¼ NPT connection fits any standard compressor.

What you get - 100pcs Riseuvo TR413 valve stems, package contains tire valves ( contains in the valve stems )
Alternatives: QuikStem, Emergency Inserts, Glue-On Tube Valves
You’ve got three practical alternatives to replacing a factory valve stem.
QuikStem/Quick Valve Change systems handle rapid outside-the-tire swaps. Use QuikStem when you need a fast install, roughly 5 minutes, on fluid-filled rear tires. The Quick Valve Change Tool can also work but often requires significant force.
Emergency valve inserts serve as temporary field fixes. Assess their effectiveness as a short-term solution when the original stem is compromised or hard to reach.
Glue-on tube valves seal leaks on existing tubes that you can access, without full tire removal.
In every case, evaluate tire age, rubber condition, and rim corrosion. Installation challenges may rule out these alternatives.
[Products Worth Considering]

Quick valve change tool kit,Very suitable for replacing leaking valve stems,Change Valve Stem without removing the tire
【Complete Tire Valve Stem Tool Kit for Tire Repair】 This all-in-one valve stem replacement kit includes a valve installation push rod, T-handle puller, valve stem removal tool, Valve stem installer, 4-way valve core removal tool, TR413/TR414 snap-in valve stems, gloves, and more – everything you need for quick tire valve replacement and repair at home or on the go.

Complete 38-Piece Tool Set:This all-inclusive kit includes 1 valve core installation push rod, 1 plastic tapered positioning tube, 4 TR412, 4 TR413 and 4 TR414 valve cores, 1 4-way valve tool, 10 extra valve cores, 1 T-hook tool, 1 dual-head valve removal tool, 10 valve stem caps, 1 work glove and a detailed instruction manual. All accessories fully meet your tire valve replacement and maintenance needs.
Troubleshooting, Leaks to Watch For, and When to Go Pro
Start by checking the valve threads and surrounding rim for corrosion or damage. Damaged threads can prevent a secure seal or proper installation without tire removal.
Next, inflate the tire to recommended pressure and apply soapy water around the valve stem, bead area, and any tube repairs to spot leaks. If bubbles form at the stem, try tightening or replacing with a QuikStem per product instructions. If bubbles persist at a tube patch, the tube may be failing.
Watch TPMS sensor contact points. Any distortion there can cause intermittent leaks and needs careful handling.
Troubleshooting tips: isolate the stem, retest after each adjustment, and note any persistent bubbles. Head to a pro when threads are ruined, TPMS is involved, or you need balancing and internal inspection.
Frequently Asked Questions
How to Replace Valve Stems on Tires at Home?
You can replace valve stems at home with basic valve tools. Deflate the tire, remove the core, use a QuikStem or glue-on for tubes, thread the new stem with a quick-change tool, then inflate and check for leaks. Follow each tire maintenance step carefully.
Can You Fix a Broken Valve Stem on a Car Tire?
Yes, you can often fix a broken valve stem by replacing it or swapping the Schrader core. Assess the tube and wheel condition, use proper tools or visit a professional, and follow standard tire maintenance steps for a safe, leak-free seal.
Conclusion
You can swap a valve stem in place for a quick fix, but you need the right tools, steady hands, and patience. Deflate the tire, pull and clean the old stem, drill or extract if it’s stuck, then seat a new rubber stem or use a QuikStem insert. Test for leaks, re-inflate, and re-check torque. If extraction fails, leaks persist, or the bead is damaged, stop and seek professional help. Don’t risk a roadside failure.
Related Articles

What Does THE P Stand For on a Tire? Full Meaning Explained
I’ll explain what the “P” on a tire really means and why it could change how you choose your next set.
Read More
How to Use a Tubeless Tire Repair Kit: Complete Field Guide
Learn how to fix tubeless tire punctures fast with the right kit, because one small mistake can leave you stranded on the trail.
Read More
How to Tell a Tire’s Diameter: Easy Guide to Reading Tire Size
Want to decode tire sidewall numbers and find the right diameter, but wonder what those hidden digits really mean?
Read More