
Tyre Glider Review: Original Bicycle Tire Lever for Fast Bike Tire Removal
Disclosure: As an Amazon Associate, we earn from qualifying purchases. If you click a link on this page and make a purchase, we may receive a small commission at no extra cost to you.
Tight bicycle tyres can turn a simple tube change into a long fight with sore thumbs, scratched rims, and snapped levers. The Tyre Glider takes a different approach: its clip-on shape guides the bead over or off the rim while you push with your palm and, on stubborn tyres, use controlled body weight. It is compact, light, and especially useful for road, gravel, mountain, and tubeless-ready setups. The tradeoff is technique, because the right-handed version feels unfamiliar at first and will not work with every possible tyre-and-rim combination.
At a Glance
Quick Verdict
Rating: 8.5/10, recommended with caveats
Best For: Cyclists who regularly struggle with tight beads, tubeless-ready rims, or roadside tyre changes
Bottom Line: The Tyre Glider can make fitting and removing difficult bicycle tyres quicker and easier than small hooked levers. It works best after you learn the correct motion, and fit still depends on the specific tyre-and-rim combination.


Key Specifications
| Specification | Detail |
|---|---|
| Brand | Tyre Glider |
| Product type | Clip-on bicycle tyre removal and installation tool |
| Version reviewed | Right-handed version |
| Material | High-tensile, glass-filled nylon |
| Dimensions | 9.0 × 4.3 × 3.2 cm |
| Weight | 20 g |
| Wing-clip limit | Fits a tyre hook width up to 7 mm |
| Compatibility | Designed for many road, gravel, mountain bike, tubed, and tubeless-ready tyre setups |
| Country of manufacture | United Kingdom |
| Package note | One Tyre Glider tool; no separate hooked lever is listed as included |
What Is the Tyre Glider?
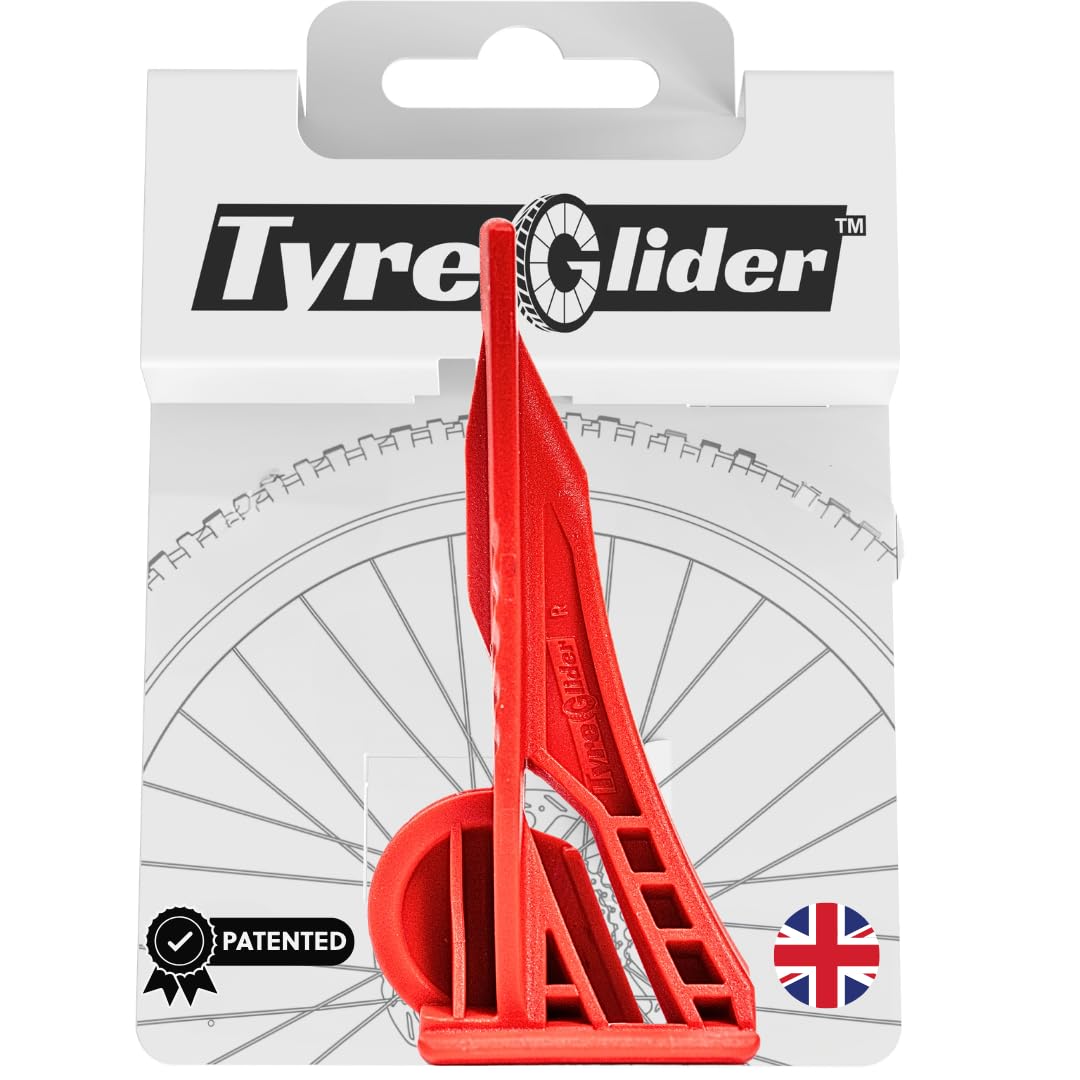
The Tyre Glider is a one-piece bicycle tyre tool that combines a wide scoop for lifting the bead with a wing-shaped clip that rides along the rim during installation. Instead of repeatedly repositioning two or three narrow levers, you clip or scoop the tool into place and push it around the wheel.
The reviewed Amazon listing is for the right-handed version. The manufacturer also offers a left-handed version, so handedness is worth checking before you order. At 20 g and 9 cm long, the tool is small enough for a saddlebag, jersey pocket, or workshop drawer without replacing much of your existing repair kit.
Who Should Buy It?
Best For
- Road, gravel, and mountain bike riders dealing with tight tyre beads
- Riders who want one compact tool for both removal and refitting
- Home mechanics and touring cyclists who often break or bend basic levers
Skip If
- You need a left-handed tool and the listing does not let you choose that version
- Your rim hook is wider than 7 mm or the wheel maker restricts tyre-lever use
- You want a familiar hooked lever with no new technique to learn
Before You Buy: The Tyre Glider works with many tyre-and-rim combinations, not every combination. Confirm the right-handed version suits you, check the 7 mm wing-clip limit, and follow your wheel manufacturer’s instructions, especially with carbon or hookless rims.
What People Say
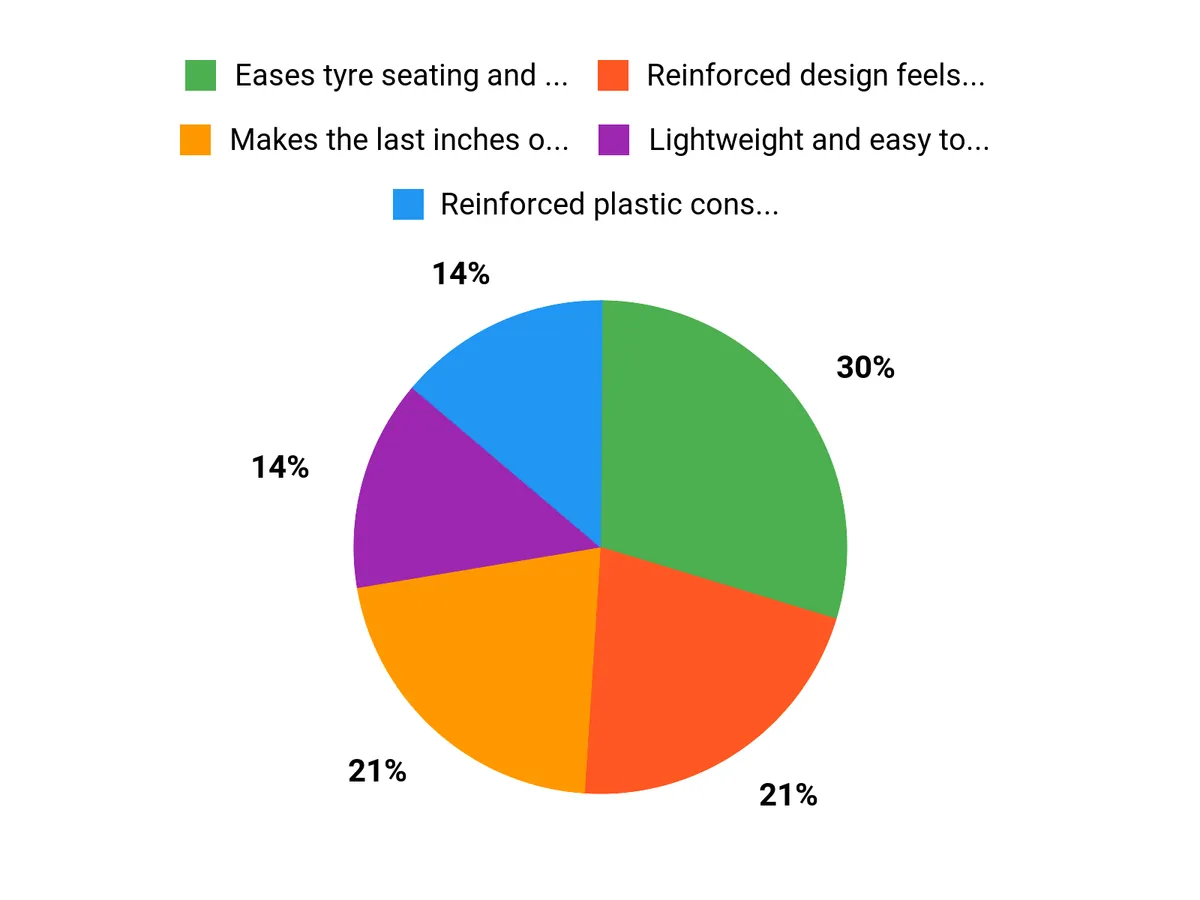
Buyer feedback is mainly positive about the tool’s ability to handle the final, difficult section of a tight bead. Riders often mention road, gravel, tubeless-ready, and stiff commuter tyres, along with less strain on their thumbs than they experienced with conventional levers.
The repeated caution is that technique matters. Watching the maker’s instructions and practising on a familiar wheel usually produces better results than forcing the tool during the first attempt.
Overall Sentiment: Positive, with a learning-curve caveat

Pros and Cons
Pros
- The clip-on design can guide a bead around the rim with fewer tool changes
- Glass-filled nylon is more substantial than thin, disposable plastic levers
- Compact 20 g build is easy to carry on rides
- Works for both tyre removal and installation
- Body-weight technique can reduce reliance on thumb and hand strength
Cons
- The right-handed orientation may feel awkward for left-handed riders
- It requires practice and correct bead positioning
- It cannot guarantee compatibility with every rim and tyre pairing
Design and Build Quality
The Tyre Glider uses high-tensile, glass-filled nylon rather than the thin plastic found in many low-cost tyre levers. Its broad body spreads pressure across your palm, while the scoop and wing clip handle different stages of the tyre change. The one-piece shape also means there are no hinges, metal pins, or separate parts to lose.
It is still a lightweight polymer tool, not an indestructible workshop bar. Excessive force, poor alignment, or trying to push through a tyre-and-rim combination that does not fit can damage the tool, tyre, tube, or rim. Controlled pressure is more important than brute force.
Ease of Use
For removal, you first create space by pushing the tyre bead toward the centre channel of the rim. The scoop goes fully under the bead, then the tool levers the bead over the rim and glides forward and down. For installation, you begin near the valve, clip the tool to the rim, and push with your palm as the bead seats.
This motion is different from hooking a small lever under the bead and anchoring it to a spoke. The first attempt may feel awkward, but the method becomes easier once you keep the opposite side of the bead in the rim’s centre channel and maintain steady pressure.
Comfort and Rim Control
The wide pushing surface is easier on your palm than a narrow lever, and the option to use body weight can help when hand strength is limited. Because the tool glides along the rim instead of being repeatedly pried at several points, it may also reduce sudden slips.
That does not remove the need for care. Make sure the scoop is under the tyre bead rather than the inner tube, and stop if the wing clip binds against the rim. Carbon and hookless wheel owners should follow the wheel maker’s service guidance before using any tyre lever.
[Products Worth Considering]

This 4-pack kit converts Presta bike valves to standard Schrader valves so you can inflate with any regular pump or air compressor. The solid brass adapters include an O-ring for a tight, leak-proof seal and provide a simple screw-on setup. Compatible with road bikes, mountain bikes, e-bikes, and e-scooters, it’s designed for convenient, everyday carry readiness.

Convert Presta bicycle valves to accept standard Schrader pump nozzles for fast, hassle-free inflation. This kit includes durable brass adapters with leak-resistant connections, plus sports inflation needles and protective valve caps for convenient use on bikes and ball sports equipment.
How It Performs in Real Use
Roadside Tube Changes
The compact size makes the Tyre Glider easy to carry with a tube, pump, and patch kit. It can simplify the final section of tyre installation, which is often the hardest part of a roadside repair. Practise at home first, because learning the motion during bad weather or beside traffic is not ideal.
Tubeless-Ready Road and Gravel Tyres
Tubeless-ready beads often fit tightly by design. The Glider’s broad scoop and clip-on installation method can help move the bead without repeatedly inserting narrow levers. You still need to push the bead into the centre channel, work away from the valve, and avoid disturbing rim tape.
Stiff Commuter and Touring Tyres
Reinforced commuter tyres can be difficult to refit after a puncture. Using your palm and body weight may be more comfortable than relying on both thumbs. Compatibility still varies, so a stubborn tyre may require more bead preparation rather than more force.
Workshop and Home Maintenance
At home, the tool is useful for seasonal tyre swaps and routine tube replacement. Its single-piece design is quicker to find and harder to misplace than a set of several small levers. Keeping one conventional lever nearby is still sensible for unusual rims or for holding a bead in place.
How to Use It Correctly
- Deflate the tyre fully. Remove trapped air before trying to lift the bead.
- Move the bead into the centre channel. Start opposite the valve and pinch both sides inward to create slack.
- Seat the scoop fully. Confirm it is under the tyre bead and not catching the inner tube.
- Use a forward and downward motion. Keep the tool aligned with the rim instead of twisting it sideways.
- For installation, start near the valve. Clip the tool onto the rim and push around the wheel with your palm.
- Stop if it binds. Recheck bead position, rim compatibility, and the manufacturer’s instructions rather than adding uncontrolled force.
Pro Tip: When the last section becomes tight, work around the wheel from the opposite side and keep feeding the bead into the rim’s deepest centre channel. That creates more slack at the point where the Tyre Glider is working.
Compatibility and Safety
The tool is intended for a broad range of bicycle tyres, including road, gravel, mountain bike, tubed, and tubeless-ready setups. The manufacturer states that the wing clip fits a tyre hook width up to 7 mm and also warns that a small number of tyre-and-rim combinations may not work.
Before using it, inspect the tool for cracks or worn edges. Avoid trapping an inner tube under the scoop, do not drag the tool across damaged rim tape, and do not use more force than the rim or tyre maker allows. A bicycle shop is the safer choice when a bead will not move, the rim is damaged, or the wheel manufacturer prohibits lever use.
Is It Worth the Price?
The Tyre Glider sits above a basic set of disposable levers but remains a small, specialised hand tool. It offers strong value for riders who change tyres often, deal with tight tubeless-ready beads, or want to reduce hand strain during installation.
It is less compelling for riders who rarely remove a tyre or already have a lever set that works well with their wheels. The main value comes from its clip-on technique and compact one-tool design, not from guaranteed universal compatibility.
How It Compares to Alternatives
Traditional tyre levers are cheaper, familiar, and useful for holding a bead against a spoke, but they often require two or three tools and put more pressure on a small contact point. The Tru-Tension Tyre Monkey uses a similar one-tool idea and is designed for either hand, while newer metal-and-composite fitting tools may offer extra leverage at a higher cost.
The Tyre Glider makes the most sense when you want a light, simple, one-piece tool that can both remove and refit tyres. A conventional lever set remains a useful backup for wheel combinations that do not suit the Glider’s clip geometry.
Frequently Asked Questions
Is this Tyre Glider right-handed?
Yes. The Amazon product reviewed here is identified as the right-handed version. A left-handed version is available from the manufacturer, so check the selected variation before ordering.
Will it work with tubeless tyres?
It is designed for many tubeless-ready tyre and rim setups. Keep the bead in the centre channel and take care around rim tape, because tight fit and compatibility vary by wheel.
Can I use it on carbon rims?
The tool is promoted for use across different rim types, but carbon rims need extra care. Follow the wheel manufacturer’s service instructions and stop if the tool binds, marks the rim, or requires excessive force.
Can it replace traditional tyre levers?
It can handle removal and installation on many wheels, so one tool may be enough for routine jobs. Carrying one conventional hooked lever is still useful for unusual rims or for holding a bead in position.
What is the most common mistake?
The most common mistake is forcing the final section while the opposite bead is still sitting on the rim shoulder. Push the bead into the centre channel first, then use steady forward pressure.
How durable is the tool?
Its glass-filled nylon build is stronger than thin, basic plastic levers and has no moving parts. It can still crack or wear if twisted, misaligned, or forced through an incompatible setup.
Who should skip the Tyre Glider?
Skip it if you need a left-handed tool but cannot select that version, your rim hook exceeds 7 mm, or your wheel maker restricts tyre-lever use. It is also unnecessary if your current lever set already handles your tyres easily.
Why Riders Choose It
Riders choose the Tyre Glider for its compact one-tool design, broad pushing surface, and ability to use palm pressure or controlled body weight instead of relying only on thumb strength. It is most useful when the last section of a tight tyre bead is the part that normally slows you down.
The Bottom Line
The Tyre Glider is a practical buy for cyclists who regularly struggle with tight road, gravel, mountain bike, or tubeless-ready tyres. Its main strength is the clip-on, body-weight-assisted technique, while its main limitation is that you must learn the motion and compatibility is not universal. Left-handed riders and owners of unusual, carbon, or hookless rims should confirm the exact version and wheel guidance before buying.
Ready to Buy?
Check the latest product details and selected handedness before you decide.

Related Articles

Best Westlake Tires 2026: Affordable Tires for Daily Driving and All-Season Use
You spend a lot of time on the road, and the tires you choose affect safety, comfort, fuel economy, and long-term costs. Westlake offers…
Read More
Best Sailun Tires 2026: Affordable Tire Picks for Everyday Driving
You rely on tires for safety, fuel economy and ride comfort, so choosing the right Sailun model matters more than just price. This guide…
Read More
Best Snow Tires for Trucks 2026: Winter Truck Tires for Safe Cold-Weather Driving
Winter tires are one of the most effective upgrades you can make to keep your truck safe when temperatures drop and roads become snow-…
Read More