How to Use a Tire Plug Kit: Roadside Repair Tutorial
You can safely perform a temporary roadside repair by stopping on level ground, engaging the brake, and locating the leak with soapy water. Remove the object with pliers, ream the hole, thread a compatible plug into the insertion tool, push it straight in, rotate 90 degrees, then withdraw sharply and trim flush. Inflate to the recommended PSI, check for bubbles, and drive slowly to a shop for a permanent repair — continue for detailed safety, limits, and troubleshooting.
Quick Answer: How to Use a Tire Plug Kit
Locate the leak by inspecting the tire and spraying soapy water to spot bubbles, then remove the puncturing object with pliers. You’ll ream the hole with the kit’s rasp to clear debris and slightly enlarge the opening for plug insertion. Thread a cork plug into the insertion tool, apply liquid cement if provided, and push the tool squarely into the puncture until roughly three-quarters of the plug seats. Rotate the tool 90 degrees and withdraw it sharply, leaving the plug embedded; trim any excess flush with the tread. Inflate to the manufacturer’s PSI with a compressor and recheck for bubbles around the plug. Use this as a temporary measure; follow tire maintenance routines and puncture prevention practices to avoid repeat incidents.
Quick Safety Checklist Before Roadside Repairs
Before you start the plug procedure, stop on a flat, stable surface well away from traffic and turn on your hazard lights to warn other drivers. Confirm parking brake engaged and wheels chocked if available. Put on safety gear—at minimum safety gloves and eye protection—to prevent cuts and debris injuries. Keep a tire pressure gauge within reach to record pressure before and after repair. Review your tire plug kit instructions quickly to verify you use the correct tool sequence and plug materials for the puncture type. Inspect the wound visually; if it’s near the sidewall or excessively large, don’t attempt a plug. If conditions feel unsafe—traffic, poor lighting, or unstable ground—call roadside assistance instead of proceeding.
Tire Plug Kit Checklist: What to Carry and Why
You’ll want a compact kit that includes cork plugs, an installation tool, a reamer, and optionally liquid cement so you can perform an effective seal. Add needle-nosed pliers or side-cutters to remove the puncturing object, plus a portable air compressor and pressure gauge to reinflate and verify PSI. Keep the kit in an easily accessible spot in your vehicle so you can reach it quickly during a roadside repair.
Essential Kit Components
A compact, well-organized tire plug kit lets you repair most tread punctures quickly and get back on the road. Your kit should contain cork plugs (know plug types and compatible sizes), an insertion tool, and a reamer. Use the reamer to clean and widen the puncture channel before inserting the plug; this prepares the path for proper seating. Add pliers for extracting debris, a portable air compressor to reinflate the tire immediately, and liquid cement if you prefer a more permanent bond. Store components in a labeled pouch so you can execute repair techniques without searching. Inspect and replace worn plugs, a frayed insertion tool, or a clogged reamer before long trips to guarantee readiness.
Why Each Item Matters
Because a successful on-road tire repair depends on preparation, carry each plug kit component with a clear purpose: plugs seal the tread puncture, the insertion tool seats the plug without tearing the rubber, and the reamer opens and cleans the channel so the plug bonds properly; include pliers to remove debris, a portable air compressor to restore correct pressure immediately, and liquid cement if you want a stronger, longer-lasting seal. You’ll use plugs to stop air loss fast; the insertion tool controls placement and minimizes bead damage. The reamer removes corrosion and shapes the hole for adhesive contact. Pliers extract the foreign object and clear fragments. The compressor verifies leak repair and returns correct PSI for safe handling. Liquid cement improves bond strength for extended road use. This checklist supports routine tire maintenance and practical emergency kits.
Storage And Accessibility
Now that you know what each plug kit component does, make certain the kit itself is stored where you can reach it quickly during an emergency. You’ll apply kit organization and accessibility tips to minimize response time. Store the kit in the trunk or under a seat; keep items in labeled pouches. Include a portable air compressor, pliers (needle-nosed or diagonal), and a tire pressure gauge. Inspect components and expiry (liquid cement) monthly.
| Item | Location |
|---|---|
| Plug kit | Trunk / under seat |
| Compressor | Padded pouch |
| Pliers | Tool roll |
| Gauge | Small pocket |
Before use, verify completeness and pressure specs. Replace expired materials immediately. These steps keep you prepared, reduce roadside exposure, and guarantee safe, swift tire repairs.
How to Spot a Puncture (Visual + Soap‑Bubble Test)

Want to find a puncture quickly and reliably? Use systematic tire inspection techniques: visually scan tread and sidewalls for cuts, embedded nails, screws, or deformities. Illuminate the surface with a flashlight to reveal small objects or hairline damage. Check tire pressure first to confirm a suspected leak.
Prepare a soap-and-water solution and apply it across the entire tire, concentrating on the tread where punctures are likeliest and most repairable. Watch for persistent bubbles forming at a point — that’s a positive leak detection method. Inspect bead area and valve stem too. Note: sidewall bubbles or large tears indicate replacement, not repair. Record the leak location relative to tread pattern so you can position the plug kit and perform the roadside repair accurately.
When to Plug a Tire : And When to Call a Shop?
Finding the leak tells you where to act, but it doesn’t guarantee a safe roadside fix — use a plug only for small punctures in the tread (generally under 1/4 inch) and when the damage is centered well away from the shoulder or sidewall. You must evaluate tire safety, repair limitations, and condition before proceeding. If the puncture is near the shoulder, sidewall, multiple, rapidly leaking, or the tire is aged/worn, call a shop.
| Situation | Action |
|---|---|
| Single small tread puncture (<1/4") | Plugable roadside |
| Near shoulder/sidewall | Do not plug; shop |
| Multiple nearby punctures | Shop evaluation |
| Rapid loss or bulge after plug | Immediate professional repair |
| Severe wear/old tire | Replace at shop |
Check pressure after plugging; any instability mandates professional assistance.
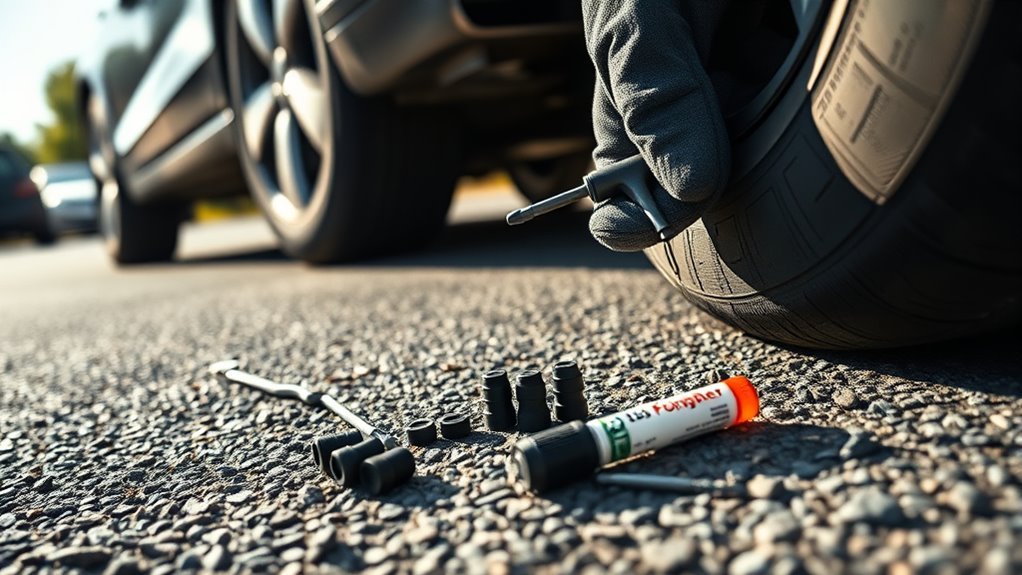
Remove the Object and Prep the Hole (Reaming Tips)
Grab needle-nosed pliers or diagonal cutters and pull the object straight out, taking care not to twist or tear the rubber; then inspect the hole to confirm it’s a small tread puncture and note debris, angle, and depth. Perform a rapid puncture assessment: confirm location in the tread, measure diameter, and rule out sidewall or shoulder damage. Select the reamer and insert it into the puncture along the original path. Use a controlled reamer technique—twist firmly while withdrawing to clean and roughen edges, penetrating through any steel belts to form a uniform opening. Clear all loosened material from the hole and surrounding area. Re-inspect for uniformity and absence of debris before proceeding to plug insertion.
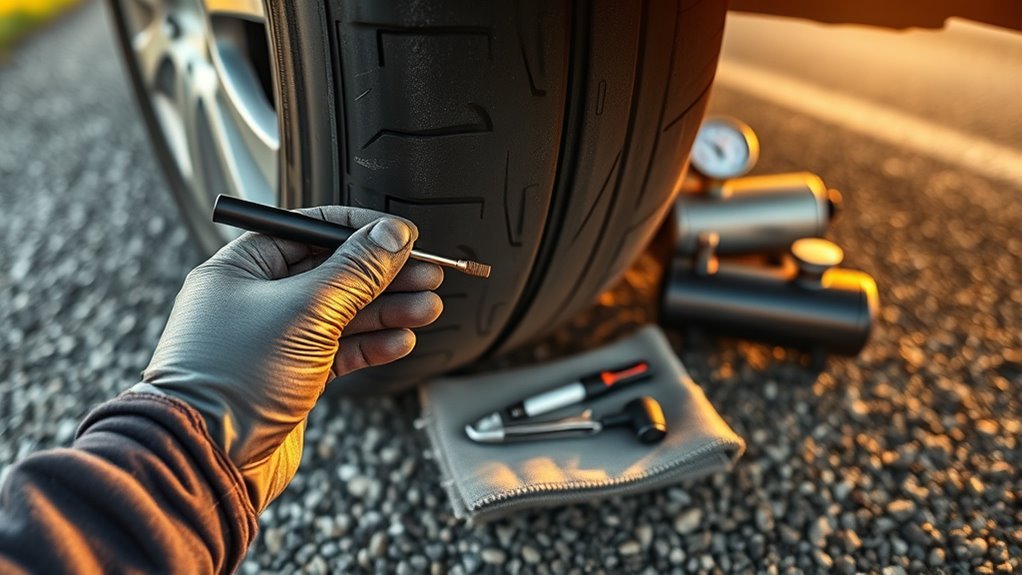
Insert the Plug: Tools, Angle, and Depth
Load the squished cork plug onto the inserter and align it perpendicular to the puncture so you’ll enter at a straight 90-degree angle. Push the tool straight in until about three-quarters of the plug is inside the tire, avoiding twists to keep the seal aligned. Rotate the tool 90 degrees and withdraw it, trim excess, then inspect for a tight seat and any air leaks before reinflation.
Proper Insertion Angle
Position the installer tool straight over the puncture, then insert the plug at a perpendicular angle about 3/4 of the way into the tire, using a twisting motion to work the reamer through any steel belts and applying cement to the plug if your kit provides it. For correct insertion technique, keep the tool vertical—this ideal angle prevents enlargement or misalignment of the hole and guarantees the plug seats evenly. Twist gently but firmly to clear reinforcing layers; don’t lever or bend the tool. Once the plug is driven in, rotate the handle 90 degrees and withdraw the tool straight out to anchor the plug. Maintain controlled force throughout to avoid pushing the plug too deep or tearing the bead around the puncture.
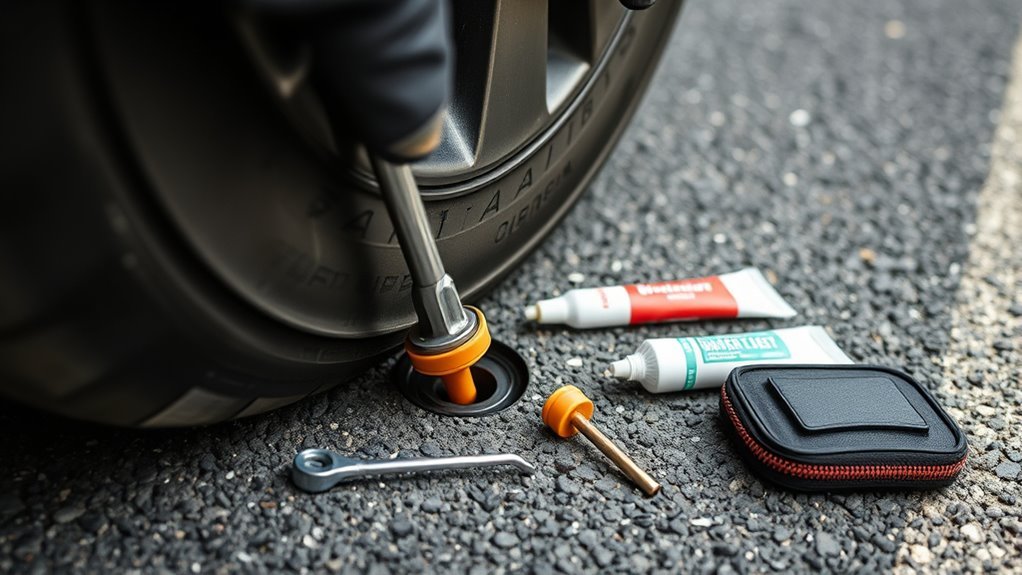
Correct Plug Depth
When you insert the plug, keep the installer tool vertical and drive the cork so about three‑quarters of its length seats inside the tire to form a secure, leak‑proof seal; after seating, rotate the tool 90° and withdraw it to anchor the plug, then trim any excess flush with the tread. Position the tool straight along the puncture path — this insertion technique prevents misalignment and internal cord damage. Use steady, even pressure; don’t twist during drive-in or you’ll enlarge the hole. Confirm plug material is compatible with your kit; cork or vulcanizing strips require the same depth for reliable adhesion. After anchoring and trimming, press the area and check for bubbles with soapy water to verify a proper, sealed repair.
Inflate, Test for Leaks, and Road‑Test Tips
Reconnect the valve and use a portable air compressor to inflate the tire to the manufacturer’s recommended PSI (check the driver’s side door jamb or your vehicle manual), then immediately spray soapy water around the plug to check for bubbles that indicate a leak. Use proper inflation techniques: add short bursts of air, monitor pressure, and avoid overfilling. If bubbles appear, reseat or replace the plug and retest. Perform a controlled road-test at low speeds in a safe area to confirm stability and that the plug holds under load. Recheck pressure after the test and over the next days for gradual loss. If pressure drops or handling feels off, plan a shop visit.
| Concern | Action |
|---|---|
| Leak detection | Reseat/replace plug |
| Stability | Low-speed road-test |
| Ongoing loss | Visit tire shop |
Temporary vs Permanent: When to Get Professional Repair
How long should you rely on a tire plug before getting professional help? You should treat plugs as temporary solutions: use them to reach a shop, not as a long-term fix. Inspect the puncture, inflate to recommended pressure, and monitor PSI and visible condition. If the puncture is small and in the tread, drive cautiously to a repair facility within a few days for professional assessment. Never rely on a plug for sidewall or large-diameter damage; those require immediate replacement or shop intervention. At the service center, technicians will verify tire integrity with proper tools and perform a standardized repair or recommend replacement. If you detect pressure loss, vibration, or visible deformity, stop driving and seek professional repair immediately.
Troubleshooting: Leaks, Poor Seating, and Replugging
Check for slow leaks by applying soapy water around the plug and watching for bubbles. If bubbles appear or pressure drops after inflation, remove the plug, ream the hole clean, and insert a new cork plug. Replugging multiple nearby punctures or repeated failures warrants professional inspection.
Check For Slow Leaks
Start by visually inspecting the tire for punctures and then apply soapy water over the repair area; forming bubbles will pinpoint any slow leak. Once located, confirm the plug sits flush with the tire surface—any raised or twisted material can allow air escape and defeat leak prevention. If bubbles appear around the plug, depressurize slightly, remove the plug cleanly, and inspect the hole for debris. Reinsert a new plug using the tool’s specified angle and depth to guarantee proper seating. After installation, reapply soapy water to verify no further bubbling. Record pressure, restore recommended PSI, and monitor regularly as part of routine tire maintenance. Persistent leaks require professional evaluation if replugging fails.
When To Replug
If you notice air escaping around the plug after installation, you should replug immediately to restore a proper seal and prevent further damage. Inspect the plug visually and with soapy water; bubbles indicate a leak. If the plug is protruding, improperly seated, or shows wear, remove it with the reamer or pliers and prepare the hole per kit instructions. Use recommended replugging techniques: clean the puncture, insert a fresh plug with the insertion tool, trim flush, and retest with soapy water. Replace the plug if it’s been stressed by prolonged low-pressure driving or repeated punctures at the same location. Check manufacturer guidance on plug lifespan and service limits; when in doubt, replug or seek professional repair.
Frequently Asked Questions
How Long Can I Drive on a Tire Plug Kit?
You can drive up to about 100 miles on a plugged tire as a temporary measure; you’ll keep speeds below 50 mph, monitor tire safety regularly, and remember plug longevity is limited—get a professional permanent repair promptly.
Do You Twist When Plugging a Tire?
No — you push the plug straight down; don’t twist. Coincidentally, that simple step prevents leaks and panic. Use proper tire plug techniques, avoid common mistakes, then twist the tool 90° only to release the plug.
Conclusion
So you fixed the tire like a roadside MacGyver and now you’re humming triumphantly—until air sneaks out later. Don’t get proud: a plug’s a smart bandage, not a citizenship certificate for your tread. Follow the checklist, seat the plug square, and test with soap bubbles. If the leak persists, replug only once and then see a pro. Drive cautiously to a shop; don’t treat a temporary fix like permanent bravery.
Related Articles

How to Read Motorcycle Tire Size: Complete Breakdown
Often misunderstood, this guide decodes motorcycle tire sizes like 180/55ZR17—learn what each number and letter means to ensure safe, perfect fitment.
Read More
How to Read Bicycle Tire Size: Inches, Metric & ISO
Get the essential trick to decoding ETRTO/ISO codes so you’ll always pick rim-compatible tyres—discover what to check next.
Read More
How to Read Tire Size Numbers: Decode the Sidewall
Step-by-step guide to decode tire sidewalls—sizes, load, speed, DOT and winter symbols—so you’ll know what fits and when to replace.
Read More