How to Patch an Inner Tube: Easy Repair Tutorial
You’ll want a vulcanizing kit, clean bench, bright light and safety glasses. Inflate the tube to find the leak, mark it, then clean and lightly abrade the area. Apply cold vulcanizing cement until tacky, center the patch, roll outward to expel air and bond, then let cure briefly. Test under water for bubbles, dust with talc, and reinstall carefully to avoid pinches. Continue for troubleshooting tips, larger damage fixes and replacement criteria.
Essential Tools, Workspace, and Safety
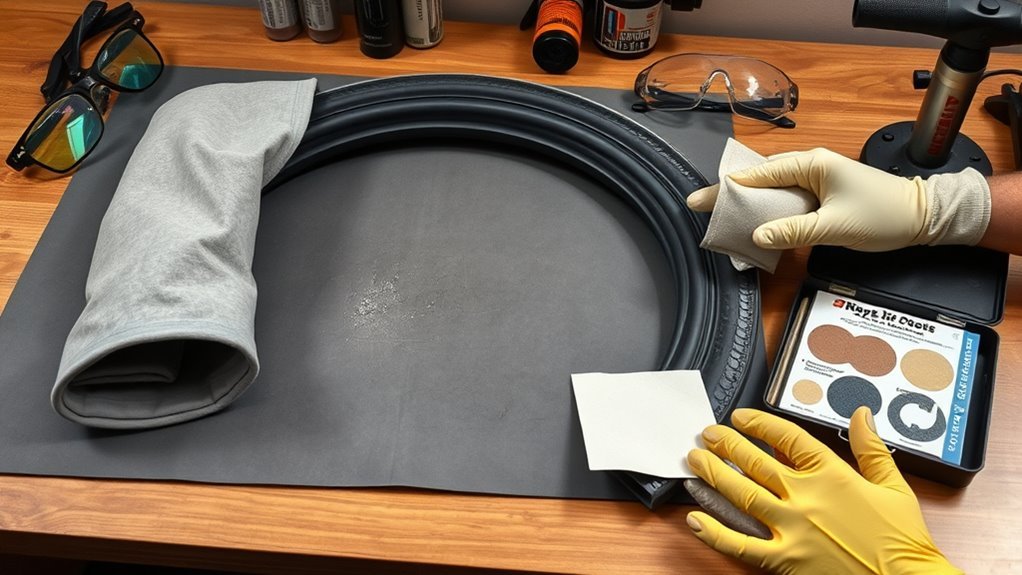
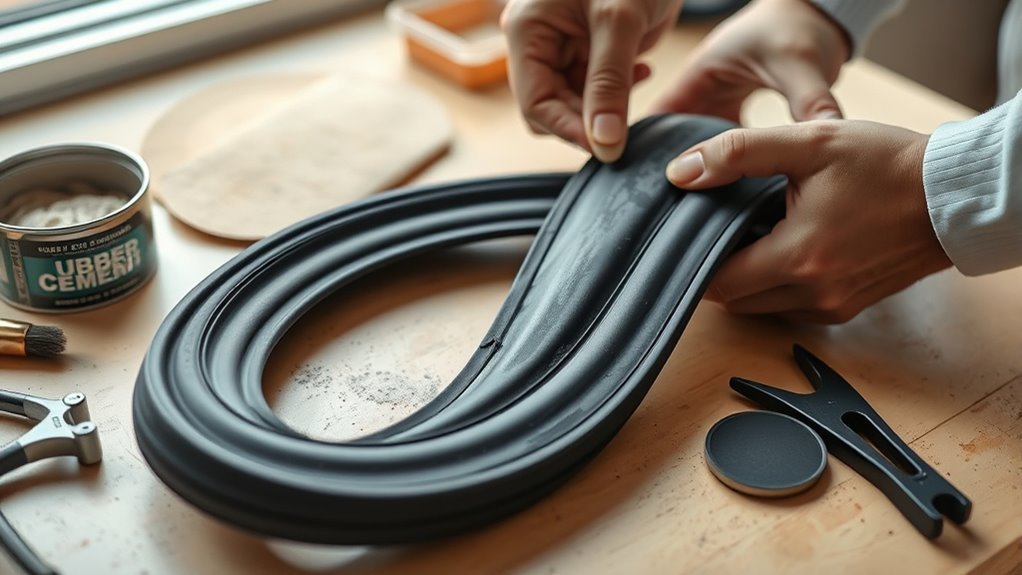
Before you start, gather a basic tube-repair kit — safety eyewear, brass bristle brushes, scissors, a rubber scraper, buffer wheel, tube stitcher, and an awl — and set up a warm, dry workbench so you can handle and prepare the tube effectively. Organize tools logically: keep adhesives, patches, and applicators grouped by manufacturer to guarantee chemical compatibility and reduce patch separation risk. Use trays or magnetic strips for tool organization so you won’t misplace small items. Position a focused task lamp to eliminate shadows; good workspace lighting prevents missed defects and unsafe handling. Wear protective eyewear at all times to shield against debris. Consult the Rema Tube Repair Manual for specified procedures and product pairings, and keep the manual accessible during repairs.
Locate the Puncture and Decide If It’s Repairable
Once you’ve inflated the tube to at least twice its normal width, listen and watch for leaks—use a quiet room to catch hissing or submerge sections in water and look for steady bubbles—and mark the puncture with four small pen dots around the hole so you can align the patch precisely. For puncture identification, scan the tube systematically: trace seams, valve area, and tread-contact zones. Measure or estimate hole diameter; anything over 2–3 mm needs a larger patch or tube replacement. Run your fingers along the surface to feel for stress cracks, nicks, or thin spots. If multiple defects, seam separation, or ragged tears appear, classify the tube as non-repairable. Record findings for repair assessment and proceed only if the damage fits patch specifications.
Prepare the Repair Area (Clean, Buttonhole, and Buff)
To guarantee the patch bonds reliably, clean and prepare the puncture area precisely: use a pre-buff cleaner to remove oils and debris, lightly abrade the rubber with sandpaper or fine emery cloth to promote adhesion, and cut 1/16‑inch buttonhole reliefs at each end of the tear to stop cracks from running. Use controlled sanding techniques and strict cleaning methods—no compressed air or cloths. Buff with a pneumatic buffer at max 5,000 rpm to produce a uniform, matte surface. Keep contaminants away; re-clean if dust appears.
| Task | Specification |
|---|---|
| Cleaner | Pre-buff solvent, degreasing |
| Abrasion | Sandpaper/fine emery cloth, light |
| Buttonholes | 1/16‑inch diameter at ends |
| Buffing | Pneumatic buffer ≤5,000 rpm |
Patch an Inner Tube : Step‑by‑Step (Vulcanize, Apply, Stitch)
With the tube cleaned and the puncture area abraded and marked, you’ll spread a thin coat of cold vulcanizing cement and let it dry until tacky. Center the patch over the hole, press firmly, then use a tire stitcher to roll from the center outward to remove air and lock the bond. Inflate the tube partially to test the seal, then dust the surface with talc before reinstalling.
Prepare The Repair Area
Start by thoroughly cleaning and preparing the damaged area so the patch will bond properly. You’ll use basic repair techniques and evaluate adhesive options later, but first remove contaminants with pre-buff cleaner. Lightly abrade surrounding rubber with fine sandpaper—avoid deep grooves. Buttonhole the puncture ends to stop tear propagation. Apply a thin coat of cold vulcanizing fluid and let it become tacky before patch placement; don’t overapply. Center the patch, press firmly, and use a tire stitcher to expel air and guarantee full contact. Finish by dusting tire talc to prevent sticking.
| Step | Tool | Purpose |
|---|---|---|
| Clean | Pre-buff cleaner | Remove oils/dirt |
| Abrade | Sandpaper | Promote adhesion |
| Buttonhole | Cutter | Prevent tear spread |
Apply Vulcanizing Cement
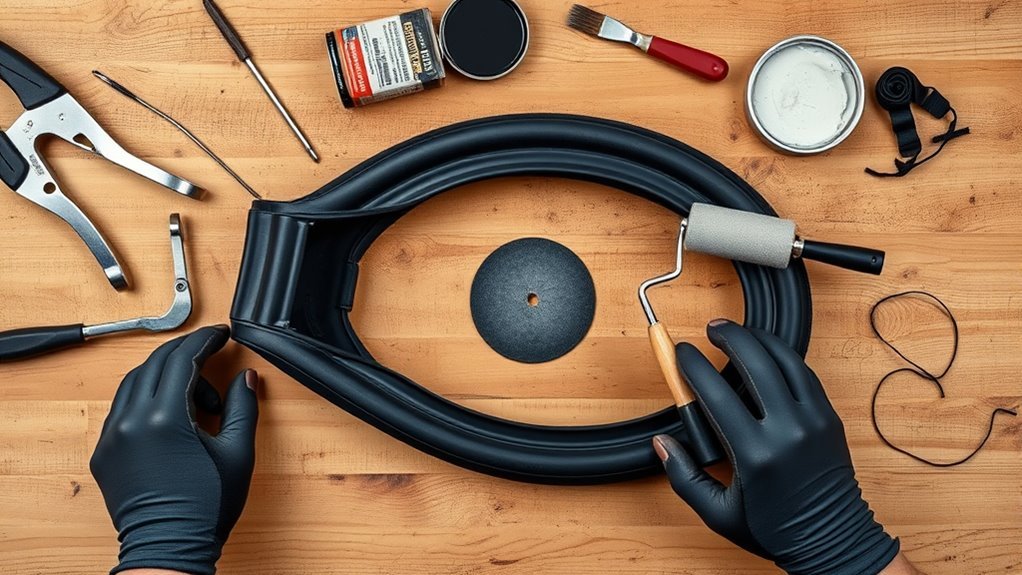
Apply a thin, even coat of cold vulcanizing fluid around the puncture and let it dry until tacky—this readies the rubber for a permanent bond. Using precise vulcanizing techniques, coat the scored area uniformly to optimize adhesive properties; avoid pools or gaps. When tacky, position the patch centered over the hole and press firmly from center outward to expel air and seat the patch. Maintain steady, even pressure; misalignment or trapped air compromises the bond. A tire stitcher can be used to apply targeted pressure at the patch perimeter to reinforce edge adhesion and reduce peel risk. Allow the assembly to cure undisturbed for the recommended 5–15 minutes so the vulcanized joint achieves initial strength before proceeding.
Stitch And Test Patch
Once the patch is seated and the vulcanizing fluid has become tacky, use a tire stitcher to press firmly from the center outward so you expel trapped air and fully bond the edges. Sand the surrounding rubber beforehand if you haven’t, and verify the patch sits flush without folds. Employ consistent stitch techniques: steady, overlapping strokes radiating to the perimeter to guarantee uniform contact and avoid localized stress risers. Lightly dust tire talc over the cured patch to prevent it adhering to the tire carcass. Let the bond cure 5–15 minutes per manufacturer guidance. Partially inflate the tube and inspect for leaks around the patch; listen and feel for seepage. Only fully inflate once you confirm adhesion—this maximizes patch durability and reduces failure risk.
Test the Patched Inner Tube, Talc, and Reinstall
Inflate the patched tube slightly and inspect the repair for any escaping air to confirm the patch sealed correctly. Sprinkle talc evenly over the tube surface to reduce friction and prevent chafing during reinsertion. Reinstall the tube carefully—avoid pinches—then inflate to the recommended pressure and check again for leaks.
Inflate And Inspect
Before you put the tube back in the tire, pump it up just enough to shape it and check the patch for any leaks or lifting at the edges; this lets you spot failures without stretching the tire or pinching the repair. Inflate to a low pressure, then submerge the patched area in water or use a soapy spray to detect bubbles indicating compromised air retention or poor patch durability. If you see bubbles, remove adhesive residue, re-roughen the area, and reapply patching materials. Once no leaks appear, deflate slightly to a manageable profile for installation. Do a final visual inspection for edge lifting, glue squeeze-out, or cuts. Keep the tube clean and ready for talc and careful reinstall to avoid pinches.
Talc And Reinstall
Test the patch one more time, then dust the tube liberally with talc before you seat it back in the tire. Inflate slightly and listen or submerge to confirm no leaks at the repair site. Use talc application to cut friction; spread it evenly so the patch won’t stick or fold.
- Smooth, even talc layer on the tube surface, avoiding clumps.
- Align the valve and position the tube so the patch clears the bead.
- Inflate slightly after tube seating to check for pinches or movement.
Work methodically: tuck the tube into the tire with fingers only, roll the bead on rather than forcing it. Inflate to recommended pressure and perform a final inspection to confirm integrity and secure tube seating.
When to Replace vs. Emergency Fixes (Large Holes, Valve Damage, Boots)
When a tube has a hole larger than about 2–3 mm, or the damage is clustered near the valve or in several places, replace it rather than patching—standard repairs won’t reliably restore strength and can fail under load. Use clear repair criteria: hole size, valve proximity, puncture types, and total number of breaches determine action. If the valve body or base is damaged, swap the tube; valves are failure points you can’t trust after trauma. Multiple punctures raise integrity concerns and shorten tube lifespan beyond safe limits. For emergency situations, you can use a tire boot or folded patch as a temporary solution, but don’t treat it as permanent. Maintain spares, inspect tubes regularly, and plan prompt replacements after any major damage.
Frequently Asked Questions
How Long to Let Rubber Cement Dry Before Applying Patches?
Let the rubber cement dry 5–15 minutes until tacky before patch application; you’ll adjust drying time longer in high humidity or cool temperatures, and always follow the manufacturer’s instructions for specific drying time guidance.
Can I Use E6000 to Patch a Tire?
No—you can’t rely on E6000 to patch a tire; like a bandage on armor, it’s temporary. E6000 advantages include flexibility, but use proper vulcanizing patches or tire patching alternatives for durable, pressure-resistant repairs.
Conclusion
You’ve got the basics: the right tools, a clean patch area, proper vulcanizing, and a solid test. If the leak’s small and the valve’s fine, a stitched patch will get you rolling again—no need to reinvent the wheel. For large tears, valve damage, or repeated failures, replace the tube. Keep talc handy, work methodically, and you’ll be back on the road before you know it—practice makes perfect.
Related Articles

How to Read Motorcycle Tire Size: Complete Breakdown
Often misunderstood, this guide decodes motorcycle tire sizes like 180/55ZR17—learn what each number and letter means to ensure safe, perfect fitment.
Read More
How to Read Bicycle Tire Size: Inches, Metric & ISO
Get the essential trick to decoding ETRTO/ISO codes so you’ll always pick rim-compatible tyres—discover what to check next.
Read More
How to Read Tire Size Numbers: Decode the Sidewall
Step-by-step guide to decode tire sidewalls—sizes, load, speed, DOT and winter symbols—so you’ll know what fits and when to replace.
Read More