How to Change a Wheelbarrow Tire Tube: Quick Fix Guide
You can fix a flat wheelbarrow tire quickly by swapping the tube or patching small holes. Loosen the axle nuts, pull the wheel off, deflate fully and pry the tire bead off with levers. Pull out the old tube, inspect the tire and rim for debris, then either patch small punctures with a kit or fit a correctly sized replacement, seating the valve first and inflating gradually. Reinstall, check alignment and pressure, and keep going for more tips.
Quick Answer: Fix or Replace Your Wheelbarrow Tube (Time & Cost)
Decide quickly: in most cases it’s cheaper and faster to replace the wheel than to repair the tube. You’ll save time and hassle—puncture-proof wheels cost as little as £8–£15—so a quick cost comparison often favors replacement. Repairs take more effort, and parts or labour can add up, making repair options less attractive unless you’ve got spare time and the right skills. If you do consider fixing the tube, weigh the labour and part costs against buying a new wheel. Check inner tube dimensions before buying replacements to avoid compatibility problems. Do regular inspections to catch wear early and avoid surprises. Depending on local availability and your schedule, swapping the wheel is usually the most efficient choice.
Tools & Parts Needed (Wrench, Levers, Pump, Replacement Tube)
You’ll need just a few tools to swap a wheelbarrow tube: a wrench to remove the axle nuts, tire levers or a large flat-head screwdriver to pry the tyre off the rim, an air pump to inflate and test the new tube, and a correctly sized replacement tube to fit your wheel. Use the wrench to loosen mounting hardware, keeping nuts and washers together. Levers make tire removal faster and reduce rim damage; a flat-head works if you don’t have levers. Inflate the new tube partially with the pump to seat it, then check tire pressure to the recommended level for reliable performance. Carry a basic repair kit (patches, adhesive) for quick fixes during wheelbarrow maintenance, and confirm tube size matches your wheel before starting.
Decide: Patch the Tube or Buy a New Wheel?
After you’ve removed the wheel and inspected the tube, weigh the options of patching versus replacing. If it’s a single small puncture and the tube’s otherwise sound, patching techniques with a basic kit (often under £15) save money and keep you working — but factor in the time and care needed for a reliable seal. If there are multiple holes, significant wear, or a damaged valve, replacement benefits kick in: new pneumatic or puncture-proof wheels can be as cheap as £8, and swapping is faster and more certain. Consider terrain: solid rubber cuts punctures but rides harsher; pneumatic gives comfort on rough ground. Regular inspection and maintenance help you choose wisely and avoid repeat failures.
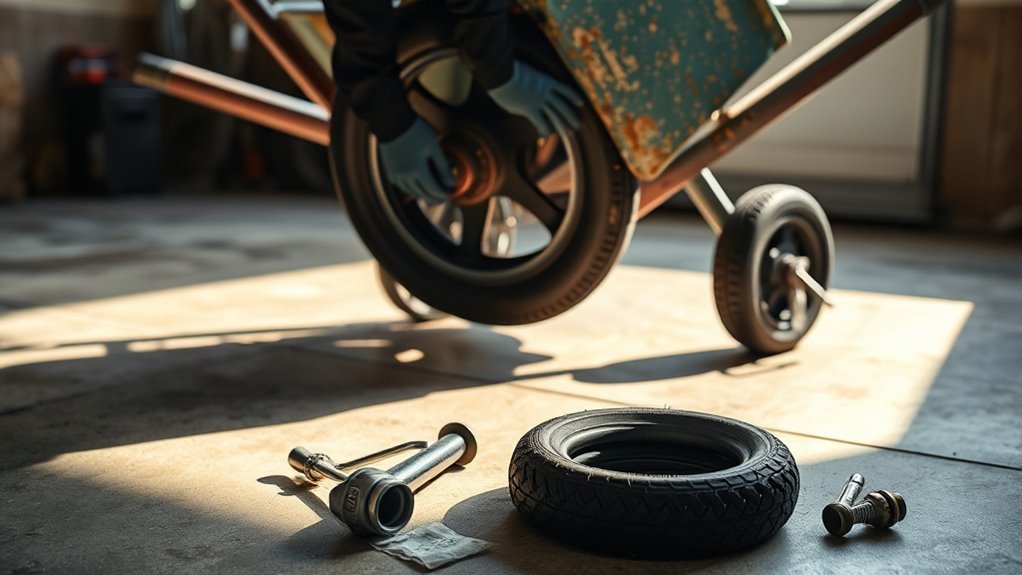
Remove the Wheel From the Wheelbarrow
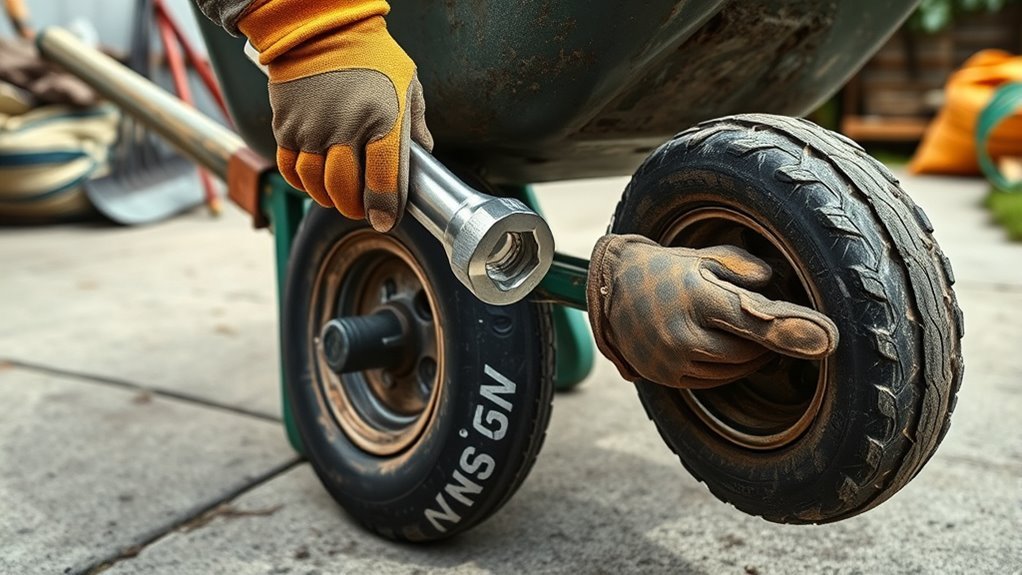
Loosen the axle nuts with a wrench and pull the wheel assembly off the bracket so you can work on the tire more easily. You’ll remove the nuts, slide the wheel with the axle and bushings off, and set it on a flat surface for stable, safe work. Keep hardware organized for reuse and note any wear for axle maintenance. For two-wheel dollies you might skip removal if access is fine.
| Task | Tip |
|---|---|
| Wheel removal | Use the correct wrench size; hold axle steady |
| Hardware | Place nuts/bushings in a tray |
| Workspace | Flat, clean surface for stability |
You’ll be faster and less likely to lose parts when you follow this hands-on, practical approach.
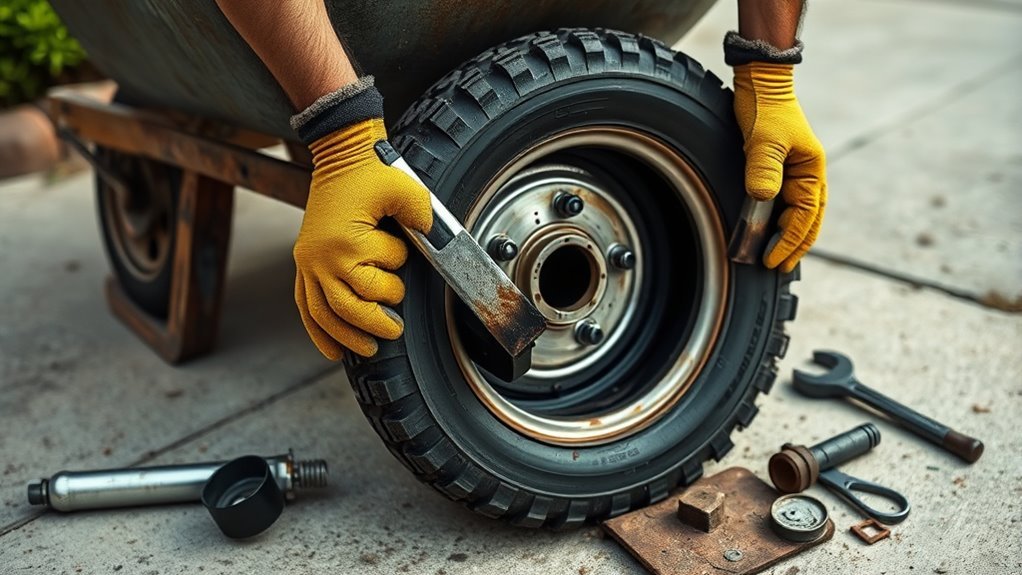
Unseat the Tire Safely From the Rim
Start by making sure the tire is completely flat—this reduces tension and makes prying much easier. With the wheel secured, insert a large flat-head screwdriver between the tire bead and rim, tip pointing outward, and pry the bead over the rim lip. Move a few inches, repeat, and work your way around the tire until a section clears. For stubborn areas, use a second screwdriver wrapped in duct tape to protect the rim—this gives leverage while providing rim protection. Keep both hands steady, prying a little at a time to avoid damaging the tire or rim. Once the bead is loosened all the way, manually pull the remaining tire off the rim. Regular tire maintenance prevents tight, hard-to-unseat beads.
Extract the Old Tube and Inspect the Tire for Debris
With the tire unseated and fully deflated, pull the tube out gently starting at the valve to avoid tearing it. Run your fingers along the tire’s inner surface to feel for embedded glass, nails, or thorns and remove any debris you find. Finally, inspect the rim and valve stem for sharp edges or damage that could puncture a new tube.
Remove Tube Carefully
Deflate the tire completely so you can pry it off without stretching or pinching the tube, then use a large flat-head screwdriver to lever the bead over the rim while guarding the tube with your hand. Use tube maintenance tips: remove the valve core first to speed deflation, and work opposite the valve to ease extraction. Reach between tire and rim, pull the valve through the hole, then ease the rest of the tube out without yanking.
- Start at the valve to reduce stress and avoid tears.
- Pry slowly, protecting the tube with your fingers and a cloth.
- Clean rim and tire bead area to remove grit and support tire puncture prevention.
Handle parts gently and inspect the rim edge for sharp burrs before fitting a new tube.
Check For Embedded Debris
Once the tube’s out, give the inside of the tire a careful inspection for anything that caused the leak. Start by visually scanning and then run your fingers along the inner surface to detect sharp points. Note common debris types—nails, glass, sharp stones—and remove anything you find with pliers or a magnet. Use inspection techniques like a bright light and fingertip probing to catch small shards. If you suspect a hidden puncture, spray soapy water around the interior and watch for rising bubbles that reveal leaks. Keep the valve position in mind for reinstallation, but don’t troubleshoot the rim or valve yet. Once the tire’s clear of debris and damage, you can repair or replace the tube and finish the job.
Inspect Rim And Valve
Pull the old tube out by pushing the valve stem back through the rim hole first to avoid tearing it, then peel the tube away from the tire. Once free, inspect the rim and valve area closely. Check rim condition for sharp edges, rust, or burrs that could puncture a new tube. Verify the valve hole is clear and the valve itself isn’t bent or damaged — good valve maintenance prevents leaks.
- Clean rim flange and remove debris or rust before fitting a new tube.
- Run your fingers along the inner tire surface to find embedded objects or cuts.
- Replace the tire or file down any sharp rim edges if you find significant damage.
Address any issues now to guarantee a reliable, leak-free installation.
Locate the Leak in the Tube (Inflate, Listen, Soapy Water)

Start by inflating the tube with a bike pump until it’s firm but not overpressurized, then listen closely and scan for leaks. You’ll catch hissing sounds where air escapes—hold the tube near your ear and rotate it slowly. Use leak detection methods next: spray soapy water from a bottle over the tube, paying special attention to the valve and seam areas; watch for persistent bubbles that mark the puncture. Mark each spot with a pen or chalk and note size and location so you can decide on repair techniques or replacement. Small pinholes near the center are often patchable; large tears or damaged valves usually mean a new tube. Work methodically to avoid missing multiple leaks.
Patch the Tube or Fit a New Wheelbarrow Tube Correctly
Decide whether to patch or replace the tube based on the size and location of the leak: small pinholes in the tread can be reliably patched, but large tears, valve damage, or multiple leaks mean you should fit a new tube that matches your wheelbarrow’s tire diameter and width. For patching techniques, clean around the puncture, roughen the surface, apply adhesive, press the patch firmly and let it cure per instructions. If fitting a new tube, check tube materials and specs, insert the valve through the rim hole first, then tuck the tube into the tire to avoid pinching. Inflate gradually, watching for even seating and leaks. Replace tubes showing heavy wear or many previous patches.
Patch small tread punctures; replace tubes with large tears, valve damage, or multiple leaks—match size, seat valve, avoid pinches.
- Patch small punctures cleanly and follow cure times.
- Match tube diameter and width exactly.
- Seat valve first; avoid pinched tube.
Re-Seat, Inflate to the Right Pressure, Reinstall, and Perform Safety Checks
Seat the tube evenly by pressing the tire bead into the rim all the way around so the tube can’t get pinched as you inflate. Once seated, partially inflate to shape the tube, check the bead seating, then finish to the manufacturer’s recommended pressure—usually listed on the tire sidewall. Use a reliable gauge; correct pressure prevents blowouts and improves performance. Reinstall the wheel onto the axle, confirm bushings sit correctly, and tighten the mounting nuts securely. Spin the wheel and watch for rubbing on the frame or wobble; adjust axle position or tighten fasteners as needed. For ongoing tire maintenance, inspect tread and sidewalls regularly and follow these inflation tips: check pressure before each heavy use and correct low PSI promptly to extend tube life.
Frequently Asked Questions
Can I Change the Inner Tube Without Removing the Wheel?
Yes — you can change the inner tube without removing the wheel, but you’ll deflate the tire, pry one side off the rim, access the valve stem, swap the tube, reseat the tire, and finish wheel maintenance carefully.
Conclusion
You’ve got this: most wheelbarrow flats happen within 5 feet of the job, so fixing the tube on the spot saves time. Whether you patch or replace, work methodically—remove the wheel, unseat the tire, take out the tube, find the leak, then patch or fit a new tube. Re-seat the tire, inflate to the correct pressure, reinstall, and check for wobble. A quick, tidy repair keeps you moving and cuts downtime.
Related Articles

How to Read Motorcycle Tire Size: Complete Breakdown
Often misunderstood, this guide decodes motorcycle tire sizes like 180/55ZR17—learn what each number and letter means to ensure safe, perfect fitment.
Read More
How to Read Bicycle Tire Size: Inches, Metric & ISO
Get the essential trick to decoding ETRTO/ISO codes so you’ll always pick rim-compatible tyres—discover what to check next.
Read More
How to Read Tire Size Numbers: Decode the Sidewall
Step-by-step guide to decode tire sidewalls—sizes, load, speed, DOT and winter symbols—so you’ll know what fits and when to replace.
Read More