How to Change a Lawn Mower Tire Tube: DIY Guide
You can change a lawn mower tire tube yourself by parking on a flat surface, securing the mower, and removing the wheel with a socket wrench. Deflate the tire, lubricate the bead with soapy water, pry one side off, remove the old tube, feed the new tube’s stem through the rim, seat the bead and inflate gradually while checking alignment. Torque the wheel to spec and perform a soapy-water leak check; continue for detailed steps and troubleshooting.
When to Repair vs Replace a Lawn Mower Tire Tube
Decide whether to repair or replace a lawn mower tire tube by evaluating damage, age, and cost: patch small punctures (under 1/4 inch) with a puncture kit, but replace the tube if you find multiple leaks, sidewall cuts, cracks, bulges, or if the tube is old and has had several repairs; also compare repair-material costs to a new tube and confirm fitment specs in your owner’s manual before buying. Inspect the tube systematically: locate punctures, probe sidewalls for cuts or thinning, and flex to reveal cracks or bulges. If damage is isolated and small, apply standard repair techniques and retest for air retention. If you find multiple faults, significant sidewall damage, or cumulative age-related degradation, calculate replacement costs and install a new tube to restore safe operation.
Gather Tools & Parts for Changing a Mower Tube
Gather these essential tools and parts before you start: a jack or sturdy blocks to elevate the mower, a socket wrench set for wheel bolts, a pry bar or flathead screwdriver for hubcap and bead work, pliers for retaining clips, and a valve-stem tool if the stem must be removed. Verify tube compatibility with your mower’s tire size from the manual and have a matching replacement tube. Lubricate the rim with soapy water for easier seating.
Gather tools and parts first: jack or blocks, socket set, pry bar, pliers, valve tool, matching tube, and soapy lubricant.
- Confirm tire size and tube compatibility; check width, diameter, and valve type.
- Inspect and prepare tool selection: jack/blocks, socket wrench, pry bar, flathead screwdriver, pliers, valve-stem tool, and lubricant.
- Keep a clean rag and a small container for bolts and clips to avoid loss.
Safety Setup: Secure Mower, PPE, and Workspace Checklist
Before you begin changing the tube, park the mower on a flat, well-lit surface, engage the parking brake, and block the wheels so it can’t roll; then put on safety goggles and gloves. Verify PPE fits and is undamaged. Clear the area of dirt, tools, and trip hazards; keep a 3–4 ft clear zone. Position a jack or sturdy blocks under the mower frame at manufacturer-recommended lift points and raise only as high as needed; confirm stability before working. Arrange essential tools—socket wrench, pliers, tire iron—within arm’s reach on a tray to avoid reaching under the mower. Follow tire maintenance logs: note tire size and condition before disassembly. These safety practices prevent movement, reduce injury risk, and streamline the tube-change procedure.
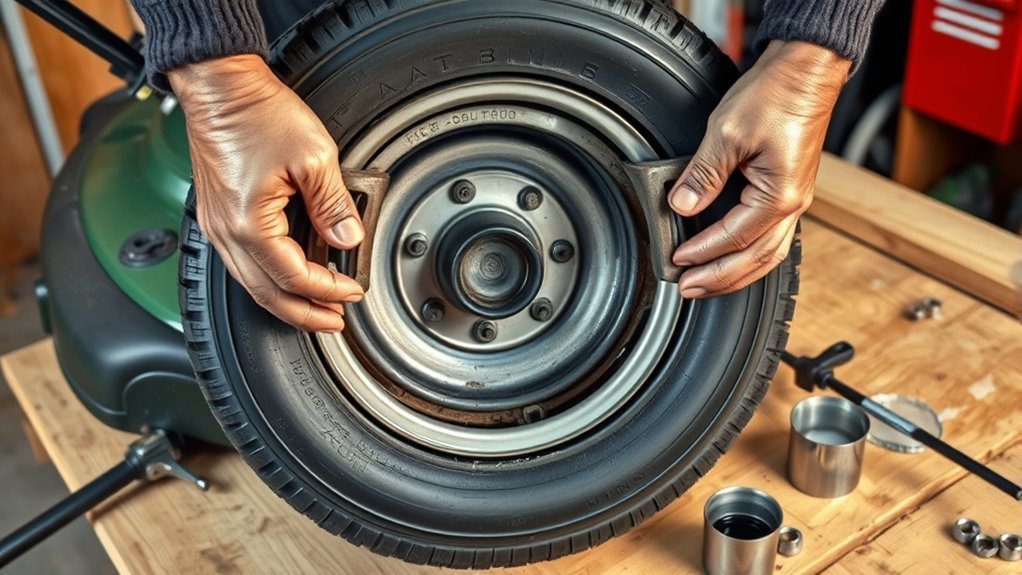
Remove Wheel, Deflate, and Take Tire Off Rim (Mower Tube)
Raise and stabilize the mower on a flat surface so you can safely remove the wheel with a socket wrench, using pliers to remove any retaining clip. Fully deflate the tire by removing or depressing the valve core, then lubricate the bead with oil or soapy water. Pry one side of the tire off the rim with tire bars—only one side—to expose the tube, avoiding damage to the rim or tire.
Remove Wheel Safely
Set the mower on a level surface and secure it with blocks or a jack so the wheel is stable before you work. Maintain wheel stability throughout; this is critical to safe tire maintenance. Wear gloves and eye protection.
- Use a socket wrench to loosen and remove wheel nuts; keep track of hardware.
- If a retaining clip is present, remove it with pliers; hold the wheel as you extract fasteners.
- Once free, support the wheel and slide it off the axle; set it on a clean surface.
Do not attempt removal on uneven ground or without blocking the mower. After the wheel is off, inspect the rim for dirt and debris and clean it before proceeding. Next steps will cover deflating and prying the tire.
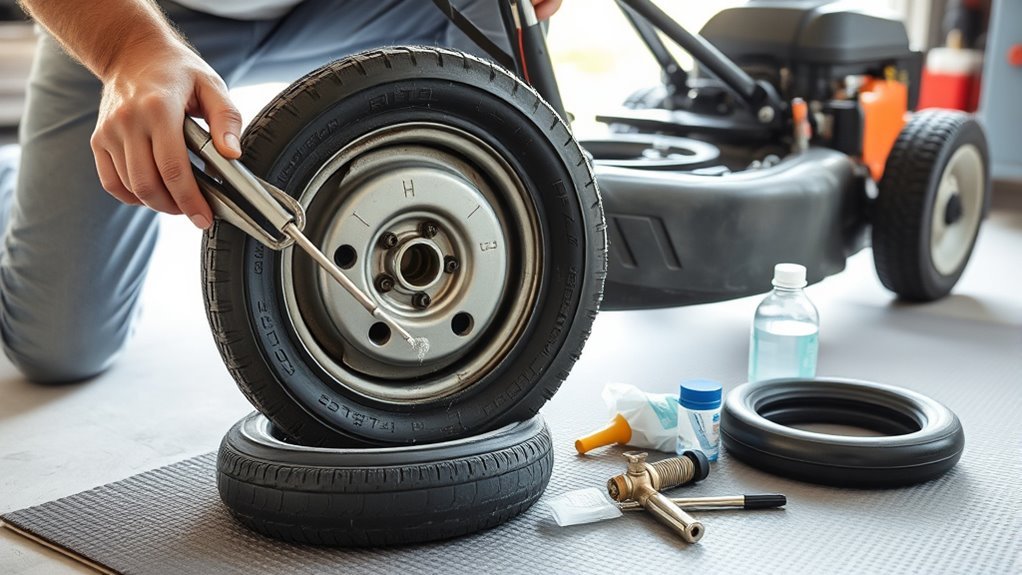
Deflate And Pry
With the wheel off, fully deflate the tire by depressing the valve core or inserting a flathead screwdriver into the valve to release all air, then clean the rim and apply soapy water around the bead to lubricate it. Elevate the mower securely on blocks. Use a socket wrench to remove the wheel; pliers may be needed for retaining clips. Insert a pry bar or tire bars between bead and rim, working opposite sides to avoid rim damage. Pry one side off enough to access the tube, then pull the tube out carefully. Follow tire maintenance tips and tube replacement techniques: keep beads lubricated, work incrementally, and avoid sharp tools near the tube.
| Step | Tool |
|---|---|
| Elevate | Jack/blocks |
| Remove wheel | Socket wrench |
| Deflate | Flathead screwdriver |
| Pry tire | Tire bars |
Install and Seat the New Lawn Mower Tube Correctly

Slip the tube stem through the rim hole and thread the stem nut finger-tight so the stem won’t move during seating. Use one tire bar to pull the bead over the rim and a second to work the tire on, taking care not to pinch the tube and keeping the tube aligned inside the tire. Inspect for bulges or misalignment, then inflate slowly to the recommended pressure while watching for leaks or irregularities.
Position Tube Stem Properly
- Position Tube Stem Properly: You’ll focus on tube alignment and correct stem placement to guarantee a reliable seal and trouble-free inflation. Slip the stem through the rim hole, align the tube evenly, then secure the stem nut so it won’t shift but won’t crush the stem.
- Use one tire bar to pull the tire bead over the rim edge while monitoring tube positioning; prevent twists as you work.
- With the second tire bar, slide the remaining bead into place, checking for smooth tube alignment around the rim to avoid kinks.
- Once seated, rotate the wheel visually and press the bead to confirm uniform seating; verify the stem sits perpendicular and snug before inflating.
Double-check everything before applying air.
Avoid Pinching The Tube
Before you inflate, make sure the tube and stem are perfectly aligned and free of twists so nothing gets pinched during seating. Check tube alignment with the stem through the rim hole, then apply lubrication techniques—soapy water—along the tire bead to ease seating. Use tire bars gently, guiding the bead over the rim incrementally; don’t force or lever at a single point. Rotate the wheel as you work to confirm the tube sits evenly without folds or snags. Once seated, inspect the visible bead gap and run your fingers around the rim edge for trapped material. If you detect a snag, deflate slightly, reposition, and reseat before any full inflation.
| Action | Checkpoint |
|---|---|
| Stem fit | Flush with rim hole |
| Bead lube | Soapy water applied |
| Seating method | Even, gentle tire bars |
| Final inspect | No twists or snags |
Inflate Gradually And Check
With the tube aligned and bead seated, begin inflating slowly so the tube can settle evenly into the tire; rapid inflation will trap a fold or push the tube out of place. Use controlled inflation techniques and watch tube seating as pressure rises. Stop periodically to inspect for bulges, kinks, or misalignment.
- Inflate in short bursts, check bead contact and tube seating visually.
- Monitor PSI with a gauge, target the tire sidewall recommendation.
- Inspect around the valve stem for pinches or twists before final pressure.
After reaching target pressure, rotate the wheel and recheck seating around the rim. If you see irregularities, deflate slightly, reposition the tube, then repeat gradual inflation. Only reassemble the mower once seating and pressure are correct.
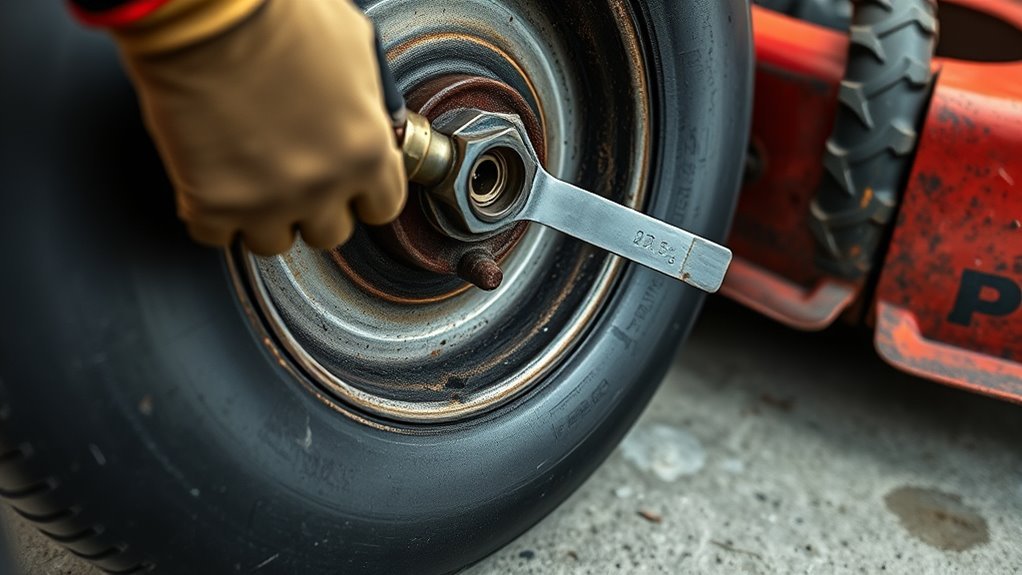
Inflate, Torque, and Post‑Install Leak Checks
Inflate the tube slowly to a low pressure while watching the bead and sidewalls for any irregular bulging or misalignment, since that’s the quickest way to spot seating issues; then tighten the wheel bolts to the manufacturer’s specified torque using a calibrated torque wrench and perform a soapy-water leak check around the valve stem and seams, letting the tire sit a few minutes to verify it holds pressure before you reassemble the mower. For tube maintenance follow inflation tips: increase pressure in small increments to recommended operating PSI, observing seating and rim alignment at each step. Set torque to manual specifications, retorque after initial run-in if advised. Spray soapy water on valve, rim, and bead; watch for persistent bubbles. Let the tire sit; confirm no pressure loss before full reassembly and routine pressure inspections.
Troubleshooting Leaks, Common Problems, and When to Get Help
Now that you’ve checked seating, torque, and leaks, focus on locating and fixing any remaining air loss. Perform systematic leak detection: inflate to spec, apply soapy water over the tube and bead, watch for bubbles, and mark breaches. Do a valve inspection separately; flex the stem and apply soapy water at the base to catch slow valve leaks.
- Inspect the tube for punctures, tears, and pinches created during reassembly.
- Verify alignment and clear any debris between tire and rim that can cut the tube.
- Confirm the valve core is tight and the stem isn’t damaged; replace if suspect.
If air loss persists after these steps, consult a professional at your local NAPA AUTO PARTS for repair or replacement.
Frequently Asked Questions
Can I Change the Inner Tube Without Removing the Wheel?
You can, but it’s difficult and risky: deflate the tire, pry one bead off rim while wheel stays mounted, replace tube carefully; follow tire maintenance tips and lawn mower safety to avoid injury or improper installation.
What Tools Do You Need to Change an Inner Tube?
You need a jack or blocks, socket wrench, pliers, pry bar, valve stem tool and replacement tube; these enable safe tire maintenance and precise tube replacement, letting you lift, remove wheel, unseat tire, swap core, and reinstall efficiently.
Conclusion
Measure twice, cut once — but here, measure twice, patch once: if the tube’s salvageable, repair it; if not, replace it. You’ve secured the mower, removed the wheel, swapped the tube, seated beads, and pressurized to spec. Verify torque, inspect for leaks, and recheck pressure after the first use. Keep tools and spares on hand; when seals won’t hold or rim damage appears, stop and get professional help to avoid injury or repeat failures.
Related Articles

How to Read Motorcycle Tire Size: Complete Breakdown
Often misunderstood, this guide decodes motorcycle tire sizes like 180/55ZR17—learn what each number and letter means to ensure safe, perfect fitment.
Read More
How to Read Bicycle Tire Size: Inches, Metric & ISO
Get the essential trick to decoding ETRTO/ISO codes so you’ll always pick rim-compatible tyres—discover what to check next.
Read More
How to Read Tire Size Numbers: Decode the Sidewall
Step-by-step guide to decode tire sidewalls—sizes, load, speed, DOT and winter symbols—so you’ll know what fits and when to replace.
Read More