How to Change a Bike Tire Tube in 10 Simple Steps
Gather tools, flip or mount your bike, and identify the valve type and pump adapter. Release all air, push the bead to the rim center and use levers if needed. Remove the wheel, pull the old tube out, inspect tire and rim strip for debris or damage. Slightly inflate the new tube, insert valve through the rim, tuck the tube, and seat beads evenly. Inflate to recommended PSI, check for bulges, reinstall wheel, test brakes — keep going to get full step-by-step guidance.
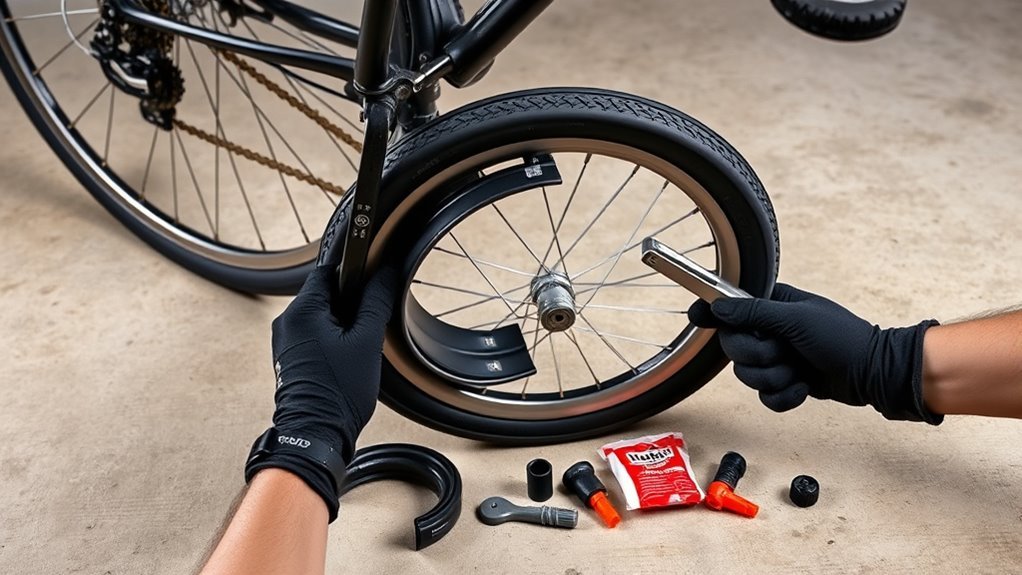
Prep Workspace and Tools for Tube Change
Choose a clean, flat surface with good lighting and enough room to lay out the bike and tools; this prevents parts damage and makes small components easier to see. You’ll organize the workspace to separate removed parts, fasteners, and tools for quick access and to avoid loss. For tool selection, gather tire levers, a bicycle pump, and a wrench for bolt-on axles; include a compact repair kit with patches and spare tubes. Set up a repair stand or invert the bike to stabilize it and maintain consistent orientation while you work. Verify lighting and clear floor space so you can inspect the tire and tube for cuts or embedded debris. Keep consumables and tools within arm’s reach to minimize movement during the tube change.
Identify Valve Type, Adapters, and Variations
Before you remove the wheel, identify the valve type—Schrader, Presta, or Dunlop—since each has different dimensions and connection requirements. Match the valve to the correct pump head or adapter (Schrader fits most pumps; Presta needs a specific head or adapter; Dunlop may require its own adapter). Using the right adapter guarantees proper inflation and prevents damage when you replace or inflate the tube.
Valve Types Overview
When you look at a bike tube’s valve stem, you’ll quickly spot one of three common types—Schrader, Presta, or Dunlop—each with distinct dimensions and filling requirements that affect pump compatibility and pressure control. You’ll recognize Schrader by its wider diameter and spring-loaded core; it mates with standard pumps and simplifies inflation. Presta is slim with a threaded locknut requiring either a matched pump head or an adapter; it’s preferred where higher pressure and smaller rim holes matter. Dunlop (Woods) resembles Schrader but uses a different internal design and is regionally common. Use valve maintenance tips: keep cores clean, check threads and caps, and verify seals seat correctly. For tube replacement strategies, match valve type to rim and carry adapters as needed.
Adapter And Compatibility
Two simple checks let you match valve to pump: identify the stem as Schrader (wide, car-style), Presta (narrow, threaded with a locknut), or Dunlop (similar diameter to Schrader but with a rubber seal), then pick the correct head or adapter. Inspect the valve and confirm thread presence and diameter. Use a pump with dual heads or carry small adapter types: Presta-to-Schrader threaded converters, universal switching pump heads, or a Dunlop-compatible fitting where available. Test fit before inflation to avoid leaks. Note common compatibility issues: mismatched head geometry, absent locknut engagement, and rubber seal deterioration on Dunlop valves. Keep a compact adapter in your kit and check that materials and threads match to guarantee reliable inflation.
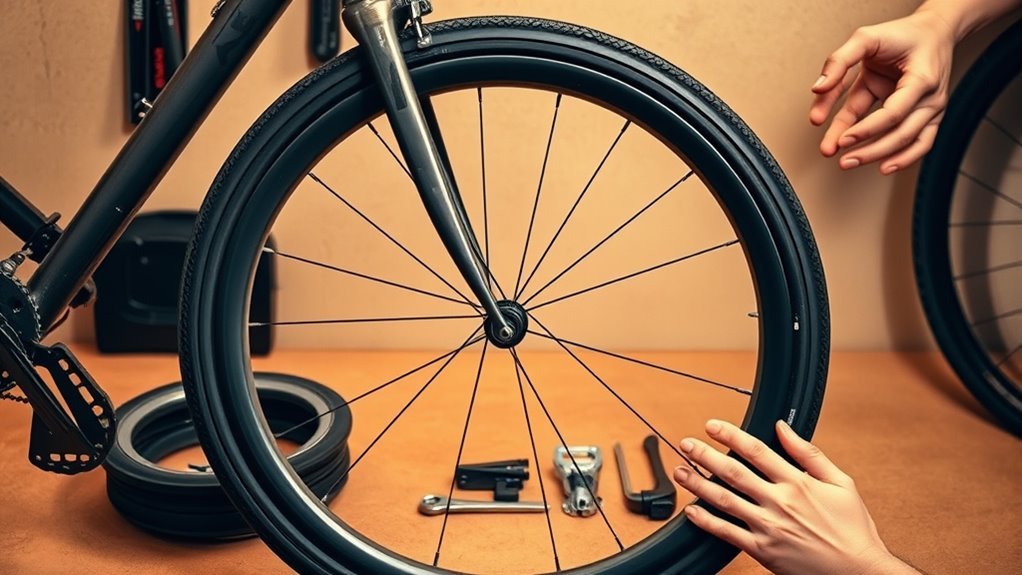
Remove the Wheel for a Tube Change
Flip your bike upside down or shift into the outer gear and hang it so you can access the wheel easily. Begin by confirming proper wheel maintenance and performing any required gear adjustment so the drivetrain is stable. Disengage the brakes if they obstruct wheel removal: release cable tension with a wrench or open the brake mechanism. For quick-release axles, flip the lever and unscrew slightly; for bolt-on axles, remove the nuts with the correct wrench. When removing a rear wheel, guide the chain off the gear cassette and clear it from the gear discs to avoid damage. Withdraw the wheel vertically, keeping it aligned to avoid bending spokes. Place the detached wheel on a clean, flat surface ready for the tube change.
Deflate the Tire and Break the Bead
Start by fully deflating the tire: press the valve stem to release all air until the tire is completely flat, which makes it much easier to work with. Once flat, perform bead breaking by pushing the tire bead toward the rim’s center channel; this releases the bead’s seating force. Work around the circumference, applying steady, even pressure with your hands for consistent tire handling. If your hands can’t move the bead, use a plastic tire lever to pry a short section away from the rim without cutting or scratching. After loosening one side, repeat opposite side until both beads sit in the rim’s well. Confirm both sides are free before proceeding. Maintain controlled force to avoid rim damage and preserve the tube and tire for the next step.
Remove the Old Tube Without Damage
Make sure the tire is fully deflated before you start so the bead moves freely and the tube can’t be pinched. Use plastic tire levers to pry the bead over the rim, beginning opposite the valve and working around the wheel in small increments. When the bead is free, pull the tube out carefully and push the valve stem through the rim to release it without snagging.
Deflate Completely First
Fully deflate the tire by pressing the valve stem until no air escapes, then push the tire bead toward the rim center on one side to break it free; this lets you use plastic levers to pry the bead over the rim opposite the valve, withdraw the valve stem gently, and remove the old tube without nicking the stem or the tire. You’ll use controlled deflation techniques to eliminate tire pressure completely before any manipulation. Break the bead manually, confirming the bead sits in the rim well. Pry starting opposite the valve to reduce stress on the stem. Remove the tube by pulling the valve straight through the rim hole. Inspect the tire and rim for debris or sharp objects before fitting a new tube.
- Relief — you avoided a pinch flat.
- Confidence — precise control.
- Control — safe handling.
- Readiness — tire’s clean and inspected.
Use Tire Levers Carefully
Although you’ve already deflated and worked the bead by hand, use plastic tire levers to remove the tube without damaging the rim or tire: fully deflate first, then break the bead on one side with your hands. Choose lever material choices that favor plastic over metal to prevent rim and tire abrasion. Insert one plastic lever under the tire bead and hook it on a spoke to hold position. Use a second lever to pry the bead over the rim, advancing both levers around the circumference with controlled, sequential motions. Apply even pressure; don’t lever against spokes or brake components. Once the tire is off, gently pull the valve stem through the rim to free the tube and inspect for retained debris or sharp objects. Use these tire lever techniques methodically.
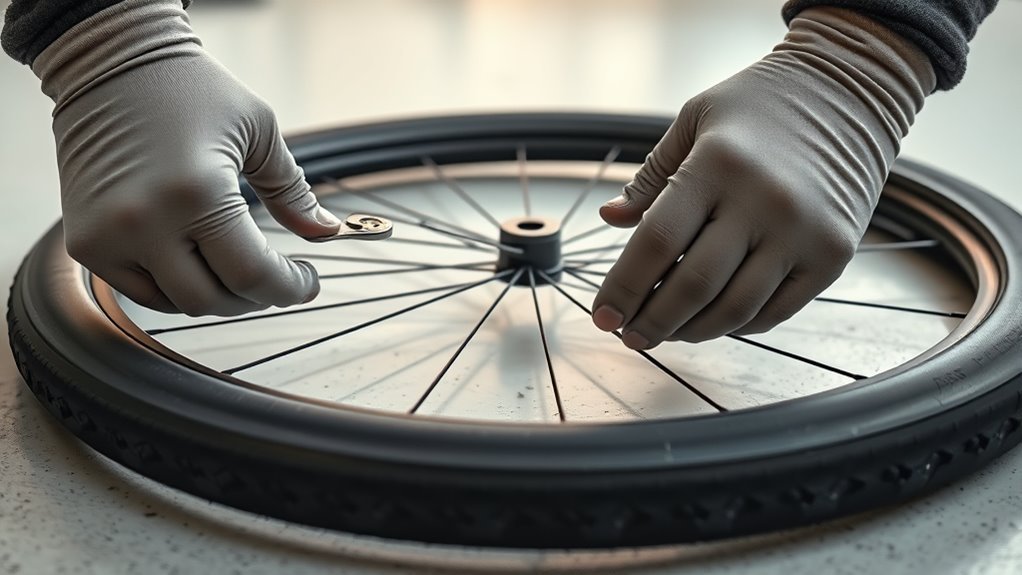
Inspect Tire, Rim, and Rim Strip

Before you fit a new tube, inspect the tire, rim, and rim strip carefully to prevent avoidable punctures: follow tire maintenance tips and rim care essentials methodically. Inflate the removed tube to find leaks; patch small punctures, replace large ones. Run your fingers and a cloth inside the tire casing to remove embedded glass, nails, or sharp debris; check tread and sidewalls for cuts or significant wear. Verify the rim strip covers all spoke nipple holes and isn’t cracked or shifted. Examine the rim for burrs, sharp edges, or protruding spokes that could abrade the tube during installation or inflation.
- Feel the rim for sharp spots to avoid anger and frustration.
- Scan the tire to prevent future disappointment.
- Check the strip to stop sudden punctures.
- Test the tube to restore confidence.
Fit the New Tube and Straighten Valve
Slightly inflate the new tube so it holds shape, then feed the valve stem through the rim hole and align it perfectly straight. Check the tube for twists as you tuck it into the rim and work the bead evenly around the valve. Confirm the valve is accessible and the bead is seated before proceeding to fully inflate.
Align Valve Stem Straight
When you fit the new tube, align the valve stem vertically with the rim hole so it points straight toward the hub; this prevents kinks, makes inflation easier, and reduces the risk of future flats. Position the valve before seating the tube, using tube installation techniques to avoid pinching. Guarantee the stem sits flush and won’t lean under pressure. Keep it accessible after mounting the tire so you can inflate without struggle. Use valve maintenance tips: check for secure seating, confirm no lateral force, and verify the valve core is tight. After seating both beads, re-check alignment and hold the valve steady while partially inflating to confirm it remains straight.
- Relief — prevents sudden flats.
- Confidence — simplifies inflation.
- Control — avoids pinches.
- Safety — prolongs tube life.
Check Tube For Twists
After seating the valve stem straight in the rim, inspect the new tube for twists by laying it flat along the tire’s interior and visually tracing both seams; rotate the tube until it sits smoothly with no overlaps or kinks. With the valve stem aligned, gently feed the tube into the tire cavity, watching that the tube lays evenly and that no section is pinched between bead and rim. Perform a systematic tube inspection: follow seams, feel for bunching, and confirm the valve base remains perpendicular to the rim. This twist prevention routine reduces pinch flats and uneven seating. Partially inflate the tube to give it shape, recheck for twists, then proceed to final inflation to the recommended pressure.
Seat Bead Around Valve
Insert the valve stem straight through the rim hole, keeping it aligned toward the hub, then tuck the tube fully into the tire cavity without twists or pinches. Seat the near bead first, verifying the tube sits clear of the rim bed. Work the far bead toward the rim, using bead seating tips: hand pressure first, tire levers only when necessary. Pay special attention at the valve area; use valve alignment techniques to keep the stem perpendicular and free of lateral stress. Once the bead is fully on, rotate the wheel slowly while checking for pinches and that the bead sits evenly in the rim well. Inflate slightly, confirm the valve remains straight, then finish inflating to riding pressure.
- Relief
- Confidence
- Precision
- Readiness
Seat the Tire Beads Evenly on Rim
Seat the tire beads evenly in the rim so the bead line sits flush all the way around, preventing uneven wear or a sudden failure. You’ll check tire bead alignment visually, confirming the bead line is consistent with no bulges or dips. Use bead seating techniques: work the bead into the rim with your hands, alternating sides to keep both beads even. If the bead resists, apply soapy water sparingly to reduce friction and ease positioning. Inflate slowly while observing the bead; listen for hissing that indicates escaping air from an unseated section. Keep adjusting by pushing the bead toward the rim center with your thumbs until uniform. Finally, inspect both sides for symmetry before moving to final pressure steps.
Inflate Tube to Recommended Pressure and Test
Pump the new tube to the tire’s recommended pressure—shown on the tire sidewall—using a pump with a reliable gauge so you can monitor PSI precisely. You’ll apply controlled inflation techniques: pump in short bursts, watch the gauge, and stop as you approach the target tube pressure. Rotate the wheel and inspect bead seating visually; the tire should sit uniformly on the rim without gaps. Check for bulges or unevenness by running your hands along the tire.
- Relief — seeing the bead seated correctly reassures you’ve done it right.
- Confidence — precise tube pressure gives predictable handling.
- Alertness — detecting a small leak early prevents roadside failure.
- Satisfaction — a steady pressure on a short test ride confirms success.
Reinstall the Wheel, Check Brakes, Troubleshoot
Place the wheel back into the dropouts and secure the quick-release or axle nuts, making sure the wheel sits centered in the frame and the axle is fully seated. Confirm wheel alignment by visually checking equal clearance between rim and frame or fork. Tighten fasteners to recommended torque or firm hand tension on a quick-release. Squeeze the brake levers and observe pad contact; verify brake adjustment so pads hit the rim squarely and clear on release. Spin the wheel to confirm it rotates freely without rubbing. If rubbing occurs, loosen mounting, realign the wheel, retighten, and recheck. If brakes feel spongy or fail to engage, increase cable tension incrementally or adjust pad position, then test again before riding.
Frequently Asked Questions
How to Change a Bike Tire for Beginners?
You remove the wheel, deflate the tire, lever the tire off, inspect or replace the tube, reseat the tire, inflate to pressure, reinstall the wheel; follow tire maintenance tips and use basic beginner cycling gear for a safe repair.
How to Change a Bike Tube With No Tools?
Think of it as a gentle surgery: you’ll fully deflate, break the bead, perform tube removal by easing the valve out, seat the new tube with valve through the rim, reseat the tire, then complete tire inflation.
Conclusion
You’ve learned a clear, methodical sequence to change a bike tube; don’t worry if it feels technical at first — you’ll get faster with practice. Follow the tool prep, valve check, wheel removal, bead break, tube swap, seating, inflation, and reinstall steps in order, and you’ll avoid common mistakes. Even if you’re nervous about damaging a new tube, work deliberately and use tire levers correctly; competence comes from repetition and attention to detail.
Related Articles

How to Read Motorcycle Tire Size: Complete Breakdown
Often misunderstood, this guide decodes motorcycle tire sizes like 180/55ZR17—learn what each number and letter means to ensure safe, perfect fitment.
Read More
How to Read Bicycle Tire Size: Inches, Metric & ISO
Get the essential trick to decoding ETRTO/ISO codes so you’ll always pick rim-compatible tyres—discover what to check next.
Read More
How to Read Tire Size Numbers: Decode the Sidewall
Step-by-step guide to decode tire sidewalls—sizes, load, speed, DOT and winter symbols—so you’ll know what fits and when to replace.
Read More