
Toyota Tundra Death Wobble: Causes and How Tires Play a Role
A Toyota Tundra that shakes near 60 mph needs prompt attention, but the cause is not always a true “death wobble.” The problem may come from a tire or wheel, brake pulsation, worn steering or suspension parts, or the driveline. The key is to note exactly when the vibration starts, where you feel it, and whether braking or acceleration changes it before replacing any parts.
Quick Answer
A Toyota Tundra shake around 60 mph is most often diagnosed by checking the tires, wheel balance, wheel runout, and installation first. If it happens only while braking, inspect the brake rotors, hubs, and lug-nut torque. If it appears during acceleration or through the seat, inspect the driveline.
Key Takeaways
- “Death wobble” is a common search term, but a Tundra’s highway-speed shake should be treated as an undiagnosed vibration until its trigger is identified.
- A shake during steady cruising points first toward tires, wheels, centering, balance, or runout.
- A shake only while braking points more strongly toward brake rotor, hub, or wheel-installation problems.
- A vibration under acceleration or through the seat and floor may come from the driveshaft, U-joints, CV joints, or driveline angles.
- Do not buy shocks, bushings, or steering parts until inspection confirms that those parts are worn.
At a Glance
| Time Required | 10–20 minutes for basic checks; longer for a professional road test and chassis inspection |
| Difficulty | Easy for pressure and visual checks; advanced measurements require a qualified technician |
| Tools Needed | Tire-pressure gauge, flashlight, model-correct manual, and a calibrated torque wrench; shops may use a balancer, alignment rack, dial indicator, and chassis-lift equipment |
| Cost | Basic checks may cost nothing; balancing, alignment, brake work, and component replacement vary by location and the confirmed fault |
Identifying and Solving Toyota Tundra Wobble at 60 MPH
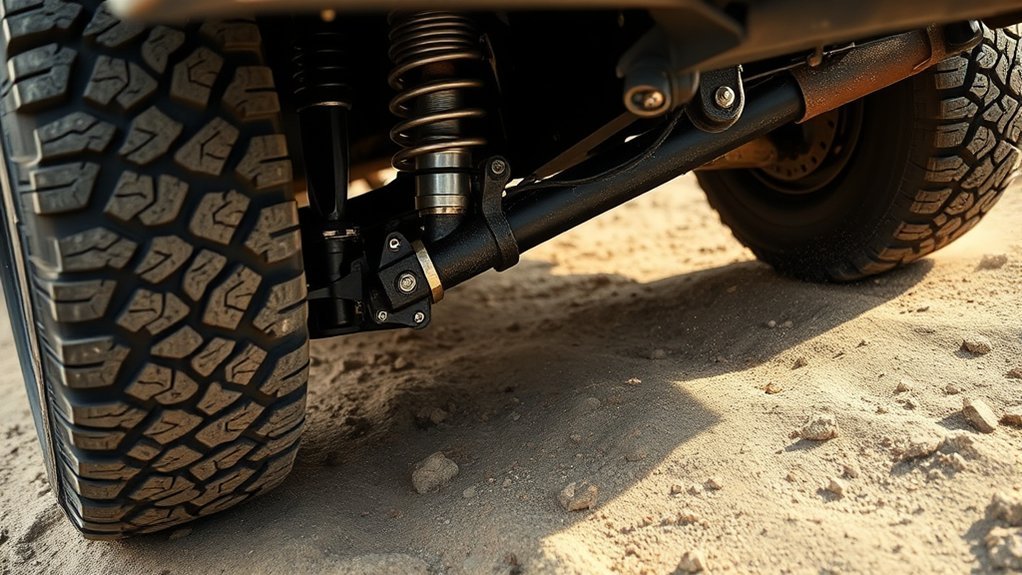
The phrase death wobble usually refers to a rapid, sustained side-to-side steering oscillation. Tundras use independent front suspension rather than the solid-beam front-axle layout most closely associated with classic death wobble. Toyota describes a double-A-arm front suspension on earlier models and a redesigned double-wishbone system on the 2022 generation. For that reason, a Tundra complaint near 60 mph is better described first as a steering shimmy, brake pulsation, or vehicle vibration.
Before testing, record the truck’s exact model year, 2WD or 4WD configuration, tire size, wheel size, recent tire service, and any lift, leveling kit, spacers, or aftermarket control arms. Also note whether the truck is unloaded, towing, or carrying cargo. These details can change the likely cause and the correct specifications.
Warning: Stop driving and arrange professional inspection if the shaking is violent, a tire has a bulge or exposed cord, a wheel appears loose, the steering has sudden free play, the truck pulls sharply, or you hear grinding or clunking. Never crawl beneath a truck supported only by a jack.
[Products Worth Considering]

EVOULTES heavy duty tire inflator with an integrated gauge delivers accurate pressure readings from 10–120 PSI, helping you inflate, deflate, and check tires in one tool. The 16.5-inch extended dual-head air chuck with swivel base reaches hard-to-access dual wheel valves on trucks and RVs. A brass trigger core and side-mounted air release valve make operation smooth, with standard 1/4" NPT threading and quick-connect compatibility for easy setup.

This VEVOR tire bead breaker uses a slide-hammer impact and wedge tip to separate tire beads from rims quickly and efficiently without damaging hub surfaces. The long handle and sturdy steel construction help reduce user strain while providing reliable, portable tire changing for cars, trucks, and more. Ideal for home mechanics and repair shops handling multiple vehicle tire sizes.

The JACO FlowPro Tire Inflator measures, inflates, and airs down tires up to 100 PSI with battery-free operation and ±2% accuracy after calibration. It features a glowing pressure dial for night visibility, a heavy-duty steel build with a hybrid hose, and a precision push-to-inflate thumb trigger. The patented Lightning Air Chuck locks on for a secure seal, and the kit includes quick-connect hardware for easy inline use with your air compressor.
Match the Vibration to the Driving Condition
- Steady cruising near 55–70 mph: Start with tire pressure, tire damage, lost balance weights, wheel centering, wheel runout, and tire-force variation.
- Only while braking: Check rotor runout or thickness variation, hub cleanliness, brake condition, and uneven lug-nut torque.
- Mainly during acceleration: Inspect the driveshaft, U-joints, CV joints, engine or transmission mounts, and driveline angles.
- Mostly through the steering wheel: Give extra attention to the front tire-and-wheel assemblies, front brakes, steering linkage, and front suspension.
- Mostly through the seat or floor: Include the rear wheels, rear brakes, driveshaft, and rear suspension in the diagnosis.
- Started after tire or wheel service: Recheck wheel seating, centering, balance, torque, tire direction, and pressure before replacing suspension parts.
Pro Tip: Write down the speed range, road surface, whether the brakes are applied, and where you feel the vibration. A repeatable symptom pattern is more useful to a technician than simply reporting that the truck “wobbles.”
Common Causes of Tundra Steering Shake at 60 MPH
No single cause explains every Tundra vibration. The most efficient approach is to inspect low-cost and high-probability items first, then measure the brake, steering, suspension, and driveline systems as the symptom requires.
Tire Imbalance, Damage, and Uneven Wear
Tire and wheel problems are a common starting point when a vibration appears within a narrow highway-speed range. Check all four tires when cold and use the pressure listed on the driver-side Tire and Loading Information label, not the maximum pressure molded into the tire sidewall. The National Highway Traffic Safety Administration recommends regular pressure, tread, damage, rotation, balance, and alignment checks.
Look for missing balance weights, uneven tread, flat spots, bulges, cuts, exposed cords, cupping, or a tread surface that appears to move from side to side as the wheel turns. A tire can look acceptable while still having internal belt damage or excessive radial-force variation.
A normal spin balance corrects weight imbalance. A road-force balance adds a load roller that can reveal tire stiffness variation, wheel runout, centering problems, or a tire-and-wheel combination that remains rough after an ordinary balance.
Wheel Runout, Centering, and Installation
A bent wheel, corrosion between the wheel and hub, debris on the mounting surfaces, or an incorrectly centered aftermarket wheel can create a speed-related vibration. This is especially important after installing non-original wheels, spacers, or hub-centric rings.
Wheel runout should be measured rather than judged by sight alone. The technician should also confirm that the wheel seats fully against a clean hub and that the wheel hardware matches the wheel design.
Brake Rotor and Hub Problems
If the shake appears only when the brake pedal is applied, focus on the braking system before blaming tire balance. The more precise terms are rotor lateral runout and disc-thickness variation, rather than assuming that a rotor is visibly warped.
Toyota issued Tech Tip T-TT-0404-16 for certain 2013–2017 Tundras with vibration or pulsation during light-to-hard braking. The symptom could be felt in the steering wheel, brake pedal, seat, or entire vehicle. That bulletin is historical and model-year-specific, so it should guide diagnosis rather than be treated as proof that every Tundra needs brake parts.
Dirty hub faces, rust, incorrect wheel installation, or uneven wheel torque can also affect rotor runout. Toyota’s brake-vibration and lug-nut torque bulletin for listed 2015–2018 vehicles states that even one over- or under-torqued lug nut can contribute to vibration.
Steering and Suspension Component Wear
Worn tie-rod ends, ball joints, control-arm bushings, wheel bearings, steering-rack mounts, or damaged suspension parts can allow movement that makes another vibration feel worse. Leaking or weak shocks may also reduce control after bumps, but replacing shocks will not correct an out-of-round tire, bent wheel, brake runout, or driveshaft problem.
A simple bounce test can reveal obvious lack of damping, but it cannot prove that every shock or strut is healthy. A proper inspection checks for leakage, damaged mounts, looseness, binding, uneven ride height, and continued oscillation after a bump.
Driveline and Powertrain Vibration
A vibration that is strongest through the floor or seat, changes with throttle, or began after lifting the truck may come from the driveline. Possible causes include driveshaft imbalance, damaged or binding U-joints, worn CV joints, incorrect operating angles, or worn mounts.
A driveline vibration can occur at the same road speed as a tire vibration, so speed alone does not identify the source. A technician may need to compare vibration frequency with wheel, driveshaft, and engine speed.
The Impact of Tire Condition on Steering Stability
Tire condition directly affects ride quality and steering feel. Use these checks before authorizing more expensive repairs:
- Correct cold pressure: Set pressure from the vehicle label or the exact owner’s manual available through Toyota Owners.
- Matching specifications: Confirm that all tires are an approved size and suitable for the truck’s load. Large differences in model, construction, wear, or pressure can change handling.
- Tread and sidewall condition: Replace tires with bulges, exposed cords, separation, serious cracking, or other unsafe damage.
- Even wear: Feathering, cupping, or one-sided wear can point toward pressure, balance, alignment, or worn-component problems.
- Clean wheels: Remove packed mud, snow, ice, or stones that may create imbalance.
A tire can be perfectly balanced by weight and still cause vibration if it is out of round, damaged, mounted off-center, or has excessive force variation.
Diagnostic Steps for Addressing Wobble Issues
-
Confirm whether the truck is safe to inspect or drive.
Do not perform a highway road test if a tire is visibly damaged, a wheel is loose, steering play is severe, or the vibration is violent.
-
Record the symptom.
Note the exact speed range, whether the vibration appears during cruising, braking, acceleration, coasting, turning, or towing, and whether it is felt in the steering wheel, brake pedal, seat, or floor.
-
Check cold tire pressure and visible condition.
Inspect every tire, including the inside sidewall and tread where practical. Confirm matching approved sizes and an appropriate load rating.
-
Inspect the wheels and mounting surfaces.
Look for bends, cracks, packed debris, missing weights, loose hardware, incorrect spacers, and signs that a wheel is not centered or fully seated.
-
Verify wheel torque correctly.
Use the value for the exact model year and wheel. Toyota advises tightening in a star pattern with a calibrated torque wrench or torque stick. Do not use an impact wrench for final tightening.
-
Balance and measure the tire-and-wheel assemblies.
Begin with a careful dynamic balance. If the problem remains, request wheel runout and road-force measurements rather than repeating an ordinary balance without additional testing.
-
Check alignment and tire wear together.
Alignment can correct out-of-spec toe, camber, or caster, but it cannot balance a tire or repair a bent wheel. Inspect loose or damaged parts before aligning the truck.
-
Inspect the steering and suspension.
A qualified technician should check tie rods, ball joints, control arms, bushings, wheel bearings, steering mounts, shock absorbers, springs, and fasteners using model-correct procedures and limits.
-
Inspect the brakes if braking triggers the shake.
Measure rotor runout and thickness variation, inspect the hub and mating surfaces, and confirm even wheel installation. Do not replace rotors based only on a steering-wheel shake that also occurs without braking.
-
Inspect the driveline if throttle or floor vibration is involved.
Check driveshaft condition and balance, U-joints, CV joints, mounts, and angles, especially after suspension or ride-height modifications.
-
Check model-specific information.
Search the exact year, make, and model for manufacturer communications and enter the truck’s VIN in the NHTSA recall lookup. A bulletin helps with diagnosis, while an open safety recall requires the manufacturer’s remedy.
Note: If the truck has a lift, leveling kit, wheel spacers, oversized tires, or a large change in wheel offset, tell the technician before diagnosis. Modified geometry and heavier tire-and-wheel assemblies can expose marginal balance, alignment, bearing, or driveline problems.
Affordable Solutions for Wobble Problems
The most affordable repair is the one based on a confirmed cause. Begin with pressure, visible damage, wheel cleanliness, installation, and symptom documentation before buying suspension or brake parts.
Affordable Fixes Overview
- Correct tire pressure: Use the vehicle label and check the tires cold.
- Remove wheel debris: Mud, snow, or ice can create sudden imbalance.
- Correct wheel installation: Clean mating surfaces, use correct hardware, and apply model-correct torque evenly.
- Rotate only when appropriate: Follow the model’s maintenance guide and tire configuration. Rotation may help identify whether the vibration moves with a tire, but it will not repair a damaged tire.
- Balance before replacing chassis parts: A careful balance and runout check are usually less costly than replacing shocks, control arms, or steering components without evidence.
- Repair only confirmed wear: Replace loose joints, damaged bushings, failed bearings, worn dampers, or brake components after inspection or measurement confirms the problem.
Tire Balancing Techniques
A standard dynamic balance corrects weight differences in the tire-and-wheel assembly. The wheel must be mounted correctly on the balancer, and the machine and adapters must be suitable for the wheel.
If repeated standard balancing does not solve a narrow speed-range vibration, ask for:
- Wheel and tire radial runout measurements
- Lateral wheel runout measurements
- Road-force measurement
- Verification that the assembly is centered correctly
- Inspection for an internally damaged or out-of-round tire
- Force matching, where appropriate, by repositioning the tire on the wheel
Rebalance after tire replacement, wheel repair, or any work that changes the tire’s position on the wheel. Suspension work alone does not always require balancing, but it may require an alignment if geometry was disturbed.
Alignment Importance Explained
Alignment affects tracking, steering feel, and tire wear. Incorrect toe can create feathered tread and instability, while caster and camber changes may affect straight-line behavior and steering return.
However, alignment does not correct:
- A missing wheel weight
- A bent or incorrectly centered wheel
- A separated or out-of-round tire
- Brake rotor runout
- A loose steering joint
- A damaged wheel bearing
- A driveshaft vibration
Inspect for loose or damaged parts first. Then align the truck to the correct model-specific specification, accounting for approved modifications when applicable.
Why Regular Tire Maintenance Matters
Regular pressure checks, rotation where permitted, balancing, and inspections can reveal problems before they become severe. Watch for a new steering vibration, increased road noise, pressure loss, pulling, or an unusual tread pattern.
Use the maintenance schedule for the exact model year rather than a universal interval. Recheck the tires and wheels after a hard pothole impact, curb strike, off-road trip, or wheel service. Also confirm that replacement tires meet the vehicle manufacturer’s size and load requirements.
[Products Worth Considering]

This portable cordless tire inflator delivers up to 160 PSI with fast 17 L/min airflow to help you quickly top up tires and get back on the road. It features dual power mode, running on a 21V rechargeable battery or a 12V DC adapter for convenient roadside use. An automatic shut-off with digital pressure gauge helps prevent overinflation, and a built-in LED light improves visibility in low-light conditions.

This tire repair patch tool kit helps you quickly seal small punctures using upgraded mushroom plugs and a built-in roller system that presses for even penetration. The tungsten buffing wheel and HSS twist drill bits prepare the damaged surface for stronger adhesion, while the crown-angle friendly plugs are designed to keep water and debris out. Ideal for puncture repairs on many vehicle types, from cars and trucks to bikes and scooters.
Upgrades and Modifications to Enhance Ride Quality
Upgrades should follow diagnosis, not replace it. Quality shocks can improve damping when the original units are worn, but they are not a cure for wheel imbalance, tire-force variation, brake pulsation, or loose steering parts.
- Restore worn parts first: Replace confirmed failed joints, bushings, bearings, mounts, shocks, or springs with model-correct components.
- Preserve safe geometry: After a lift or leveling change, verify alignment, control-arm position, steering travel, brake-line clearance, and driveline angles.
- Control tire-and-wheel weight: Large, heavy assemblies may require more precise balancing and can increase loads on bearings and suspension parts.
- Use correct wheel fitment: Verify diameter, width, offset, center bore, hardware seat type, and load rating.
- Align after geometry changes: Any modification that changes ride height or control-arm position should be followed by inspection and a model-appropriate alignment.
Do not add a steering stabilizer or replace several suspension parts merely to mask a vibration. The original source should still be found and corrected.
Proven Solutions From the Community
Owner reports can help identify patterns, but an anecdote is not proof that the same repair fits another truck. Commonly reported solutions include correcting tire balance, replacing a defective tire, repairing a bent wheel, cleaning hub surfaces, correcting brake runout, restoring proper wheel torque, and replacing confirmed worn steering or suspension parts.
Use community reports to create a test list rather than a shopping list. Ask the shop to document:
- The condition that reproduces the vibration
- Balance and road-force results for each assembly
- Wheel and rotor runout measurements
- Any measured steering or suspension play
- Alignment readings before and after adjustment
- The reason a recommended part has failed
This approach reduces repeated repairs and helps distinguish a tire-and-wheel problem from brake, chassis, or driveline vibration.
Frequently Asked Questions
Why does my Tundra feel wobbly when the tires look fine?
A tire may have internal damage, excessive force variation, a flat spot, or an out-of-round condition that is not obvious during a visual inspection. The problem may also come from a bent or off-center wheel, brake runout, worn steering parts, a wheel bearing, or the driveline.
What is the number one cause of Toyota Tundra death wobble?
There is no single universal cause. For a shake that occurs only within a steady highway-speed range, tire and wheel checks are a sensible starting point. A shake only during braking, acceleration, or turning requires a different diagnostic path.
Can a wheel alignment fix a Tundra shake at 60 mph?
Alignment can help when incorrect geometry causes unstable tracking or irregular tire wear. It cannot balance a tire, straighten a wheel, repair tire separation, correct brake rotor runout, tighten a loose joint, or fix a driveshaft problem.
Why does the steering wheel shake only when I brake?
Brake-only shaking commonly directs diagnosis toward rotor runout or thickness variation, hub cleanliness, brake condition, and wheel installation. The rotor and hub should be measured before parts are replaced.
Do I need road-force balancing?
Not every vibration requires it. Start with correct pressure, inspection, wheel seating, and a careful dynamic balance. Road-force testing is useful when the vibration remains, the tire appears out of round, or ordinary balancing repeatedly fails to produce a smooth ride.
Is it safe to drive a Tundra that shakes at highway speed?
A mild repeatable vibration still needs inspection. Do not continue driving if the shake becomes violent, the steering feels loose, the truck pulls suddenly, a tire is damaged, a wheel may be loose, or grinding or clunking is present. Slow down smoothly and stop in a safe location.
Conclusion
A Toyota Tundra shake near 60 mph is a symptom, not a diagnosis. Start with tire pressure, condition, wheel seating, balance, and runout. Then follow the trigger: inspect the brakes when the shake occurs during braking, the steering and suspension when looseness is present, and the driveline when the vibration changes with acceleration or is strongest through the floor.
Avoid replacing several parts based on guesses or forum reports. Record the conditions, use the exact model-year specifications, measure the suspected components, and repair the confirmed fault. If the shaking is severe or accompanied by tire damage, loose steering, grinding, or a loose wheel, stop driving and have the truck inspected.
Sources
- NHTSA TireWise — tire pressure, damage, tread, balance, alignment, rotation, and vibration guidance
- Toyota: 2019 Tundra Engineering Overview — earlier-model double-A-arm front suspension information
- Toyota: Next-Generation 2022 Tundra — redesigned chassis and double-wishbone front suspension information
- Toyota Tech Tip T-TT-0404-16 — braking vibration and pulsation on listed 2013–2017 Tundras
- Toyota TSB T-SB-0313-17 — brake vibration, lug-nut torque, star-pattern tightening, and calibrated tools
- NHTSA Recall Lookup — VIN-specific open recall and manufacturer-communication searches

Related Articles
Toyota Tundra Tire and Wheel Package: What to Consider Before Buying
Unlock the secrets to choosing the perfect tire and wheel package for your Toyota Tundra—essential tips await to enhance your ride.
Read More
Do Bigger Tires Void a Toyota Tundra Warranty? Magnuson-Moss Act Explained
Bigger tires might not void your Toyota Tundra warranty, but understanding the Magnuson-Moss Act is crucial—discover how to protect your investment effectively.
Read More
Toyota Tundra Tire Rack Setup: Garage Storage Ideas for Seasonal Sets
Better tire storage for your Toyota Tundra awaits—discover essential tips to maximize space and protect your seasonal sets in the garage!
Read More