
How to Store Winter Tires for Your Hyundai Sonata
You should clean each winter tire and wheel with detergent, dry them completely, and inspect for cuts or uneven wear. Mark each tire with its original position (FL/FR/RL/RR) and photograph placement. Seal tires individually in airtight, puncture-resistant bags with excess air removed, then store upright in a cool, dark, well-ventilated space (basement or climate-controlled garage). Rotate or re-stack periodically, avoid heat and sunlight, and check seals. More detailed steps follow.
Quick Checklist: Store Winter Tires (Short Steps)
Start by cleaning each winter tire with detergent and water and drying them completely. Next, mark each tire’s original position (front right, front left, rear right, rear left) so you can restore proper rotation and keep wear patterns aligned. Inspect for damage, then place each tire in a large airtight plastic bag and evacuate air to limit oil loss. Choose a cool, dry, ventilated storage location away from direct sunlight and heat sources. If you must stack, do so sparingly and stabilize the pile. Whenever possible, store tires upright. These steps preserve tread and rubber so your tires stay ready for the next season.
Prepare and Label Hyundai Sonata Tires
Mark each tire with its exact Sonata position (e.g., “front right,” “rear left”) so you’ll maintain correct rotation at reinstall. Clean tires and rims with detergent and water, then dry completely to prevent corrosion or mold during storage. Place each tire in a large airtight bag, expel excess air, and note the date so you can monitor age and condition.
Mark Tire Positions
When you remove the winter tires from your Hyundai Sonata, clearly label each one with its original position (front left, front right, rear left, rear right) using chalk or a washable marker so you can reinstall them in the same locations. Mark tire positions on the sidewall near the tread edge where writing won’t rub off during brief handling. Use concise codes (FL, FR, RL, RR) and record a photo of wheel placement on the vehicle for backup. Tire labeling supports correct tire rotation patterns and preserves balanced wear, extending service life. Place marks where routine cleaning or storage won’t erase them. If needed, add a removable tag on the valve stem.
Clean And Dry
Before storing your Hyundai Sonata’s winter tires, clean each tire and wheel with a detergent-and-water solution to remove road grime, salt, and brake dust. Rinse and dry thoroughly to eliminate moisture that can cause rubber degradation or corrosion. You’ll mark positions first, then execute a strict cleaning and drying routine. Work methodically: wash, inspect, dry.
- Dry all tire surfaces and wheel wells. Trapped moisture accelerates degradation.
- Seal each tire in a large airtight plastic bag, expelling air to protect the rubber and slow natural oil loss.
- Store in a cool, dry, ventilated spot away from sunlight and heat to prevent UV damage and maintain longevity.
Clean and Dry Tires and Wheels
Although cleaning may seem routine, you should wash each tire and wheel with a detergent-and-water solution to remove salt, grime, and road contaminants that can accelerate deterioration. For disciplined tire maintenance, scrub tread and sidewalls with a stiff brush, rinse thoroughly, and inspect for cuts, embedded debris, or uneven wear. If tires are mounted, clean alloy or steel wheels to remove brake dust and road salts that cause corrosion.
Drying is critical. Use clean towels to remove surface water, then air-dry in a ventilated area until completely moisture-free. Mark each tire’s position (front left, rear right) to preserve rotation history and simplify reinstalling. Don’t apply dressings, solvents, or gloss agents. They can alter compound chemistry and undermine longevity. Follow a systematic cleaning checklist and a dry, controlled environment so your Sonata’s winter tires emerge from storage ready for safe driving when temperatures drop again.
Bag and Seal Tires to Prevent Ozone Damage
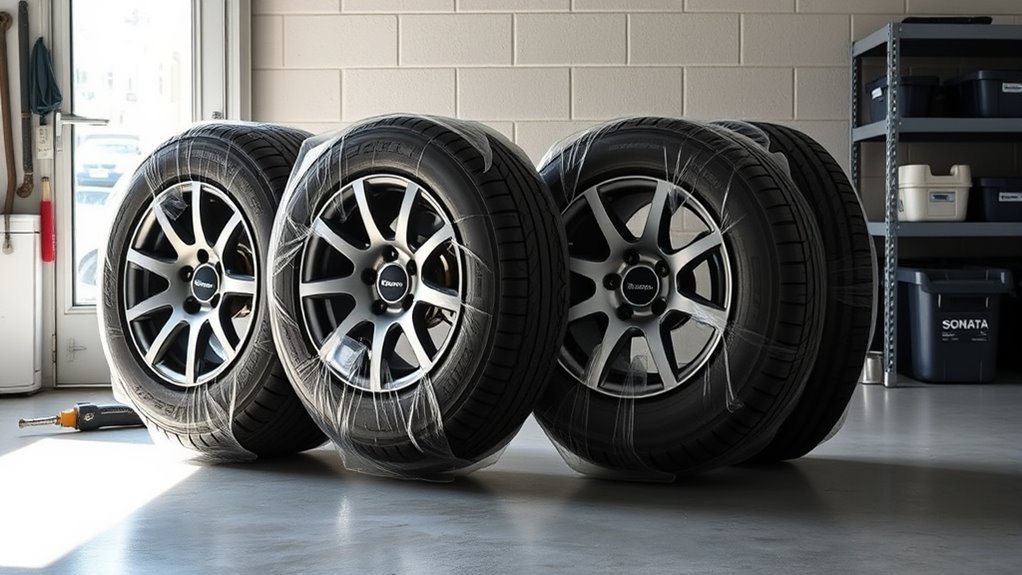
Seal each clean, dry tire in a large, airtight plastic bag to block ozone and other contaminants. Remove as much air as possible before sealing to limit oil evaporation and maintain rubber integrity. Check seals periodically for damage or leaks and store the bags in a cool, dry, ventilated area away from heat and sunlight.
Seal Tires In Bags
One clear step is to place each winter tire into a large, airtight plastic bag and remove as much air as you can to prevent oil evaporation and preserve the rubber’s integrity. You’ll protect the compound from ozone damage and limit degradation from nearby electric motors or generators. Use puncture-resistant bags, label each with its vehicle position for correct tire maintenance, and store them in a cool, dry place away from sunlight and heat sources.
- Choose thick, airtight bags resistant to tears and contaminants.
- Mark each bag with position labels (front left, rear right) for rotation.
- Keep sealed tires in a controlled environment following storage tips to extend service life.
Remove Air From Bags
Start by seating each tire inside a thick, airtight plastic bag and expel as much air as you can before sealing to minimize internal oxygen and ozone exposure. You’ll use deliberate air removal methods: either employ a shop vacuum to draw a near-complete vacuum or manually compress the tire and roll the bag to force air out. Choose vacuum sealing options when available for the cleanest, most consistent result. After extraction, fasten the bag mouth with plastic ties or industrial tape, creating an airtight seal. Inspect seals for leaks and resecure if needed. This approach reduces ozone contact that degrades rubber compounds, preserves tread integrity, and extends your tires’ lifespan.
Best Places in Your Home or Garage to Store Tires
A cool, dry, well-ventilated space away from sunlight and heat sources is best for storing your Sonata’s winter tires. Place them in a basement, climate-controlled garage alcove, or an interior utility room where temperatures stay moderate and airflow prevents moisture buildup. Choose ideal locations that keep tires off heat-absorbent surfaces like asphalt and away from reflective materials or HVAC units. Use airtight plastic bags with excess air removed to protect rubber quality and slow natural oil loss. Keep chemicals and contaminants out of the area.
- Basement with steady temperature and shelving or caddies for organization
- Climate-controlled garage alcove that’s ventilated and free of chemicals
- Interior utility room on pallets or mats to avoid direct floor heat
Assess storage options by accessibility, ventilation, and proximity to heat or solvents. Don’t overcrowd the space. Allow airflow and secure placement to prevent tipping. This approach protects tread compound and extends service life.
Ideal Temperature and How Long Can Winter Tires Be Stored?
Tires store best in steady, moderate temperatures. Aim for 50 to 70 degrees F. Do not let the area rise above 77 degrees F or drop below 40 degrees F for long periods. A basement or climate-controlled space works well.
Winter tires can stay in storage for several years when kept properly. Check the four-digit manufacture date code on the sidewall. Most manufacturers recommend inspecting tires after five years and replacing them by ten years, even if the tread looks fine. For more details, see the Continental tire storage guide.
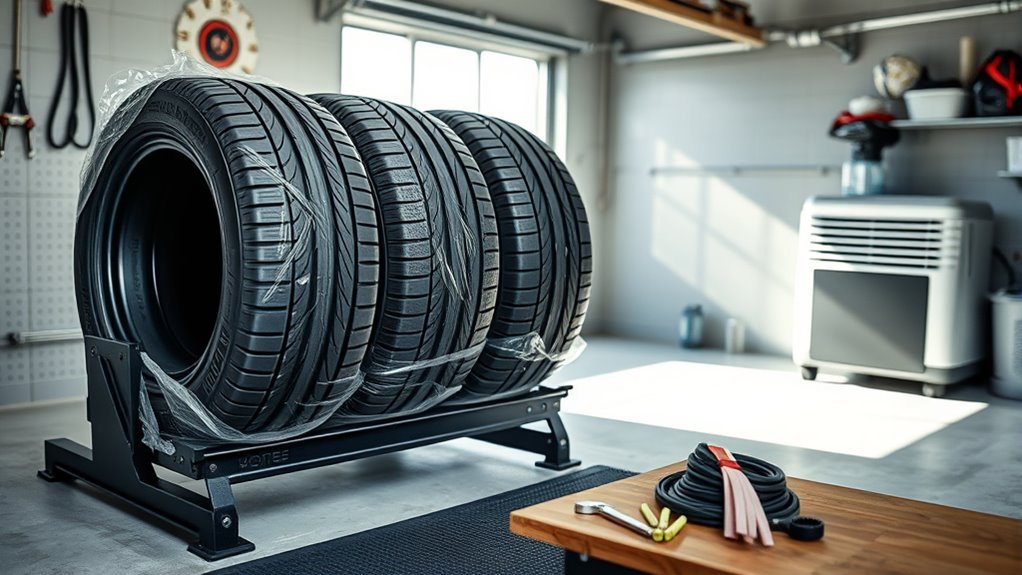
Store Tires: Stand, Stack, or Hang – When to Use Each
Decide whether to stand, stack, or hang your Sonata’s winter tires based on whether they’re mounted and how long you’ll store them. Stand unmounted tires upright to minimize stress and preserve tread shape. This is the preferred option for tire longevity and long-term storage. If you must stack unmounted tires, place them on their sides and never exceed four per stack to avoid deformation and tipping; mounted tires on rims should not be stacked more than two high. Rotate the bottom tire periodically for even load. Hang unmounted tires on sturdy wall hooks or a tire rack to keep their shape and remove floor pressure. Avoid hanging mounted tires (on rims), as this puts stress on the rim bead — mounted tires should be stood upright or stacked carefully instead. Before any method, clean and dry each tire to remove contaminants that accelerate degradation. Choose a cool, dry storage area away from sunlight and heat sources to protect rubber quality. These storage tips help you avoid premature wear and extend the useful life of your winter tires.
How to Check Tire Condition Before Storage
Never put tires into storage without a quick condition check first. Storing a damaged tire for several months will not fix the damage — it will make it worse. Before bagging and shelving your Hyundai Sonata’s winter tires, inspect each one carefully using these steps:
- Check tread depth — insert a tread depth gauge or a quarter coin into the tread groove. Winter tires should have at least 4/32 inch of tread remaining to be worth storing for next season. Below that, replace them rather than store them.
- Inspect sidewalls — run your hand and eye along the full sidewall of each tire. Look for cracking, crazing (fine surface cracks), cuts, or any visible bulges. A bulge means internal structural damage and the tire must be retired immediately.
- Look for embedded objects — check the tread face for nails, screws, glass, or stones pressed into the rubber. Remove debris carefully and check whether the object has penetrated deep enough to cause a slow leak.
- Examine bead area — the bead is the inner edge of the tire that seals against the rim. Look for cracking, distortion, or signs of previous bead separation.
- Check the manufacture date — find the four-digit DOT code on the sidewall. The first two digits are the week, the last two are the year. A tire made in week 24 of 2018 reads 2418. If the tire is approaching ten years old, consider replacing rather than storing.
Any tire with a bulge, deep sidewall cracking, or tread below 4/32 inch should not go back into storage — it should be replaced before next winter season.
Risks of Improper Winter Tire Storage
Storing tires incorrectly does not just shorten their lifespan — it can create a genuine safety risk when you reinstall them. Here are the main risks to understand:
- Flat spots — tires stored flat (lying on their side) under their own weight for months can develop permanent flat spots on the contact patch. This causes vibration and uneven rolling when you reinstall them. The risk is higher for heavier tires and increases with longer storage periods.
- Sidewall cracking from UV and ozone — exposure to sunlight or ozone sources (electric motors, generators, compressors) breaks down the antiozonant compounds in rubber. This causes surface cracking that starts cosmetic but becomes structural over time, leading to blowout risk.
- Rubber hardening — heat accelerates the vulcanization process in rubber, making the tire compound stiffer and less grippy. A hardened winter tire loses its snow and ice traction advantage even if the tread depth looks fine.
- Rim corrosion — storing mounted tires without cleaning brake dust and road salt off the wheels leads to corrosion at the bead seat. This can cause slow leaks or make the tire extremely difficult to dismount safely next season.
- Mold and moisture damage — storing tires in a damp area without proper drying introduces moisture that accelerates rubber deterioration and can cause mold growth on the tire surface and inside the wheel cavity.
- Oil evaporation — tires left unsealed in open air lose their plasticizing oils faster. This makes the rubber brittle earlier than its rated lifespan, reducing both wet and winter grip.
All of these risks are avoidable with clean, dry, sealed, upright storage in a stable indoor environment.
How to Store Winter Tires With Rims
Storing tires that are still mounted on their rims requires a slightly different approach than storing bare tires. Here is what to do:
- Clean the wheels thoroughly — brake dust and road salt left on alloy or steel rims will continue to corrode the wheel surface and the bead seat area during storage. Use a wheel-specific cleaner and a stiff brush to scrub all surfaces, including inside the barrel.
- Check and adjust tire pressure — reduce pressure by about 5 PSI from the standard specification before storing. This compensates for the slight pressure increase that can occur in warmer storage environments. Note: do not fully deflate. Keeping some pressure maintains the bead seal.
- Bag them individually — place the entire wheel-and-tire assembly into a large airtight tire bag. This is slightly more awkward with the rim attached but still important to block ozone.
- Store upright or stacked on a rim rack — mounted tires can be stood upright (which is preferred) or stacked horizontally no more than two high on a padded surface. A dedicated rim storage rack keeps them upright without any floor contact stress.
- Do not hang mounted tires — hanging a tire on its rim puts the full weight load on a single point of the rim edge, which can distort both the rim and the bead over months of storage.
- Label the bag, not just the tire — since the rim will hide the sidewall markings during storage, write the position code (FL, FR, RL, RR) clearly on the outside of the storage bag.
How to Avoid Tire Flat Spots During Storage
Flat spots form when a tire sits stationary under load or pressure in the same position for an extended period. Here is how to prevent them:
- Store tires upright, not flat — standing tires on their tread edge distributes the tire’s own weight evenly around the circumference. Storing them lying on their sidewall concentrates weight on one spot over time.
- For mounted tires, use a tire cradle or rack — a tire cradle supports the rim rather than the tire contact patch, eliminating flat spot risk entirely for mounted assemblies.
- Rotate stacked tires monthly — if you must stack unmounted tires, rotate which tire is on the bottom once a month to redistribute pressure points.
- Keep the storage area temperature stable — temperature swings cause the tire compound to soften and harden repeatedly, increasing flat spot risk. A stable indoor environment between 40 and 77 degrees F minimizes this effect.
- Avoid storing on concrete directly — cold concrete draws heat out of the tire, making the rubber stiffer and more prone to flat spotting. Place tires on a wooden pallet, rubber mat, or tire rack instead.
- Do not store tires under heavy objects — placing boxes, tools, or other heavy items on top of stored tires compresses the sidewall and contact area over time.
If your tires develop a minor flat spot despite proper storage, it usually corrects itself after driving a few miles once the rubber warms up. Severe or permanent flat spots require tire replacement.
Can I Store Winter Tires Vertically?
Yes — storing tires vertically (standing upright on their tread edge) is actually the recommended method for unmounted tires. It is superior to flat storage because it distributes the tire’s own weight evenly around the full circumference rather than concentrating it on one sidewall spot. This prevents flat spots and sidewall deformation. Make sure the tires are standing on a clean, level surface and cannot tip over. If space allows, lean them against a wall or use a vertical tire storage rack to keep them stable. For mounted tires (on rims), vertical storage is also preferred and can be combined with a freestanding rim rack for safety.
What Type of Storage Container or Bag Is Best for Tires?
The best option for most home storage situations is a purpose-built tire storage bag. These are available at auto parts stores and online for roughly $15 to $30 for a set of four. They are made from thicker polyethylene than standard garbage bags, are sized correctly for passenger car tires, and are designed to be sealed tightly after air removal. Key features to look for:
- Thickness of at least 3 mil — thinner bags puncture easily and will not maintain an airtight seal through a full storage season.
- Re-sealable or tie-able closure — look for bags with a fold-and-tie or zip closure that can be sealed tightly after you remove the air.
- Opaque or dark color — a black or dark bag blocks any residual light that may penetrate your storage area, adding an extra layer of UV protection.
- Labeled or labelable surface — some bags include a white panel for writing the tire position directly on the bag.
Avoid standard household garbage bags — they are too thin, often not fully airtight, and degrade faster than purpose-built options. Rigid plastic storage bins are not recommended either, as tires do not fit cleanly inside them and the bin itself can trap moisture if not ventilated.
Is It Safe to Store Tires in a Garage?
Yes, a garage is a safe and practical storage location for winter tires, with a few conditions. The main concerns in a garage environment are:
- Temperature extremes — an uninsulated garage can drop below 40 degrees F in winter and climb above 100 degrees F in summer. Both extremes stress rubber. If your garage is uninsulated, consider storing tires in a climate-controlled corner, a well-insulated cabinet, or moving them to a basement instead.
- Ozone sources — garage environments often contain compressors, battery chargers, electric motors, and power tools — all of which emit ozone. Store tires in sealed bags and keep them as far from these devices as possible.
- Chemical exposure — gasoline, solvents, paint, and motor oil stored in the same garage space can off-gas fumes that degrade rubber compounds over time. Keep tires away from these chemicals.
- Direct sunlight — if your garage has windows that let in afternoon sun, make sure stored tires are not in the path of direct sunlight. Use opaque bags and position tires away from windows.
A well-ventilated, insulated garage with the tires sealed in bags and placed away from heat sources and chemicals is a perfectly suitable storage environment.
How to Prepare Winter Tires for Summer After Storage
When winter ends and it is time to switch back to your summer or all-season tires, follow these steps before reinstalling or boxing up your winter set:
- Inspect each tire thoroughly — check tread depth, sidewall condition, and bead area before reinstalling. Look for cracking, flat spots, or any damage that developed during storage. Refer to the condition checklist earlier in this article.
- Check tire pressure — tires naturally lose a few PSI over several months. Inflate each tire to the manufacturer’s recommended pressure (found on the Hyundai Sonata’s door jamb sticker) before mounting.
- Clean rims before remounting — if tires are stored on rims, clean the bead seat area on the wheel and the tire bead itself before remounting to ensure a proper seal and prevent leaks.
- Reinstall in original positions — use the FL/FR/RL/RR labels you applied before storage to put each tire back in its correct location. This maintains your established wear pattern and rotation history.
- Have them balanced if needed — if you notice vibration after reinstalling, have the tires rebalanced. Tires can shift very slightly during storage.
- Store summer tires correctly — once removed, apply the same storage steps (clean, dry, bag, label, store upright) to your summer or all-season tires for the warmer months.
Switching tires yourself or having a shop do it takes about 30 to 60 minutes. Many shops offer a seasonal tire changeover service for $40 to $80, which often includes balancing.
What Tools Do You Need to Store Winter Tires?
You don’t need specialized equipment, but having the right basic tools makes the process easier and more effective. Here is what to gather before you start:
- Tire brush and bucket — a stiff-bristle brush with soapy water removes road salt, brake dust, and grime from tread and sidewalls.
- Clean towels or a leaf blower — for thorough drying before bagging. Any trapped moisture causes rubber degradation over time.
- Large airtight plastic tire bags — purpose-built tire storage bags (available at most auto parts stores) are thicker and more puncture-resistant than standard garbage bags.
- Shop vacuum or manual pump — used to remove air from bags before sealing to reduce ozone and oxygen exposure inside.
- Zip ties or strong packing tape — to seal bag openings tightly after air removal.
- Chalk or a washable marker — for labeling each tire with its position (FL, FR, RL, RR).
- Tire rack or wall hooks — optional but helpful for upright storage, especially in small spaces.
- Tire pressure gauge — to check and adjust inflation before reinstalling next season.
Most of these items cost very little and are reusable season after season.
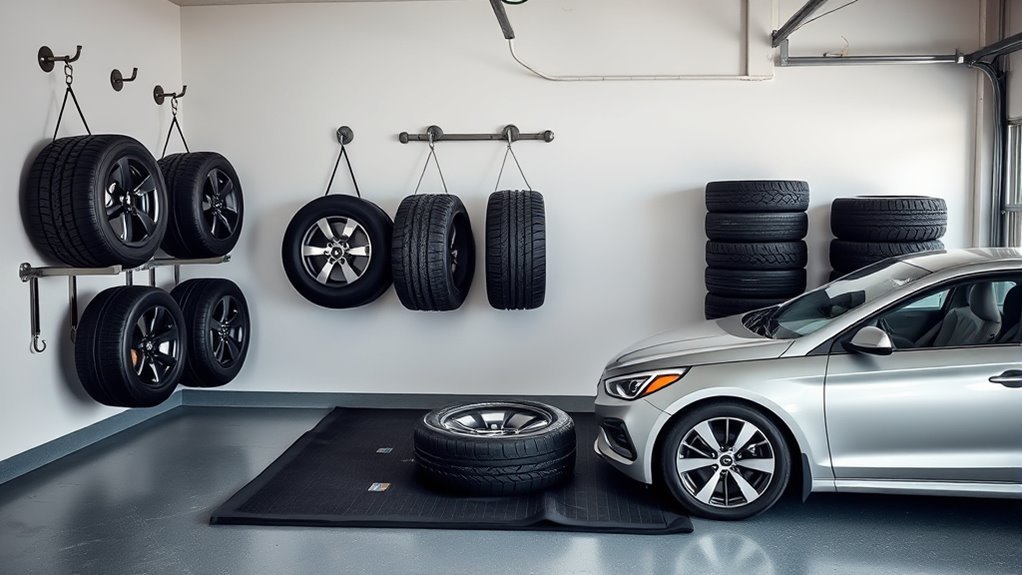
How to Store Winter Tires in a Small Space
Limited space does not have to mean poor storage. A few simple strategies help you fit four tires safely without sacrificing tire condition. First, consider a wall-mounted tire rack — these hold tires vertically off the floor and free up valuable floor space in a garage or utility room. They typically cost $30 to $80 and hold up to four tires securely. If wall mounting is not possible, a freestanding vertical tire tree holds all four tires in a single compact footprint. Stacking is a last resort in small spaces, but if necessary, keep the stack at two tires maximum and use a rubber mat underneath to protect the bottom tire. Avoid placing tires near water heaters, furnaces, or electrical panels — heat and ozone from these sources damage rubber even through sealed bags. If your living or garage space is genuinely too limited, a professional tire storage service is worth considering (see cost section below).
Signs Your Winter Tires Are Deteriorating in Storage
Even properly stored tires can degrade over time. Check your tires at least once mid-storage season and again before reinstalling. Watch for these warning signs:
- Surface cracking or crazing — fine cracks across the sidewall or tread face indicate ozone or UV damage and dried-out rubber compounds. This is the most common sign of aging.
- Flat spots — soft spots or uneven areas on the tread contact surface, usually caused by improper flat storage or excessive stacking weight.
- Discoloration or brown staining — a brownish tint on the sidewall can signal that antiozonant chemicals in the rubber are depleting, often due to heat or sunlight exposure.
- Bulges or blisters — any visible bulge on the sidewall means internal damage. Remove these tires from service immediately.
- Tread depth below 4/32 inch — winter tires lose effectiveness for snow and ice traction at this depth, regardless of age. Use a tread depth gauge to check before reinstalling.
- Strong chemical or burning odor — unusual smells after storage suggest the rubber has been exposed to solvents or heat sources nearby.
If you notice cracking, bulges, or tread below 4/32 inch, have the tires inspected by a technician before putting them back on the vehicle.
What to Do With Old Winter Tires
When your winter tires are worn past their safe limit or have aged beyond ten years, disposal is the responsible next step. You have several options:
- Tire retailer drop-off — most tire shops and dealers accept old tires for a small recycling fee, typically $2 to $5 per tire. Many will take them for free when you purchase new ones.
- Municipal recycling programs — many cities hold periodic tire collection events at no cost. Check your local government’s waste management website for scheduled drop-off dates.
- Auto parts stores — chains like AutoZone and O’Reilly often participate in tire recycling programs.
- Repurposing — old tires can be used as garden planters, playground equipment, or erosion barriers, though this should only be done with tires that are not cracked or leaking chemicals.
Never dump tires illegally. Tires left in the open harbor mosquitoes, leach chemicals into soil, and are difficult to dispose of once abandoned.
What Is the Cost of Winter Tire Storage?
If you choose to store tires yourself at home, the main costs are one-time purchases: a set of four tire storage bags ($15 to $30), a basic tire rack ($30 to $80), and cleaning supplies you likely already own. Total DIY setup cost is typically under $100 and reusable for many seasons.
If you prefer professional storage, many tire shops and dealerships offer seasonal tire storage services. Typical pricing ranges from $50 to $150 per season for a set of four tires, depending on your region and whether the service includes pickup, dropoff, and remounting. Some dealerships include storage as part of a tire purchase package.
When comparing options, ask the facility whether tires are stored indoors in a climate-controlled space, whether they are individually bagged, and whether your specific tires are tagged and returned to you (not swapped with another customer’s set).
How to Choose a Tire Storage Facility
Not all tire storage services are equal. Use these criteria when evaluating a facility:
- Climate-controlled indoor space — tires must be stored away from temperature extremes. Ask directly whether the storage area is indoors and temperature regulated.
- Individual bagging and labeling — your tires should be stored in their own bags with your name and vehicle information, not loose in a pile.
- No chemicals or ozone sources nearby — storage areas should not contain paint, solvents, generators, or compressors, all of which emit ozone or fumes that degrade rubber.
- Clear pricing with no hidden fees — confirm whether the quoted price includes mounting and balancing when you retrieve the tires next season.
- Insurance or liability coverage — ask whether the facility carries coverage for lost or damaged tires.
- Reputation and reviews — check Google reviews and ask your regular mechanic for a recommendation before committing.
Many franchise tire retailers such as Discount Tire, Firestone, and Canadian Tire (in Canada) offer reliable seasonal storage programs with standardized procedures.
Frequently Asked Questions
Should Winter Tires Be Stored Flat or Upright?
You should store winter tires upright to maximize tire longevity and aid seasonal maintenance. If mounted, you can stack them carefully no more than two high, but avoid long-term flat storage to prevent sidewall deformation and preserve performance.
How to Store Winter Tires Properly?
Clean, dry, and seal the tires in airtight bags. Remove the air and label them with their position (FL, FR, RL, RR). Use a cool, dry, ventilated spot between 40 and 77 degrees F, stack safely if needed, and check the manufacture date so you know when to replace them.
Which Way Should Winter Tires Go?
You should store winter tires upright, labeled by position to preserve tread depth and simplify tire rotation. That method minimizes deformation, lets you inspect tread depth easily, and helps you manage tires efficiently.
Should I Inflate or Deflate Tires Before Storing?
For unmounted tires (removed from the rim), inflation is not relevant. For tires stored on their rims, keep them at or slightly below the manufacturer’s recommended pressure — typically around 30 to 35 PSI for most passenger vehicles including the Hyundai Sonata. Do not fully deflate mounted tires, as this can cause the bead to separate from the rim over time. Always recheck and adjust pressure to the correct specification before reinstalling next season, as tires naturally lose a few PSI over several months.
Can I Store Winter Tires Outside?
Outdoor storage is strongly not recommended for winter tires. Exposure to sunlight causes UV degradation of rubber compounds, even through tire covers. Temperature swings between freezing nights and warm days accelerate cracking. Rain and humidity introduce moisture that leads to rim corrosion and rubber deterioration. If outdoor storage is your only option, use thick waterproof tire bags, place tires on a pallet or wooden boards (never directly on concrete or soil), cover with an opaque weatherproof cover, and choose a shaded spot. This is a temporary solution only — aim to move tires indoors as soon as possible.
Is It Necessary to Use Tire Covers?
Tire covers are useful but not essential if you are already using airtight storage bags. If your tires are stored in a sealed bag in a dark indoor space, a separate cover adds little benefit. Covers become more important when tires are stored without bags, stored outdoors, or kept in a garage with windows that let in sunlight. A good tire cover blocks UV rays and keeps the surface clean. Look for covers made from UV-resistant polyester or polypropylene. Avoid covers that trap moisture against the tire, such as plastic sheeting without ventilation holes.
Can I Store Winter Tires in a Basement?
Yes, a basement is one of the best places to store winter tires at home. Basements typically maintain steady temperatures year-round, staying within the ideal 50 to 70 degrees F range without much variation. They are naturally dark, which prevents UV damage. Make sure the basement is dry — if you have moisture or humidity issues, run a dehumidifier during storage months. Keep tires away from the furnace, water heater, or any electrical motors, as these emit ozone that degrades rubber. Place tires on a shelf, rack, or wooden pallet rather than directly on a concrete floor, as concrete can wick moisture.
Are There Winter Tire Storage Services Near Me?
Yes, tire storage services are widely available. Most independent tire shops, dealerships, and franchise retailers such as Discount Tire, Firestone, Pep Boys, and Midas offer seasonal storage programs. When you are ready to switch back to summer tires, you drop off your winter set, and the shop stores them until the following season. Many services also include remounting and balancing when you return. Prices typically range from $50 to $150 per season. Call your local shop or check their website for availability and pricing, as programs vary by location.
How Should I Label My Stored Tires?
Use a chalk marker or grease pencil to write directly on the sidewall of each tire. Mark the position using standard codes: FL (front left), FR (front right), RL (rear left), RR (rear right). Also note the mileage at removal if possible, so you can track wear history across seasons. Write the storage date on the bag itself with a permanent marker. Take a quick photo of the labeled tires before bagging them as a backup record. This takes two minutes and saves confusion when you reinstall next season.
Conclusion
Storing your Hyundai Sonata’s winter tires correctly keeps them safe and ready. Clean and dry each tire and wheel, tag them with position and mileage, then bag and seal to block ozone. Choose a cool, dry, dark spot, avoiding sunlight and heat. Stack, stand, or hang only as recommended for your wheel type. Follow these steps to extend tread life and ensure safe performance next winter.
Related Articles

Hyundai Sonata Overall Tire Diameter by Size: Full Chart
Hyundai Sonata overall tire diameter by size: discover exact measurements, common OEM examples, and fitment tips to ensure speedometer accuracy and proper clearance.
Read More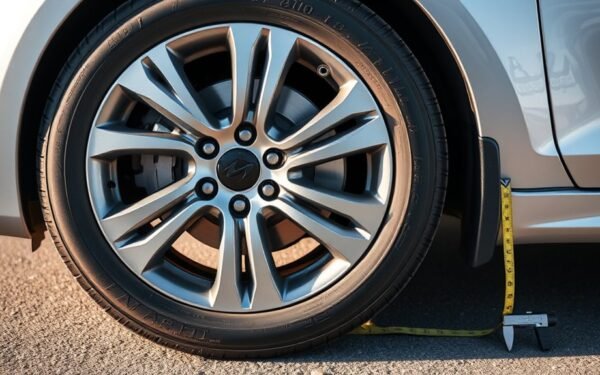
Hyundai Sonata Tire Aspect Ratio Explained: What the Number Means
Good to know: discover how the Sonata’s tire aspect ratio affects ride, handling, and speedometer accuracy — and why that number really matters.
Read More
Hyundai Sonata Compatible Tire Sizes: Full Fitment Guide
I need to show which Hyundai Sonata generations accept which tire sizes and why fitment, offset, and diameter matter—read on to get exact matches.
Read More