
How to Remove the Spare Tire From a Hyundai Sonata Trunk

Open the trunk, lift the liner, and locate the spare well and tool kit. Remove the jack, lug wrench, and hook, then unscrew the central retaining bolt counterclockwise to release the spare and tools. Take out any clips securing the liner and set them aside. If you’re changing a tire, park on level ground, engage the brake, and chock a wheel before using the jack and loosening lug nuts. Continue for full step-by-step guidance.
Quick Steps: Change a Spare Tire (What to Expect)
Start by opening the trunk and removing the trunk liner to get the tool kit and spare. You’ll use the hook and wrench tools to twist the retaining bolt left and extract the spare. Before jacking, secure the vehicle with a rock or stone to block movement. Position the jack at the designated jack point—rear door handle area for rear tires or front mirror area for front tires—so it sits stable. Loosen and remove lug nuts, then lift the car until the flat clears the ground. Fit the spare, hand-tighten lug nuts in a crisscross pattern to seat the wheel, lower the car, and finish tightening in the same crisscross sequence. Check tire pressure and follow tire maintenance tips to guarantee safe travel. If you’re uncomfortable at any step or lack tools, consider roadside assistance options. Move deliberately, reclaim control, and treat this as a brief, empowering task that restores your mobility.
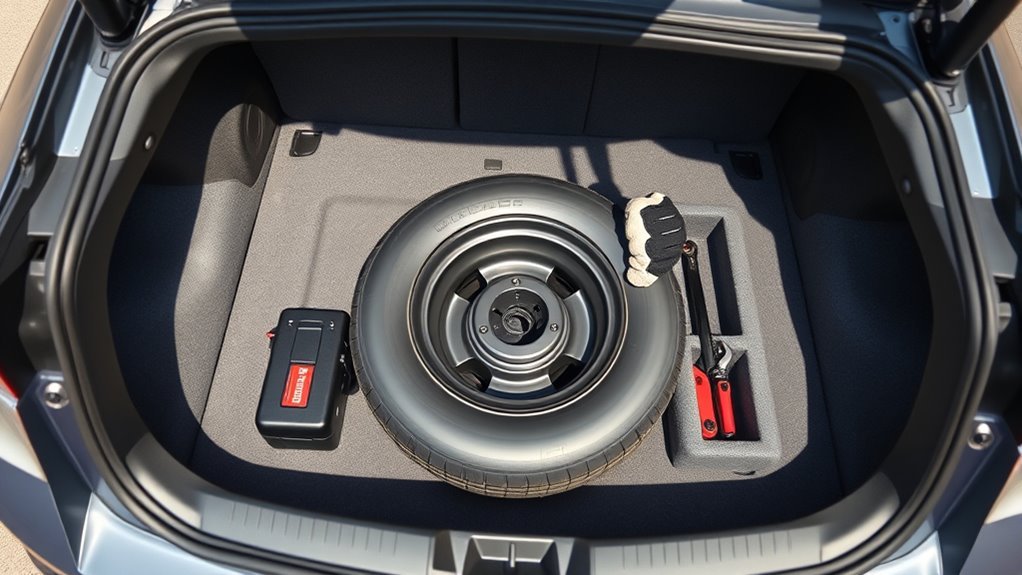
Locate the Sonata Spare and Tool Kit
Open the trunk and lift the liner to expose the spare tire well. Check the well for the tool kit—typically a hook, wrench, and jack—nested beside the spare. Unscrew the retaining bolt counterclockwise, lower the jack if needed, and lift the spare and tools out.
Trunk Liner Removal
Lift the trunk lid and pull back the trunk liner covering the spare tire well, then detach any clips or fasteners holding it in place so you can access the spare and tool kit. Inspect the trunk liner materials for tears or stuck clips; free them cleanly to preserve trunk organization and prevent future snags. Work methodically: unclip fasteners along the perimeter, fold the liner back, and set clips aside so you can reattach them without hunting. With the liner removed, locate the retaining bolt that secures the spare and tools. Keep your movements deliberate and steady—this is about reclaiming control over your vehicle. Once exposed, you’ll be ready to twist the retaining bolt left to release the spare and retrieve tools without delay.
Tool Kit Location
With the liner folded back and clips set aside, look directly into the spare well to find the tool kit and spare tire. You’ll remove the trunk liner to expose the tool kit essentials—hook tool, wrench tool, and jack—arranged beside the spare. Check the kit contents now; confirm you have the correct tools before proceeding so you won’t be stopped mid-task. Note the retaining bolt holding the spare; turn it left to free the wheel. Use the wrench tool to loosen the bolt while stabilizing the tire. Follow trunk liner maintenance practices: replace clips and fold the liner back neatly after use to protect the trunk and keep the kit accessible. Act deliberately—this frees you to move on confidently.
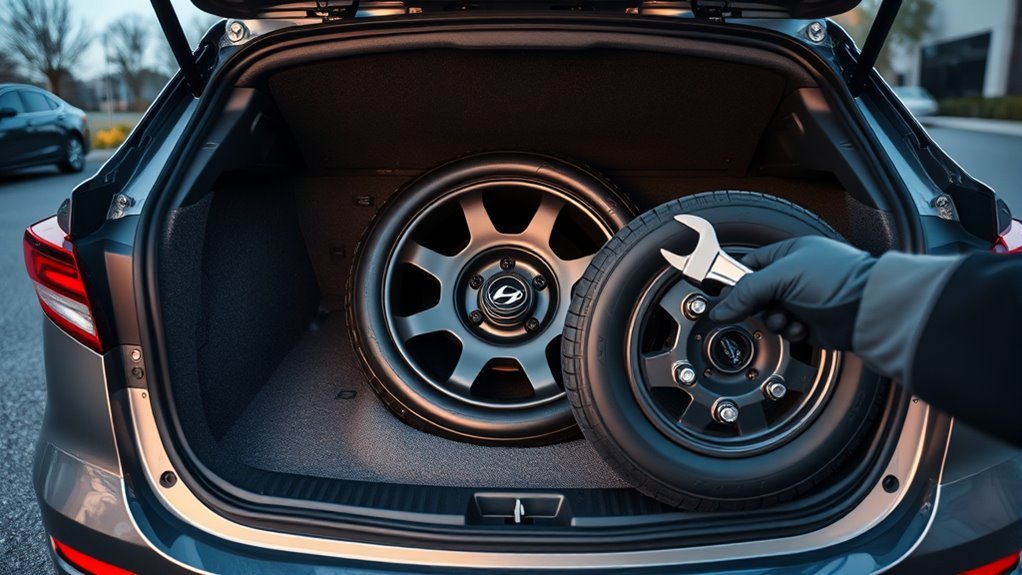
Unpack Tools: Hook, Lug Wrench, and Jack
Before you begin, pull up the trunk liner to expose the spare and tool kit beneath, then undo the retaining bolt by twisting it left to free the kit. Reach in, lift the kit out, and set it beside the spare tire; keep tool safety top of mind—gloves help you grip and avoid cuts. Open the kit and remove the hook tool, lug wrench, and jack in that order so you can work efficiently.
Inspect each tool: check the jack for smooth threading, confirm the lug wrench fits your wheel nuts, and verify the hook tool isn’t bent. Lower the jack height slightly so you can position it under the vehicle without strain; this small adjustment speeds setup when you’re ready to lift. Stow the retaining bolt where you’ll remember it. You’re liberating yourself from dependence—organize tools for quick access, stay deliberate, and proceed to the next steps with confidence.
Secure Vehicle and Choose a Safe Spot
Park on a flat, hard, level surface and engage the parking brake before you start. Place a rock or stone behind the wheels and chock the opposite wheel to prevent any movement. Identify the correct jack point for the tire you’re changing so you can lift safely without putting any part of your body under the car.
Choose A Level Surface
1. Choose a level surface before you touch the trunk. Inspect surface types—pavement, concrete, or compact gravel are best because they offer predictable stability factors. Avoid soft soil, grass, or uneven ground; those surfaces let the jack sink and compromise safety. Clear the area of debris and obstacles so you’ve got unobstructed footing and tool placement. If you must work on a slope, stop and, if possible, repark facing uphill to reduce roll risk. Place a rock or stone behind the wheels as an added precaution while you prepare to remove the spare. These actions keep you in control and free to act; they reduce hazard and let you proceed to the trunk with confidence and purpose.
Secure Vehicle Movement
Secure the vehicle and pick a safe spot so nothing shifts while you work: set the parking brake, chock the wheels (behind the rear wheels if you’re changing a front tire, or in front of the front wheels for a rear tire), and confirm you’re on firm, level ground. Next, verify vehicle stability by engaging the parking brake fully and placing a rock or stone as a secondary chock. Locate the Sonata’s jack points—near the rear door handle for rear tires and the front mirror area for front tires—and position the jack correctly. Keep hands and body clear of the vehicle while lifting; never place any part of your body under a raised car. These steps protect you and guarantee proper tire safety and confident, liberated action.
Use Sonata Jack Points and Lift the Car
Find the Sonata’s designated jack point near the rear door handle for rear tires or by the front mirror for front tires, and verify the car’s on a flat, hard, level surface before you raise it. Position the jack so its saddle seats squarely under the marked point; lower the jack height first to make placement easier, then snug it into the contact area. This guarantees jack safety and steady engagement.
Once seated, apply controlled lifting techniques: turn the jack handle steadily, watching the saddle contact and vehicle rise evenly. Lift only high enough to clear the tire for removal; excessive height increases risk. Keep your hands and body out from under the vehicle at all times. If the jack feels unstable, lower it, reposition, and re-seat before trying again. Maintain simple, decisive movements—you’re reclaiming mobility, not courting danger. When the car’s lifted to the needed height and stable, stop and secure the scene before proceeding.
Loosen Lug Nuts and Remove the Flat Wheel
Start by using the wrench from the trunk kit to break each lug nut loose—turn each about half a turn while the car’s still on the ground so the wheel won’t spin. Use deliberate lug nut techniques: loosen each nut evenly, then jack the car at the designated lift point. Wiggle the wheel to confirm looseness and preserve wheel stability. Leave one nut threaded to hold the wheel until you’re ready to remove it fully.
| Action | Purpose | Mindset |
|---|---|---|
| Break loose (½ turn) | Prevent wheel spin | Controlled freedom |
| Wiggle wheel | Verify looseness | Confident check |
| Leave one nut | Prevent drop | Cautious liberation |
Once the wheel rocks freely, remove the final nut and lift the flat off the hub with both hands. Place the removed wheel securely in the trunk so it won’t roll or damage items. You’re clear to proceed to the spare installation step.
Install the Spare and Tighten Lug Nuts (Crisscross)
With the flat removed, lift the spare onto the hub, align the bolt holes, and thread each lug nut by hand so the wheel sits flush without cross-threading. You’ll feel liberated when the spare seats cleanly; this is the core of safe spare tire installation. Hand-tighten all lug nuts first to hold the wheel, then use the wrench to snug them in a crisscross pattern to distribute pressure evenly.
Lower the vehicle until the spare contacts the ground, remove the jack, and complete lug nut tightening in the same crisscross sequence. Proper lug nut tightening secures the wheel and frees you to move on. Remember the spare is temporary; plan repair or replacement.
- Confirm all lug nuts started by hand to avoid cross-threading.
- Use a crisscross pattern to even out pressure.
- Snug with the wrench, don’t over-torque.
- Finalize tightening after lowering the car.
- Treat the spare as a short‑term solution and act promptly.
Post‑Change Checks: Pressure, Speed Limit, and Stowage
After the change, check the spare’s pressure immediately and top it to 60 PSI if needed, confirm the vehicle’s speed stays at or below 50 mph (80 kph), and stow the removed tire and tools securely so nothing shifts while you drive. Next, verify the spare’s tread and sidewall for damage; temporary spares are for short runs, not full liberation via reckless speed. Inflate to 60 PSI using a portable air inflator if available; this supports tire pressure safety and reduces risk of failure. Keep speed at or below the 50 mph (80 kph) limit until you’ve repaired or replaced the original tire. Stow the flat and tools in the trunk’s designated compartments, secure the jack and wrench, and make certain straps or fasteners hold everything tight. Finally, schedule tire repair or replacement promptly and include the spare in your routine spare tire maintenance checks so it’s ready when you need freedom from roadside delay.
Frequently Asked Questions
Where Is the Tire Pressure Gauge Located for the Spare?
The spare doesn’t have a dedicated tire pressure gauge; you’ll use your vehicle’s gauge or a portable one. For tire maintenance and spare compatibility, check pressure before use, ensuring correct PSI and safe driving readiness.
Can I Drive on the Spare in Rainy Conditions?
Absolutely — you can drive on the spare in rainy conditions, but don’t pretend it’s permanent. Check spare tire safety: lower speed, avoid standing water, increase following distance, and replace the spare with a full tire ASAP for freedom.
Will My Vehicle Alarm Activate When Trunk Is Opened?
Yes — if your trunk lock trips or a sensor detects opening, the alarm can activate; check alarm sensitivity in settings, disengage valet/lock modes, and manually open the trunk to prevent unintended alerts.
Are There Weight Limits for the Space-Saver Spare?
Yes — the space-saver spare has limits: treat it like a feathered anchor, not a full tire. You’ll follow manufacturer specs (usually reduced load and speed), monitor spare tire, and adjust weight distribution to avoid overload.
How Long Can I Store the Spare Tire Unused?
You can store the spare tire unused for about 6–10 years if you inspect it regularly. For ideal spare tire lifespan, keep proper storage: cool, dry, out of sunlight, inflated to recommended pressure, and rotate or replace per signs.
Conclusion
You’ve located the kit, used the hook and lug wrench, jacked the car at the Sonata’s lift point, and swapped the wheel—now finish smart. Tighten lug nuts in a crisscross pattern, lower the car, and recheck torque. Like clockwork, stow the flat, tools, and jack back in the trunk so nothing rattles loose. Confirm spare tire pressure, note the temporary speed limit, and drive cautiously to a shop for a permanent repair.
Related Articles

Hyundai Sonata Overall Tire Diameter by Size: Full Chart
Hyundai Sonata overall tire diameter by size: discover exact measurements, common OEM examples, and fitment tips to ensure speedometer accuracy and proper clearance.
Read More
Hyundai Sonata Tire Aspect Ratio Explained: What the Number Means
Good to know: discover how the Sonata’s tire aspect ratio affects ride, handling, and speedometer accuracy — and why that number really matters.
Read More
Hyundai Sonata Compatible Tire Sizes: Full Fitment Guide
I need to show which Hyundai Sonata generations accept which tire sizes and why fitment, offset, and diameter matter—read on to get exact matches.
Read More